- ActionBar (Панель действий)
- Немного теории
- Прячем и показываем ActionBar
- Полный список
- overflow menu
- Как узнать текст элемента, если видна только иконка
- Как отключить ActionBar
- Где обрабатывать нажатия на элементы
- О кнопке Home
- How to Create Custom AppBar/ActionBar/ToolBar in Android Studio | Java
- Gradle dependency
- Set the styles
- Design our AppBar/ActionBar/ToolBar
- Using the Android Toolbar (ActionBar) — Tutorial
- 1. Introduction to the toolbar
- 1.1. What is the toolbar (action bar)?
- 1.2. Action bar on devices lower than API 21
- 1.3. Once upon a time their was the options menu
- 2. Using the toolbar
- 2.1. Creating actions in the toolbar
- 2.2. Reacting to action selection
- 2.3. Search an action in the action bar
- 2.4. Changing the menu
- 2.5. Making the toolbar context sensitive with the contextual action mode
- 2.6. Contributing to the action bar with fragments
- 2.7. Changing the visibility of the toolbar bar
- 2.8. Assigning a Drawable
- 2.9. Dimming the navigation buttons
- 2.10. Using immersive full screen mode
- 2.11. Enabling the split toolbar
- 3. Exercise: Using the contextual action mode
- 3.1. Target
- 3.2. Create menu resource in the res/menu folder
- 4. Making the action bar dynamic
- 4.1. Custom views in the action bar
- 4.2. Action view
- 5. Action provider
- 5.1. What is an action provider?
- 5.2. Example: usage of the ShareActionProvider
- 6. Navigation via the application icon
- 6.1. Application icon as home
- 6.2. Application icon as Up button
- 7. Exercise: Using the toolbar
- 8. Exercise: Add a toolbar to your application
- 8.1. Add a refresh icon
- 8.2. Add menu resources
- 8.3. Turn off the default action bar from the styling
- 8.4. Add a toolbar view to your activity layout
- 8.5. Adjust your activity
- 8.6. Run the application and test the toolbar
- 8.7. Trigger an intent via the toolbar
- 9. Trigger a method in your fragments via the toolbar
ActionBar (Панель действий)
3-й курс/Закрытая зона
Немного теории
Начиная с Android 3.0 (API 11), в приложениях появилась возможность использовать панель действий ActionBar, которая сочетает в себе заголовок и меню, упрощая навигацию и предоставляя быстрый доступ к частым операциям.

ActionBar заменяет Options Menu, которое было в ранних версиях Android, используя новые дополнительные параметры для меню. По умолчанию, новые проекты, создаваемые через шаблоны Empty Activity и др., уже содержат ActionBar. Следует отметить, что в Android 5.0 появился новый компонент Toolbar, который является дальнейшим развитием ActionBar. И он активно вытесняет панель действий. Но вам всё равно следует изучить работу ActionBar, так как основные принципы работы завязаны на ней.
Если запустить программу как есть из шаблона Empty Activity, то увидим заголовок программы.
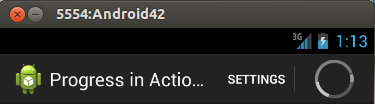
Если в код программы добавить методы для меню, то справа появится значок из трёх вертикальных точек.
Если щёлкнуть по значку из трёх точек, выстроенных по вертикали, то увидим всплывающее меню с единственным пунктом Settings. Не прикладывая никаких усилий, мы получили готовый элемент ActionBar в своём приложении.
Давайте разбираться, что происходит за кулисами приложения. За появление панели действий отвечает тема Theme.Holo или её производные. В API 21 и выше произошли небольшие изменения. Как я уже сказал выше, появился новый компонент ToolBar, который может заменить панель действий в активности. Поэтому тут нужно быть внимательным и выбирать соответствующую тему, например, Theme.Material.Light.DarkActionBar. Для старых устройств используются библиотеки совместимости. В этом случае активность наследуется от AppCompatActivity, а используемая тема Theme.AppCompat или его производные, например, Theme.AppCompat.Light.DarkActionBar.
В студии версии 4.1 снова всё поменяли и теперь используется тема Theme.MaterialComponents.DayNight.DarkActionBar.
Прячем и показываем ActionBar
Изначально существовали два вида ActionBar для новых устройств и для старых устройств при помощи библиотеки совместимости. Не смешивайте вызовы методов из разных классов, а то получите ошибку. На сегодняшний день студия создаёт проекты с применением библиотеки AndroidX, поэтому будем использовать классы из неё.
Чтобы увидеть разницу в активности с ActionBar и без неё, напишем простой пример. Добавим на форму компонент ToggleButton и пропишем код, скрывающий и показывающий ActionBar:
Вы вошли на сайт, как гость.
Необходимо зарегистрироваться, чтобы прочитать статью
Источник
Полный список
— размещаем элементы в ActionBar
Еще одно нововведение третьего Андроида – Action Bar. Это панель в верхней части приложения.
В этом уроке попробуем размещать там свои элементы с иконками и посмотрим, как с ними взаимодействовать. Тут нам все уже будет знакомо, т.к. используется механизм, который раньше строил меню. Т.е. мы в методе onCreateOptionsMenu получаем на вход объект Menu и (программно или с помощью XML) наполняем его элементами.
Для элементов будем указывать id, текст, иконку и режим показа.
Project name: P1071_ActionBarItems
Build Target: Android 4.1
Application name: ActionBarItems
Package name: ru.startandroid.develop.p1071actionbaritems
Create Activity: MainActivity
В strings.xml добавим строки:
В файл res\menu\main.xml напишем следующий текст:
С id, title и icon, думаю все понятно – это идентификатор, текст и иконка элемента. Иконки системные, выбранные случайно.
Нам тут больше интересен атрибут showAsAction, это режим показа элемента. Он может принимать значения:
never – не показывать элемент
ifRoom – показывать, если есть место
always – всегда показывать
К этим значениям может быть добавлено еще одно – withText. Актуально для элементов с указанной иконкой. В этом случае для элемента будет показана не только иконка, но и текст из title.
Думаю, комментарии тут особо не нужны. Все знакомое. Заполненный нами ранее xml-файл используется для создания элементов Menu.
Все сохраняем, запускаем приложение.
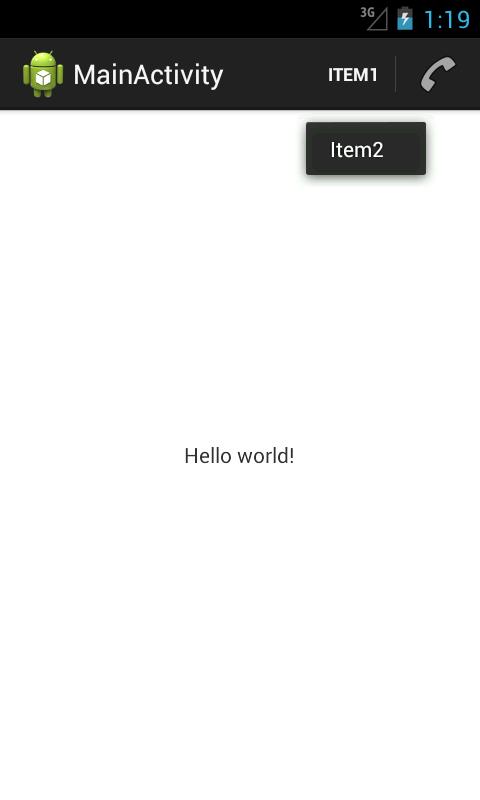
Отобразился item1 и item2.
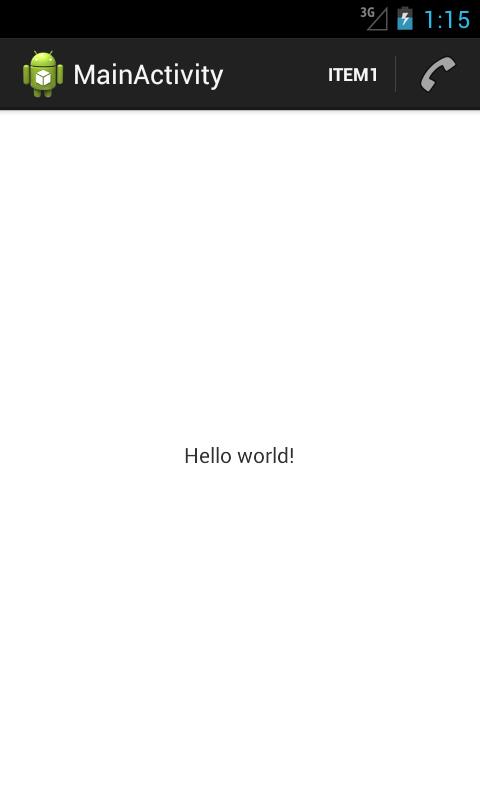
Для item1 мы не указывали иконку, поэтому видим только текст. А в showAsAction мы указали always, т.е. система будет пытаться отобразить элемент, даже если не хватает места на ActionBar.
Для item2 мы указали иконку ic_menu_call, ее и видим в ActionBar. В showAsAction мы указали ifRoom, т.е. отображать, если есть свободное место. Место есть – элемент виден.
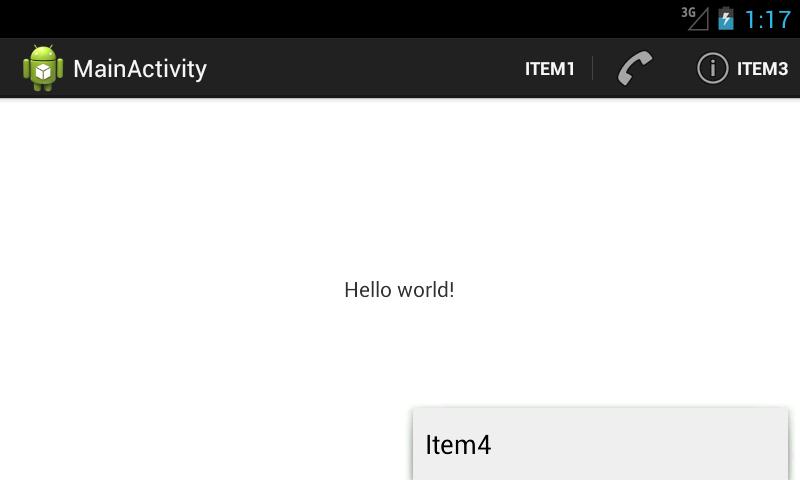
Жмем на эмуляторе menu и видим два оставшихся элемента. Они не отобразились в ActionBar и теперь доступны только так.

item3 не отобразился, т.к. ему не хватило места. Мы для него указывали showAsAction = ifRoom, т.е. отображать, если есть где. Для item2 место нашлось, а вот item3 не влез.
item4 не отобразился, т.к. мы указали showAsAction = never.
11.12.2017 Кнопки меню больше нет. Вместо нее в ActionBar есть кнопка Overflow (три точки), используйте ее, чтобы увидеть скрытые пункты меню.
Давайте увеличим место в ActionBar и посмотрим, что изменится. Для этого просто повернем экран в горизонтальную ориентацию – CTRL+F12.
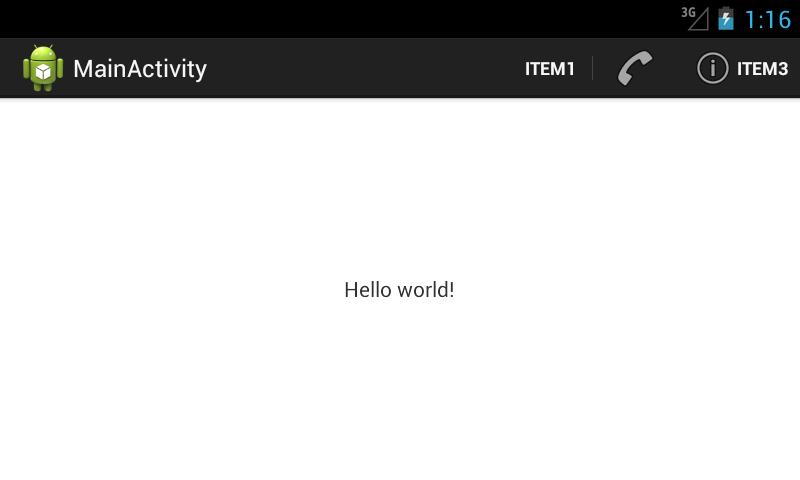
Для item1 и item2 ничего не изменилось. А вот для item3 теперь появилось местечко, и он вылез. Если для item2 отображена только иконка, то для item3 мы видим и текст. Это сказывается withText в атрибуте showAsAction.
item4 не виден несмотря на то, что есть куча места свободного. Причина — never в атрибуте showAsAction. Чтоб добраться до него, жмем menu.
overflow menu
Если запустить это же приложение на планшете, то увидим чуть другой интерфейс ActionBar:

Справа появляется кнопка, нажатие на которую аналогично нажатию на menu. Судя по всему, эта кнопка видна только на тех устройствах, на которых нет кнопки menu.
Как узнать текст элемента, если видна только иконка
Если для элемента показана только иконка, то долгим нажатием на нее можно добиться показа текста. Попробуем на item2:
На AVD с 4.1 это работает. На планшете с 3.2 – почему-то нет.
Как отключить ActionBar
Для этого в коде можно прописать:
Либо выбрать для Activity тему, содержащую текст NoActionBar.

Где обрабатывать нажатия на элементы
Там же, где и при работе с меню – метод onOptionsItemSelected. Все аналогично.
О кнопке Home
В левой части ActionBar находится кнопка Home. По умолчанию для нее используется иконка приложения или Activity. Мы можем поставить сюда свою иконку, не трогая текущие. Для этого используется атрибут android:logo у Activity или Application.
В третьем Андроиде кнопка Home кликабельна по умолчанию. В четвертом же ее надо явно задействовать методом setHomeButtonEnabled.
Поймать нажатие кнопки Home можно также в onOptionsItemSelected. Она имеет >
Насколько я понял по хелпу, назначение этой кнопки – перейти в коренное Activity программы, т.е. действительно кнопка «Домой». Также хелп говорит об еще одной логической возможности использования – как кнопка «Вверх». Т.е. не в корневое Activity, а на один логический уровень вверх. Например, из чтения письма переходим к списку писем. А для того, чтобы пользователь знал, что он попадет не Домой, а Вверх предлагается вешать на кнопку стрелочку методом setDisplayHomeAsUpEnabled.
В итоге выглядит это примерно так
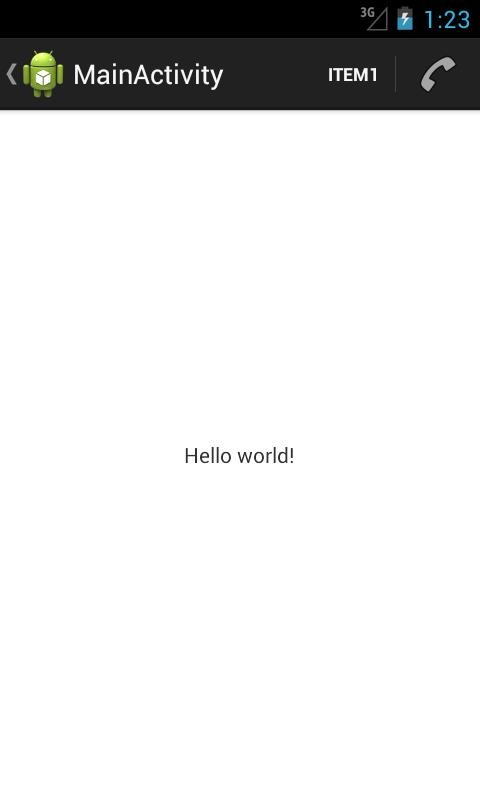
На кнопке появилась стрелка.
Надо понимать, что эта стрелка – это просто изображение для пользователя, чтобы он знал, какое поведение ожидать от нажатия. А кодить весь процесс перехода Вверх надо самим. Как впрочем и процесс перехода Домой.
Напоследок еще несколько полезных методов для ActionBar:
setTitle – установить свой заголовок
setSubtitle — установить свой подзаголовок
setDisplayShowTitleEnabled – скрыть/показать заголовок и подзаголовок
На следующем уроке:
— используем навигацию в ActionBar
Присоединяйтесь к нам в Telegram:
— в канале StartAndroid публикуются ссылки на новые статьи с сайта startandroid.ru и интересные материалы с хабра, medium.com и т.п.
— в чатах решаем возникающие вопросы и проблемы по различным темам: Android, Kotlin, RxJava, Dagger, Тестирование
— ну и если просто хочется поговорить с коллегами по разработке, то есть чат Флудильня
— новый чат Performance для обсуждения проблем производительности и для ваших пожеланий по содержанию курса по этой теме
Источник
How to Create Custom AppBar/ActionBar/ToolBar in Android Studio | Java


Today in this tutorial, we’re going to see how to create a custom AppBar/ActionBar/ToolBar in android.
I also already created a tutorial on this topic, but here I will demonstrate it with different examples.
Gradle dependency
for circle image view:
Set the styles
now go to your styles.xml file and set the theme to NoAction Bar so that we can create our own toolbar.
Design our AppBar/ActionBar/ToolBar
now go to your main XML file and create a ToolBar and set the width and height, make sure min-height should be actionBar size.
this will give you just a toolbar without any field. Look at the below image.

for the logo, we’re using a circular image view. Already add the dependency. Put it inside the toolbar and do the adjustment.
here we set our title to null, so in the main java file assign our toolbar and do the below change
the result will be:

we can also set the logo by using app:logo=”your logo here” in your toolbar
the result will be:

for the menu, create a menu android resource folder and create a menu resource file ( /res/menu/custom_menu.xml)
import that menu in our main java file by using these code of lines
for adding a title simply add a textView inside the toolbar.
Источник
Using the Android Toolbar (ActionBar) — Tutorial
Using the toolbar in Android applications. This tutorial describes how to use the toolbar widget in your Android application. It is based on Android 6.0.
1. Introduction to the toolbar
1.1. What is the toolbar (action bar)?
The toolbar bar (formerly known as action bar) is represented as of Android 5.0 via the Toolbar view group. It can be freely positioined into your layout file. It can display the activity title, icon, actions which can be triggered, additional views and other interactive items. It can also be used for navigation in your application.
Before Android 5.0 the location of the toolbar (actionbar) was hard coded to the top of the activity. It is possible to disable the toolbar via the used theme, but the default Android themes have it enabled.
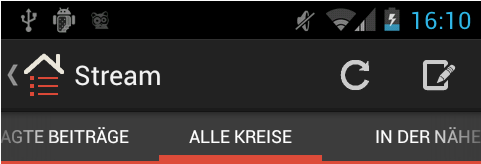
The following screenshot shows the toolbar of the Google+ Android application with interactive items and a navigation bar. On top it also indicates that the user can open a navigation bar on the side of the application.
1.2. Action bar on devices lower than API 21
The toolbar has been introduced in Android 5.0 (API 21). If you want to use the toolbar on devices with an earlier Android release you can use the downport provided by the appcompat-v7 support library. To use the toolbar on such devices add a compile dependency to com.android.support:appcompat to your Gradle build file. For example:
See the following link for setting up the library v7 in your project: http://developer.android.com/tools/support-library/setup.html.
1.3. Once upon a time their was the options menu
Applications with a target SDK version less than API 11 use the options menu, if such a button is present on the device. The option menu is displayed if the user presses the Option button. The toolbar bar is superior to the options menu, as the action bar is clearly visible, while the options menu is only shown on request. In case of the options menu, the user may not recognize that options are available in the application.
2. Using the toolbar
2.1. Creating actions in the toolbar
Entries in the toolbar are typically called actions. While it is possible to create entries in the action bar via code, it is typically defined in an XML resource file.
Each menu definition is contained in a separate file in the res/menu folder. The Android tooling automatically creates a reference to menu item entries in the R file, so that the menu resource can be accessed.
An activity adds entries to the action bar in its onCreateOptionsMenu() method.
The showAsAction attribute allows you to define how the action is displayed. For example, the ifRoom attribute defines that the action is only displayed in the action bar if there is sufficient screen space available.
The MenuInflator class allows to inflate actions defined in an XML file and adds them to the action bar. MenuInflator can get accessed via the getMenuInflator() method from your activity. The following example code demonstrates the creation of actions.
| While you can define the actions also in your source code, it is good practice to do this via XML files, as this results in less boilerplate code. |
2.2. Reacting to action selection
If an action is selected, the onOptionsItemSelected() method in the corresponding activity is called. It receives the selected action as parameter. The usage of this method is demonstrated in the following code snippet.
2.3. Search an action in the action bar
To search for a menu item in a menu you can use the findItem() method of the Menu class. This method allows to search by id.
2.4. Changing the menu
The onCreateOptionsMenu() method is only called once. If you want to change the menu later, you have to call the invalidateOptionsMenu() method. Afterwards this onCreateOptionsMenu() method is called again.
2.5. Making the toolbar context sensitive with the contextual action mode
A contextual action mode activates a temporary toolbar that overlays the application toolbar for the duration of a particular sub-task.
The contextual action mode is typically activated by selecting an item or by long clicking on it.
To implement this, call the startActionMode() method on a viewor on your activity. This method gets an ActionMode.Callback object which is responsible for the life cycle of the contextual action bar.
You could also assign a context menu to a view via the registerForContextMenu(view) method. A context menu is also activated if the user «long presses» the view. The onCreateContextMenu() method is called every time a context menu is activated as the context menu is discarded after its usage. You should prefer the contextual action mode over the usage of context menus.
2.6. Contributing to the action bar with fragments
Fragments can also contribute entries to the toolbar bar.
To do this, call setHasOptionsMenu(true) in the onCreate() method of the fragment. The Android framework calls in this case the onCreateOptionsMenu() method in the fragment class. Here the fragment can adds menu items to the toolbar.
2.7. Changing the visibility of the toolbar bar
You can change the visibility of the toolbar at runtime. The following code demonstrates that.
You can also change the text which is displayed alongside the application icon at runtime. The following example shows that.
2.8. Assigning a Drawable
You also add a Drawable to the action bar as background via the ActionBar.setBackgroundDrawable() method.
The toolbar scales the image. Therefore it is best practice to provide a scalable drawable, e.g., a 9-patch or XML drawable.
As of Android 4.2 the background of the action bar can also be animated via an AnimationDrawable .
2.9. Dimming the navigation buttons
You can also dim the software navigation button in your Android application to have more space available. If the user touches the button of the screen, the navigation button is automatically shown again.
Dimming the navigation buttons is demonstrated by the following code snippet.
The following screenshots show an application with and without the navigation buttons.
2.10. Using immersive full screen mode
As of Android 4.4 (API 19) you can put your application into full screen mode. The first time this happens the system displays the user the info that he can restore the system bars with a downward swipe along the region where the system bars normally appear.
For example the following method also to put an activity into full screen mode.
2.11. Enabling the split toolbar
You can define that the toolbar should be automatically split by the system if not enough space is available.
You can activate this via the android:uiOptions=»SplitActionBarWhenNarrow» parameter in the declaration of your application activity in the AndroidManifest.xml file.
| If this option is activated, Android has the option to split the toolbar. Whether to split is decided by the system at runtime. |
3. Exercise: Using the contextual action mode
3.1. Target
In this exercise you add a contextual action mode to one of your existing applications.
3.2. Create menu resource in the res/menu folder
For this, create a new menu XML resource with the actionmode.xml file name. See ActionMode.Callback callback as demonstrated in the following example code.
In your adapter implement a LongClickListener which triggers the contextual action mode.
4. Making the action bar dynamic
4.1. Custom views in the action bar
You can also add a custom view to the action bar, for example, a button or a text field.
For this you use the setCustomView method of the ActionView class. You also have to enable the display of custom views via the setDisplayOptions() method by passing in the ActionBar.DISPLAY_SHOW_CUSTOM flag.
For example, you can define a layout file which contains a EditText element.
This layout can be assigned in an activity to the action bar via the following code. The example code also attaches a listener to the custom view.
4.2. Action view
An action view _ is a widget that appears in the _action bar as a substitute for an action item’s button. You can, for example, use this feature to replace an action item with a ProgressBar view. An action view for an action can be defined via the android:actionLayout or android:actionViewClass attribute to specify either a layout resource or widget class to use.
This replacement is depicted in the following screenshots.
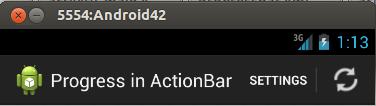
The following activity replaces the icon at runtime with an action view which contains a ProgressBar view.
The following code shows the layout used for the action view.
The following code shows the XML files for the menu.
5. Action provider
5.1. What is an action provider?
An action provider defines rich menu interaction in a single component. It can generate action views, which are used in the action bar, dynamically populate sub-menus of an action and handle default action invocations.
The base class for an action provider is the ActionProvider class.
Currently the Android platform provides two action providers: the MediaRouteActionProvider and the ShareActionProvider .
5.2. Example: usage of the ShareActionProvider
The following demonstrates the usage of the ShareActionProvider . This action provider allows you to grab selected content from applications which have registered the Intent.ACTION_SEND intent.
To use ShareActionProvider , you have to define a special menu entry for it and assign an intent which contains the sharing data to it.
6. Navigation via the application icon
6.1. Application icon as home
The action bar shows an icon of your application. This is called the home icon. You can assign an action to this icon. The recommendation is to return to the main activity in your program if the user selects this icon.
If the action is selected, the onOptionsItemSelected() method is called with an action which has the android.R.id.home ID.
Before Android 4.1, you had to use the android.R.id.home ID in the onOptionMenuItemSelected() method and enable the selection of the home button. This is demonstrated by the following code in which the SecondActivity activity defines the MainActivity as home.
As of Android 4.1 you can simply set the parentActivityName in the AndroidManifest.xml file pointing to the parent activity.
6.2. Application icon as Up button
You can use the application icon also as Up button, e.g., to go to the parent activity of the current activity. The back button on the device always returns to the previous activity.
Both can be different, for example, if the user started the option to write an email from the home screen, the back button will return the user to the home screen while the Up button would return the user to the activity which shows an overview of all emails.
To enable the Up display, you can use the following code snippet in your activity.
| This snippet only enables the Up display on your home icon. You need to implement the correct behavior in your activity in the onOptionsItemSelected() method. The corresponding action still has the android.R.id.home ID. |
| The difference between Up and the Back button can be confusing for the end user. If you decide to implement Up, in your application, it is recommended to perform some end user testing to see if the Up implementation is intuitive for them or not. |
7. Exercise: Using the toolbar
This exercise demonstrates how to use the toolbar widget in your Android application.
It is based on the fragment tutorial which can be found under: https:///www.vogella.com/tutorials/AndroidFragments/article.html You have to finish this tutorial before continuing this one.
8. Exercise: Add a toolbar to your application
8.1. Add a refresh icon
Continue to use the RSS Reader project. Create a new drawable called ic_refresh via the File New Vector Asset menu entry. Select a fitting image from the provided example images.
If the fill color does not fit to your styling, open the created drawable and adjust the color.
8.2. Add menu resources
Create a new XML resource for your menu called mainmenu.xml in your menu resource folder (create one, if the folder does not exist). The resulting XML file should look similar to the following listing.
8.3. Turn off the default action bar from the styling
Disable the default action bar one via the res/values/styles.xml file.
The following styling setting assumes that RssFeedActivity extends Activity . Please double-check this.
8.4. Add a toolbar view to your activity layout
Change the layout files of your RssfeedActivity activity to also contain a toolbar entry. For this you need to wrap your existing layout definition into another LinearLayout and add the toolbar to this second layout file.
Do the same for the layout for the portrait mode.
8.5. Adjust your activity
Change your RssfeedActivity class to the following code, to configure the toolbar view.
8.6. Run the application and test the toolbar
Run your application and validate that you can select both of your actions. Ensure that a Toast is displayed if you select the different entries.
If your device or emulator has an Option menu button, you will not see the overflow menu. You need to press the Option key to see the actions which are part of the overflow menu.
8.7. Trigger an intent via the toolbar
If the action_network action is selected, trigger the intent to control the network connectivity.
9. Trigger a method in your fragments via the toolbar
In this exercise you call a method in your list fragment based on the toolbar selection. It continues to use the RSS Reader project.
Create a updateListContent method in MyListFragment .
In your RssfeedActivity class, call the new method, if the action_refresh action is selected.
Источник


