- Android Debug Bridge
- In this document
- Enabling adb Debugging
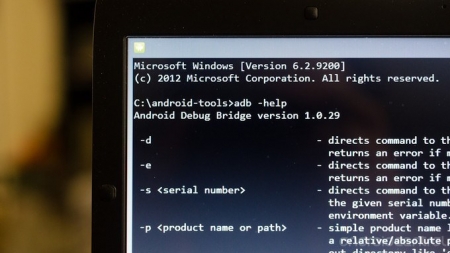
- Syntax
- Commands
- Querying for Emulator/Device Instances
- Directing Commands to a Specific Emulator/Device Instance
- Installing an Application
- Forwarding Ports
- Copying Files to or from an Emulator/Device Instance
- Stopping the adb Server
- Wireless usage
- ADB команды для Android
- ADB для Android — что это такое?
- ADB команды для Android
- adb devices
- adb install
- adb uninstall
- adb push
- adb pull
- adb reboot
- adb reboot-bootloader
- adb reboot recovery
- adb connect
- adb shell
- fastboot devices
- fastboot oem unlock
- adb logcat
- adb sideload
- adb backup и adb restore
Android Debug Bridge
In this document
Android Debug Bridge (adb) is a versatile command line tool that lets you communicate with an emulator instance or connected Android-powered device. It is a client-server program that includes three components:
- A client, which runs on your development machine. You can invoke a client from a shell by issuing an adb command. Other Android tools such as the ADT plugin and DDMS also create adb clients.
- A server, which runs as a background process on your development machine. The server manages communication between the client and the adb daemon running on an emulator or device.
- A daemon, which runs as a background process on each emulator or device instance.
You can find the adb tool in /platform-tools/ .
When you start an adb client, the client first checks whether there is an adb server process already running. If there isn’t, it starts the server process. When the server starts, it binds to local TCP port 5037 and listens for commands sent from adb clients—all adb clients use port 5037 to communicate with the adb server.
The server then sets up connections to all running emulator/device instances. It locates emulator/device instances by scanning odd-numbered ports in the range 5555 to 5585, the range used by emulators/devices. Where the server finds an adb daemon, it sets up a connection to that port. Note that each emulator/device instance acquires a pair of sequential ports — an even-numbered port for console connections and an odd-numbered port for adb connections. For example:
Emulator 1, console: 5554
Emulator 1, adb: 5555
Emulator 2, console: 5556
Emulator 2, adb: 5557
and so on.
As shown, the emulator instance connected to adb on port 5555 is the same as the instance whose console listens on port 5554.
Once the server has set up connections to all emulator instances, you can use adb commands to access those instances. Because the server manages connections to emulator/device instances and handles commands from multiple adb clients, you can control any emulator/device instance from any client (or from a script).
Enabling adb Debugging
In order to use adb with a device connected over USB, you must enable USB debugging in the device system settings, under Developer options.
On Android 4.2 and higher, the Developer options screen is hidden by default. To make it visible, go to Settings > About phone and tap Build number seven times. Return to the previous screen to find Developer options at the bottom.
On some devices, the Developer options screen may be located or named differently.
Note: When you connect a device running Android 4.2.2 or higher to your computer, the system shows a dialog asking whether to accept an RSA key that allows debugging through this computer. This security mechanism protects user devices because it ensures that USB debugging and other adb commands cannot be executed unless you’re able to unlock the device and acknowledge the dialog. This requires that you have adb version 1.0.31 (available with SDK Platform-tools r16.0.1 and higher) in order to debug on a device running Android 4.2.2 or higher.
For more information about connecting to a device over USB, read Using Hardware Devices.
Syntax
You can issue adb commands from a command line on your development machine or from a script. The usage is:
If there’s only one emulator running or only one device connected, the adb command is sent to that device by default. If multiple emulators are running and/or multiple devices are attached, you need to use the -d , -e , or -s option to specify the target device to which the command should be directed.
Commands
The table below lists all of the supported adb commands and explains their meaning and usage.
Table 1. Available adb commands
| Category | Command | Description | Comments |
|---|---|---|---|
| Target Device | -d | Direct an adb command to the only attached USB device. | Returns an error if more than one USB device is attached. |
| -e | Direct an adb command to the only running emulator instance. | Returns an error if more than one emulator instance is running. | |
| -s | Direct an adb command a specific emulator/device instance, referred to by its adb-assigned serial number (such as «emulator-5556»). | See Directing Commands to a Specific Emulator/Device Instance. | |
| General | devices | Prints a list of all attached emulator/device instances. | See Querying for Emulator/Device Instances for more information. |
| help | Prints a list of supported adb commands. | ||
| version | Prints the adb version number. | ||
| Debug | logcat [option] [filter-specs] | Prints log data to the screen. | |
| bugreport | Prints dumpsys , dumpstate , and logcat data to the screen, for the purposes of bug reporting. | ||
| jdwp | Prints a list of available JDWP processes on a given device. | You can use the forward jdwp: port-forwarding specification to connect to a specific JDWP process. For example: | |
| Data | install | Pushes an Android application (specified as a full path to an .apk file) to an emulator/device. | |
| pull | Copies a specified file from an emulator/device instance to your development computer. | ||
| push | Copies a specified file from your development computer to an emulator/device instance. | ||
| Ports and Networking | forward | Forwards socket connections from a specified local port to a specified remote port on the emulator/device instance. | Port specifications can use these schemes:
|
| ppp [parm]. | Run PPP over USB.
Note that you should not automatically start a PPP connection. | ||
| Scripting | get-serialno | Prints the adb instance serial number string. | See Querying for Emulator/Device Instances for more information. |
| get-state | Prints the adb state of an emulator/device instance. | ||
| wait-for-device | Blocks execution until the device is online — that is, until the instance state is device . | You can prepend this command to other adb commands, in which case adb will wait until the emulator/device instance is connected before issuing the other commands. Here’s an example: Note that this command does not cause adb to wait until the entire system is fully booted. For that reason, you should not prepend it to other commands that require a fully booted system. As an example, the install requires the Android package manager, which is available only after the system is fully booted. A command such as would issue the install command as soon as the emulator or device instance connected to the adb server, but before the Android system was fully booted, so it would result in an error. | |
| Server | start-server | Checks whether the adb server process is running and starts it, if not. | |
| kill-server | Terminates the adb server process. | ||
| Shell | shell | Starts a remote shell in the target emulator/device instance. | See ADB Shell Commands for more information. |
| shell [shellCommand] | Issues a shell command in the target emulator/device instance and then exits the remote shell. |
Querying for Emulator/Device Instances
Before issuing adb commands, it is helpful to know what emulator/device instances are connected to the adb server. You can generate a list of attached emulators/devices using the devices command:
In response, adb prints this status information for each instance:
- Serial number — A string created by adb to uniquely identify an emulator/device instance by its console port number. The format of the serial number is — . Here’s an example serial number: emulator-5554
- State — The connection state of the instance may be one of the following:
- offline — the instance is not connected to adb or is not responding.
- device — the instance is now connected to the adb server. Note that this state does not imply that the Android system is fully booted and operational, since the instance connects to adb while the system is still booting. However, after boot-up, this is the normal operational state of an emulator/device instance.
- no device — there is no emulator/device connected.
The output for each instance is formatted like this:
Here’s an example showing the devices command and its output:
Directing Commands to a Specific Emulator/Device Instance
If multiple emulator/device instances are running, you must specify a target instance when issuing adb commands. To do so, use the -s option in the commands. The usage for the -s option is:
As shown, you specify the target instance for a command using its adb-assigned serial number. You can use the devices command to obtain the serial numbers of running emulator/device instances. For example:
Note that, if you issue a command without specifying a target emulator/device instance while multiple devices are available, adb generates an error.
If you have multiple devices available (hardware or emulated), but only one is an emulator, simply use the -e option to send commands to the emulator. Likewise if there’s multiple devices but only one hardware device attached, use the -d option to send commands to the hardware device.
Installing an Application
You can use adb to copy an application from your development computer and install it on an emulator/device instance. To do so, use the install command. With the command, you must specify the path to the .apk file that you want to install:
For more information about how to create an .apk file that you can install on an emulator/device instance, see Building and Running
Note that, if you are using the Eclipse IDE and have the ADT plugin installed, you do not need to use adb (or aapt) directly to install your application on the emulator/device. Instead, the ADT plugin handles the packaging and installation of the application for you.
Forwarding Ports
You can use the forward command to set up arbitrary port forwarding — forwarding of requests on a specific host port to a different port on an emulator/device instance. Here’s how you would set up forwarding of host port 6100 to emulator/device port 7100:
You can also use adb to set up forwarding to named abstract UNIX domain sockets, as illustrated here:
Copying Files to or from an Emulator/Device Instance
You can use the adb commands pull and push to copy files to and from an emulator/device instance. Unlike the install command, which only copies an APK file to a specific location, the pull and push commands let you copy arbitrary directories and files to any location in an emulator/device instance.
To copy a file or directory (and its sub-directories) from the emulator or device, use
To copy a file or directory (and its sub-directories) to the emulator or device, use
In the commands, and refer to the paths to the target files/directory on your development machine (local) and on the emulator/device instance (remote). For example:
Stopping the adb Server
In some cases, you might need to terminate the adb server process and then restart it to resolve the problem (e.g., if adb does not respond to a command).
To stop the adb server, use the kill-server command. You can then restart the server by issuing any other adb command.
Wireless usage
adb is usually used over USB. However, it is also possible to use over Wi-Fi, as described here.
- Connect Android device and adb host computer to a common Wi-Fi network accessible to both. We have found that not all access points are suitable; you may need to use an access point whose firewall is configured properly to support adb.
- Connect the device with USB cable to host.
- Make sure adb is running in USB mode on host.
- Connect to the device over USB.
- Restart host adb in tcpip mode.
- Find out the IP address of the Android device: Settings -> About tablet -> Status -> IP address. Remember the IP address, of the form #.#.#.# .
- Connect adb host to device:
- Remove USB cable from device, and confirm you can still access device:
You’re now good to go!
If the adb connection is ever lost:
- Make sure that your host is still connected to the same Wi-Fi network your Android device is.
- Reconnect by executing the «adb connect» step again.
- Or if that doesn’t work, reset your adb host: and then start over from the beginning.
Источник
ADB команды для Android
Большинство пользователей Android ничего не знают об ADB. Полное название — Android Debug Bridge , расшифровывается, как «Отладочный Мост Android». ADB является частью Android SDK. При помощи ADB можно выполнять различные действия над вашим Android планшетом или смартфоном, такие как: перепрошивку, копирование файлов с компьютера на Андроид и обратно, восстановление системы и другие.
Содержание — ADB команды для Android:
ADB для Android — что это такое?
Вам наверняка известно, что операционная система Android основана на модифицированном ядре Linux. Поэтому и с ней возникает необходимость использовать командную строку. Именно программа adb помогает устанавливать связь между компьютером и Android. Она является составляющей среды разработки Android SDK, поэтому чтобы установить Android Debug Bridge, вам нужно скачать Android SDK с официального сайта . Есть версии для всех популярных операционных систем: Windows, Mac OS и Linux. То есть, проще говоря, adb позволяет при помощи компьютера управлять телефоном или планшетом.
ADB команды для Android
Подключите ваше устройство к ПК по USB. Убедитесь, что установлены все драйвера и включена отладка по USB .
Работать с Android Debug Bridge лучше всего через командную строку Windows. Для этого в Windows XP нажмите «Пуск» и в поле ввода «Найти программы и файлы» введите «cmd», после этого нажмите «Enter». Если у вас Windows 7 и выше, нажмите «Пуск» и в поле «Выполнить» введите «cmd» и снова нажмите клавишу «Enter».
adb devices
Самая распространенная команда adb. При помощи нее можно определить, видит ли ваш ПК подключенное устройство. Если вы всё сделали нормально, то появится такая строка: «List of devices attached». После нее вы увидите серийный номер вашего смартфона или планшета и его состояние: «online» либо «offline».
Если пишет «offline», это значит, что аппарат находится в спящем режиме, если «online», то девайс готов выполнять ваши команды.
adb install
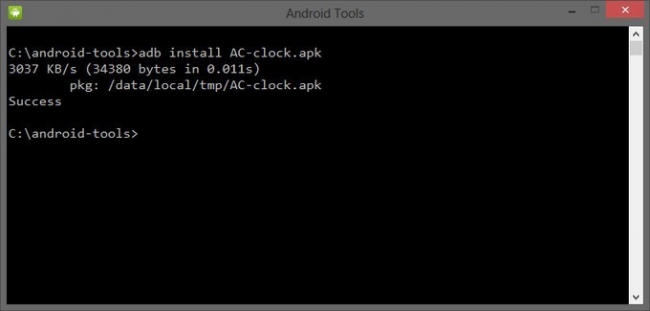
Благодаря этой команде вы можете устанавливать приложения на вашем смартфоне или планшете. Для этого нужно прописать путь, где находится APK файл:
adb intsall D:\papka_s_faylom\nazvanie_prilogeniya.apk
Чтобы не писать длинных путей, скопируйте файл в директорию android-tools. Тогда путь станет таким:
adb intsall nazvanie_prilogeniya.apk
adb uninstall
Вводить нужно аналогично предыдущей команде. При этом приложение удалится.
У этой команды есть интересная фишка. Если вы добавите ключ -k,то при удалении игры или программы их данные и кэш не удалятся, а останутся на Android устройстве.
adb push
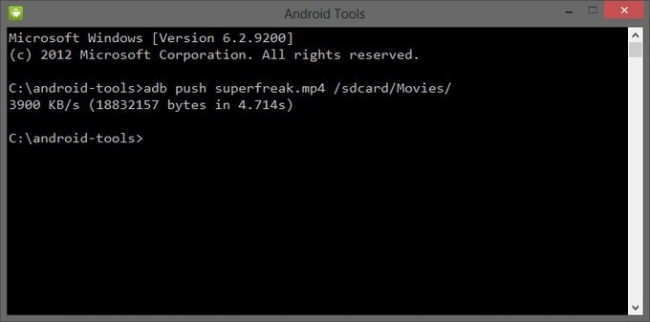
Благодаря этой команде вы можете перекидывать файлы с компьютера на Android. Для этого вам нужно знать полный путь, где хранится файл и куда его перемещать.
adb push D:\papka_s_faylom\nazvanie_fayla/sdcard/Android
Чтобы не писать длинных путей, скопируйте файл в директорию android-tools. Тогда вводить нужно:
adb push nazvanie_fayla/sdcard/Android
adb pull
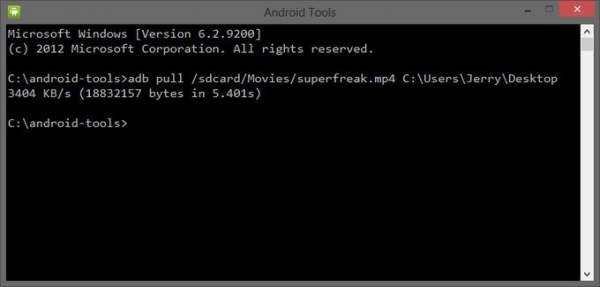
Эта команда копирует файлы с Android на компьютер. Вам нужно знать путь, где находится файл на смартфоне или планшете и указать место, где вы хотите сохранить файл. Если вы не укажете последнее, то файл сохранится в директории android-tools.
adb pull /sdcard/nazvanie_fayla\D:\papka_gde_sohranity
adb reboot
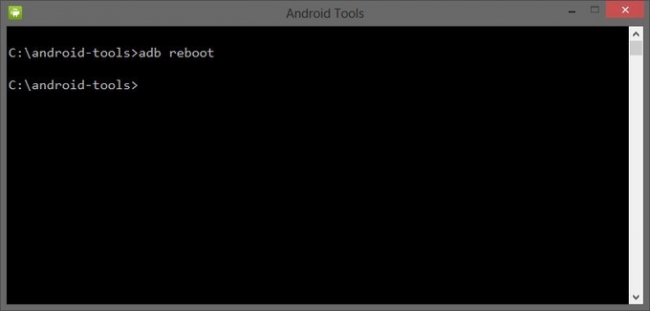
Эта команда перезагрузит ваш Android телефон или планшет.
adb reboot-bootloader
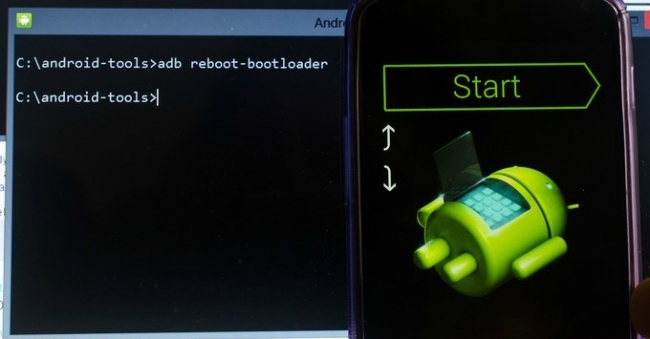
Благодаря этой команде вы можете напрямую загрузиться в режиме bootloader.
adb reboot recovery
Не все девайсы поддерживают данную команду. При помощи нее можно попасть в режим восстановления.
adb connect
При помощи этой команды можно подключить устройство к Wi-Fi сети. Для этого нужно знать ip адресс и порт устройства.
adb connect ip:port
adb shell
При помощи этой команды вы получаете полный доступ ко всем файлам на вашем устройстве.
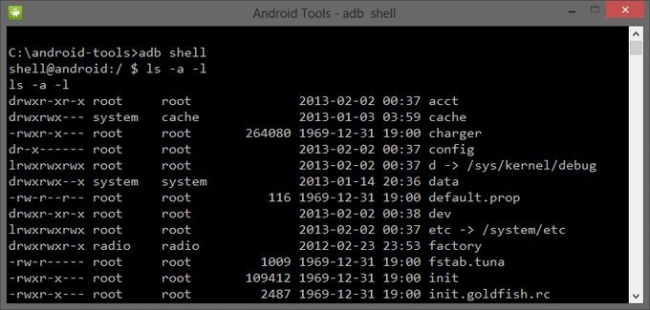
Второй способ использования adb shell — это выполнение единичной команды Android shell с помощью такой конструкции:
fastboot devices
Если вы переведете ваш телефон или планшет под управлением Андроид в режим bootloader , то команды adb больше срабатывать не будут. Здесь нужно использовать команды fastboot.
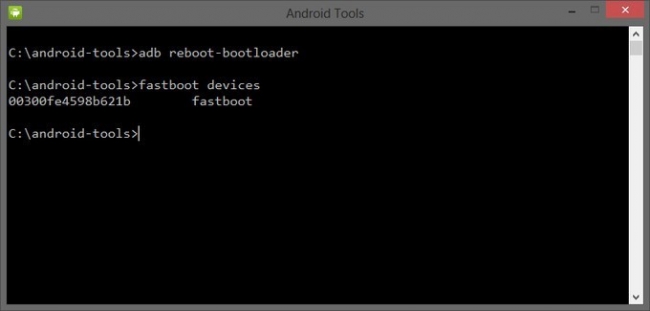
Чтобы проверить, видят ли ПК и Android друг друга, используем команду:
После её ввода должен появится серийный номер вашего аппарата.
fastboot oem unlock
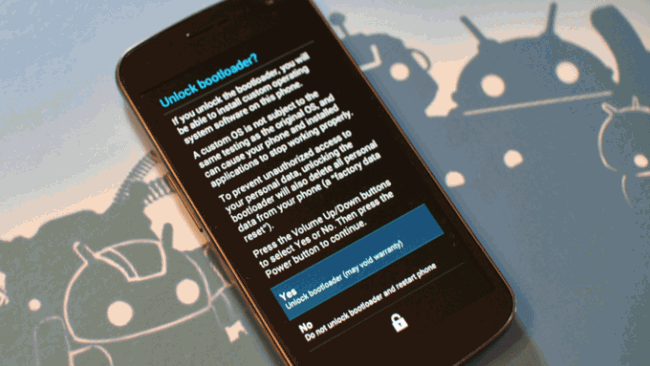
При вводе этой команды можно разблокировать загрузчик телефонов и планшетов Asus и HTC. Когда ваше устройство находится в режиме bootloader, введите:
fastboot oem unlock
Также все ваши установленные программы и персональные данные будут потеряны.
adb logcat
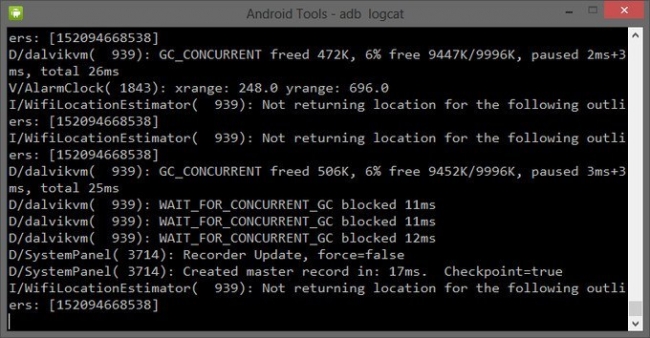
При помощи этой команды можно вывести содержимое log файла: изменения, ошибки и т.д. Данные будут слишком быстро прокручиваться, поэтому верным решением будет сохранить их в один TXT-файл. Для этого введите:
adb logcat > filename.txt
adb sideload
Команда пригодится для владельцев устройств линейки Google Nexus. При помощи нее можно обновить прошивку девайса. Скачайте её на компьютер, подключите к нему Nexus, зайдите в режим Recovery, выберите пункт «Apply update from ADB» и после этого введите команду:
adb sideload name.zip
name.zip – это имя zip файла c прошивкой.
adb backup и adb restore
Команда adb backup создает бэкап, а adb restore проводит восстановление из бэкапа.
Источник


