- Навигация с помощью жестов Android 10 в любом стороннем лончере (Инструкция по активации)
- Android Q Beta 3: How to enable and use Android Q’s fully gestural navigation
- How to enable Android Q Fully Gestural Navigation on Pixel
- How to enable Android Q Fully Gestural Navigation on OnePlus 6
- How to use Android Q’s fully gestural navigation
- How to go home
- How to go Back
- How to use the App Switcher
- How to enable Android 10 gesture navigation on Nova launcher and other third-party launchers
- How to get Android 10 back gesture navigation on Nova launcher and other third-party apps
- Use Action Launcher’s Android 10 Navigation Gestures
- Tutorial How To Enable Android 10 Gestures on Android 10 Beta on Max M1 (No Root)
Навигация с помощью жестов Android 10 в любом стороннем лончере (Инструкция по активации)

Вне всякого сомнения, одним из самых серьезных нововведений операционной системы Android 10 является возможность включения режима навигации с помощью жестов, пользоваться которыми легко и удобно.
Проведите пальцем вверх от нижней части экрана, затем сделайте паузу и вы увидите свои последние приложения вместе с док-панелью, содержащей несколько значков часто используемых приложений для быстрого доступа. Для возврата назад вам достаточно провести пальцем от левого края экрана, а вперед – от правого. Жест снизу вверх приведет вас на домашний экран, а жест вправо и влево по нижней части экрана позволяет быстро переходить от одного приложения к другому.
К сожалению, многие сборки Android 10 отключают полностью навигацию жестами, когда вы устанавливаете сторонний лончер в качестве главного экрана по умолчанию. Эта опция также становится недоступной и в настройках системы.
Но, к счастью, есть способ обойти это. Вы можете снова сделать эту опцию доступной, для того, чтобы пользоваться жестами Android 10 одновременно со сторонними лончерами.
Как включить жесты Android 10 в любом лончере
1. Для того, чтобы приступить к работе, вам понадобится компьютер, ноутбук или Windows планшет * и программы ADB и Fastboot для него. Скачать свежие версии ADB и Fastboot от Google вы всегда можете по следующим ссылкам:
* Если компьютера или Windows планшета у вас нет, то вы можете использовать и Android устройство. Как это сделать описано в этой статье: ADB и Fastboot без компьютера, с помощью Android смартфона или планшета [Инструкция].
2. Включите в меню настроек системы смартфона режим отладки через USB. Где его найти и как включить описано в этом материале
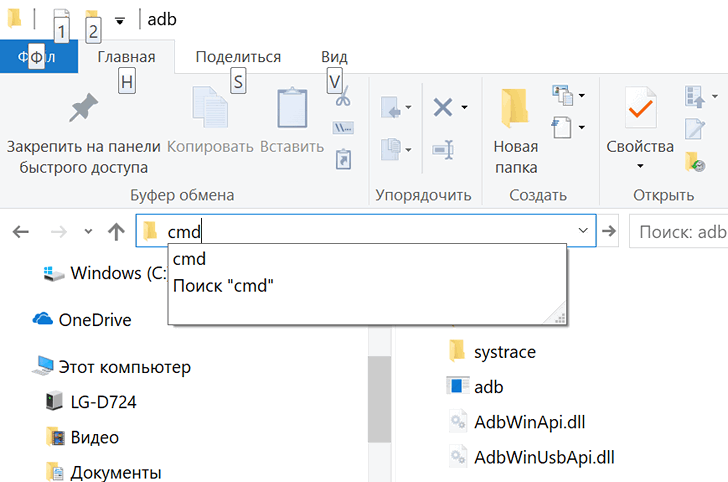
3. Подключите ваш смартфон к компьютеру с помощью USB кабеля, затем на компьютере перейдите в папку, в которую вы поместили ранее программу ADB и запустите окно командной строки Windows (терминал Linux/Mac). На Windows устройстве для этого нужно ввести в адресной строке проводника команду cmd и нажать «Enter».
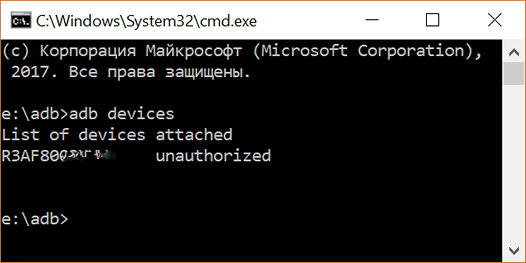
В открывшемся после этого окне командной строки выполните команду:
Если вы всё сделали правильно, то ADB сообщит вам о том, что смартфон подключен к компьютеру, но не авторизован, а на экране смартфона появится запрос на разрешение отладки. Разрешите её нажав на кнопку ОК.

4. Теперь можно приступать к включению управления с помощью жестов. Для этого в окне командной строки/терминала выполните следующую команду:
adb shell cmd overlay enable com.android.internal.systemui.navbar.gestural
./adb shell cmd overlay enable com.android.internal.systemui.navbar.gestural
Всё. Теперь жесты навигации Android 10 будет доступны вам в любом стороннем лончере.
Само собой, стоит иметь в виду приведенное выше решение не гарантирует идеальной и беспроблемной работы системы навигации Android 10 с помощью жестов с любым сторонним лончером.
Источник
Android Q Beta 3: How to enable and use Android Q’s fully gestural navigation
— May. 8th 2019 5:06 pm PT
With the release of Android Q beta 3 yesterday we’ve seen yet another revision to gestural navigation on Android. The newest effort certainly shows promise, but it might take longtime Android users some time to get used to it.
If you are taking the plunge and installing the Android Q beta, you aren’t thrown into the deep end by starting out with the fully gestural navigation enabled, so if you are looking for the full Android Q experience you’ll need to enable it first.
How to enable Android Q Fully Gestural Navigation on Pixel
- Open Settings
- Scroll down and tap on the System menu
- Open Gestures
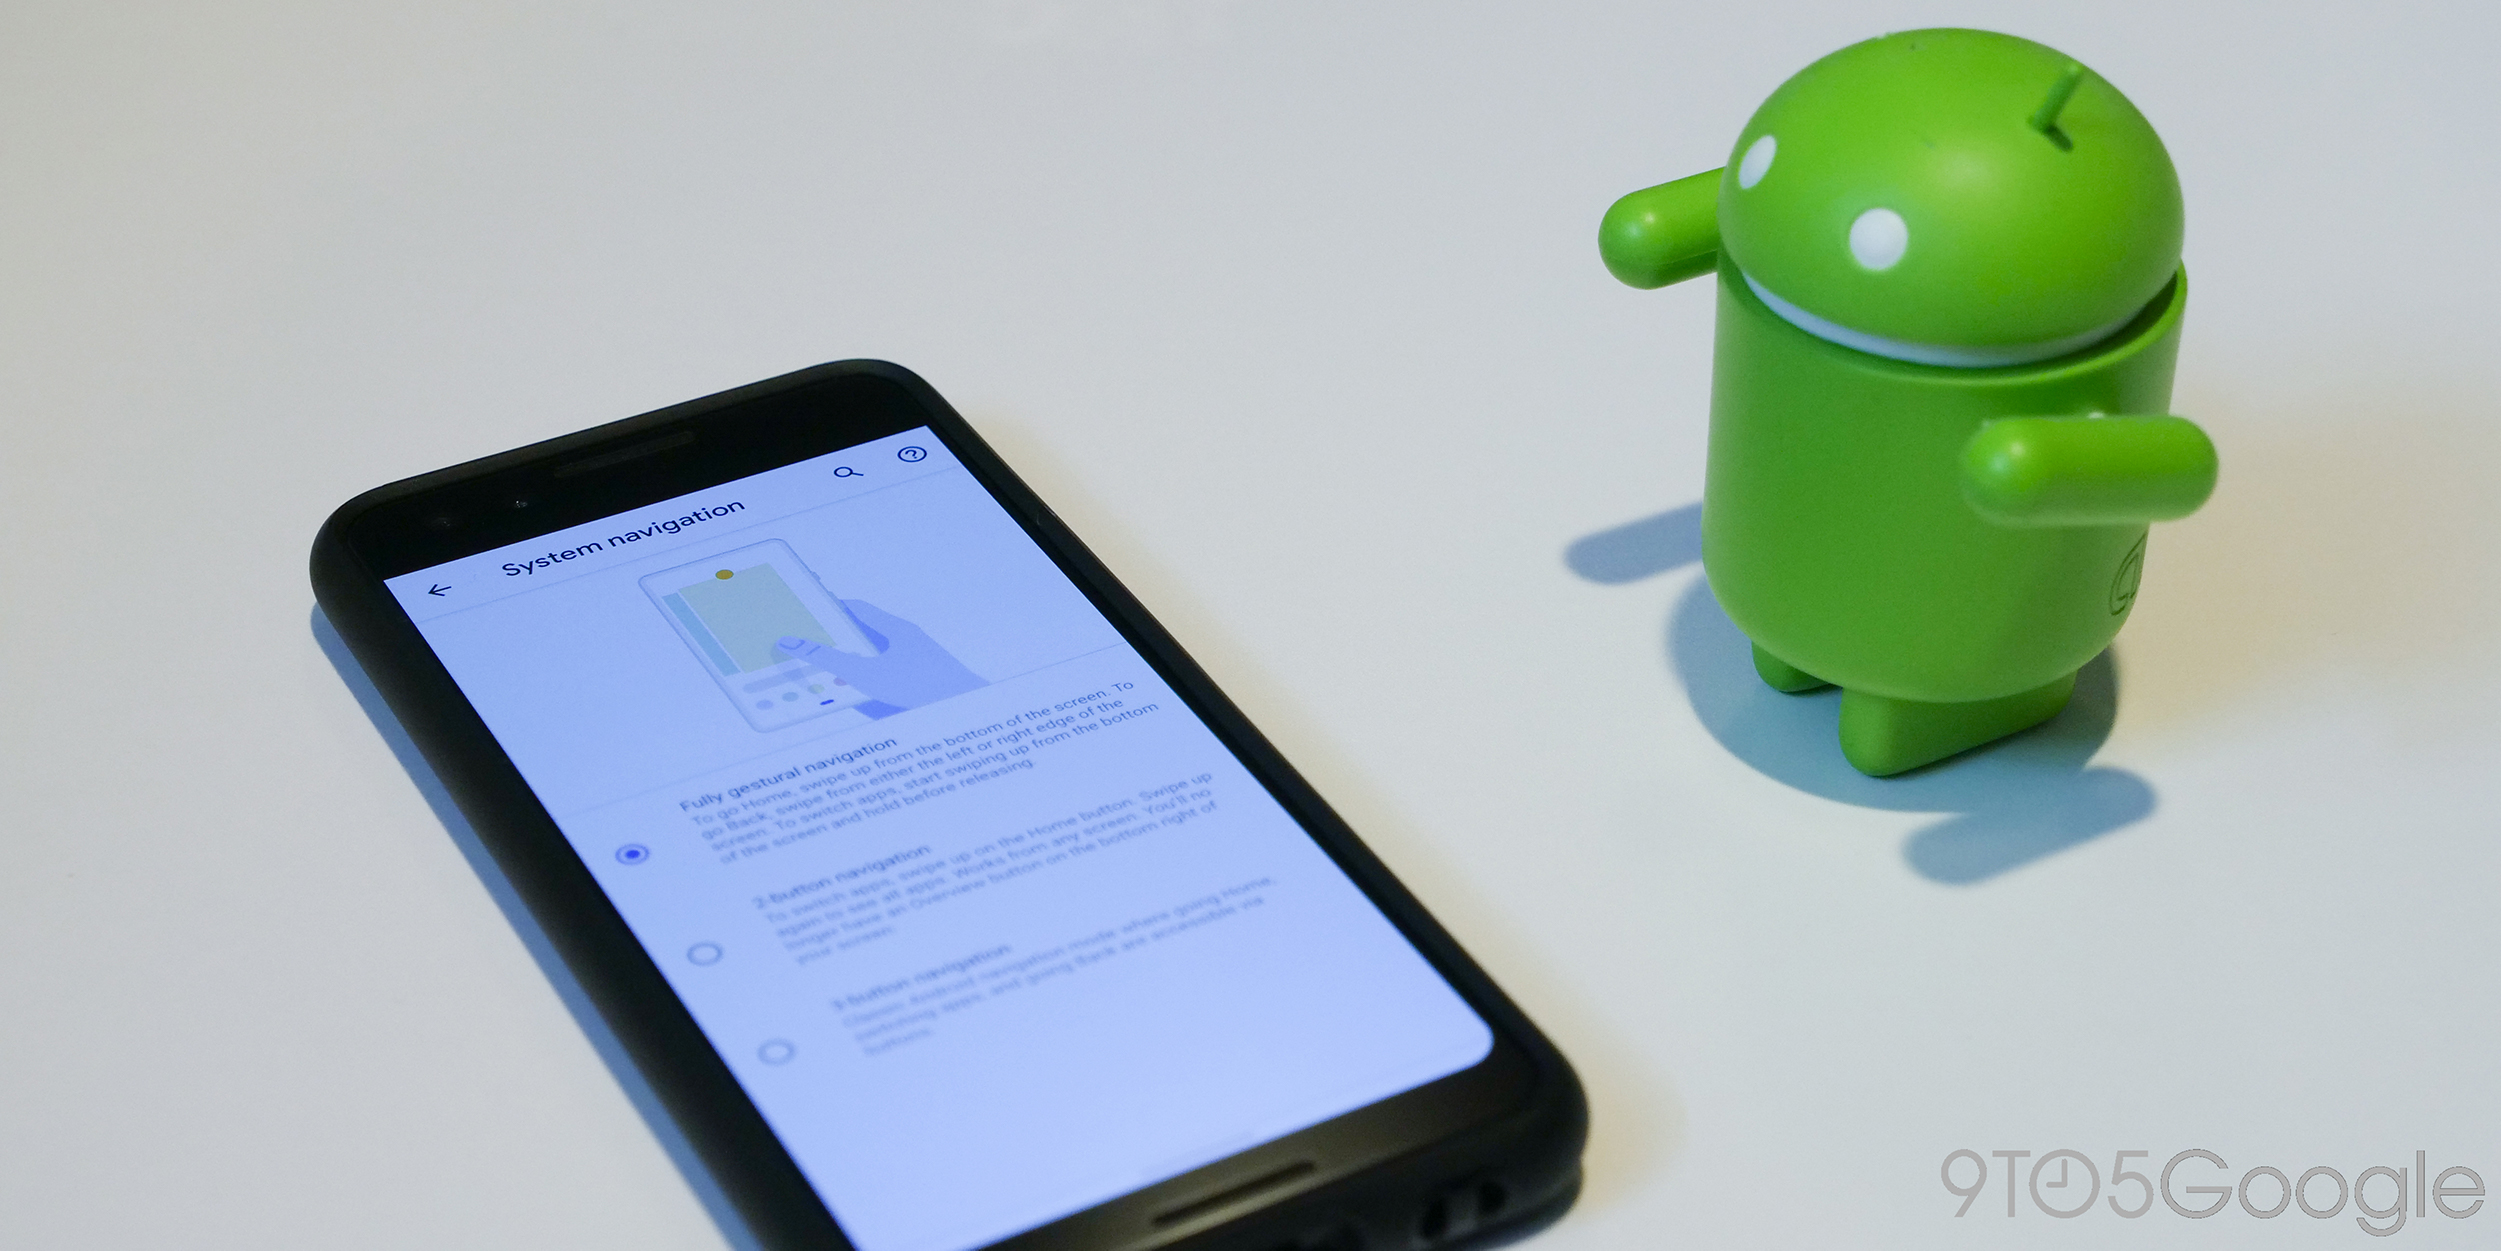
- Tap on System navigation
- Select Fully gestural navigation
At this stage in the beta you still have the option to retreat back to 2-button navigation or even traditional 3-button navigation. But for now, let’s press on and look at how the new Android Q gestural navigation works in Android Q Beta 3.
How to enable Android Q Fully Gestural Navigation on OnePlus 6
If you have installed the Android Q Beta on your OnePlus 6, you can also enable the native fully gestural navigation, but you will need to do it via ADB and you have a few more steps to get through.
Please note: To switch from one navigation method to another you need to first disable the previous one. Nothing breaks if you forget, you just won’t necessarily have the navigation you want active.
How to enable fully gestural navigation: adb shell cmd overlay enable com.android.internal.systemui.navbar.gestural
How to disable fully gestural navigation: adb shell cmd overlay disable com.android.internal.systemui.navbar.gestural
How to enable 2-button navigation: adb shell cmd overlay enable com.android.internal.systemui.navbar.twobutton
How to disable 2-button navigation: adb shell cmd overlay disable com.android.internal.systemui.navbar.twobutton
How to enable 3-button navigation: adb shell cmd overlay enable com.android.internal.systemui.navbar.threebutton
How to disable 3-button navigation: adb shell cmd overlay disable com.android.internal.systemui.navbar.threebutton
How to use Android Q’s fully gestural navigation
How to go home
This is one of the most critical features and thankfully the one that works the best at the moment. You just swipe up from the bottom of the screen and release to return to your home screen.
How to go Back
This one took a little bit more practice to get it down reliably, but if you swipe in from either the left side or the right side of the screen it will duplicate the behavior of the former back button. Out of habit, I find myself always swiping in from the left to do this, but users with larger devices and/or smaller hands are certainly going to appreciate the option swipe in from the right so as to avoid a reach across the entire screen.
How to use the App Switcher

I’m still a little hit or miss on this one, but to get to the app switcher in Android Q gestural navigation you need to swipe up from the bottom of the screen just like you do to get to the home menu, but keep your finger on the screen until you see the second app appear to the left. At that point, you can release your finger from the screen and access the app switcher as normal or the Google Search, Assistant, favorite apps section at the bottom of the screen.
FTC: We use income earning auto affiliate links. More.

Источник
How to enable Android 10 gesture navigation on Nova launcher and other third-party launchers

Android 10’s new gesture navigation has invited a lot of criticism, and we gotta say, some of it is indeed fair. While we don’t find many issues with the back gesture and slide-in navigation bar gesture, we do hate that you cannot use the Android 10 gesture on 3rd party launcher apps including Nova Launcher.
Given that Android 10 is now available for major phones like OnePlus 7, OnePlus 6 and more, one would expect the issue to be resolved by now but here we are, still facing this.
It’s been a few weeks since Samsung’s grand unveiling of One UI 2 for the Galaxy S10 and Note 10 devices. Last week, the third version of the beta was released for the S10 devices, and it’s safe to say that the reception has been quite positive. Most users are loving the little refinements Samsung has built into the release, and also the promise of seeing more such changes in the coming months.
One UI 2 (new features here) has brought almost all of Android 10’s celebrated features, including the revamped gesture navigation. S10 and Note 10 users have found Samsung’s implementation to be even more refined than Google itself and are eager to see it in action in third party launcher apps — Nova Launcher, Apex Launcher, etc.
However, a pretty straightforward way to achieve the desired result, and here, we’re going to break it down for you.
How to get Android 10 back gesture navigation on Nova launcher and other third-party apps
- You would have to enable Developer options on your smartphone.

- Go to Settings > About phone > Software information.
- Tap on Build number 7 times (until you get the ‘You’re now a developer!’ message).
- Enable USB Debugging via the Developer options.
- Go to Settings > Developer options > Toggle on USB debugging.
- Now, head over to your computer and download the ADB tools.
- Download the SDK Platform Tools (Windows, Linux, and Mac)
- Once you’ve downloaded the SDK Platform Tools, simply extract the tools to a convenient location on your PC.
- Proceed by connecting your Samsung device to your PC via a USB cable.
- Make sure the USB connection is set to Transferring files.
- This can be done via the notification tray itself.
- Now head over to the SDK Tools folder you extracted in step 5.
- Left Click on the empty space in the SDK folder. Press Shift+Right Click to bring a menu and select Open command prompt here. (if you see the option Open Powershell window here, select it as this will do, too.)
- Alternatively, simply type cmd in the address bar and hit the Enter key to open a command window right there.
- Enter the command “adb devices” just to make sure your smartphone is recognized. You will get a random serial number if ADB is working.,
- Now, run the command given below to enable Android 10’s gesture on your Galaxy S10 running One UI 2:
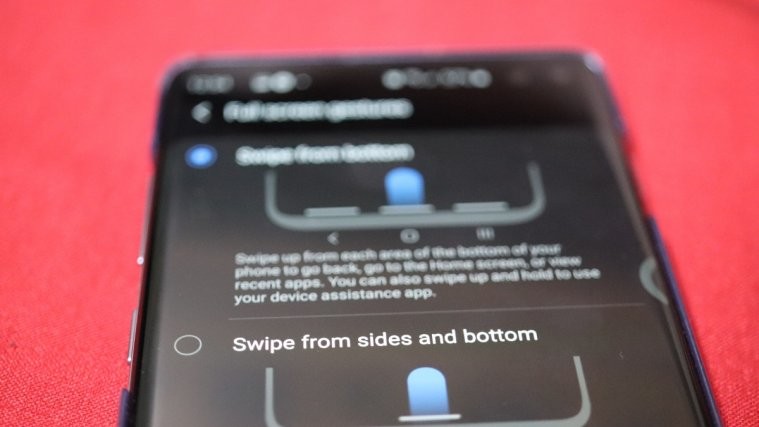
- That’s all. Go to Settings > Display > Navigation bar > Select Full screen gestures > tap More options, and select the back key option.


Use Action Launcher’s Android 10 Navigation Gestures

If the process above feels a bit too heavy or you’re having no luck with it, you can check out Action Launcher on Google Play. It may not be as popular as Nova, Apex, or Go, but probably is the only launcher that delivers Android 10’s reworked gesture navigation without a hitch.
The update, which brings the coveted Android 10 navigation gestures, was in beta last week. Now, after hashing out the reported bugs, it has been made available to the public through a stable rollout.
However, before giving it a go, there’s one important criterion that you must fulfill. Action Launcher requires your device to have the December 2019 security patch (Android 10) up and running. So, if you’re stuck even with the November security patch, you’ll have no luck with Action Launcher navigation gestures.
Thankfully, almost all leading manufacturers have blessed their eligible devices with and Android 10 and the December 2019 security patch. In case you haven’t received them yet, your device, if eligible, is likely to get it the duo in the next couple of months.
Apart from the Android 10 navigation gestures, the update also brings support for Live wallpapers, a new ActionDash widget that shows device usage stats, the ability to pause apps with ActionDash directly from the launcher, improved duplicate app support, and 2020 supporter badge alongside impressive bonus wallpapers.

Sushan
A mediocre engineer hoping to do something extraordinary with his pen (well, keyboard). Loves Pink Floyd, lives football, and is always up for a cup of Americano.
Источник
Tutorial How To Enable Android 10 Gestures on Android 10 Beta on Max M1 (No Root)

Before i has been write about How To Remove Navigation Bar on Zenfone Max Pro M1 ( No Root ), today i will do the same but different device. Today will do with Zenfone Max M1. This device was using Android 10 Beta (not yet release the Official by ASUS).
DO THIS WITH YOUR OWN RISK.
First thing you need to prepared is Adb dan Driver. You can check my previous post regarding adb if you are still confused. Make sure your Zenfone Max M1 has been have Android 10 installed. But if you are missing the link, you can download form below on my blog gwrangerbiru.blogspot :
Now Check if you has been enable developer option, if not Open Settings, go to About Phone and continuously tap for around 6-8 times for enabling Developer Options, Then enable USB Debugging.
type adb devices

if show list of letter and number means your are ok to continue.
Now let continue. For enabling Android 10 Gestures, run the following command:
adb shell cmd overlay enable com.android.internal.systemui.navbar.gestural

Android 10 Gestures will be now enabled. To DISABLE Android 10 Gestures you just need to do the same, only command will change from ENABLE to DISABLE
adb shell cmd overlay disable com.android.internal.systemui.navbar.gestural
Now Check if youre Zenfone Max M1 has been enable Android 10 Gestures ?

Here is some others Commands :
How to enable fully gestural navigation:
adb shell cmd overlay enable com.android.internal.systemui.navbar.gestural
How to disable fully gestural navigation:
adb shell cmd overlay disable com.android.internal.systemui.navbar.gestural
How to enable 2-button navigation:
adb shell cmd overlay enable com.android.internal.systemui.navbar.twobutton
How to disable 2-button navigation:
adb shell cmd overlay disable com.android.internal.systemui.navbar.twobutton
To switch from one navigation method to another you need to first disable the previous one.
Источник


