- Introduction to Android Architecture Components
- Put the magic back into Android development #
- What is it? #
- ViewModel #
- Model #
- Example #
- Data # 1 #
- Data # 2 #
- Adding Architecture Components to your project #
- The Kotlin version #
- UI — ConstraintLayout #
- UI — Downloadable Fonts #
- UI — No more findViewById #
- UI — Toasts #
- UI — Snackbar #
- UI — Alert #
- ViewModel — StateViewModel #
- LiveData — Counter #
- LiveData — Data #
- Android Architecture Components. Часть 1. Введение
Introduction to Android Architecture Components
Dec 7, 2017 ∙ Nazmul Idris
- Hi, I’m Nazmul, a Google software engineer, entrepreneur, leader, designer, dancer, TaiChi’er, Yogi, racer, healer, and storyteller. I leadership, authenticity, empowerment, lifelong learning, , & 😃.
Put the magic back into Android development #
In Nov 2017 Architecture Components v1 was launched. This is a big deal because for the longest time it was very difficult to deal with certain use cases which would crop up all the time in mobile app development.
Things like dealing with configuration changes when rotating a screen, and sharing app state data between fragments and activities were difficult.
While these difficulties are not insurmountable, the fact that they crop up in so many common scenarios have had a negative impact on the developer experience on Android and didn’t make it feel magical. 😠
Architecture Components puts the magic back into Android development! 🎩✨ This article has both Java and Kotlin versions of a sample project that I build to illustrate the use of Architecture Components.
What is it? #
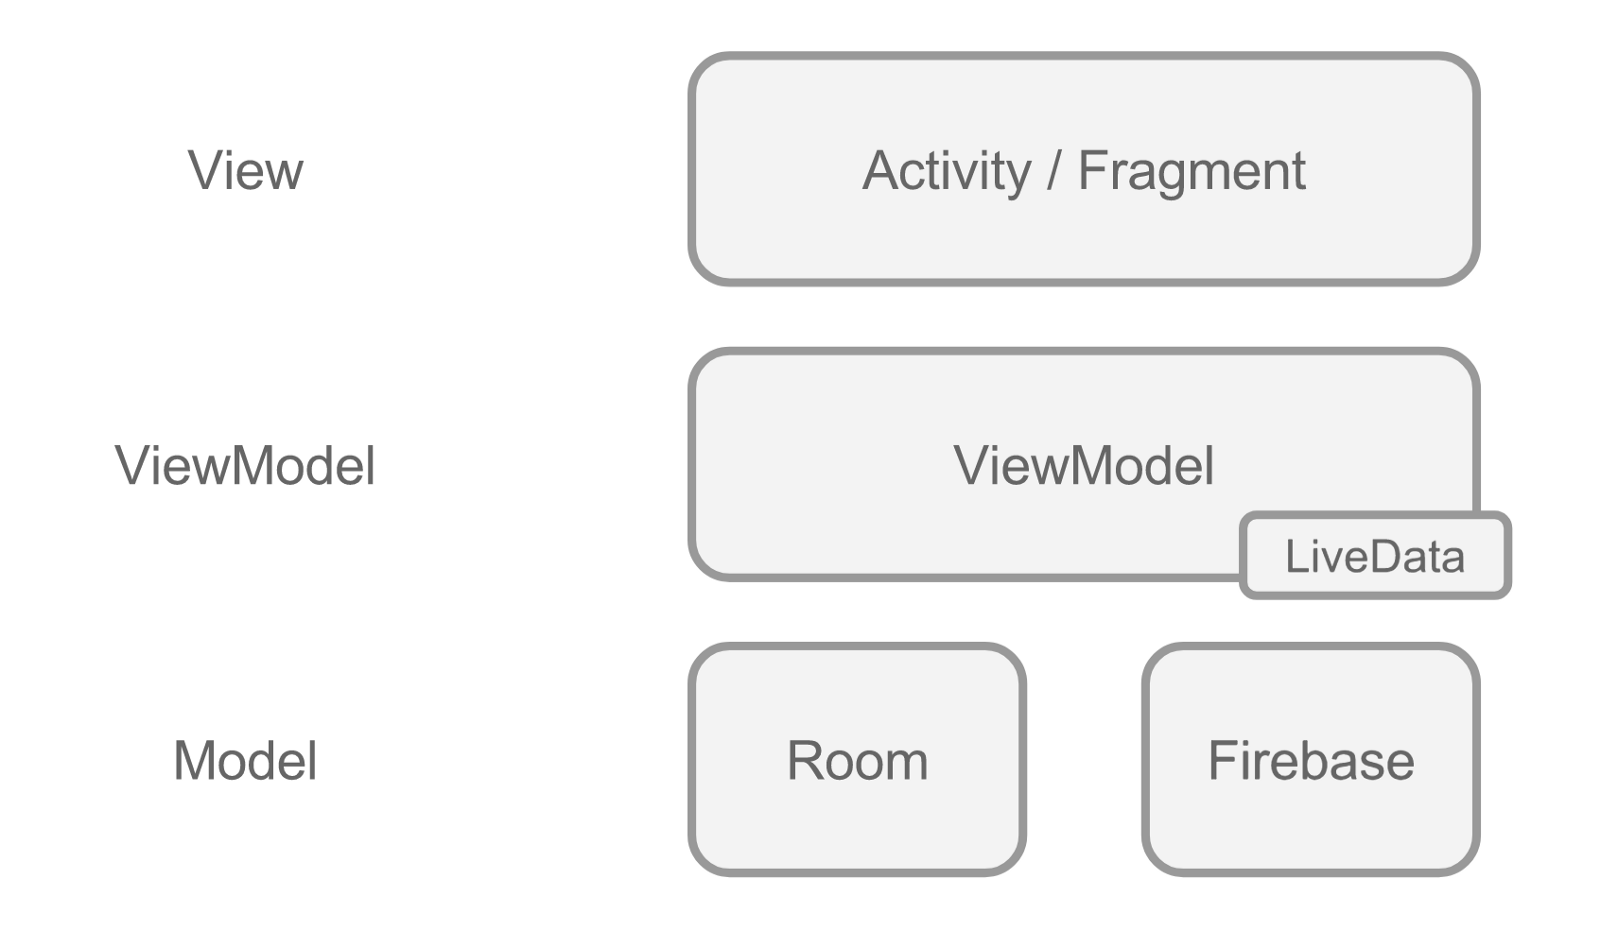
There are quite a few patterns out there for app architectures, such as MVP, MVVM, and unidirectional. I’m a huge fan of unidirectional, and I like MVVM too. There are 3 parts of M-V-VM, the Model , View , and ViewModel . Let’s take a look at what each of these are.
This is the UI component that is in a layout and rendered on the display.
ViewModel #
Views subscribe to the data they are interested in from the ViewModel . So when this data changes it can be broadcast to any interested observers.
- The ViewModel is responsible for prearing data for consumption by the View.
- The ViewModel’s state is stable across the lifecycle of Activities and Fragments . So as an Activity is torn down and rebuilt (on an orientation change) it can use the same ViewModel . And you can scope the lifetime of these ViewModels to the Activity lifetime as well, so that when the Activity is finished (not destroyed), then the ViewModel can be cleaned up.
- LiveData is an interesting piece of a ViewModel that you can wrap any data that changes quite rapidly and these changes have to be reflected in UI components.
- ViewModels should not hold references to any Views . And if they need an ApplicationContext , then you can use AndroidViewModel which supplies this.
- You don’t directly create a ViewModel , instead you ask the system to find you one. And the system ends up creating the ViewModel and managing what it’s scope is based on this. Basically you have to use a factory method to get a reference to a ViewModel instead of just creating one yourself using a constructor.
Model #
This is where your underlying data is actually stored. The model can be backed by local persistence stores, and synchronized with remote data sources. You can use Room to make it easier to work with SQLLite (on device) and have Room generate the ORM layer for you. Or you can use Firebase for persistence, which automagically syncs its state across multiple platforms. You have a lot of flexibility in what you choose. You can even use something like Redux in addition to Firebase to be your Model .
This article is focused on the ViewModel and LiveData parts of the Architecture Components. I will be covering Lifecycle awareness and Models in other articles.
Example #
I’ve created a simple app that showcases how you might use a ViewModel and LiveData in your apps. You can get this sample on GitHub.
The sample just has 1 Java file — MainActivity.java . This Activity loads its state from a StateViewModel , which contains two pieces of data. Here’s the entire Activity .
Data # 1 #
There’s a UUID String that is generate the first time this StateViewModel is created and this is displayed in the UI. This String does not change for the lifetime of the Activity . It is stable across configuration changes. So as you rotate the screen, and the Activity is destroyed and then recreated (but not finished), the same UUID String will be displayed in the UI. When you finish the Activity by pressing the back button, or by going to the task switcher and swiping the Activity away, then the ViewModel will be destroyed and onCleared() will be called.
Data # 2 #
The ViewModel also creates a ScheduledExecutor that runs a simple task every second. This task simply updates a counter, and it generates a log message (“ tick ”, or “ tock ”). This Executor also sets the value of this counter in a CounterLiveData object. The UI actually subscribes to this LiveData object and when it changes the UI gets updated with the current count. This too is stable across configuration changes. When the Activity is finally finished, the onCleared() method actually shuts the executor down. Also, you have to be mindful of which thread the CounterLiveData’s value is set.
Adding Architecture Components to your project #
Read more about how to modify your build.gradle file on developer.android.com. Here’s a simple build.gradle file snippet just for Lifecycles , ViewModel , and LiveData .
The Kotlin version #
You can find the Kotlin version of this project on GitHub. The Kotlin version is similar in spirit, but the code is very very different. I recently learned Kotlin (in Dec 2017) and have used it so far in Android, Web, and JavaScript projects.
Kotlin is a very different project from Java or JavaScript, and it took me a while to become fluent “thinking in Kotlin”. In this project, I used both Kotlin for Android and Anko. Anko is a delightful library that made so much mundane boilerplate disappear from the codebase. I am going to highlight some of the major changes between the Java version and Kotlin version of the projects below.
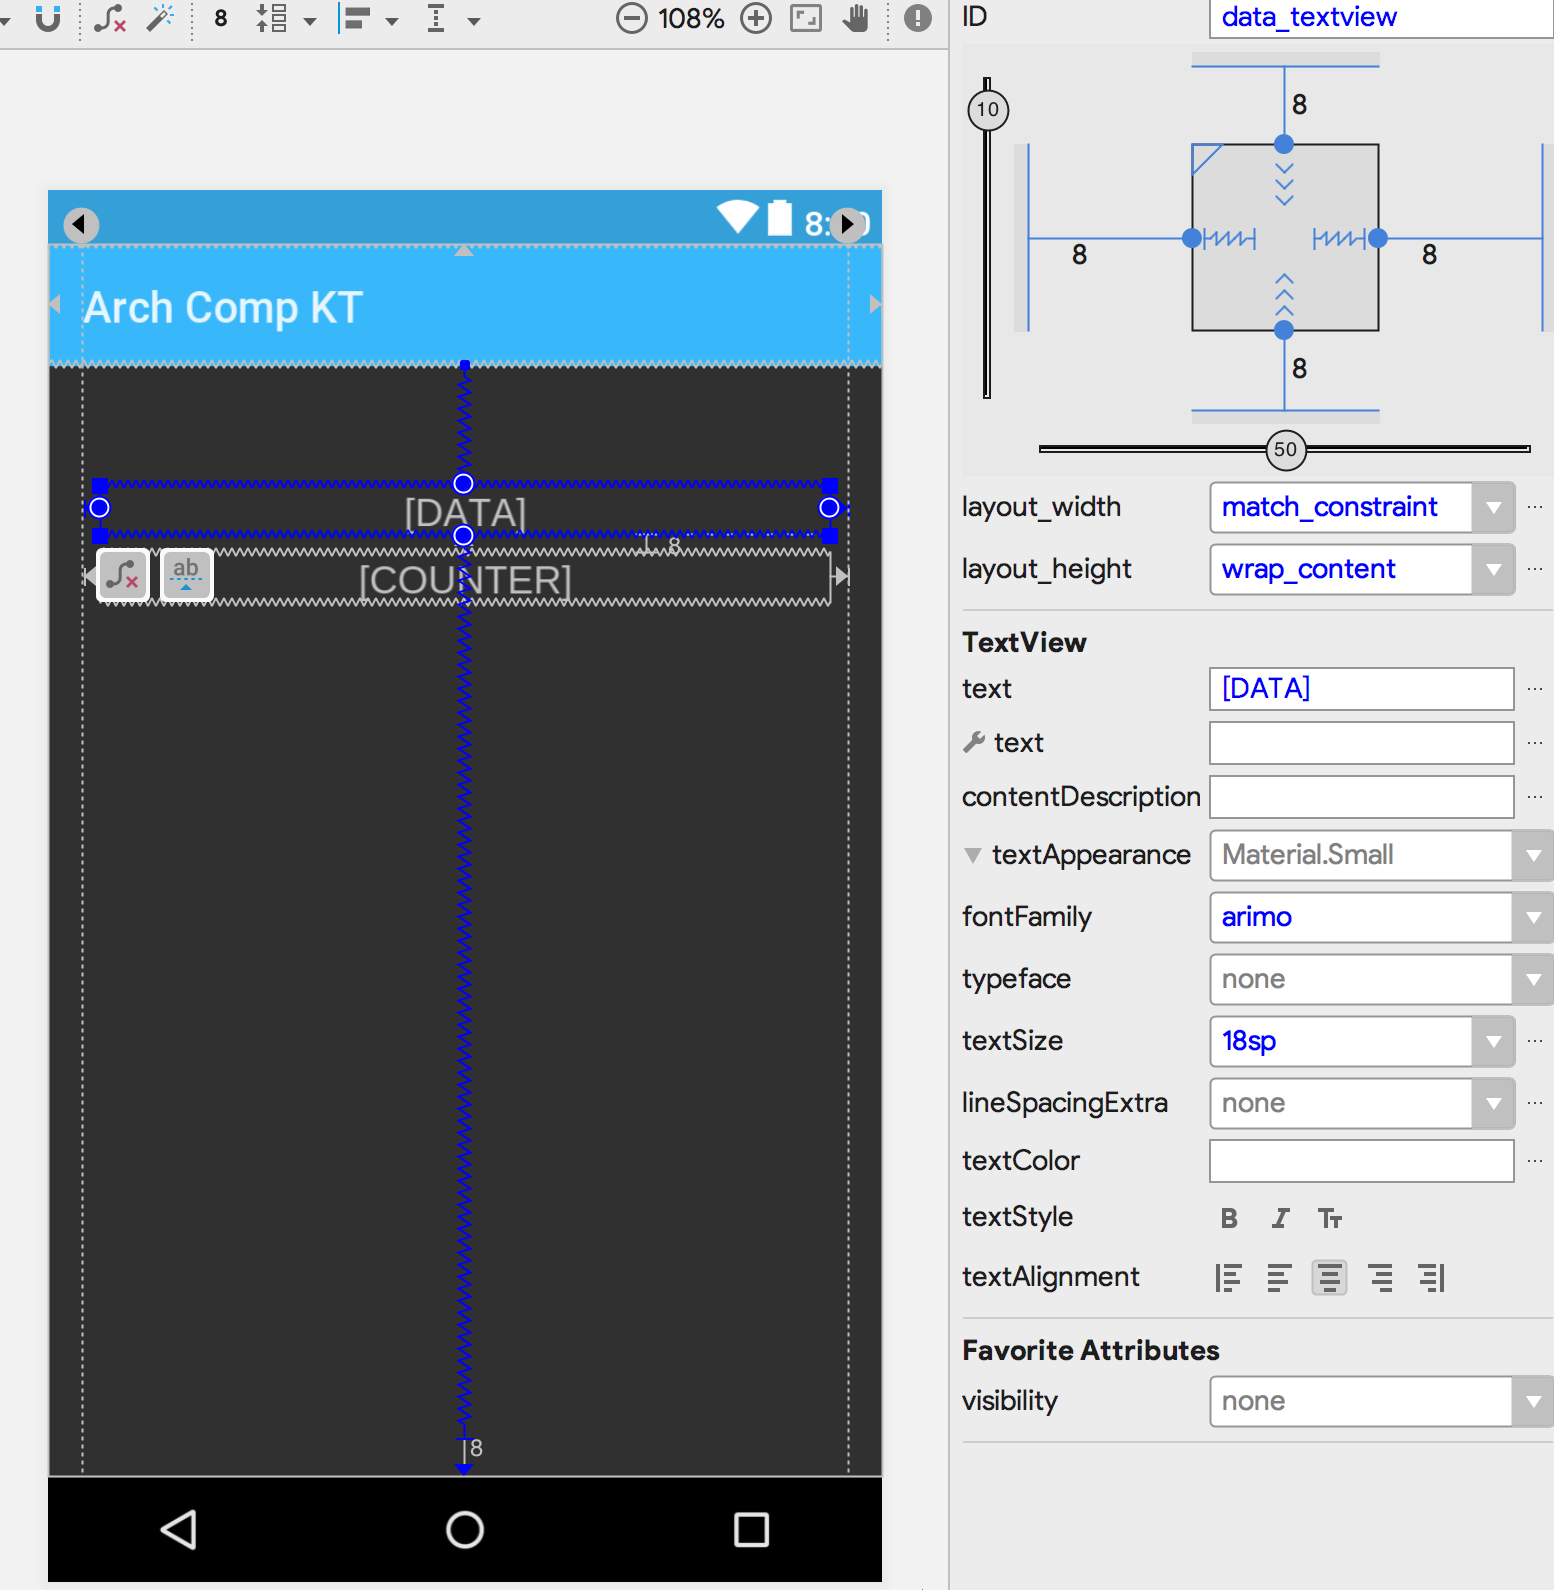
UI — ConstraintLayout #
This really has nothing to do with Kotlin. I decided to go with ConstraintLayout for the Kotlin version. The biggest learning about ConstraintLayout came from using guidelines to position my components and setting width/height to 0dp for match_constraint .
UI — Downloadable Fonts #
I’m a big fan of downloadable fonts. The Kotlin version of the code is quite different from the Java version in many ways. I also use Anko to take care of some nasty view traversal (to set the Typeface on the Toolbar ). AnkoLogger is also a great thing to avoid having to create a TAG for log message generation.
To use Anko logger, you have to make your class implement the AnkoLogger interface. Then you can just call info() or wft() , etc to generate logs without using a TAG .
You can use Anko to take care of some gnarly view traversal.
And with the lazy delegate, you can create heavy objects with ease (without having to deal with null checking). The with extension function makes things neat so that I don’t have to create clumsy local variables.
UI — No more findViewById #
This is one of my favorite Kotlin for Android extensions! You can reference the id of your Views directly in your code without doing clunky and possibly leaky findViewById() calls (Kotlin maintains a view cache for you to make this syntactic sugar performant and reliable as well).
UI — Toasts #
Anko makes it a breeze to work with Toasts , with the extension function toast(String) . You will be glad to know that you don’t have to call show() for this Toast to actually be visible! Only caveat is that this function is defined on a Context object, so if you’re not in a Context , or Fragment , etc then you have to call this function on a Context reference. Here’s an example of calling a toast() from the StateViewModel class.
UI — Snackbar #
Anko makes it easy to work with Snackbars with the extension function snackbar(View, String) . It’s very similar to toast() except that you need to provide one View in the layout in which you want the Snackbar to appear. IN order to get a View that you can use, call findViewById(**android.R.id.content**) . This will get you the top level view in whatever View hierarchy you’ve inflated. You can then use this View to create a Snackbar .
UI — Alert #
Anko makes it easy to work with Dialogs as well with the alert() extension function. Here’s an example of this.
ViewModel — StateViewModel #
When your Activity is created, you can call the following to get a reference to the ViewModel . Note that we are using a AndroidViewModel in this case (which comes with a reference to the Application Context ). Also remember that you can’t directly instantiate the ViewModel , Android will do this for you.
Once you’ve got the ViewModel, you can use the properties it exposes — mData: Data and mCounter: Counter .
Here’s an example of setting the text of mData’s toString() to a TextView .
Here’s are examples of attaching Observers to mData and mCounter . Both Data and Counter classes are subclasses of LiveData .
LiveData — Counter #
The Counter subclass of LiveData exposes one public property count and one function increment() . These are used in order to increment the count by 1 every second, by the Executor thread that’s started in the StateViewModel . You can pass an initial value of the counter via the constructor. There’s also an init block that takes this value and sets it on the LiveData .
The count property is backed by private value: Int . This means that the count itself doesn’t really store the Int value. However it’s setter and getter are used in order to expose the value of count to other classes. Additionally, when the setter is used, this causes the LiveData setValue() / postValue() to be called as well.
The increment() method actually increments the value and then sets it on the count property itself. This results in a call to setValue() / postValue() as shown above, which is what makes this an Observable .
LiveData — Data #
The Data subclass of LiveData exposes one property — clicked . This property is set when the user interacts with the alert / dialog shown above.
Источник
Android Architecture Components. Часть 1. Введение

На Google I/O 2017, было представлено набор библиотек под названием Android Architecture Components. В нескольких словах — это ряд вспомогательных библиотек, которые призваны помочь с такими вещами как, проектирование, тестирование и сопровождение приложений. То, что команда разработки Android начала акцентировать внимание на архитектуре не может не радовать, поскольку проблема является действительно актуальной. Ведь изначально не было предоставлено никаких требований или гайдлайнов по проектированию, и разработчику приходилось отталкиваться от своего предыдущего опыта. Что, в свою очередь, вызывало сложности в сопровождении проекта, а также сомнительные решения для специфических для ОС ситуаций. По факту это не первые шаги в этом направлении. Ранее уже Google представил репозиторий android-architecture с примерами применения разных архитектурных концептов. Надеемся, что развитие будет дальше и может на следующем Google I/O мы сможем увидеть полноценный фреймворк.
В целом Android Architecture Components можно разделить на четыре блока: Lifecycles, LiveData, ViewModel и Room Persistence.
Компонент Lifecycle – призван упростить работу с жизненным циклом. Выделены основные понятия такие как LifecycleOwner и LifecycleObserver.
LifecycleOwner – это интерфейс с одним методом getLifecycle(), который возвращает состояние жизненного цикла. Являет собой абстракцию владельца жизненного цикла (Activity, Fragment). Для упрощения добавлены классы LifecycleActivity и LifecycleFragment.
LifecycleObserver – интерфейс, обозначает слушателя жизненного цикла owner-а. Не имеет методов, завязан на OnLifecycleEvent, который в свою очередь разрешает отслеживать жизненный цикл.
Что это нам дает?
Назначение этого компонента – избавить разработчика от написания рутинного кода и сделать его более читаемым. Довольно частая ситуация, когда в нашем приложении работает ряд процессов, которые зависят от этапа жизненного цикла. Будь-то воспроизведение медиа, локация, связь с сервисом и т.д. Как итог нам приходится вручную отслеживать состояние и уведомлять о нём наш процесс. Что неудобно по двум причинам, захламление основного класса (Activity или Fragment) и снижение модульности, ведь нам нужно позаботиться про поддержку передачи состояния. С помощью же этого компонента мы можем переложить всю ответственность на наш компонент и все что для этого нужно это объявить интересующий наш класс как observer и передать ему в onCreate() методе ссылку на owner. В общем это выглядит так:
Наш обсервер абсолютно осведомлен о состоянии и может самостоятельно обрабатывать его изменение.
Компонент LiveData – являет собой holder класс для хранения объекта, а также разрешает подписаться к нему. LiveData знает про жизненный цикл и разрешает от него абстрагироваться.
Для имплементации компонента нам нужно расширить класс LiveData. Для работы нам нужно знать всего три метода из этого класса.
onActive() – этот метод вызывается когда у нашего экземпляра есть активный(-ые) обсервер. В нем мы должны инициировать интересующий нас сервис или операцию.
onInactive() – вызывается когда у LiveData нет активных слушателей. Соответственно нужно остановить наш сервис или операцию.
setValue() – вызываем если изменились данные и LiveData информирует об этом слушателей.
Если вы обратили внимание, то мы реализовали наш класс как Singleton. Это дает нам возможность использовать LiveData в других Activity, Fragment и т.д без переинициализации, если это нам не нужно.
Для того чтоб подписать слушателя, тоже никаких проблем нет. Все что нужно это вызвать метод observe у нашего экземпляра LiveData, передать в него LifeCycleOwner и реализацию интерфейса Observer. Интерфейс Observer имеет всего один метод onChanged(T t), с помощью него LiveData будет информировать слушателей об изменении в данных(вызов метода setValue(T t) в LiveData).
Что это нам дает?
Плюсов действительно много, начиная от защиты от memory leaks(Observer связан со своим Lifecycle и автоматически отписывается в случае, когда его Lifecycle уничтожен), защита от остановленной Activity(если, Lifecycle неактивен(stopped), то и нотификации на Observer не будут отправляться). С функциональных особенностей, это единый доступ к данным(с помощью singleton) и сбережение наших данных(Для таких операций как пересоздание активити, фрагмента). В целом же, назначение все то же, избавить разработчика от рутинной работы связанной с жизненным циклом.
Компонент ViewModel — спроектирован для хранения и управления данными которые связанные с представлением.
Задача же данного компонента, помочь разработчику абстрагировать данные и предоставить их хранение между такими операциями как пересоздание Activity. Если же нам необходимо сохранить небольшой набор данных, таких как item в RadioButtonGroup или же введенный данные, нам отлично подходит Bundle в onSaveInstanceState(). Но если это большой список к примеру: пользователей, товаров, каталог чего-нибудь нам приходилось заново доставать этот список. Вот в этом случае ViewModel является нашим основным помощником. Особенностью данного компонента является то что он привязывается к Activity и автоматически сохраняет свое состояние во время таких операций как onCofigurationChange().
Класс ViewModel, являет собой абстрактный класс, но не имеет абстрактных методов. Для реализации нашего класса нам нужно лишь наследоваться от ViewModel и описать данные которые мы хотим хранить и методы для их получения.
И это все, наш холдер для userList готов. Для того чтоб использовать наш холдер необходимо в методе onCreate(..) активити вызвать instance нашей модели:
С помощью ViewModelProviders, мы берем instance нашей модели. A c помощью if конструкции смотрим есть ли у нас уже данные в нашей модели или еще нет.
Что это нам дает?
Также как и предыдущие компоненты, этот помогает нам справится с особенностями и связанными с ними проблемами жизненного цикла Android. В этом случае, это отделение нашей модели представления данных от Activity и обеспечение безопасного механизма их хранения. Также при использовании совместно с LiveData не составляет проблем реализовать асинхронные запросы.
Компонент Room Persistence — Предлагает уровень абстракции над SQLite, предлагая более простой и продвинутый способ управления.
В целом же мы получили дефолтную ORM, этот компонент можно разделить на три части: Entity, DAO (Data Access Object), Database.
Entity — объектное представление таблицы. С помощью аннотаций можно легко и без лишнего кода описать наши поля.
Для создания нашей Entity нам нужно создать класс POJO (Plain Old Java Object). Пометить класс аннотацией Entity.
@PrimaryKey — Для обозначения ключа. @ColumnInfo — для связи поля в таблице. Создавать методы get и set не обязательно, но тогда нужно предоставить доступ к переменным с помощью модификатора public.
Установление связей объявляется также в теле аннотации Entity: Entity(foreignKeys = @ForeignKey(entity = Other.class, parentColumns = «id», childColumns = «author_id»))
DAO — Интерфейс который описывает методы доступа к БД.
Для реализации создаем интерфейс который помечаем аннотацией DAO и объявляем наши методы. Основные аннотации для методов это Insert Update Delete Query, в комментариях не нуждаются.
В обычном состоянии попытка получить доступ к БД с основного потока закончиться Exception. Если вы все же уверены в своих действиях, то можно воспользоваться методом allowMainThreadQueries(). Для асинхронного доступа рекомендовано использовать LiveData или RxJava.
Database — используется для создания Database Holder и является точкой доступа к соединению с БД.
Для создания нашего класса нужно наследоваться от RoomDatabase и использовать аннотацию Database, которой передаем параметры такие как используемые entity и версию базы. В теле описываем абстрактные методы доступа к нашим DAO.
Для создания instance для нашей БД используем код:
Для хранения db рекомендуют использовать singleton.
Что это нам дает?
Упрощение работы с базой данных, отпадает потребность в использовании сторонних ORM.
Кроме описанных выше плюшек NestedObject, параметры в запросах, коллекции аргументов, TypeConverter, database migration и т.д. Эти темы не входят в скоуп данного материала и будут рассмотрены позже.
К завершению материала хочу добавить еще несколько слов об архитектуре. С представлением Android Architecture Components была предложена архитектура решений, которая для большинства разработчиков уже и так привычна в той или иной форме. Суть заключается в том, что мы разбиваем архитектуру на 3 основных слоя: View (Activity/Fragment), который общается с ViewModel, а ViewModel работает непосредственно уже с Repository. Для наглядности преведу картинку с developer.android.com.

Выглядит абсолютно просто, а как на самом деле мы рассмотрим в следующих статьях.
Где сначала разберем более подробно каждый компонент и в конце реализуем приложение, как говорится с базой данных и… коннектом к сервису.
Источник


