How to Fix Error “Unable to Locate ADB” on Android Studio?
Android Debug Bridge or ADB allows you to communicate with your devices via a command-line interface. It can be used for various purposes as it facilitates a bunch of actions including installing and debugging apps on your device. While trying to run your app via the Android Studio, you might face the “Unable to Locate ADB” error message that stops the simulation. As it turns out, the error message appears when Android Studio is not able to locate the ADB.exe file that is located in the platform-tools folder.
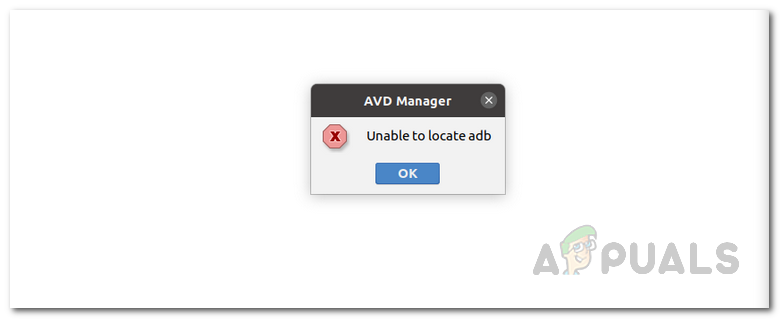 Unable to Locate ADB
This can happen due to several reasons including when your antivirus software removes the adb.exe file due to a false alarm. Issues like these are pretty common with antivirus software and thus, while using one, you need to make sure that it isn’t triggering a false positive on the files that you are working with. In addition to that, your project settings can also cause this error message to pop up. To understand and establish a better understanding of the error message in question, let us discuss the different reasons the issue may arise in more detail. However, do remember that the causes include but are not limited to the ones mentioned down below.
- Third-Party Antivirus — Antivirus softwares are known to cause several issues where they remove a file from your system due to a false positive. Avast antivirus has been known to cause this a lot with ADB where it locks the file in the virus chest. If this is applicable, you will have to restore the file from there and everything should be good. However, keep in mind that it may not only be limited to Avast if you are using a different third-party antivirus, but it could also likely be causing the issue and thus you should look at the files that have been quarantined by the application.
- Project Settings — As it turns out, in some cases, the error message may arise due to your project settings. The Android SDK by default does not give projects a default SDK. In such a scenario, you will have to go to the project settings and give the project an SDK which by default is set to No SDK.
- Corrupted Platform Tools — In addition to the aforementioned reasons, if your platform tools are damaged or corrupted, that might result in the error message as well. If this scenario is applicable, Windows Defender or any third-party software likely quarantines it, and as a result, you no longer have the adb.exe file in the platform-tools folder. In such a case, you will simply have to reinstall platform tools to resolve the issue.
Now that we have gone through the possible causes of the issue, let us get started by mentioning down the different workarounds that are available to you to get the issue sorted. So, without further ado, let us dive right into it.
Restore ADB From Third-Party Antivirus
As it turns out, the first thing that you should do when you face the error message in question is to check the third-party antivirus software that is installed on your system. More often than not, antivirus software can trigger false-positive and quarantine files that are not dangerous at all. In this case, the adb.exe would be the targeted file that is regarded as a dangerous or potential threat by the antivirus software and as a result removed from your system.
If this case applies to you, especially if you are using the Avast antivirus, you should check the virus chest of your antivirus software to see if the file has been quarantined by it. In case it is, simply restore the file and then try running the application. To do this, follow the instructions given down below:
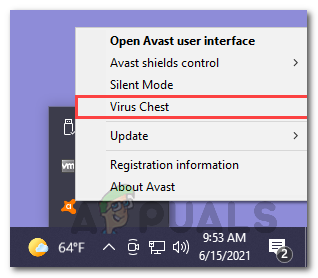
- First of all, right-click your antivirus icon on the taskbar, and then from the menu that appears, choose Virus Chest.
 Opening Virus Chest
 - Here, check if the ABD.exe file is present. In case it is, go ahead and click the three horizontal dots in front of the file.
- From the drop-down menu that appears, choose the Restore option. This will remove the file from Virus Chest and you will be able to use it. Restoring File from Virus Chest
- Alternatively, you can also choose the Restore and add exception option to make sure that it isn’t put away in the Virus Chest again.
 Opening Virus Chest
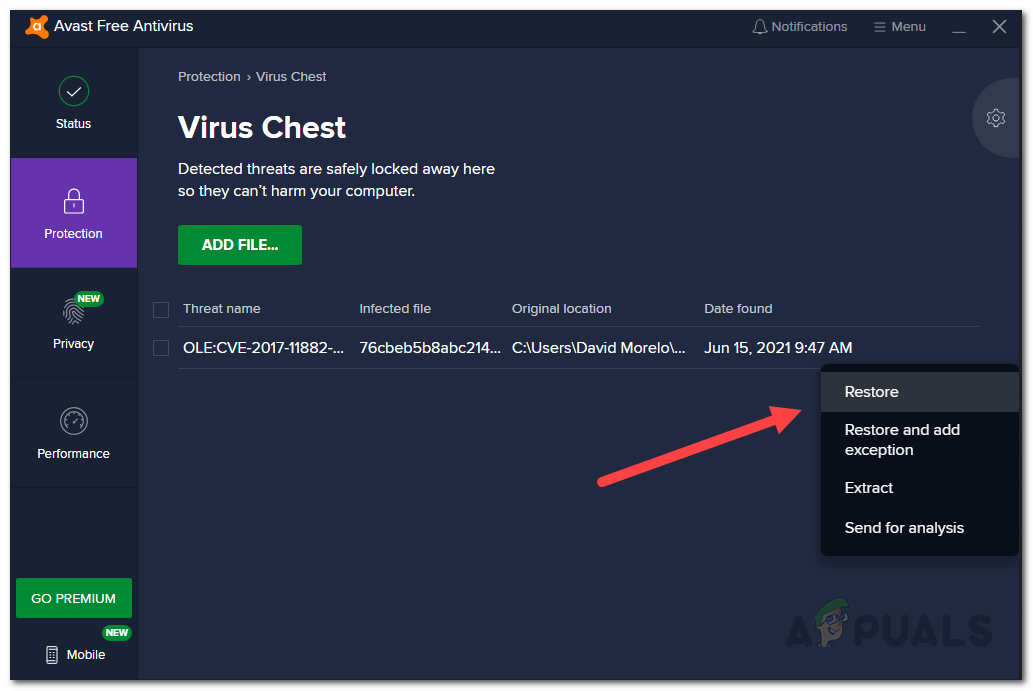 Restoring File from Virus Chest
Change Project Settings
If your antivirus software is not the culprit or if it doesn’t apply to you, the error message is likely being triggered due to your project settings. This happens when your project has no SDK assigned to it and as a result, it does not have access to ADB which is why you face the error message in question. To resolve this, you will have to change the default project settings which are set to No SDK by default. These settings can be found under Project Structure. To do this, follow the instructions given down below:
- First of all, make sure Android Studio is open.
- Then, make your way to File > Project Structure. Alternatively, you can click the Project Structure icon as shown in the picture down below.
- Once the Project Structure window is open, click on Project under Project Settings.
- Then, go ahead with what Project SDK is set to. If it is set to No SDK, go ahead and change it to Android API XX Platform from the drop-down menu. Changing Default Project SDK
- In case there are no options in the drop-down menu, you can click the New button, choose Android SDK and then choose the directory where Android SDK is present.
- Once you have done that, you will be able to select Android API XX Platform from the drop-down menu.
- After you have done that, click the OK button and try running your application to see if the issue persists.
 Changing Default Project SDK
Install Android SDK from SDK Manager
As it turns out, if you are missing the relevant Android version SDK on your system, that will also cause the error message to arise. If this case is applicable, you can easily resolve the error message by installing the respective Android SDK from the SDK Manager found in the Android Studio. To do this, follow the instructions given down below:
- In the Android Studio window, open up the Preferences window by going to File > Settings.
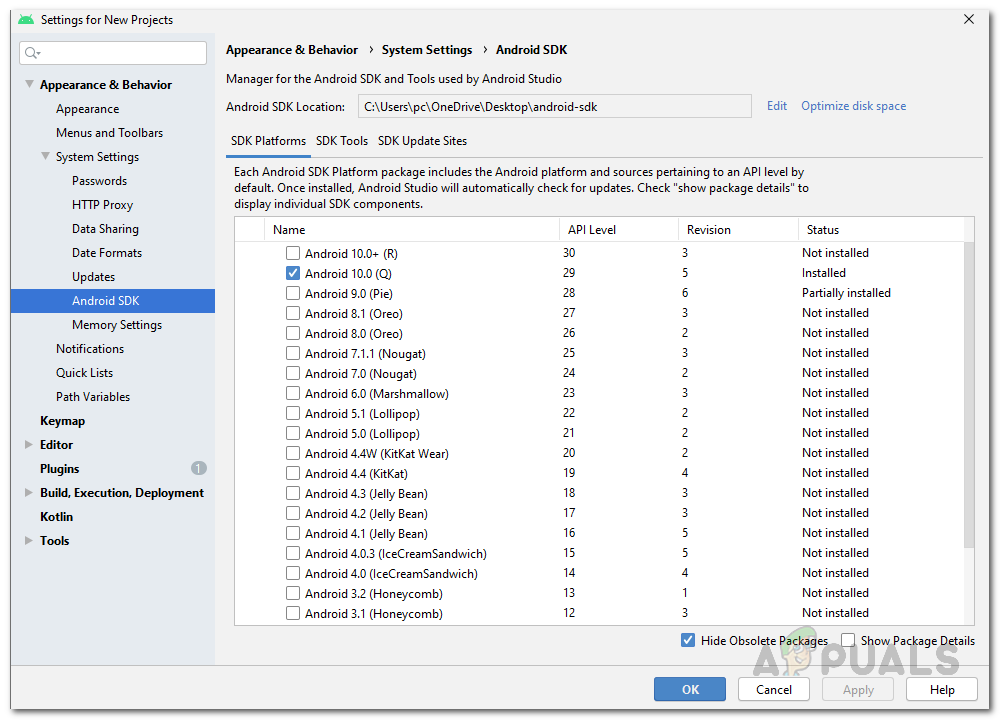
- Then, on the left-hand side, make your way to Appearance & Behavior > System Settings > Android SDK. SDK Manager
- Once you are in the SDK Manager, under SDK Platforms, install the SDK Platform for your respective Android version.
- After you have done that, go ahead and try running the application to see if you still face the error message.
 SDK Manager
Reinstall Platform Tools
Finally, if you are still facing the error message in question after trying the methods mentioned above, it could be that the issue is being triggered by damaged or corrupted platform tools files. If this scenario applies to you, you will have to reinstall the platform tools on your system to get rid of this error message. This can be done easily via the SDK Manager. You can uninstall platform tools via the SDK Manager and after that, you can easily install it again via a few clicks. To do this, follow the instructions given down below:
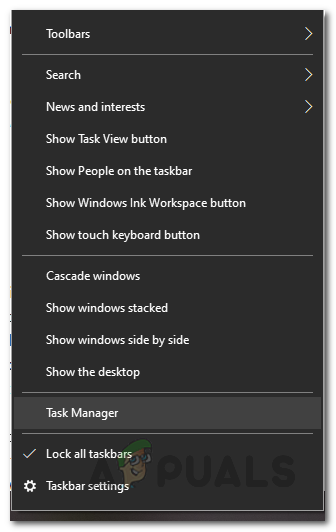
- First of all, close the Android Studio and then open up the Task Manager by right-clicking your taskbar. From the menu that appears, choose Task Manager. Opening Task Manager
- In the Task Manager window, under Processes, look for the ADB.exe process and end it.
- Once you have done that, go ahead and open up the Android Studio again.
- Now, you will have to open up the SDK Manager. For this, click the box icon with a down arrow as shown in the picture. Opening SDK Manager
- Once the SDK Manager is open, switch to the SDK Tools tab. Switching to the SDK Tools Tab
- In the SDK Tools tab, scroll down until you see Android SDK Platform-Tools. Uncheck it and then click OK. Android Platform-Tools in SDK Manager
- This will uninstall platform-tools from your IDE. Wait for it to finish uninstalling.
- Once it has been uninstalled and the Gradle is synced, open up the SDK Manager again and switch to the SDK Tools tab again. Here, look for Android SDK Platform-Tools again and tick it. Finally, click OK and wait for it to finish, and then sync your project.
- After all that is done, go ahead and try running your application to see if the error message pops up.
 Opening Task Manager
 Opening SDK Manager
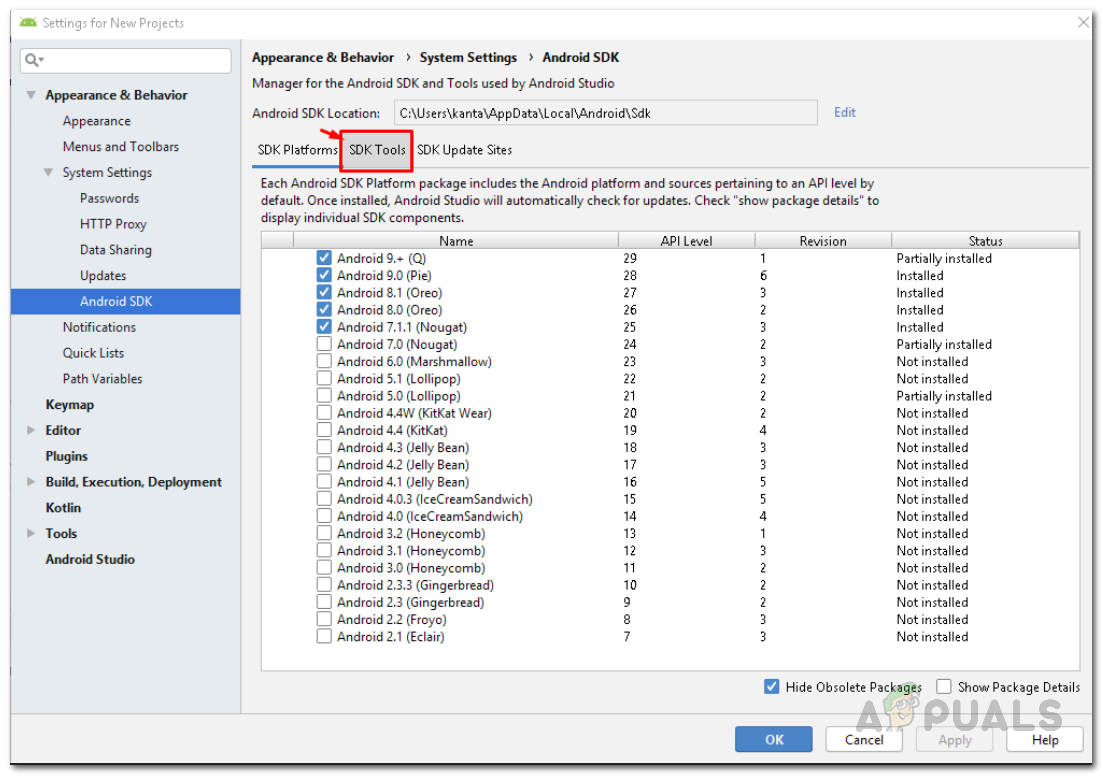 Switching to the SDK Tools Tab
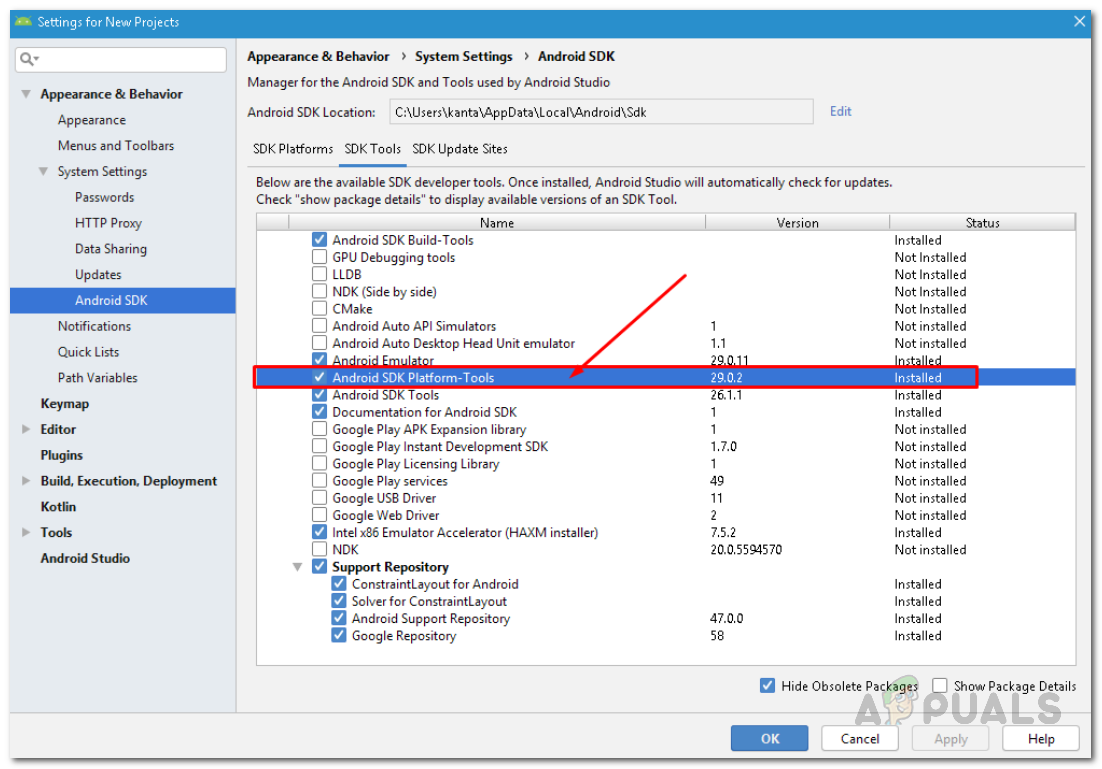 Android Platform-Tools in SDK Manager
Источник
Ошибка: невозможно найти adb в SDK в Android Studio
Кто-нибудь знает что это значит? Я вроде как noobish для Android. Когда я нажимаю кнопку «запустить» на своем симуляторе, я получаю это сообщение.
Я использую последнюю версию, 0.8.14 .
EDIT: я использую Android Studio
ADB теперь находится в платформенных инструментах Android SDK .
Проверьте [sdk directory]/platform-tools и если он его не существует, откройте диспетчер SDK в Android Studio (кнопка где-то в верхнем меню, логотип Android со стрелкой вниз), перейдите на вкладку инструментов SDK и И выберите / установите Android-платформу Android SDK .
Кроме того, вы можете попробовать автономный диспетчер SDK: откройте диспетчер SDK и вы увидите ссылку «Запустить автономный диспетчер SDK» где-нибудь внизу окна настроек. Нажмите и откройте автономный менеджер SDK, затем установите / обновите
«Инструменты> Инструменты платформы Android SDK».
Если вышеуказанное не решит проблему, попробуйте переустановить инструменты: откройте «Standalone SDK manager» и удалите инструменты платформы Android SDK, полностью удалите [your sdk directory]/platform-tools и установите его снова с помощью SDK менеджер.
Надеюсь это поможет!
Для тех, кто все еще сталкивается с этой проблемой. У меня была аналогичная проблема, когда я мог видеть свое устройство из adb в командной строке с помощью adb devices но Android Studio не узнает, когда я подключил устройство и выбрал бы:
- Unable to locate adb within SDK или
Unable to obtain result of ‘adb version’
Я попытался запустить / остановить adb, uninstalls, платформенных инструментов и многое другое. Я обнаружил, что внутри моей папки C:\Users\ \AppData\Local\Android меня было несколько папок sdk. Я выполнил следующее:
- Unistall Platform-Tools с помощью SDK-менеджера Android Studio
- Удалены все platform-tools\ каталоги в каждом каталоге C:\Users\ \AppData\Local\Android\sdk*
- Переустановленные платформы-инструменты с помощью SDK-менеджера Android Studio
Надеюсь, это поможет кому-нибудь когда-нибудь с их проблемой.
В Android Studio нажмите «Инструменты» в верхней панели вкладок студии Android.
Инструменты >> Android >> SDK Manager >> Запуск автономного диспетчера Sdk
Там вы можете ясно видеть, какой инструмент платформы отсутствует, а затем просто установите это, и ваш adb начнет работать должным образом.
Полностью установите по крайней мере один пакет Api (Android Api 23 или 24).
Если вы используете Android Studio и имеете защиту AVG, файл adb.exe может находиться в Вирусном хранилище. Это была моя проблема. Исправить: открыть AVG. Выберите «Параметры» (вверху справа), затем «Вирусное хранилище». Если вы видите файл adb.exe, выберите его и нажмите «Восстановить».
Попробуйте это: File-> Структура проекта в структуре проекта Left> SDKs местоположение SDK выберите местоположение Android SDK (использование старой версии Нажмите +, добавьте еще один sdk)
Я удалил и переустановил Android SDK Platform-Tools 23 23.0.0 . Это решило проблему. Вчера я сделал полное обновление SDK с помощью SDK Manager, удалив некоторые части, которые, как я полагал, больше не нужны и не загружают обновления. Возможно, это и стало причиной проблемы.
Просто зайдите в Менеджер SDK и установите Android SDK Tools
Да, у меня такой же опыт
АБР теперь находится в каталоге инструментов платформы.
Korsosa сказал, что проверьте его каталог [sdk directory] / platform-tools, если он существует. Если нет, то откройте диспетчер SDK в Android Studio (кнопка где-то в верхнем меню, логотип Android со стрелкой вниз), а также загрузите и установите Tools> Android SDK Platform-tools.
Если у вас есть инструменты для платформы, у вас есть файл adb.exe. В моем случае этот файл был сломан, поэтому загрузите этот инструмент платформы снова
Если у вас уже установлен Android SDK Platform Tool, перейдите в меню «Файл»> «Настройки»> «Настройки системы»> «Android SDK»> «Запустить автономный диспетчер SDK».
В разделе «Сервис» вы увидите, что Android SDK Platform-Tools удалена. Поэтому отмените выбор всех и установите флажок и просто нажмите кнопку «Установить».
Даже после загрузки определенного требуемого файла или всего, мы можем столкнуться с ошибкой выполнения файла.
Неудача выполнения файла может быть вызвана следующими причинами:
1. пользовательские разрешения / с (наследование обработано).
2. Коррумпированный файл.
3. доступ к файлу другим приложением одновременно.
4. Файл заблокирован антивирусным программным обеспечением.
Странно мой антивирус обнаружил файлы adb, avd и jndispatch.dll как нечистые файлы и выгрузил их в хранилище.
Я должен был восстановить их из хранилища AVG. Настройте AVG, чтобы игнорировать (добавить папку в список исключений) в AndroidStudio и другую требуемую папку.
Если вы без антивируса и все еще сталкиваетесь с этой проблемой, помните, что окна 7 и выше имеют встроенный «защитник окон». Посмотрите, делает ли этот человек то же самое. Поместите свою папку в список «исключение» антивируса, так как вендору доверяют по всему миру.
Этот же ответ пойдет на « Ошибка при запуске AVD с процессором AMD ». У меня нет достаточной репутации, чтобы ответить на этот вопрос там и там.
Если вы используете Windows 10 (может быть, и Windows 7) и студия Android, возможно, это связано с проблемой виртуальной памяти Windows. Невозможно получить версию adb
В моем случае я пробовал выше, но похоже, что adb не будет установлен, поэтому все, что мне нужно было сделать, это скопировать adb.exe в папку и работать! Я скопировал adb.exe и вставил следующие пути на моем устройстве:
C: \ Users \ Your-Device-имя пользователя \ AppData \ Local \ Android \ SDK
C: \ Users \ Your-Device-имя пользователя \ AppData \ Local \ Android \ SDK \ платформенные инструменты
Надеюсь, это поможет кому-то, кто в этом нуждается.
В моем случае это был простой случай неправильного пути. Просто перейдите в диалоговом окне «Структура проекта» (alt + ctrl + shift + s), а затем в платформу -> SDK и фиксированный домашний путь Android SDK. См. Снимок экрана. Исправить путь SDK
Источник


