- How to use AirDrop on your iPhone, iPad, or iPod touch
- Before you begin
- How to use AirDrop
- On your iPhone 11 or later
- On your iPhone XS or earlier, iPad, or iPod touch
- How to accept AirDrop
- How to adjust AirDrop settings
- Как включить AirDrop между iPhone и старым компьютером Mac
- Как включить AirDrop на старом Mac
- Почему AirDrop на Mac не работает
- Использование AirDrop на компьютере Mac
- Обмен содержимым с помощью AirDrop
- Получение содержимого с помощью AirDrop
- Если другое устройство не отображается в AirDrop
- How to AirDrop from Mac to iPhone in Details
- About AirDrop
- Preparations You Need to Make Before Your AirDrop from Mac to iPhone
- How to AirDrop from Mac to iPhone
- Option 1. How to AirDrop Photos from Mac to iPhone
- Option 2. How to AirDrop Files from Mac to iPhone
- Bonus Tip: How to Transfer Files from Mac to iPhone Without AirDrop
- The Bottom Line
How to use AirDrop on your iPhone, iPad, or iPod touch
Use AirDrop to share and receive photos, documents, and more with other Apple devices that are nearby.
Before you begin
- Make sure that the person you’re sending to is nearby and within Bluetooth and Wi-Fi range.
- Check that you and the person you’re sending to have Wi-Fi and Bluetooth turned on. If either of you have Personal Hotspot on, turn it off.
- Check if the person you’re sending to has their AirDrop set to receive from Contacts Only. If they do, and you’re in their Contacts, they need to have your Apple ID’s email address or mobile number in your contact card for AirDrop to work.
- If you’re not in their Contacts, have them set their AirDrop receiving setting to Everyone in order to receive the file.
You can put your AirDrop receiving setting to Contacts Only or Receiving Off at any time to control who can see your device and send you content in AirDrop.
![]()

How to use AirDrop
Follow the steps for your device.
On your iPhone 11 or later
- Open an app, then tap Share or the Share button . If you share a photo from the Photos app, you can swipe left or right and select multiple photos.
- Tap the AirDrop button.
- If the person that you want to share with also has an iPhone 11 or later model, point your iPhone in the direction of the other iPhone.
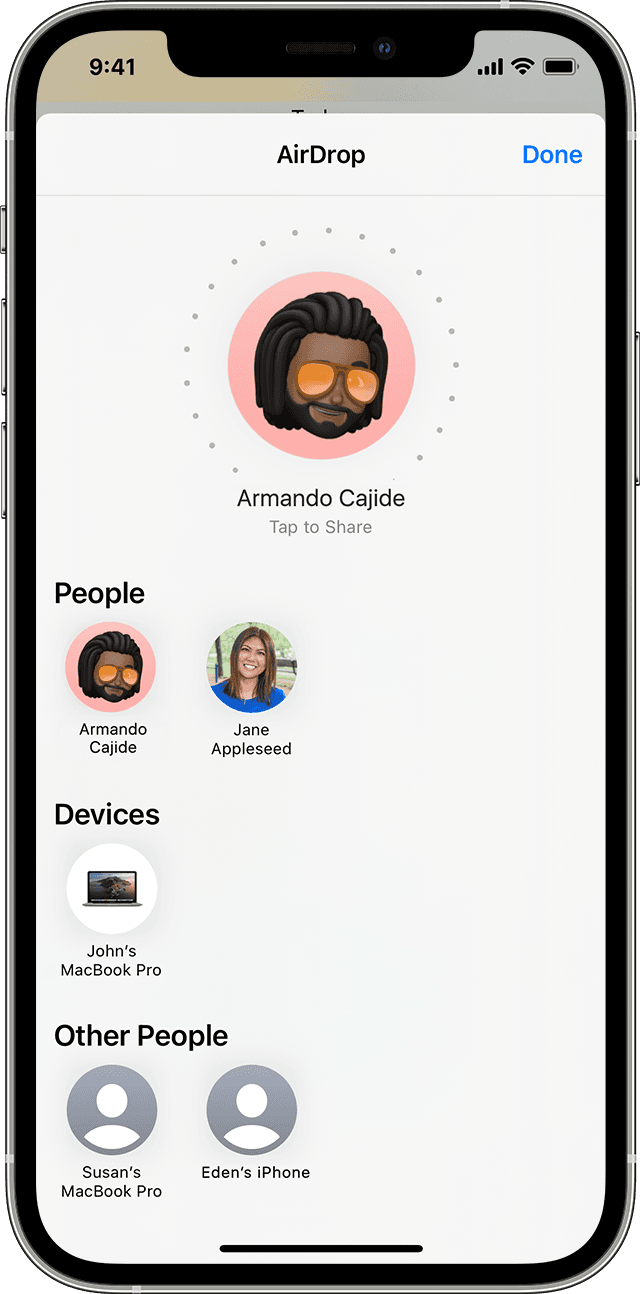
- Tap the profile picture of its user at the top of the screen. Or you can use AirDrop between your own Apple devices. If you see a red numbered badge on the AirDrop button, there are multiple devices nearby that you can share with. Tap the AirDrop button, then tap the user that you want to share with. Learn what to do if you don’t see the AirDrop user or your other device.
If the person you’re sharing content with is in your Contacts, you’ll see an image with their name. If they’re not in your Contacts, you’ll see just their name without an image.
![]()
On your iPhone XS or earlier, iPad, or iPod touch
- Open an app, then tap Share or the Share button . If you share a photo from the Photos app, you can swipe left or right and select multiple photos.
- Tap the AirDrop button.
- Tap the AirDrop user that you want to share with. Or you can use AirDrop between your own Apple devices. If you see a red numbered badge on the AirDrop button, there are multiple devices nearby that you can share with. Tap the AirDrop button, then tap the user that you want to share with. Learn what to do if you don’t see the AirDrop user or your other device.
If the person you’re sharing content with is in your Contacts, you’ll see an image with their name. If they’re not in your Contacts, you’ll see just their name without an image.
How to accept AirDrop
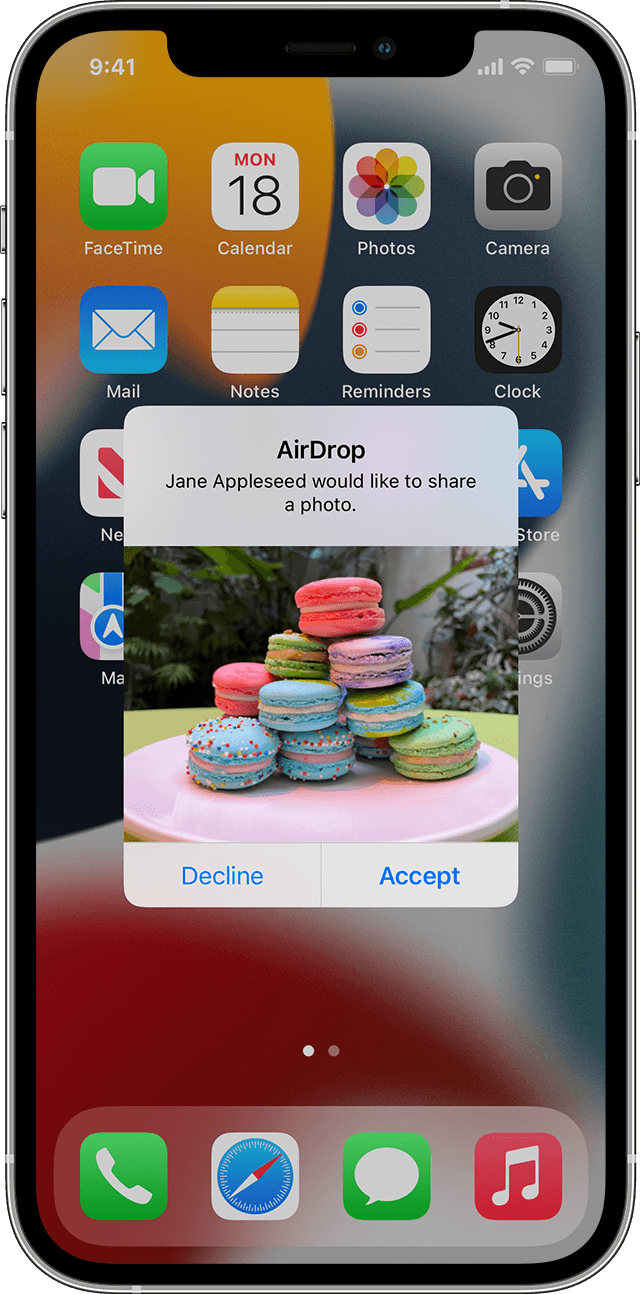
When someone shares something with you using AirDrop, you see an alert with a preview. You can tap Accept or Decline.
If you tap Accept, the AirDrop will come through within the same app it was sent from. For example, photos appear in the Photos app and websites open in Safari. App links open in the App Store so you can download or purchase the app.
If you AirDrop something to yourself, like a photo from your iPhone to your Mac, you won’t see an option to Accept or Decline — it’ll automatically get sent to your device. Just make sure that both devices are signed in with the same Apple ID.
How to adjust AirDrop settings
To choose who can see your device and send you content in AirDrop:
- Go to Settings, tap General.
- Tap AirDrop, then choose an option.
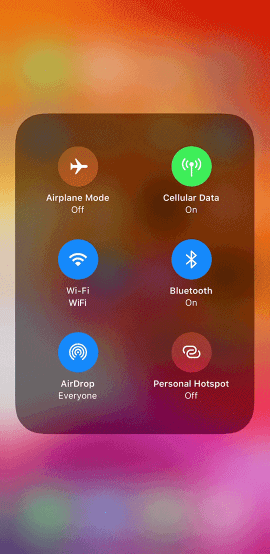
You can also set your AirDrop options in Control Center. Here’s how:
- On iPhone X or later, swipe down from the upper-right corner of the screen to open Control Center. Or follow the same motion to open Control Center on your iPad with iOS 12 or later or iPadOS. On your iPhone 8 or earlier or iPod touch, swipe up from the bottom of the screen.
- Press firmly or touch and hold the network settings card in the upper-left corner.
- Touch and hold the AirDrop button , then choose one of these options:
- Receiving Off: You won’t receive AirDrop requests.
- Contacts Only: Only your contacts can see your device.
- Everyone: All nearby Apple devices using AirDrop can see your device.
If you see Receiving Off and can’t tap to change it:
- Go to Settings > Screen Time.
- Tap Content & Privacy Restrictions.
- Tap Allowed Apps and make sure that AirDrop is turned on.
![]()
The Contacts Only option is available on devices that support iOS 10 and later, iPadOS, or macOS Sierra 10.12 and later. If AirDrop is set to Contacts Only on your device with an earlier software version, you’ll need to adjust AirDrop settings to the Everyone option in Settings or from Control Center. You can select the Everyone option while using AirDrop and disable it when not in use.
Источник
Как включить AirDrop между iPhone и старым компьютером Mac
В компьютерах Mac функция AirDrop появилась вместе с OS X 10.7 Lion. В мобильные устройства она пришла вместе с iOS 7, однако только с выходом OS X Yosemite и iOS 8 передача данных заработала между мобильными устройствами и компьютером. Но для работы на Mac функции AirDrop требуется современный чип беспроводной сети, так что на старых компьютерах обмен данными с мобильными устройствами невозможен.
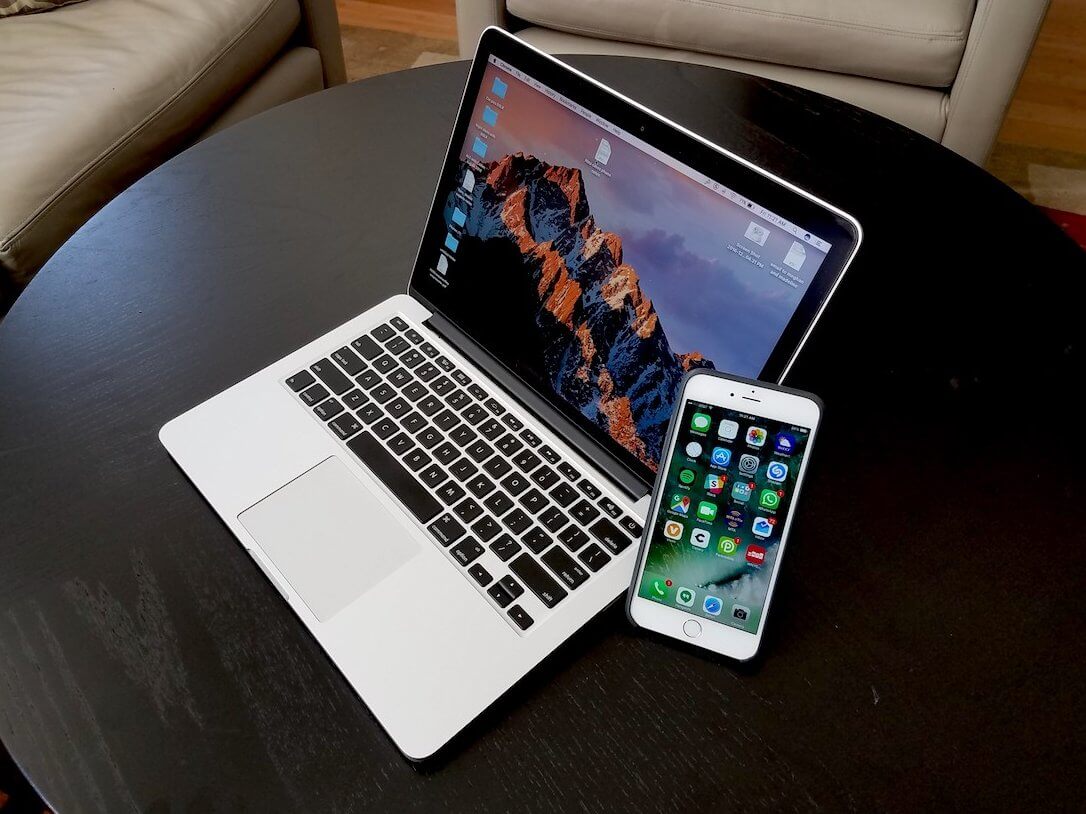
AirDrop работает не на всех компьютерах Mac
С тех пор вышло немало обновлений, и многие сейчас хотели бы включить AirDrop между своим iPhone на iOS 13 и старым Mac. Стандартными средствами операционной системы настроить эту связку не получится, но есть проверенные решения от сторонних разработчиков.
Еще несколько лет назад группа разработчиков-энтузиастов создала инструмент под названием Continuity Activation Tool, который позволяет использовать данную функцию даже на старых компьютерах Mac. Причем он активирует не только Continuity, но и обмен данными между старыми компьютерами и любыми iPhone по AirDrop. Однако старая версия Continuity Activation Tool не работает с операционными системами вроде Sierra или High Sierra.
Как включить AirDrop на старом Mac
Важно! Если у вас компьютер с macOS Sierra или новее, сначала перезагрузите компьютер и зайдите в режим восстановления (Command+R). После загрузки системы откройте терминал и введите эту команду:
Перезагрузите компьютер и в обычном режиме запускайте установщик Continuity Activation Tool.
Скачать установщик можно по этой ссылке. После загрузки необходимо извлечь ZIP-архив, запустить файл установки, а затем следовать инструкциям.
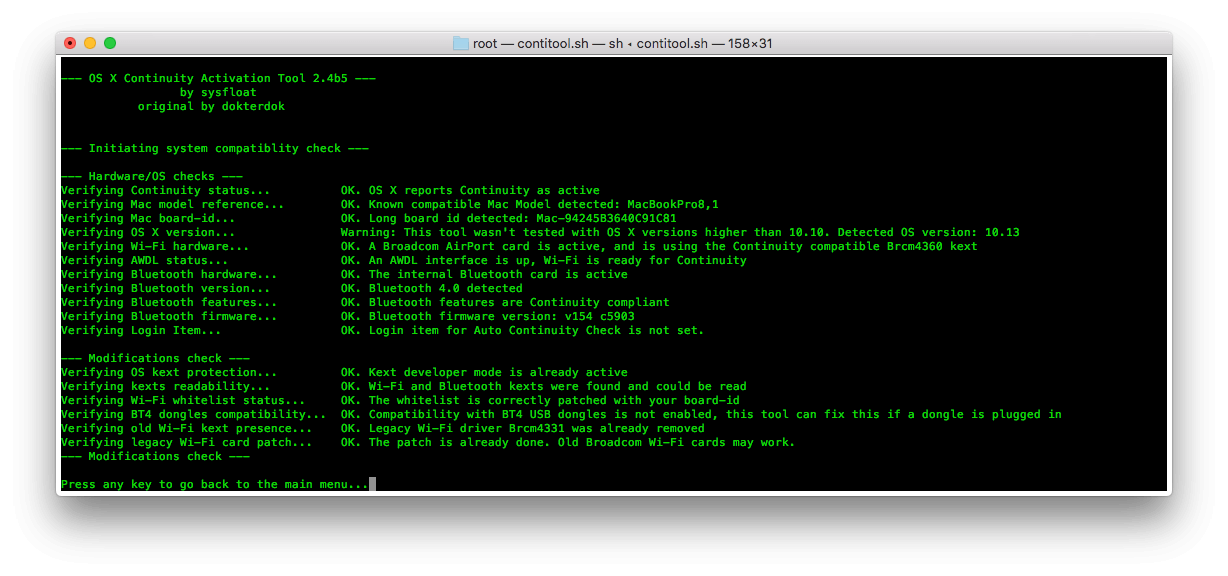
Все управление осуществляется числами
Затем программа предложит перезагрузить компьютер. После этого в основных настройках Mac вы увидите пункт «Разрешить Handoff между этим Mac и Вашими устройствами iCloud», где нужно поставить галочку. Также необходимо будет выйти из своего аккаунта iCloud на компьютере и войти заново (на iPhone ничего делать не надо).
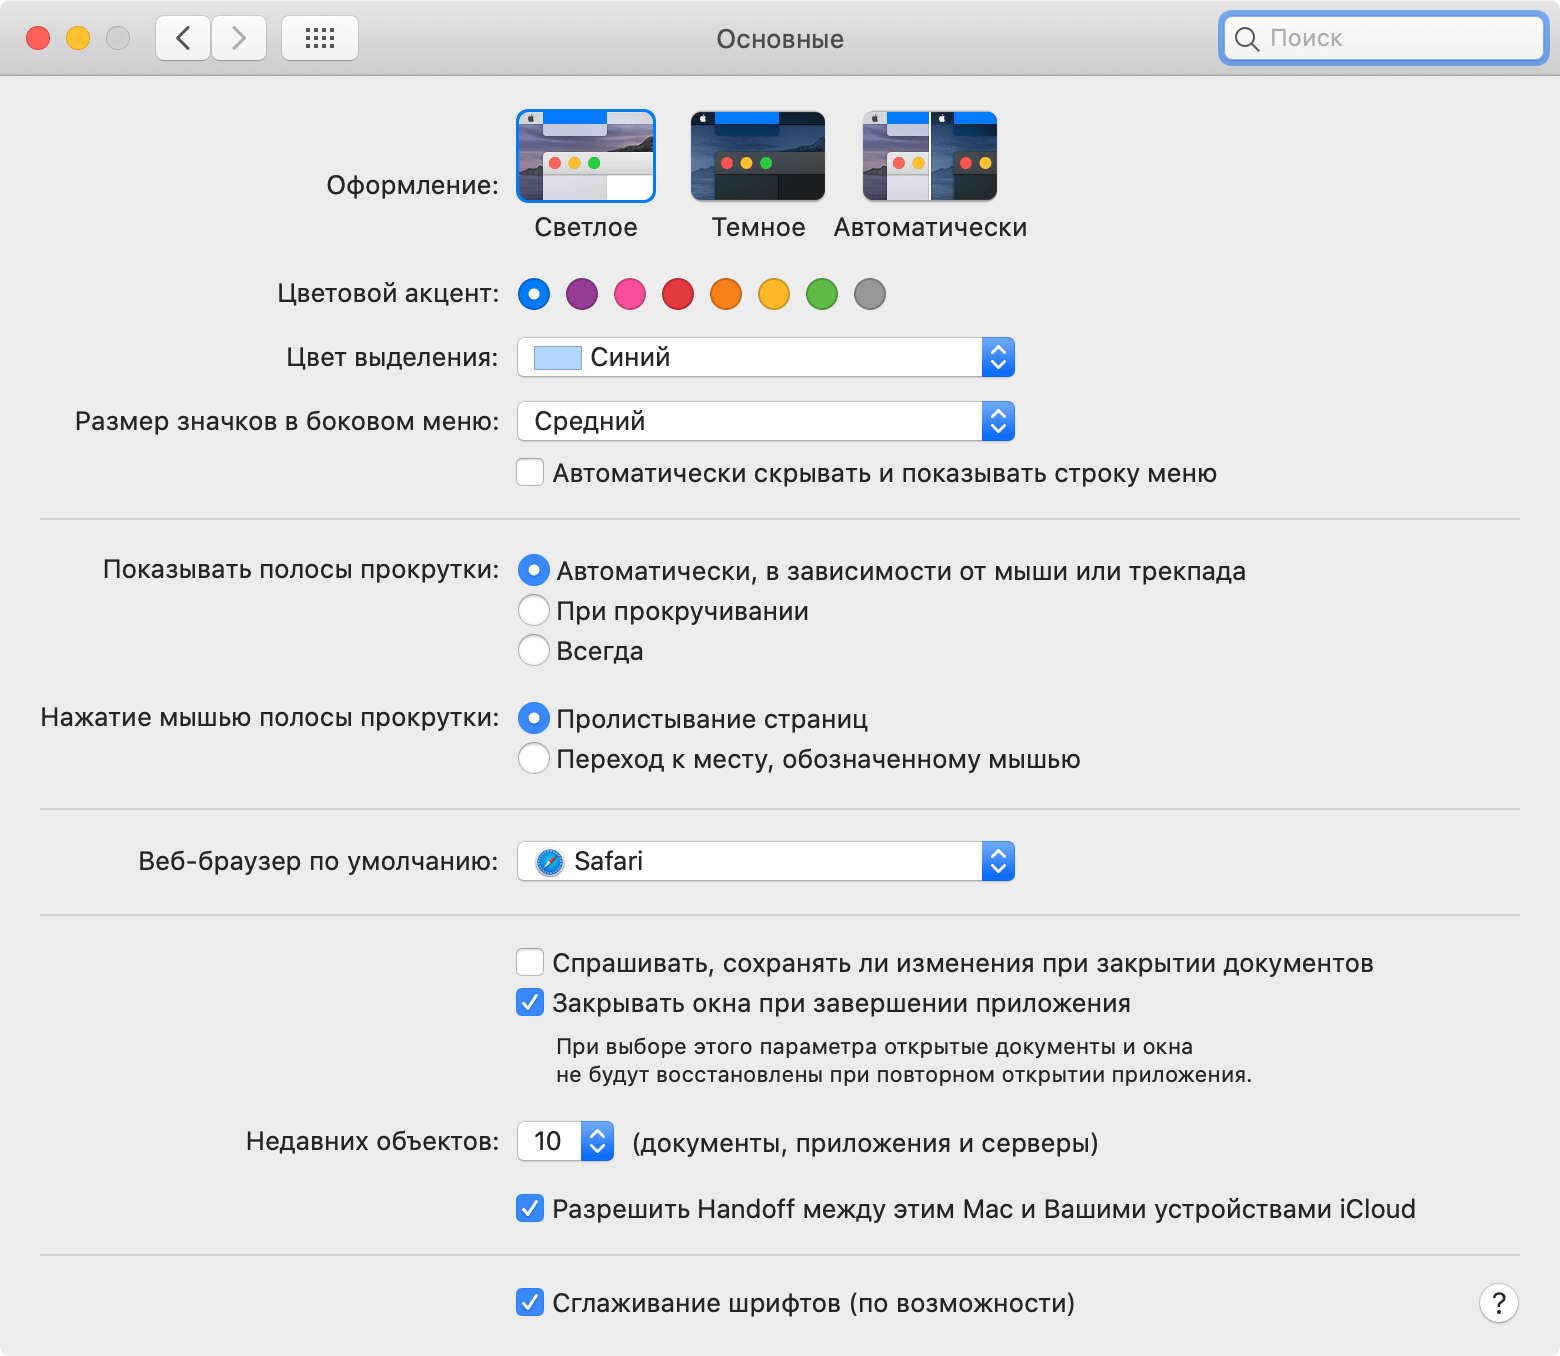
Без этой галочки ничего работать не будет
После осуществления всех этих манипуляций Continuity должна будет заработать, что с радостью подтверждают многочисленные пользователи. Мы также проверили работоспособность данного способа на Mac mini 2011 на macOS High Sierra — стала активна не только Continuity, но и функция AirDrop между Mac и iPhone с iOS 13.
По окончанию всех операций можно снова войти в режим восстановления и ввести эту команду:

Почему AirDrop на Mac не работает
Однако, как мы знаем, работе Continuity и AirDrop между Mac и iPhone препятствуют не только программные, но и аппаратные ограничения. Поэтому, прежде чем пользоваться утилитой, проверьте, не нужно ли вам установить для этого необходимые компоненты на ваш Mac.
MacBook Air 2008-2010 — Необходима установка беспроводной платы BCM94360CS2
MacBook Air mid-2011 — Никакие дополнительные компоненты не нужны
Mac mini 2009-2010 — Необходима новая беспроводная плата
Mac mini mid-2011 — Никакие дополнительные компоненты не нужны
MacBook Pro mid 2009 — late 2011 — Необходима установка беспроводной платы BCM94331PCIEBT4CAX
iMac 2008-2011 — Необходима модернизация плат Wi-Fi + Bluetooth
MacBook Pro late-2011 — Необходима установка беспроводной платы BCM94331PCIEBT4CAX
Да, MacBook Air и Mac mini середины 2011 года вообще не требуются никакие аппаратные апгрейды для того, чтобы заставить Continuity работать. Получается, что ограничения, наложенные Apple, имеют чисто программный характер.
Читайте также — Использовать AirDrop небезопасно?
Напоминаем, что установка данной утилиты повлечет за собой внесение изменений в конфигурацию системы. Поэтому на всякий случай перед осуществлением этой операции советуем вам создать резервную копию.
Источник
Использование AirDrop на компьютере Mac
Функция AirDrop обеспечивает беспроводную отправку документов, фотографий, видеозаписей, веб-сайтов, геопозиций и других данных на находящиеся поблизости устройства iPhone, iPad, iPod touch и компьютеры Mac.
Обмен содержимым с помощью AirDrop
- Откройте файл, который требуется отправить, затем нажмите кнопку «Поделиться» в окне приложения. Щелкните файл в окне Finder, удерживая нажатой клавишу Control, затем выберите «Поделиться» в контекстном меню.
- Выберите AirDrop из списка вариантов.
- Выберите получателя в списке AirDrop:


Или откройте окно AirDrop и перетащите файлы на значок получателя:
- Выберите AirDrop на боковой панели окна Finder. Или выберите «Перейти» > AirDrop в строке меню.
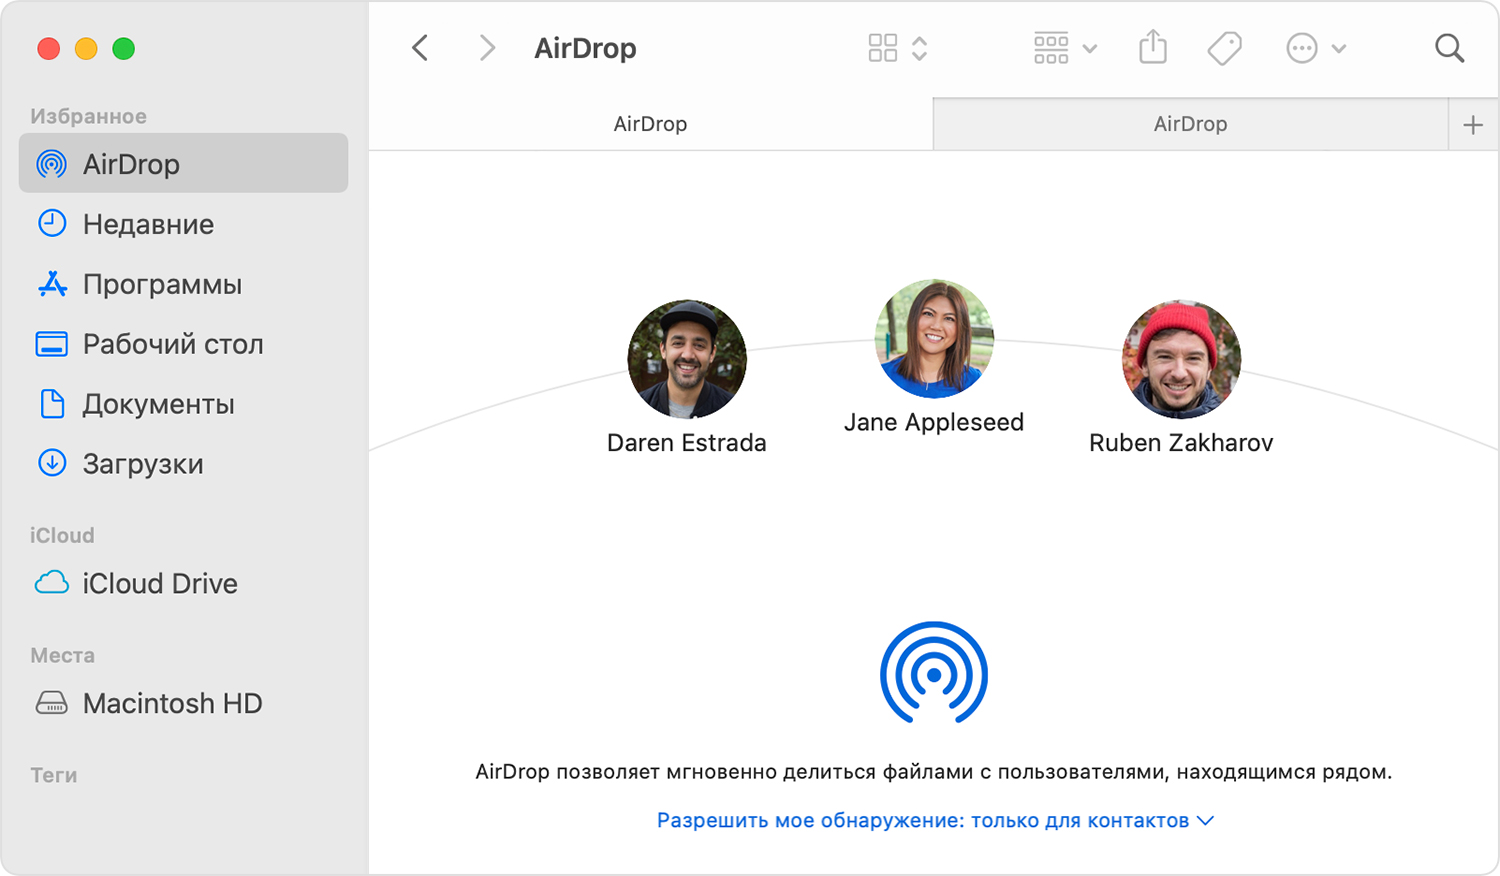
- В окне AirDrop отображаются находящиеся поблизости пользователи AirDrop. Перетащите документы, фотографии или другие файлы на значок получателя, отображаемый в этом окне.
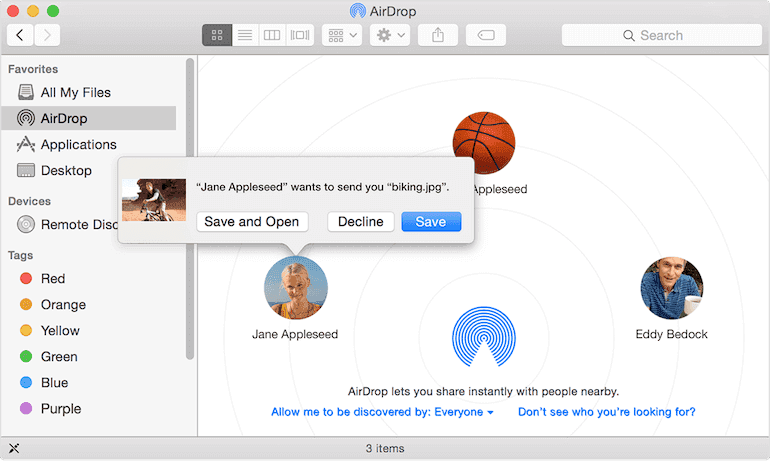
Получение содержимого с помощью AirDrop
Когда кто-то поблизости пытается отправить вам файлы с помощью AirDrop, на вашем устройстве соответствующий запрос отображается как уведомление или как сообщение в окне AirDrop. Нажмите «Принять», чтобы сохранить файлы в папке «Загрузки».

Если другое устройство не отображается в AirDrop
Убедитесь, что ваши устройства соответствуют следующим требованиям:
- Оба устройства находятся в пределах 9 метров друг от друга с включенными интерфейсами Wi-Fi и Bluetooth.
- Каждый из компьютеров Mac выпущен в 2012 г. или позднее (за исключением Mac Pro (2012 г.)) и работает под управлением OS X Yosemite или более поздней версии. Чтобы проверить это, перейдите в меню Apple > «Об этом Mac».
- Каждое из устройств iPhone, iPad или iPod touch работает под управлением iOS 7 или более поздней версии с выключенным режимом модема.
Убедитесь, что ваши устройства могут получать запросы AirDrop:
- Выберите «Перейти» > AirDrop в строке меню Finder, затем установите флажок «Разрешить мое обнаружение» в окне AirDrop. Настройки на iPhone, iPad и iPod touch аналогичны. Если настроено получение содержимого только от контактов, на обоих устройствах должен быть выполнен вход в iCloud, а связанный с идентификатором Apple ID отправителя адрес электронной почты или номер телефона должен содержаться в приложении «Контакты» на устройстве получателя.
Вариант «Только для контактов» доступен на устройствах с поддержкой iOS 10 и более поздних версий, iPadOS или macOS Sierra 10.12 и более поздних версий. Если для функции AirDrop на устройстве с более ранней версией программного обеспечения выбран параметр «Только для контактов», при использовании AirDrop можно выбрать вариант «Для всех», а затем вернуть значение обратно, когда эта функция не используется. - Перейдите в меню Apple () > «Системные настройки» и откройте вкладку «Защита и безопасность». Перейдите на вкладку «Брандмауэр», щелкните значок замка и введите пароль администратора при появлении запроса. Щелкните «Параметры брандмауэра» и снимите флажок «Блокировать все входящие подключения».
 и введите пароль администратора при появлении запроса. Щелкните «Параметры брандмауэра» и снимите флажок «Блокировать все входящие подключения».
Источник
How to AirDrop from Mac to iPhone in Details
About AirDrop
AirDrop is a file-sharing feature available on Mac computers and iOS devices that enables you to wirelessly share photos, videos, contacts, websites, map locations, documents, and more between two of these devices. Thus, you can AirDrop from Mac to iPhone to share files like photos and Pages documents without a wired connection.
Preparations You Need to Make Before Your AirDrop from Mac to iPhone
Then how to use AirDrop to share files between a Mac and an iPhone? Before you start, there are some preparations you need to make to ensure the file transfer goes smoothly.В Since AirDrop works on Wi-Fi and Bluetooth, you need to make sure:
- Your Mac and iPhone are using the same Wi-Fi network
- Bluetooth works fine on the devices
- The Mac and the iPhone are within the same Wi-Fi and Bluetooth range
How to AirDrop from Mac to iPhone
After you make the preparations, you can now turn on the AirDrop service on both the Mac and the iPhone to AirDrop from Mac to iPhone or vice versa.
To turn on AirDrop on Mac:
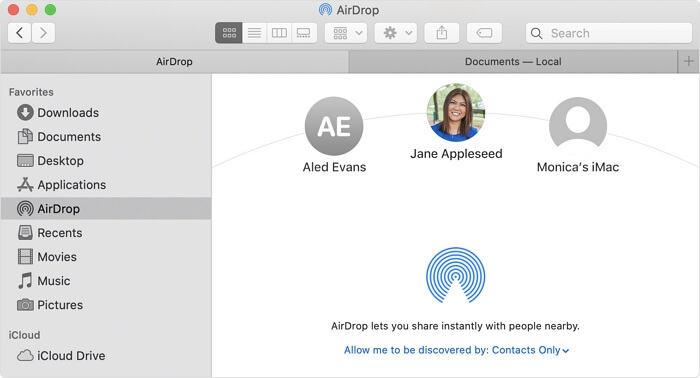
Step 1. Open Finder and go to «Go» > «AirDrop».
Step 2. Turn on both Wi-Fi and Bluetooth.
Step 3. Set to allow your Mac to be discovered by «Contacts Only» or «Everyone», depending on whether the target iPhone is in Mac’s contact list. В
To turn on AirDrop on iPhone:
Step 1. Swipe up or down from the iPhone screen to open Control Center.
Step 2. Tap AirDrop and choose «Contacts Only» or «Everyone» to enable the service.
After you enable AirDrop on both of your devices, you can now AirDrop from Mac to iPhone freely. Here are some examples.
Option 1. How to AirDrop Photos from Mac to iPhone
Photos are the files that are transferred most frequently between these devices. Thus, learning how to AirDrop photos from Mac to iPhone could be helpful.
Step 1. Go to «Finder» > «Go» > «AirDrop».
Step 2. Drag and drop the photos you want to send from Mac to your iPhone to the image of the recipient and click «Send.» Or you can go to the Photos app, select the items you want to share, and choose the «Share» button > «AirDrop», choose the recipient, and click «Done».
Option 2. How to AirDrop Files from Mac to iPhone
Let me take transferring Pages documents as an example.
Step 1. Open the document you want to share.
Step 2. Click the «Share» button, chooseВ «Send a copy», and selectВ «AirDrop». (You can also Control-click the document and choose «Share» > «AirDrop».)
Step 3. Select the recipient to start sending documents from Mac to your iPhone.
You can also AirDrop from Mac to iPhone to share other types of content using similar steps.
If AirDrop is not working on your iPhone, learn how to fix it from the troubleshooting guide or try the alternative way provided below to share files between your Mac and iPhone/iPad/iPod.
Bonus Tip: How to Transfer Files from Mac to iPhone Without AirDrop
Although AirDrop is quite convenient to use, there are still some potential issues while using AirDrop. For example, AirDrop may fail to work or it takes a long time to transfer files. That when you need an iPhone transfer software tool to help you transfer photos, videos, contacts, music, ringtones, books, and more between an iPhone/iPad/iPod and a Mac (also compatible with PC) or between two iDevices.
EaseUS MobiMover allows you to transfer files all at once or selectively, which is especially helpful when you need to transfer contacts from iPhone to Mac (AirDrop sends contacts from iPhone to Mac one by one).
In addition, this tool also works well as a video downloader, which means you can download YouTube videos on Mac or save Facebook videos to iPhone using it if you need to.
To transfer photos from Mac to iPhone with EaseUS MobiMover:
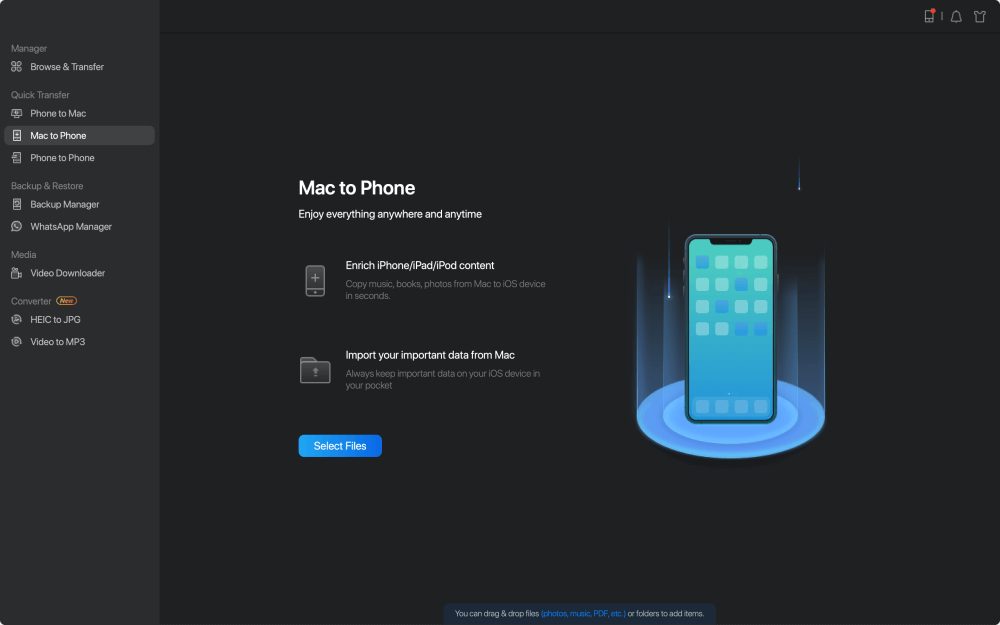
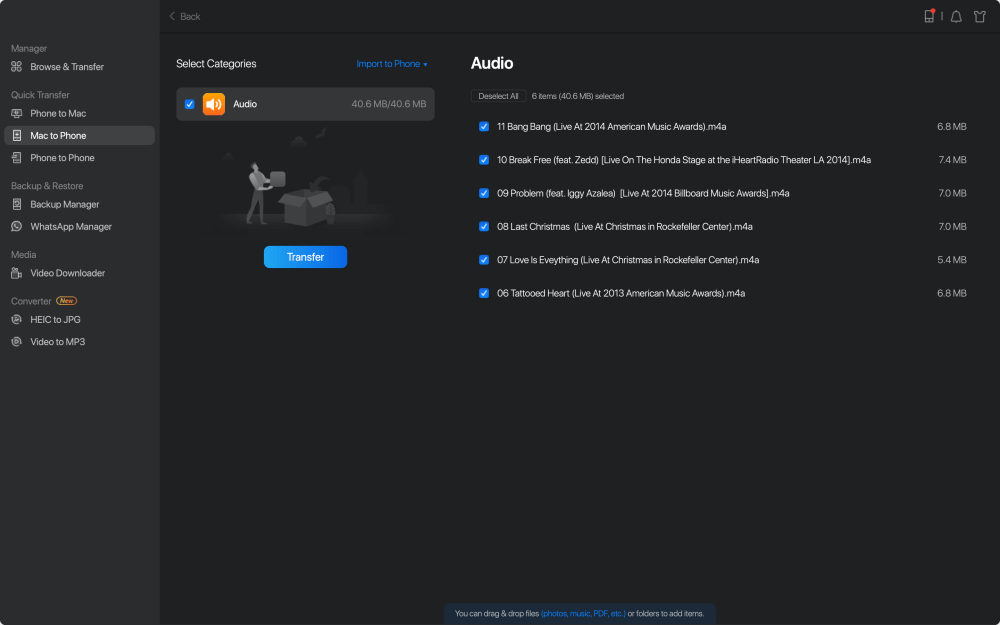
Step 1.В Launch EaseUS MobiMover on your computer > Connect your iPhone to your Mac >В Select the «Mac to Phone» option on the main interface > Click the «Select Files» to continue.В
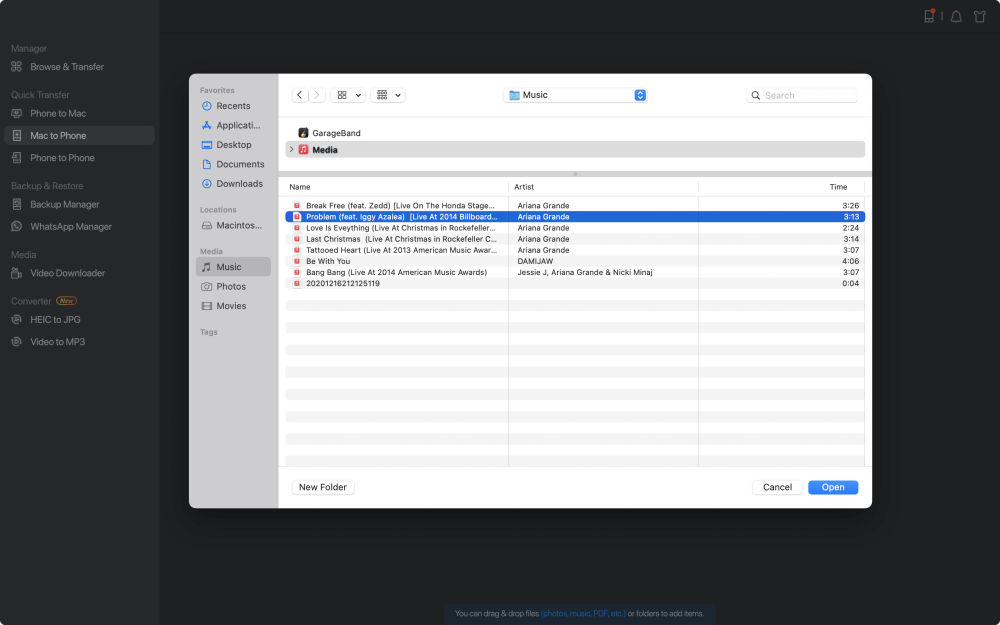
Step 2. With MobiMover, you can choose to transfer photos as well as many other popular files from Mac to your iPhone and iPad. Then, click the «Open» button to load the files.В
Step 3.В MobiMover will show the files you’ve selected on the screen. If you’ve missed an item, you can click «Add Contents» to import more files. Next, click the «Transfer» button to start the transfer process.В
The Bottom Line
Whether you are using a MacBook Air, MacBook Pro, or iMac, you can apply the steps above to transfer files from your Mac to an iPhone, iPad, or iPod. If AirDrop doesn’t work, don’t worry. Try the alternative solution to share files between your Mac and iDevice easily via a USB cable.
о™љо™љо™љо™љо™љ
4.5 out of 5 stars, based on 10 votes
EaseUS MobiMover allows you to easily transfer all data from your iPhone to your PC. The app is available for both Windows and Macs so irrespective of which platform you use, you are covered.

EaseUs MobiMover solves this problem as it allows you to transfer data from an iPhone to a Mac, Mac to an iPhone, or from one iPhone to another iPhone fast.

EaseUS MobiMover is a program that allows you to share files between your iOS device and your PC in an easy manner. This is very useful, since both operative systems are not compatible.

EaseUS MobiMover for Mac and PC is a powerful tool for transferring data from your Apple mobile device to your computer, managing the variety of files that you create, and moving those huge videos quickly.

Related Articles — ALSO ON EaseUS SOFTWARE
Источник


