- Полный список
- Доступ к фрагменту из Activity
- Доступ к Activity из фрагмента
- Обработка в Activity события из фрагмента
- Android Add Fragment To Activity Dynamically Example
- 1. Dynamic Add Or Replace Fragment Steps.
- 2. FragmentTransaction Methods.
- 3. Add Fragment To Activity Dynamically Example.
- 4. Question & Answer.
- 4.1 How to use FrameLayout to dynamically contain other fragments or activities.
- Fragments
- Modularity
- Next steps
- Getting Started
- Further topics
- Videos
Полный список
— рассмотрим взаимодействие между Activity и ее фрагментами
После размещения фрагмента, хотелось бы начать с ним взаимодействовать. Т.е. размещать View-компоненты и работать с ними, обращаться к фрагментам из Activity и наоборот. Попробуем это реализовать.
Для чистоты эксперимента будем работать с двумя фрагментами: статическим и динамическим.
Project name: P1061_FragmentActivity
Build Target: Android 4.1
Application name: FragmentActivity
Package name: ru.startandroid.develop.p1061fragmentactivity
Create Activity: MainActivity
В strings.xml добавим строки:
Создаем layout и классы для двух фрагментов.
У фрагмента нет привычного для нас метода findViewById для поиска компонентов с экрана. Поэтому вызываем этот метод для View, которое будет содержимым фрагмента. В методе onCreateView мы создаем View и сразу же находим в нем кнопку и ставим ей обработчик. Затем отдаем View системе.
Все аналогично Fragment1.
Настраиваем основное Activity.
Кнопка, компонент fragment, в который помещен Fragment1, и контейнер FrameLayout, в который потом поместим Fragment2.
Обратите внимание на атрибут tools:layout. В нем указан layout-файл, и мы можем на этапе разработки видеть, как будет выглядеть статический фрагмент, когда приложение будет запущено.

Для этого надо нажать правой кнопкой на компоненте fragment, и через пункт Fragment Layout указать нужный layout.
Здесь мы просто добавляем Fragment2 в контейнер.
Все сохраняем, запускаем приложение.
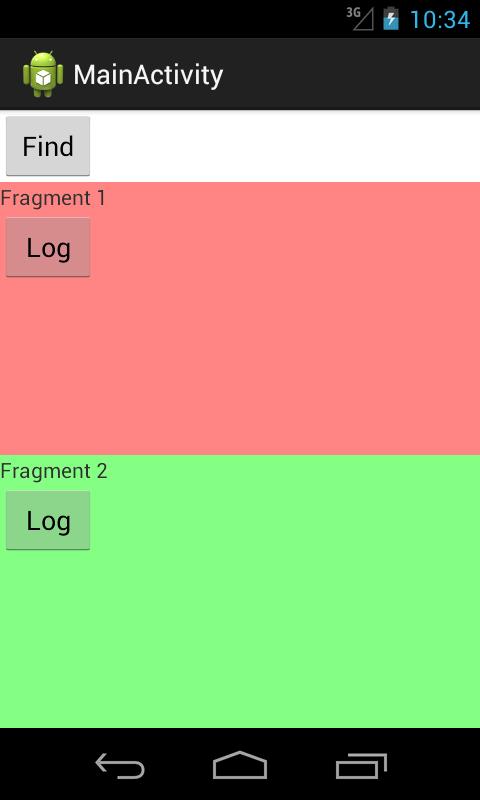
Жмем кнопку Log в первом фрагменте и смотрим лог:
Button click in Fragment1
Жмем Log во втором фрагменте:
Button click in Fragment2
Все ок. Компоненты в фрагментах нашлись и обработчики среагировали на нажатия.
Атрибут onClick, который мы привыкли использовать для кнопки, здесь не прокатит. Указанный в этом атрибуте метод, будет вызван в Activity, а не в фрагменте.
Доступ к фрагменту из Activity
Разберемся, как получить доступ к фрагменту из Activity. Для этого у FragmentManager есть метод findFragmentById, который на вход принимает id компонента fragment (если фрагмент статический) или id контейнера (если динамический).
У нас в main.xml есть кнопка btnFind, вызывающая метод onClick при нажатии. Дорисуем в MainActivity.java метод onClick:
Используем метод findFragmentById. В первом случае на вход передаем id компонента fragment, т.к. Fragment1 у нас размещен именно так. При поиске Fragment2 указываем id контейнера, в который этот фрагмент был помещен. В результате метод findFragmentById возвращает нам объект Fragment.
Далее мы получаем доступ к его View с помощью метода getView, находим в нем TextView и меняем текст.
Все сохраняем, запускаем. Жмем кнопку Find

Тексты в фрагментах обновились. Тем самым из Activity мы достучались до фрагментов и их компонентов.
На всякий случай проговорю одну вещь из разряда «Спасибо кэп!». Если посмотреть на код MainActivity, то можно заметить, что работая с frag2 в методе onCreate и с frag2 в методе onClick мы работаем с текущим фрагментом Fragment2. Это так и есть. Оба frag2 в итоге будут ссылаться на один объект. Так что, если вы динамически добавили фрагмент, то у вас уже есть ссылка на него, и искать его через findFragmentById вам уже не надо.
Доступ к Activity из фрагмента
Теперь попробуем из фрагмента поработать с Activity. Для этого фрагмент имеет метод getActivity.
Давайте перепишем обработчик кнопки в первом фрагменте. Будем менять текст кнопки btnFind.
Получаем Activity методом getActivity, ищем в нем кнопку и меняем текст.
Сохраняем, запускаем. Жмем кнопку в первом фрагменте:
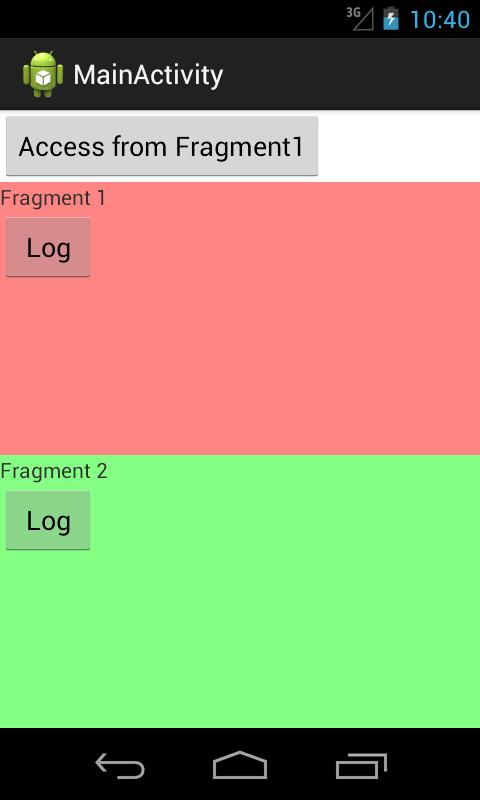
Работает. Из фрагмента мы поменяли компонент Activity.
Обработка в Activity события из фрагмента
Рассмотрим механизм, который описан в хелпе: фрагмент генерирует некое событие и ставит Activity обработчиком.
Например, в Activity есть два фрагмента. Первый – список заголовков статей. Второй – отображает содержимое статьи, выбранной в первом. Мы нажимаем на заголовок статьи в первом фрагменте и получаем содержимое во втором. В этом случае, цель первого фрагмента – передать в Activity информацию о том, что выбран заголовок. А Activity дальше уже сама решает, что делать с этой информацией. Если, например, приложение запущено на планшете в горизонтальной ориентации, то можно отобразить содержимое статьи во втором фрагменте. Если же приложение запущено на смартфоне, то экран маловат для двух фрагментов и надо запускать отдельное Activity со вторым фрагментом, чтобы отобразить статью.
Фишка тут в том, что первому фрагменту неинтересны все эти терзания Activity. Фрагмент – обособленный модуль. Его дело — проинформировать, что выбрана статья такая-то. Ему не надо искать второй фрагмент и работать с ним – это дело Activity.
Тут немного отвлекусь на небольшое лирическое отступление. Модульность, вообще, — очень важная и полезная штука. И ее надо использовать для универсальности, удобности и легкости в понимании работы своих приложений. Но уникальных рецептов, как правильно все организовать, конечно, нет. Каждый делает по-своему. Именно по этим причинам я в своих уроках даю чисто технические вещи про отдельные компоненты и не рассказываю, как организовывать и писать целое приложение. Иначе, форум бы уже ломился от сообщений, что я все делаю не так и надо по-другому, и каждый бы излагал свое видение. И была бы куча споров, где одна сторона говорит, что крокодил зеленый, а другая сторона говорит, что он нифига не зеленый, а длинный ))
Вернемся к уроку. Фрагмент должен сообщить в Activity, что выбрана статья. Для этого он будет вызывать некий метод в Activity. И как нам сообщает хелп, лучший способ тут – это использовать интерфейс, который мы опишем в фрагменте и который затем будет реализован в Activity. Схема известная и распространенная. Давайте реализуем. В нашем приложении никаких статей нет, поэтому будем просто передавать произвольную строку из второго фрагмента в Activity. А Activity уже будет отображать эту строку в первом фрагменте.
Описываем интерфейс onSomeEventListener. В нем метод someEvent, который на вход получает строку. Этот интерфейс будет реализовывать Activity.
В методе onAttach мы на вход получаем Activity, к которому присоединен фрагмент. Мы пытаемся привести это Activity к типу интерфейса onSomeEventListener, чтобы можно было вызывать метод someEvent и передать туда строку. Теперь someEventListener ссылается на Activity.
Далее, в onCreateView, в обработчике кнопки мы вызываем метод someEvent и передаем туда текст. Этот метод будет отработан в Activity.
Теперь меняем Activity.
Дописываем интерфейс onSomeEventListener к описанию класса.
onCreate без изменений.
Реализуем метод someEvent. Просто ищем первый фрагмент и вставляем туда текст.
Все сохраняем и запускаем. Жмем кнопку во втором фрагменте:
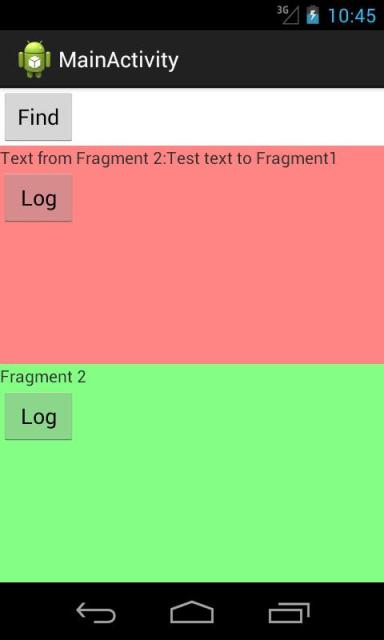
Второй фрагмент передал через интерфейс строку в Activity, а оно нашло первый фрагмент и отобразило там эту строку.
На следующем уроке:
— размещаем элементы в ActionBar
Присоединяйтесь к нам в Telegram:
— в канале StartAndroid публикуются ссылки на новые статьи с сайта startandroid.ru и интересные материалы с хабра, medium.com и т.п.
— в чатах решаем возникающие вопросы и проблемы по различным темам: Android, Kotlin, RxJava, Dagger, Тестирование
— ну и если просто хочется поговорить с коллегами по разработке, то есть чат Флудильня
— новый чат Performance для обсуждения проблем производительности и для ваших пожеланий по содержанию курса по этой теме
Источник
Android Add Fragment To Activity Dynamically Example
The fragment is widely used in android app development. You can use it statically or dynamically. Article Android Multiple Fragments In One Activity Example has introduced what it is and how to use Fragment statically. This article will tell you how to use it dynamically in your android app.
1. Dynamic Add Or Replace Fragment Steps.
- Get a android.support.v4.app.FragmentManager instance.
- Begin Fragment management transaction.
- Create a new Fragment instance.
- Call android.support.v4.app.FragmentTransaction‘s add(), remove() or replace() method to operate Fragment.
- Call the transaction object’s commit() method to commit the Fragment operation.
2. FragmentTransaction Methods.
- transaction.add() : Add a Fragment in current activity.
- transaction.remove() : Remove a Fragment from current activity. If the Fragment instance is not saved in Fragment back stack, then it will be destroyed.
- transaction.replace() : Use another Fragment to replace current Fragment.
- transaction.hide() : Hide current Fragment, only make it invisible, not destroy. Then you can show it later.
- transaction.show() : Make the hidden Fragment visible.
- transaction.detach() : Remove view objects from UI, but do not destroy it. The Fragment is still managed by Fragment Manager.
- transaction.attach() : Attach the view objects to UI.
- transaction.commit() : Commit a transaction. This method should be invoked before Activity.onSaveInstance(), otherwise, activity state loss error maybe occur.
3. Add Fragment To Activity Dynamically Example.
You can watch the youtube video https://youtu.be/bYbxB3oSJNI to see how this example behaves. There are 3 fragments ( android fragment, windows fragment, iOS fragment ) in this example.
Below are the source files of this example.
This is the main activity layout XML file. It uses PercentFrameLayout. You can read the article Android PercentFrameLayout PercentRelativeLayout Example to learn more.
This is the android fragment layout XML file.
This is the windows fragment layout XML file.
This is the iOS fragment layout XML file.
This is the main activity java class.
This is the android fragment implement class.
Please Note: The third parameter of the inflate method in the onCreateView override method must be false. Otherwise, it will throw the below error message.
Caused by: java.lang.IllegalStateException: The specified child already has a parent. You must call removeView() on the child’s parent first.
4. Question & Answer.
4.1 How to use FrameLayout to dynamically contain other fragments or activities.
- My android main activity’s layout is LinearLayout, it contains 3 buttons on the half-left side and a FrameLayout on the half-right side. The right side FrameLayout is an empty container, it will insert activities or fragments into the right side FrameLayout when clicking the buttons on the left side. How can I implement this? Thanks.
- Define a ViewGroup container in your activity, create an instance of your custom Fragment class. Then when the activity is active running, you can place the fragment object to the activity ViewGroup just like what this article said. You can add the below source code when the button is clicked.
This site uses Akismet to reduce spam. Learn how your comment data is processed.
In my android application, I do not want to use xml layout to insert the fragment to the main_activity.xml. I want to add the android fragment to the main activity in java source code like below.
WindowsFragment windowFragment = new WindowsFragment();
// First get FragmentManager object.
FragmentManager fragmentManager = this.getSupportFragmentManager();
// Begin Fragment transaction.
FragmentTransaction fragmentTransaction = fragmentManager.beginTransaction();
// Replace the layout holder with the required Fragment object. fragmentTransaction.add(R.id.dynamic_fragment_frame_layout, windowFragment);
// Commit the Fragment replace action.
fragmentTransaction.commit();
But when run the above source code it shows an alert with the error message application stopped. How can I fix it? Thanks.
Источник
Fragments
A Fragment represents a reusable portion of your app’s UI. A fragment defines and manages its own layout, has its own lifecycle, and can handle its own input events. Fragments cannot live on their own—they must be hosted by an activity or another fragment. The fragment’s view hierarchy becomes part of, or attaches to, the host’s view hierarchy.
Modularity
Fragments introduce modularity and reusability into your activity’s UI by allowing you to divide the UI into discrete chunks. Activities are an ideal place to put global elements around your app’s user interface, such as a navigation drawer. Conversely, fragments are better suited to define and manage the UI of a single screen or portion of a screen.
Consider an app that responds to various screen sizes. On larger screens, the app should display a static navigation drawer and a list in a grid layout. On smaller screens, the app should display a bottom navigation bar and a list in a linear layout. Managing all of these variations in the activity can be unwieldy. Separating the navigation elements from the content can make this process more manageable. The activity is then responsible for displaying the correct navigation UI while the fragment displays the list with the proper layout.
 Figure 1. Two versions of the same screen on different screen sizes. On the left, a large screen contains a navigation drawer that is controlled by the activity and a grid list that is controlled by the fragment. On the right, a small screen contains a bottom navigation bar that is controlled by the activity and a linear list that is controlled by the fragment.
Dividing your UI into fragments makes it easier to modify your activity’s appearance at runtime. While your activity is in the STARTED lifecycle state or higher, fragments can be added, replaced, or removed. You can keep a record of these changes in a back stack that is managed by the activity, allowing the changes to be reversed.
You can use multiple instances of the same fragment class within the same activity, in multiple activities, or even as a child of another fragment. With this in mind, you should only provide a fragment with the logic necessary to manage its own UI. You should avoid depending on or manipulating one fragment from another.
Next steps
For more documentation and resources related to fragments, see the following.
Getting Started
Further topics
Videos
Content and code samples on this page are subject to the licenses described in the Content License. Java is a registered trademark of Oracle and/or its affiliates.
Источник


