- Understanding Touch Control and Events in Android
- What happens when we touch the screen?
- How do we intercept touch events?
- How touch is handled in the view?
- What are the touch events we majorly work within Android for handling the touch control?
- Summary
- Handling single and multi touch on Android — Tutorial
- 1. Android Touch
- 1.1. Android touch basics
- 1.2. Single touch
- 1.3. Multi touch
- 1.4. GestureDetectors
- 2. Prerequisites
- 3. Exercise: Custom view and touch events
- 3.1. Draw via touch
- 3.2. Allow to pick the line width
- 3.3. Tracking
- 4. Exercise: Multitouch
- 5. Exercise: Using ScaleGestureDetector
- Untrusted Touch Events in Android
- Use special-purpose APIs if possible
- Does this affect me?
- Windows with transparent background and no UI
- Unnecessarily large windows
- Translucent windows
- Accessibility services
- How to test if your app is affected
- Next steps
Understanding Touch Control and Events in Android

Almost all phones nowadays running Android are touch-controlled. There are very few phones which are not touch-based.
In this blog, we are going to talk about how we can handle touch events in Android. This is like, understanding how we can work around with touch controls and touch events when we tap on our screen.
We are going to discuss how touch events in Android work internally for any view.
So, how do the input events actually work and what exactly happens when we touch our screen when we have a ViewGroup having different views inside it?
In this case, we are going to talk about a case where we have a LinearLayout containing a button like,

What we are to going to discuss in the blog is,
- What happens when we touch the screen?
- How do we intercept touch events?
- How touch is handled?
- What are the touch events we majorly work within Android for handling the touch control?
What happens when we touch the screen?
So, when we touch the screen the activity’s view gets the touch event notification first also known as DecorView in Android. Now, we generally don’t work with the touch of DecorView . So, the touch gets transferred to the ViewGroup and subsequently to its children in the XML file.
But how can we transfer the touch event trigger?
In Android, the ViewGroup transfers the touch event from top to bottom in the hierarchy of ViewGroup to its children using dispatchTouchEvent() .

How do we intercept touch events?
First when we perform a touch action,
Then ViewGroup gets the touch event, and then it is intercepted in the ViewGroup itself using onInterceptTouchEvent() .
If on intercepting if we return true then the touch event is not passed to its children and if we pass false , the Android eco-system gets notified that the ViewGroup wants to dispatch the event to its children, in our case it is a button.
In general, if returning true, it means we have handled the event in the ViewGroup itself, no need to dispatch to its children.
Now, as the button we have, is the last view in our view tree. So, it won’t be able to pass the touch event to its children anymore as it has none. So, in button, we would have our last onInterceptTouchEvent being called.
Intercepting of the event can only happen in ViewGroups and not Views.
Now, let’s discuss how the touch is handled in the view.
How touch is handled in the view?
When dispatching the touch event from top to bottom in the view hierarchy, we need to see at which position of the tree we need to handle the touch on the view.
When handling the dispatching the event, the top position of the hierarchy takes the lead, but when it comes to handling the touch the child views using onTouchEvent are always the first, and then it keeps moving towards the ViewGroups.
Touch event works just like the dispatching of the events but in the reverse order from child to parent.

Let’s say if we dispatch the event from ViewGroup and intercept the event there, it depends on the return value (true/false) that shall the touch of the view be handled on the ViewGroup or the children.
So in our case, if the onTouchEvent of Button returns true, then it means that it has been handled and then, it will not go to the LinearLayout .
What are the touch events we majorly work within Android for handling the touch control?
When we get the touch event, it gets handled by onTouchEvent which also has a parameter of type MotionEvent .
All the task performed regarding the touch has its reference in the event parameter. We can have the coordinates like X and Y points on the screen of the point on the touch.
It even has the actions in it, like let’s see if we tap on the screen then MotionEvent.ACTION_DOWN is called and when we lift the touch MotionEvent.ACTION_UP is called.
Even dragging a finger on the screen, the action is MotionEvent.ACTION_MOVE.
So, the flow on the view happens is when we want to tap the button,
Activity -> dispatchTouchEvent (LinearLayout) -> dispatchTouchEvent(Button) -> onTouchEvent(Button).
and when we don’t want to tap the button but want to handle the click on LinearLayout, the flow would be,
Activity -> dispatchTouchEvent (LinearLayout) -> dispatchTouchEvent(Button) -> onTouchEvent(Button) (will return false) -> onTouchEvent(LinearLayout).
Summary
To summarise everything how to work around touch control is,
- When working on touch events we start by clicking a view and removing the gesture (in our case our finger/stylus) then MotionEvent.ACTION_DOWN and MotionEvent.ACTION_UP is called respectively.
- When the initial touch happens on the ViewGroup and after intercepting when it moves to the child, then MotionEvent.ACTION_CANCEL gets called on the ViewGroup and the touch event dispatches to the children.
- Now, everything depends on onInterceptTouchEvent() and its return value. Based on its return value the dispatchTouchEvent is dependent, that if returns true the dispatcher is canceled, and if it returns false then the dispatching of the touch event keeps going on until its used.
- And onTouchEvent() if the return value is true, then it means the touch is handled and if it returns false then it means the touch is not handled.
Now, we know how to control the touch event and how it works. This is very useful when designing the CustomViews and own view library.
Источник
Handling single and multi touch on Android — Tutorial
Single and multi touch in Android. This tutorial describes how to use the touch API in Android applications.
1. Android Touch
1.1. Android touch basics
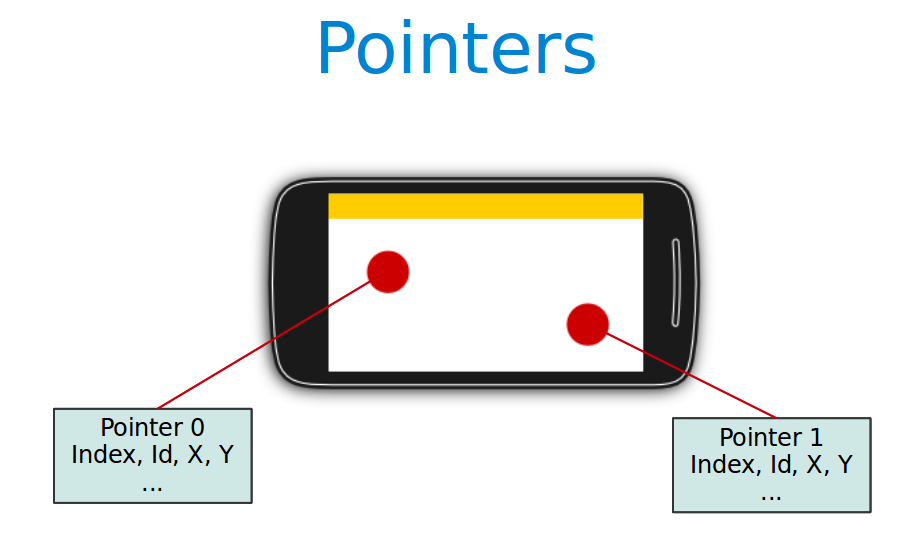
The Android standard View class support touch events. You can react to touch events in your custom views and your activities. Android supports multiple pointers, e.g. fingers which are interacting with the screen.
The base class for touch support is the MotionEvent class which is passed to Views via the onTouchEvent() method.
To react to touch events
you override the onTouchEvent() method.
The MotionEvent class contains the touch related information, e.g., the number of pointers, the X/Y coordinates and size and pressure of each pointer.
This method returns true if the touch event has been handled by the view. Android tries to find the deepest view which returns true to handles the touch event. If the view is part of another view (parent view), the parent can claim the event by returning true from the onInterceptTouchEvent() method. This would send an MotionEvent.ACTION_CANCEL event to the view which received previously the touch events.
To react to touch events in an activity, register an OnTouchListener for the relevant Views .
1.2. Single touch
If single input is used you can use the getX() and getY() methods to get the current position of the first finger.
Via the getAction() method you receive the action which was performed. The MotionEvent class provides the following constants to determine the action which was performed.
| Event | Description |
|---|---|
| Multitouch can not be tested on the emulator. You need a real Android device as input device. |
1.4. GestureDetectors
Android provide the GestureDetector class which allow to consume MotionEvents and to create higher level gesture events to listeners.
For example the ScaleGestureDetector class allows to determine the predefined gesture of increasing and decreasing the size of the object via two fingers.
2. Prerequisites
The following assumes that you have already basic knowledge in Android development.
3. Exercise: Custom view and touch events
3.1. Draw via touch
This exercise demonstrates the handling of (single) touch events within a custom view.
Create an Android project called com.vogella.android.touch.single with the activity called SingleTouchActivity. This activity uses a DialogFragment to set the color which is used for drawing.
Create the following layout called fragment_colorpicker.xml .
Create the following TouchEventView class which implements a View which supports single touch.
Adjust the activity_main.xml layout file to the following.
Add this view to your activity.
If you run your application you will be able to draw on the screen with your finger (or with the mouse in the emulator).
Change your coding so that you use a layout definition based on XML.
To use your own view in an XML layout definition you have to use the full-qualified class name (class including package information).
3.2. Allow to pick the line width
Add a menu to your application
3.3. Tracking
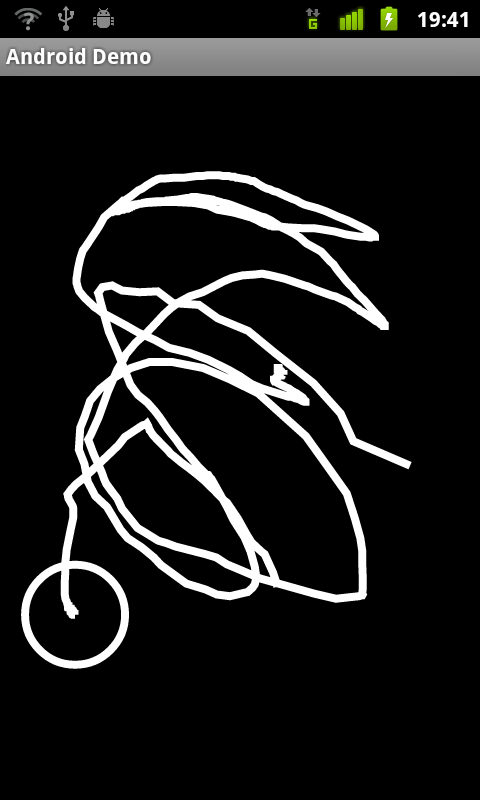
Add code to your drawing example so that the current position of a finger is marked via a circle. To draw a circle you can use the addCircle(x, y, 50, Path.Direction.CW) method call on a Path or use the canvas element directly.
Make sure that only the current position is highlighted with a circle. The circle should appears as soon as the finger goes down and vanish once the finger goes up.
The result should look like the following.
4. Exercise: Multitouch
In this exercise you create a view which support multitouch and allows you to track several fingers on your device. On the Android emulator you can only simulate singletouch with the mouse.
Create an Android project called com.vogella.android.multitouch with an activity called MainActivity.
Create the following MultitouchView class.
Add this view to the layout of your activity.
Your generated activity can remain the same.
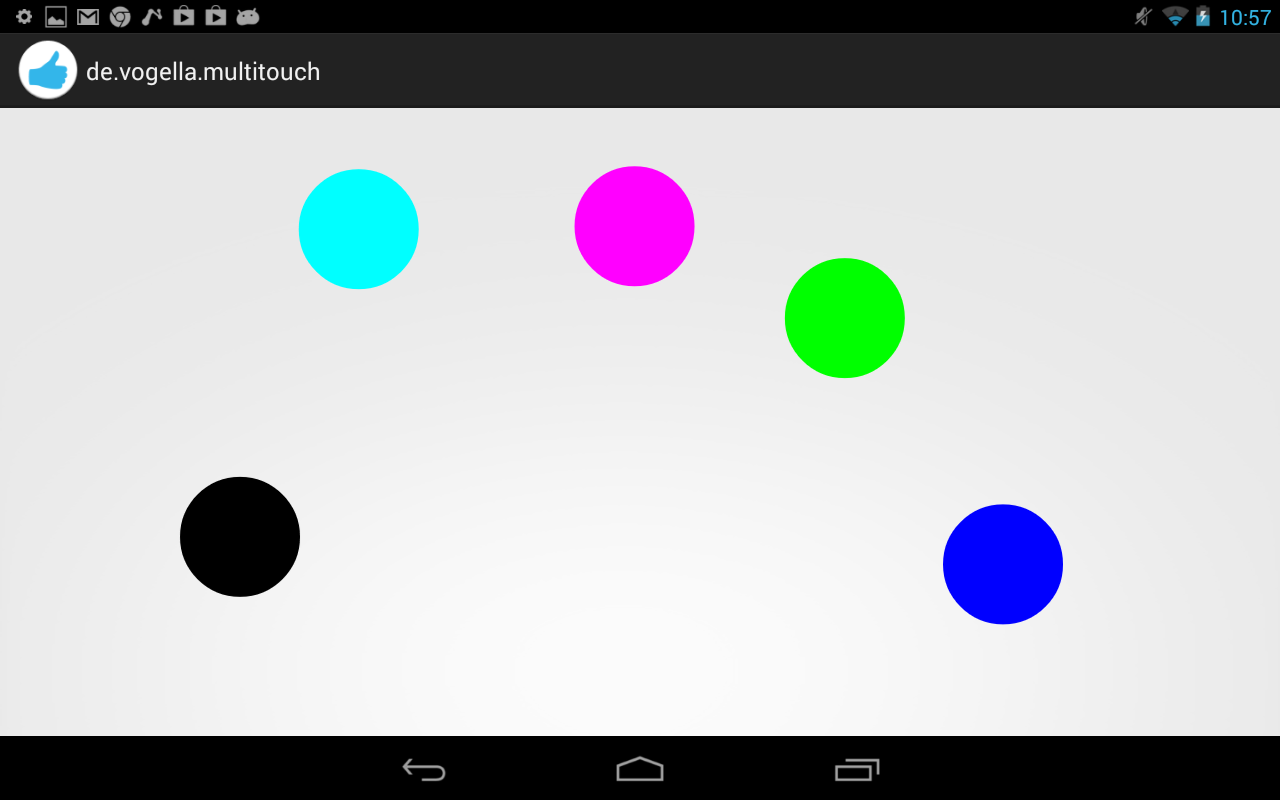
If you run your application you will be able to draw on the screen with your fingers. Every device has an upper limit how many pointers are supported, test out how many simultaneous pointers your device supports. This application should look similar to the following screenshot.
5. Exercise: Using ScaleGestureDetector
Create the Android project called de.vogella.android.touch.scaledetector with an activity called ScaleDetectorTestActivity.
Create the following class.
Add this view to your activity.
If you run your application you should be able to shrink and enlarge the image via a multi-touch gesture (pitch zoom).
Источник
Untrusted Touch Events in Android
In Android 12, we are making changes to enhance app and platform security to provide our users with a safer experience. After this article, check out our other blog posts that cover security and privacy.
Touch input is the primary means of interaction with an app in Android. Android 12 includes additional measures to ensure that touch events are properly passed to the intended apps to ensure an intuitive and safe UX. Specifically, Android 12 prevents touch events from being delivered to apps if these touches pass through a window from a different app. This behavior change applies to all apps running on Android 12, regardless of `targetSdkVersion`. This helps ensure that users can see what they are interacting with. Read on to learn about alternatives, to see if your app will be affected and how you can test for it.
Use special-purpose APIs if possible
Before checking if your use-case is affected, it’s good to evaluate if your app can utilize one of the following APIs in Android. These easy to use APIs prevent you from having to worry about these restrictions altogether since they are partly controlled by the system, and as such can be trusted. Consider the following:
- Bubbles: Bubbles float on top of other app content, follow the user wherever they go, and can be expanded to reveal app functionality and information.
- Picture-in-Picture (PIP): PIP allows the app to display content in a small window, pinned to a corner of the screen, while the user is navigating between apps or browsing content on the main screen. The user can drag the PIP window around and can click on it to expand or close.
- Notifications: Notifications are the standard way to provide the user with reminders, messages from other people, or other timely information from your app while minimally disrupting use of the device. Users can tap the notification to open your app, or take an action directly from the notification.
- Snackbars and Toasts: If you need to display a message for a brief period of time inside your app, take a look at Snackbars. If you need to display that message while your app is in the background, see if Toasts fit your use-case.
If your use-case fits one of these APIs, it’s strongly recommended to use them. Not only are they easier to use, they are safer, and the user is already familiar with most of them.
Does this affect me?
If your app can’t utilize one of the APIs above and lets touch events pass through its windows, it’s possible that, on Android 12, they will not go through to whatever is underneath as intended.
Examples include, but aren’t limited to, the following:
If you’re using FLAG_NOT_TOUCHABLE you’re likely affected, unless your use-case falls into one of the exemptions below:
- Interactions within your app. The overlay only appears above your app.
- Trusted windows. These windows include (but aren’t limited to) Accessibility windows, Input method editor (IME) windows and Assistant windows.
- Invisible windows. The window’s root view is GONE or INVISIBLE.
- Completely transparent windows. The alpha property is 0.0 for the window.
- Sufficiently translucent TYPE_APPLICATION_OVERLAY windows. The window is of type TYPE_APPLICATION_OVERLAY and its alpha property is equal to or below InputManager.getMaximumObscuringOpacityForTouch() . This value is currently 0.8 as of Developer Preview 3, but might change before final release. In case of multiple overlapping windows of such type their combined opacity is used.
If your use-case doesn’t fall into the list above, touches will be blocked. If this works for your use case, consider removing FLAG_NOT_TOUCHABLE to remove the intention of letting touches pass-through. If you need to let touches pass-through, you’ll have to adjust your code to fit one of the exemptions above. The next section covers, examples of common patterns that will have to be changed:
Windows with transparent background and no UI
Apps that display some UI in a window with a transparent background can hide their UI at the view level at certain times while adding FLAG_NOT_TOUCHABLE so the user can interact with what’s behind.
If, like in the diagram above, the app merely hid the UI, either by removing child views or changing their visibility, and added FLAG_NOT_TOUCHABLE so the user could interact with what’s behind, this won’t work on Android 12 anymore (note the difference from exemptions mentioned before — here we are changing internal views, not the window), since touches to other apps behind will be blocked. Fixing that is easy in this case; you can either:
- Remove the window using WindowManager.removeView() , passing the root view.
- Make the window invisible by calling View.setVisibility() with View.GONE or View.INVISIBLE on the root view.
- Set the opacity of the window to 0.0 via LayoutParams.alpha .
Whenever you need to display that UI again, you just need to reverse the action above.
Unnecessarily large windows
Apps might want to display some small UI while still allowing the user to interact with what is behind the window. Previously, an app could achieve that by simply using a fullscreen window and marking it with FLAG_NOT_TOUCHABLE , such as in figure 1:
Note that touches that go through the actual UI element would in this case pass-through to the windows behind in previous OS versions. The first suggestion in this case is to take a look at the Toast API to see if that fits your purpose. If not, the solution here is also straightforward and illustrated on the image on the right: you just need to reduce the window boundaries to the actual UI and use FLAG_NOT_TOUCH_MODAL , at which point you probably want to remove FLAG_NOT_TOUCHABLE too.
Now touches outside your UI will go directly to the window behind and won’t be blocked.
Translucent windows
If you are using a TYPE_APPLICATION_OVERLAY window and absolutely need to let touches pass-through it while displaying content, you’ll have to reduce the opacity such that the user is able to reasonably see what they are touching behind the window.
You’ll have to reduce your opacity at the window level, merely changing the opacity of views doesn’t work. You can use LayoutParams.alpha to reduce the opacity to a value below or equal to InputManager.getMaximumObscuringOpacityForTouch() like shown on the right. This value is currently 0.8 but might change before the Android 12 final release.
Now, provided you don’t have multiple windows from your app that overlap each other, touches will go through to the window behind. For more details about overlapping windows, take a look at the documentation of FLAG_NOT_TOUCHABLE .
Accessibility services
As a connected accessibility service, it’s possible to create windows of type TYPE_ACCESSIBILITY_OVERLAY , which are trusted and thus are exempt from the restrictions described earlier. In order to create such windows, just use the context of your AccessibilityService to obtain a WindowManager via getSystemService() to create said windows.
How to test if your app is affected
If a touch action is blocked by the system, you will see the following message in Logcat: Untrusted touch due to occlusion by PACKAGE_NAME.
Next steps
Check out the documentation if you want to learn more about untrusted touch events and their exceptions.
Источник


