- Android From Scratch: How to Store Application Data Locally
- 1. Storing Key-Value Pairs
- 2. Using an SQLite Database
- 3. Using the Internal Storage
- 4. Using the External Storage
- Conclusion
- How to get and use location data in your Android app
- Preparation
- Layout
- MainActivity
- Getting location updates
- LocationListener
- Android Developer Newsletter
- Conclusion
Android From Scratch: How to Store Application Data Locally
When it comes to persisting application data locally, Android developers are definitely spoiled for choice. In addition to direct access to both the internal and external storage areas of an Android device, the Android platform offers SQLite databases for storing relational data, and special files for storing key-value pairs. What’s more, Android apps can also use third-party databases that offer NoSQL support.
In this tutorial, I’ll show you how to make use of all those storage options in your Android apps. I’ll also help you understand how to pick the most appropriate storage option for your data.
Do you find it easier to learn with video? Why not check out our course:


1. Storing Key-Value Pairs
If you are looking for a quick way to store a few strings or numbers, you should consider using a preferences file. Android activities and services can use the getDefaultSharedPreferences() method of the PreferenceManager class to get a reference to a SharedPreferences object that can be used to both read from and write to the default preferences file.
To start writing to the preferences file, you must call the edit() method of the SharedPreferences object, which returns a SharedPreferences.Editor object.
The SharedPreferences.Editor object has several intuitive methods you can use to store new key-value pairs to the preferences file. For example, you could use the putString() method to put a key-value pair whose value is of type String . Similarly, you could use the putFloat() method to put a key-value pair whose value is of type float . The following code snippet creates three key-value pairs:
Once you’ve added all the pairs, you must call the commit() method of the SharedPreferences.Editor object to make them persist.
Reading from a SharedPreferences object is a lot easier. All you need to do is call the appropriate get*() method. For example, to get a key-value pair whose value is of type String , you must call the getString() method. Here’s a code snippet that retrieves all the values we added earlier:
As you can see in the above code, as the second parameter, all the get*() methods expect a default value, which is the value that must be returned if the key is not present in the preferences file.
Note that preferences files are limited to strings and primitive data types only. If you wish to store more complex data types or binary data, you must choose a different storage option.
2. Using an SQLite Database
Every Android app can create and make use of SQLite databases to store large amounts of structured data. As you might already know, SQLite is not only light-weight, but also very fast. If you have experience working with relational database management systems and are familiar with both SQL, which is short for Structured Query Language, and JDBC, which is short for Java Database Connectivity, this might be your preferred storage option.
To create a new SQLite database, or to open one that already exists, you can use the openOrCreateDatabase() method inside your activity or service. As its arguments, you must pass the name of your database and the mode in which you want to open it. The most used mode is MODE_PRIVATE , which makes sure that the database is accessible only to your application. For example, here’s how you would open or create a database called my.db:
Once the database has been created, you can use the execSQL() method to run SQL statements on it. The following code shows you how to use the CREATE TABLE SQL statement to create a table called user, which has three columns:
Although it’s possible to insert new rows into the table using the execSQL() method, it’s better to use the insert() method instead. The insert() method expects a ContentValues object containing the values for each column of the table. A ContentValues object is very similar to a Map object and contains key-value pairs.
Here are two ContentValues objects you can use with the user table:
As you might have guessed, the keys you pass to the put() method must match the names of the columns in the table.
Once your ContentValues objects are ready, you can pass them to the insert() method along with the name of the table.
To query the database, you can use the rawQuery() method, which returns a Cursor object containing the results of the query.
A Cursor object can contain zero or more rows. The easiest way to loop through all its rows is to call its moveToNext() method inside a while loop.
To fetch the value of an individual column, you must use methods such as getString() and getInt() , which expect the index of the column. For example, here’s how you would retrieve all the values you inserted in the user table:
Once you have fetched all the results of your query, make sure that you call the close() method of the Cursor object in order to release all the resources it holds.
Similarly, when you have finished all your database operations, don’t forget to call the close() method of the SQLiteDatabase object.
3. Using the Internal Storage
Every Android app has a private internal storage directory associated with it, in which the app can store text and binary files. Files inside this directory are not accessible to the user or to other apps installed on the user’s device. They are also automatically removed when the user uninstalls the app.
Before you can use the internal storage directory, you must determine its location. In order to do so, you can call the getFilesDir() method, which is available in both activities and services.
To get a reference to a file inside the directory, you can pass the name of the file along with the location you determined. For example, here’s how you would get a reference to a file called alice.csv:
From this point on, you can use your knowledge of Java I/O classes and methods to read from or write to the file. The following code snippet shows you how to use a FileOutputStream object and its write() method to write to the file:
4. Using the External Storage
Because the internal storage capacity of Android devices is usually fixed, and often quite limited, several Android devices support external storage media such as removable micro-SD cards. I recommend that you use this storage option for large files, such as photos and videos.
Unlike internal storage, external storage might not always be available. Therefore, you must always check if it’s mounted before using it. To do so, use the getExternalStorageState() method of the Environment class.
Once you are sure that the external storage is available, you can get the path of the external storage directory for your app by calling the getExternalFilesDir() method and passing null as an argument to it. You can then use the path to reference files inside the directory. For example, here’s how you would reference a file called bob.jpg in your app’s external storage directory:
By asking the user to grant you the WRITE_EXTERNAL_STORAGE permission, you can gain read/write access to the entire file system on the external storage. You can then use well-known public directories to store your photos, movies, and other media files. The Environment class offers a method called getExternalStoragePublicDirectory() to determine the paths of those public directories.
For example, by passing the value Environment.DIRECTORY_PICTURES to the method, you can determine the path of the public directory in which you can store photos. Similarly, if you pass the value Environment.DIRECTORY_MOVIES to the method, you get the path of the public directory in which movies can be stored.
Here’s how you would reference a file called bob.jpg in the public pictures directory:
Once you have the File object, you can again use the FileInputStream and FileOutputStream classes to read from or write to it.
Conclusion
You now know how to make the most of the local storage options provided by the Android SDK. Regardless of the storage option you choose, read/write operations can be time-consuming if large amounts of data are involved. Therefore, to make sure that the main UI thread always stays responsive, you must consider running the operations in a different thread.
To learn more about saving application data locally, refer to the official data storage API guide.
Источник
How to get and use location data in your Android app

Using Location in your app has incredible potential in making your app seem intelligent to end users. With location data, your app can predict a user’s potential actions, recommend actions, or perform actions in the background without user interaction.
For this article, we shall discuss integrating location updates into an Android app, with a focus on fetching the latitude and longitude of a given Location only. It is worth pointing out that Location can (and does) contain much more than just latitude and longitude values. It can also have values for the bearing, altitude and velocity of the device.
Preparation
Before your app can receive any location data, you must request location permissions. There are two location permissions, ACCESS_FINE_LOCATION and ACCESS_COARSE_LOCATION. We use ACCESS_FINE_LOCATION to indicate that we want to receive as precise a location as possible. To request this permission, add the following to your app manifest:
We also need to select which of the location providers we want to use to get the location data. There are currently three providers:
- GPS_PROVIDER: The most accurate method, which uses the built-in GPS receiver of the device. GPS is a system of satellites in orbit, that provides location information from almost anywhere on earth. It can sometimes take a while to get a GPS location fix (generally faster when the device is outdoors).
- NETWORK_PROVIDER: This method determines a device’s location using data collected from the surrounding cell towers and WiFi access points. While it is not as accurate as the GPS method, it provides a quite adequate representation of the device’s location.
- PASSIVE_PROVIDER: This provider is special, in that it indicates that your app doesn’t want to actually initiate a location fix, but uses the location updates received by other applications/services. In other words, the passive provider will use location data provided by either the GPS or NETWORK providers. You can find out what provider your passive provider actually used with the returned Location’s getProvider() method. This provides the greatest battery savings.
Layout
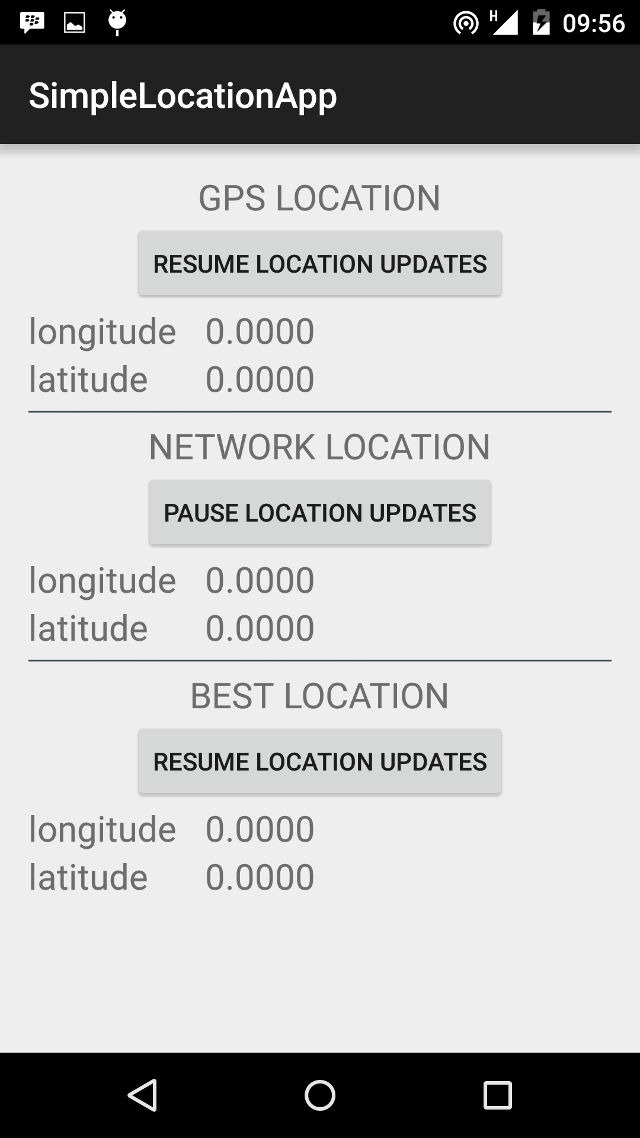
For our app, we are going to fetch location data using the GPS provider, the NETWORK provider, and also by asking the device to decide which is the best available provider that meets a given set of criteria. Our layout has three identical segments, each of which contains:
- A title for the section, such as GPS LOCATION
- A Button to resume and pause location updates for the section/provider
- Longitude Value
- Latitude Value
The code snippet for the GPS section, from our layout/activity_main.xml file is shown below
MainActivity
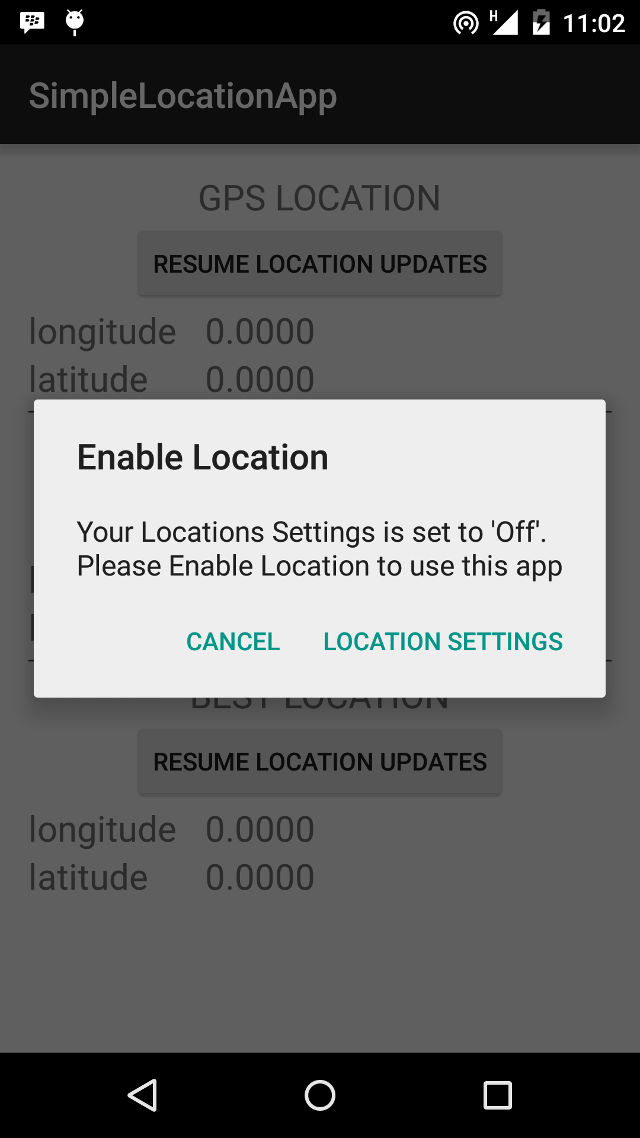
It is possible that the user has their device Location settings turned off. Before requesting location information, we should check that Location services are enabled. Polling for location data with the settings turned off will return null. To check if Location is enabled, we implement a method, called isLocationEnabled(), shown below:
We simply ask the LocationManager if either the GPS_PROVIDER or the NETWORK_PROVIDER is available. In the case where the user has Location turned off, we want to help them get to the Location screen as easily and quickly as possible to turn it on and get back into our app. To do this, we implement the showAlert() method.
The most interesting line in the snippet above is within the setPositiveButton() method. We start an activity using the Settings.ACTION_LOCATION_SOURCE_SETTINGS intent, so that when the user clicks on the button, they are taken to the Location Settings screen.
Getting location updates
To get GPS and Network location updates, we use one of the LocationManager’s requestLocationUpdates() methods. Our preferred is requestLocationUpdates(String provider, int updateTime, int updateDistance, LocationListener listener). updateTime refers to the frequency with which we require updates, while updateDistance refers to the distance covered before we require an update. Note that updateTime simply specifies the minimum time period before we require a new update. This means that the actual time between two updates can be more than updateTime, but won’t be less.
A very important point to consider is that Location polling uses more battery power. If your app doesn’t require location updates when in the background, consider stopping updates using one of the removeUpdates() methods. In the code snippet below, we stop/start location updates in response to clicking on the relevant Button.

For both NETWORK_PROVIDER and PASSIVE_PROVIDER, simply replace GPS_PROVIDER above with your desired provider.
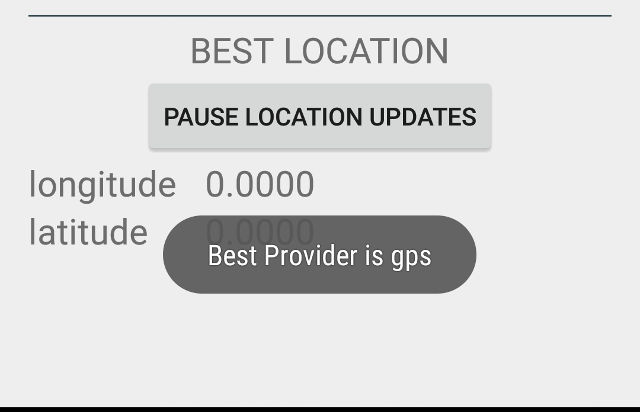
In the case where you just want to pick the best available provider, there is a LocationManager method, getBestProvider() that allows you do exactly that. You specify some Criteria to be used in selecting which provider is best, and the LocationManager provides you with whichever it determines is the best fit. Here is a sample code, and it’s what we use to select a provider:
Using the above code and Criteria, the best provider will be GPS_PROVIDER, where both GPS and NETWORK are available. However if the GPS is turned off, the NETWORK_PROVIDER will be chosen and returned as the best provider.
LocationListener
The LocationListener is an interface for receiving Location updates from the LocationManager. It has four methods
- onLocationChanged() – called whenever there is an update from the LocationManager.
- onStatusChanged() – called when the provider status changes, for example it becomes available after a period of inactivity
- onProviderDisabled() – called when the user disables the provider. You might want to alert the user in this case that your app functionality will be reduced
- onProviderEnabled() – called when the user enables the provider
We implement only the onLocationChanged() method for this sample, but in a production app, you will most likely want to perform an appropriate action for each situation.
Android Developer Newsletter
Conclusion
The complete source code is available on github, for use (or misuse) as you see fit. Just be mindful of the following:
- Integrating location tracking in your apps drains the battery.
- Google recommends apps request updates every 5 minutes (5 * 60 * 1000 milliseconds). You might need faster updates if your app is in the foreground (fitness/distance tracker).
- Users can have location turned off. You should have a plan for when location settings is turned off.
Have fun building Android apps, and watch out for our upcoming tutorial where we make use of Android device location data and web APIs to build something even more fun and challenging.
Источник


