- Create your first multiplatform application – tutorial
- Run your application
- Run your application on Android
- Run on a different Android simulated device
- Run on a real Android device
- Run your application on iOS
- Run on a different iPhone simulated device
- Run on a real iPhone device
- Run tests
- Run tests on iOS
- Run tests on Android
- Update your application
- Next steps
- Kotlin + MVP + Dagger 2 + Retrofit = Sample Android Application
- ogulcan/kotlin-mvp-dagger2
- kotlin-mvp-dagger2 — This example application implements MVP architecture using Kotlin, Dagger2, RxJava2 and also…
- What is MVP ? Why do we need?
- Libraries
- Project Structure
- Retrofit and Kotlin Data Classes
- Dependency Injection: Dagger2
- MVP Implementation
- What is Contract?
- What is Presenter?
- What happens step by step once application start?
- Создаём своё первое приложение для Kotlin Multiplatform
- Авторизуйтесь
- Создаём своё первое приложение для Kotlin Multiplatform
- ведущий мобильный разработчик компании Usetech
Create your first multiplatform application – tutorial
Here you will learn how to create and run your first KMM application.
Set up your environment for KMM development by installing the necessary tools on a suitable operating system.
You will need a Mac with macOS to complete certain steps in this tutorial, which include writing iOS-specific code and running an iOS application.
These steps cannot be performed on other operating systems, such as Microsoft Windows. This is due to an Apple requirement.
You can also watch a video of this tutorial created by Ekaterina Petrova, Kotlin Developer Advocate.
In Android Studio, select File | New | New Project.
Select KMM Application in the list of project templates, and click Next.

Specify a name for your first application, and click Next.

In the window that opens, do the following:
Keep the default names for the application and shared folders.
Select the checkbox to generate sample tests for your project.
Select Regular framework in the list of iOS framework distribution options.
Click Finish to create a new project.

If you want to use KMM module as a CocoaPods dependency, select the CocoaPods dependency manager option. To learn more about CocoaPods dependencies, see CocoaPods integration.
Now wait while your project is set up. It may take some time to download and set up the required components when you do this for the first time.
To view the complete structure of your mobile multiplatform project, switch the view from Android to Project. You can understand the KMM project structure and how you can use this.

Run your application
You can run your multiplatform application on Android or iOS.
Run your application on Android
In the list of run configurations, select androidApp and then click Run.


Run on a different Android simulated device
Run on a real Android device
Run your application on iOS
In the list of run configurations, select iosApp and then click Run.


Run on a different iPhone simulated device
If you want to run your application on another simulated device, you can add a new run configuration.
In the list of run configurations, click Edit Configurations.

Click the + button above the list of configurations and select iOS Application.

Name your configuration.
Select a simulated device in the Execution target list, and then click OK.

Click Run to run your application on the new simulated device.
Run on a real iPhone device
Create a run configuration by selecting iPhone in the Execution target list.
Click Run to run your application on the iPhone device.
If your build fails, follow the workaround described in this issue.
Run tests
You can run tests to check that the shared code works correctly on both platforms. Of course, you can also write and run tests to check the platform-specific code.
Run tests on iOS
Open the file iosTest.kt in shared/src/iosTest/kotlin/com.example.kmmapplication.shared .
Directories with Test in their name contain tests.
This file includes a sample test for iOS.

Click the Run icon in the gutter next to the test.
Tests run on a simulator without UI. Congratulations! The test has passed – see test results in the console.

Run tests on Android
For Android, follow a procedure that is very similar to the one for running tests on iOS.
Open the file androidTest.kt in shared/src/androidTest/kotlin/com.example.kmmapplication.shared .
Click the Run gutter icon next to the test.
Update your application
Open the file Greeting.kt in shared/src/commonMain/kotlin/com.example.kmmapplication.shared .
This directory stores the shared code for both platforms – Android and iOS. If you make changes to the shared code, you will see changes in both applications.

Update the shared code – use the Kotlin standard library function that works on all platforms and reverts text: reversed() .
Run the updated application on Android.

Run the updated application on iOS.

Run tests on Android and iOS.
As you see, the tests fail. Update the tests to pass. You know how to do this, right? 😉

Next steps
Once you’ve played with your first KMM application, you can:
Источник
Kotlin + MVP + Dagger 2 + Retrofit = Sample Android Application

I guess, it’s a classic post-title for these days :).
In this article, I would like to show how to implement MVP (Model-View-Presenter) pattern with using Dagger2 and also by Kotlin.
Design Patterns are very remarkable topic for mobile development. And as developers (not just android or mobile developers), we are trying to write cleaner and more testable codes and applications.
For the Android, with MVP, we are able to take most of logic out from the activities (or fragments). So that we can test it without using instrumentation tests. And with Dagger2, it is easier to apply concept of dependency injection.
So, this article/application will cover two design patterns: MVP and Dependency Injection. You may heard typicode, was used as server. It will be abstracted by using Retrofit and RxJava2 will be used to make requests it as observables which is another hot topic for mobile development.
Note: This article is not for starters. It does not answer questions like: What’s dagger or dagger in the past, dagger basics or Retrofit 101 etc.
If you are just interested in project, not the story, here is github repository:
ogulcan/kotlin-mvp-dagger2
kotlin-mvp-dagger2 — This example application implements MVP architecture using Kotlin, Dagger2, RxJava2 and also…
Let’s start with common discussions.
What is MVP ? Why do we need?
In Android we have a problem arising from the fact that activities are closely coupled to interface and data access mechanisms.
The Model-View-Presenter pattern allows to separate the presentation layer from the logic, so that everything about how the interface works is separated from how we represent it on screen.
MVP lets us to make views independent from data source and it will be easier to test each layer.
Libraries

As you may see from the title; I have used dagger2, retrofit, rxjava2 as libraries. I will not go into details about what’s dagger2 or retrofit.
Project Structure
Here is I have implemented MVP in Android. Let’s start with how project structure looks like:

This project structured into 5 packages:
- api: Where Retrofit resides in.
- di: Where dagger2 resides in aka dependency injection.
- models: Data models.
- ui: Activities and also with presenter and contract.
- util: Some tweaks.
After the structure of project, I guess it would be more accurate to tell from the outside to the inside. Means: server → api →dependency injection (app) → ui (mvp).
Retrofit and Kotlin Data Classes
Typicode offers a simple server to us: Posts, users, albums. Depending on typicode, here is how retrofit interface should like:
Unlike Java, Kotlin has a great feature. Companion objects:
In Kotlin, an interface can have a companion object but it is not part of the contract that must be implemented by classes that implement the interface. It is just an object associated to the interface that has one singleton instance. So it is a place you can store things, but doesn’t mean anything to the implementation class.
Another great feature is data classes. It’s really easy to create pojos in Kotlin:
With these three lines (remember, each will be placed in its own separate file) compiler automatically derives the following members from all properties declared in the primary constructor.
Dependency Injection: Dagger2
So I have used an interface to declare api requests and data classes. Next step should be Dagger2 to implement dependency injection.
Dagger uses Components and Modules to define which dependencies will be injected in which objects.
This application will contain an activity (named as MainActivity) and several fragments. So we will need three components: ApplicationComponent, ActivityComponent (where presenter resides in) and FragmentComponent (where presenter and api service reside in).
Here is ApplicationComponent.kt:
It’s quite simple. It just injects application and provides it when needed. Let’s assume, if we want to use Calligraphy, Crashliytcs, Timber or Stetho, application module should inject those, too.
Activity/Fragment Component and Module are also similar to Application. Additionally, provides presenter and api service:
Here is I implemented Dagger on Application scope:
MVP Implementation
As mentioned above, MVP separates views from the logic. So as an initial step there is a BaseContract to abstract Presenter and View:
Since there are three layouts as Main and List and About, there are three contracts: MainContract, ListContact and AboutContract:
What is Contract?
Presenter and its corresponding View is defined in a Contract interface class, making the code more readable and the connection between the two easier to understand.
Main screen is an activity that controls fragment layout to show list or about. This is why view has just two functions.
List screen contains a list, as the name implies, that fetches data from server. During the request there will be a progress, if request fails there will be an error message, if request is okay data will be shown. And finally there will be a detail view for each item on the list.
Here is how ListContract looks like:
About view has just a text view that shows example message. Even it’s from xml or remote we should declare functionalities as well:
What is Presenter?
In MVP, Presenter retrieves the data from the Model, applies the UI logic and manages the state of the View, decides what to display and reacts to user input notifications from the View.
I will just show how List Presenter looks like:
For the last step, here is how to inject ActivityComponent on MainActivity:
What happens step by step once application start?
- On BaseApp: Application Component will be initialized with using Dagger2. API service will be ready.
- On MainActivity: Main Activity is default activity for the application. It contains a frame layout to represent list or about fragments. After dagger injection, view will be attached to presenter.
- On ListFragment: After attachment, list fragment will be shown as default. It means that ListFragment will be shown. View of list fragment has also its presenter. So, posts list will be fetched from remote server.
- On AboutFragment: If user taps option, about fragment will be shown with animation.
Thank you so much for coming so far!
If you want to know more about this sample application please see github repository.
If you liked this article, please share. So people can also read it.
Please get in touch with me via Github, Twitter or LinkedIn.
Источник
Создаём своё первое приложение для Kotlin Multiplatform
Авторизуйтесь
Создаём своё первое приложение для Kotlin Multiplatform

ведущий мобильный разработчик компании Usetech
В настоящее время мы переживаем бум появления новых технологий и подходов к написанию мобильных приложений. Одной из них является развивающийся SDK от компании JetBrains для мультиплатформенной разработки Kotlin Multiplatfrom (KMP) .
Основная идея KMP, как и других кросс-платформенных SDK — оптимизация разработки путем написания кода один раз и последующего его использования на разных платформах.
Согласно концепции JetBrains, Kotlin Multiplatform не является фреймворком. Это именно SDK, который позволяет создавать модули с общим кодом, подключаемые к нативным приложениям.

Написанный на Kotlin модуль компилируется в JVM байткод для Android и LLVM байткод для iOS.
Sportmaster Lab , Москва, Санкт-Петербург, Новосибирск, можно удалённо , По итогам собеседования
Этот модуль (Shared, Common) содержит переиспользуемую бизнес-логику. Платформенные модули iOS/Android, к которым подключен Shared/Common, либо используют написанную логику напрямую, либо имплементируют свою реализацию в зависимости от особенностей платформы.
Общая бизнес-логика может включать в себя:
- сервисы для работы с сетью;
- сервисы для работы с БД;
- модели данных.
Также в нее могут входить архитектурные компоненты приложения, напрямую не включающие UI, но с ним взаимодействующие:
Концепцию Kotlin Multiplatform можно сравнить с реализацией Xamarin Native. Однако, в KMP нет модулей или функционала, реализующих UI. Эта логическая нагрузка ложится на подключенные нативные проекты.
Рассмотрим подход на практике и попробуем написать наше первое приложение Kotlin Multiplatform.
Для начала нам потребуется установить и настроить инструменты:
- Android Sdk
- Xcode с последним iOS SDK.
- Intelij IDEA CE или Android Studio. Обе IDE позволяют создавать и настраивать проекты для Kotlin Multiplatform. Но если в Intelij IDEA проект создается автоматически, то в Android Studio большую часть настроек надо сделать вручную. Если вам привычнее работать именно с Android Studio, то подробное руководство по созданию проекта можно посмотреть в документации на Kotlinlang.org
Мы рассмотрим создание проекта с помощью Intelij IDEA.
Выбираем меню File → New → Create Project:
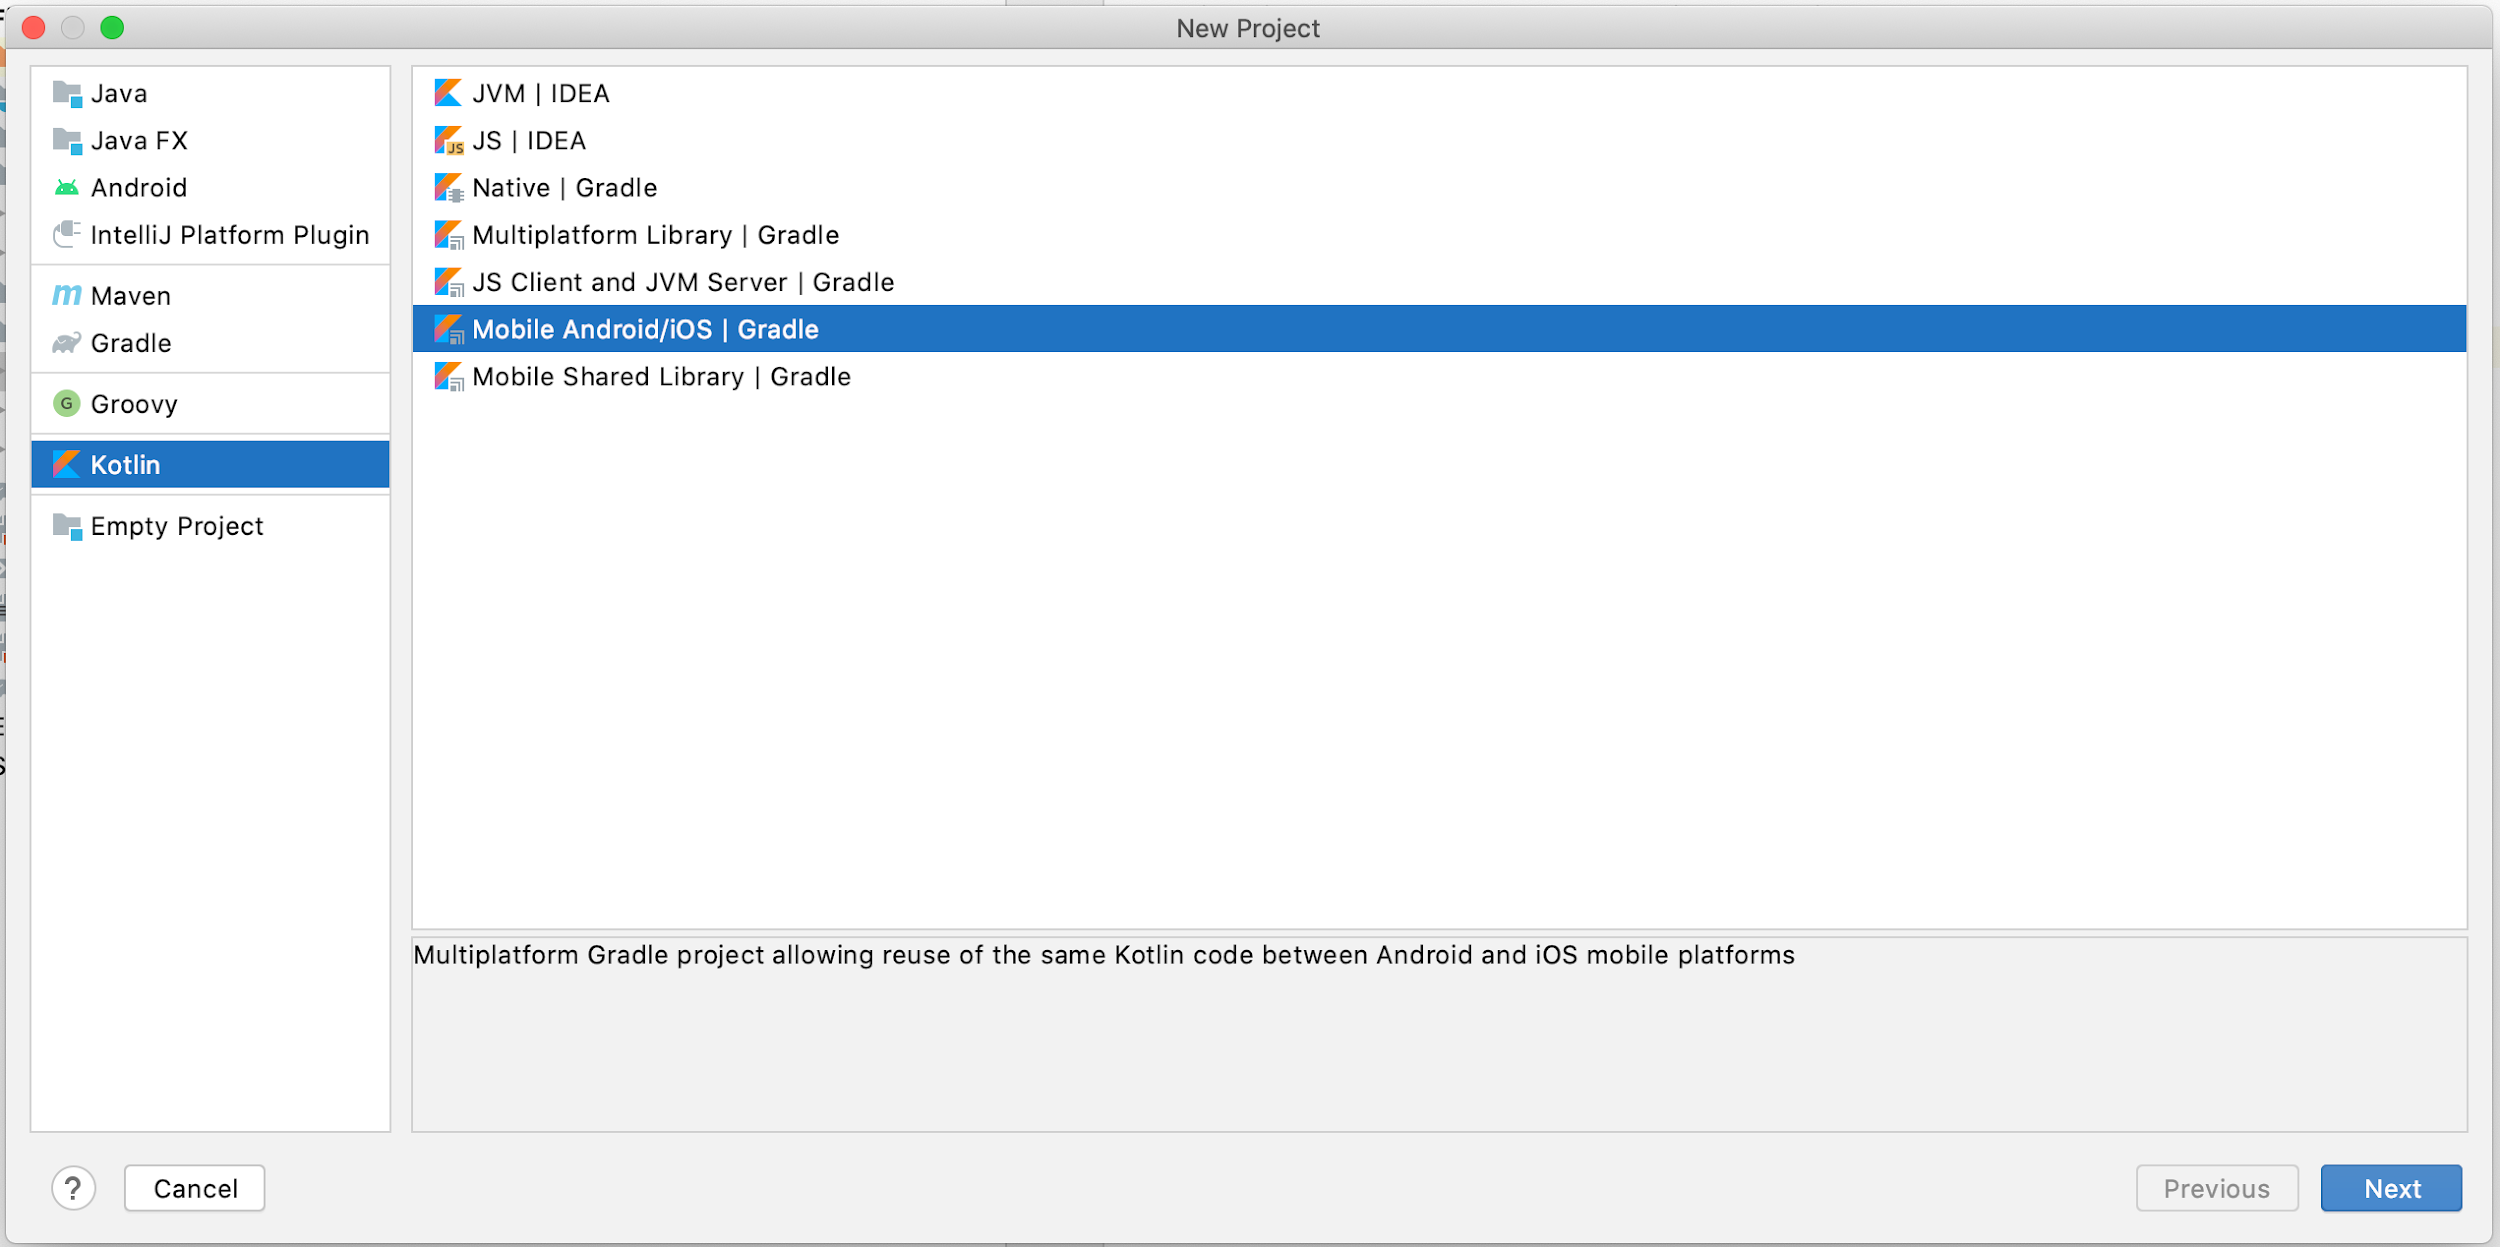
В появившемся окне выбираем тип проекта Kotlin → Mobile Android/iOS|Gradle
Далее стандартно задаем путь к JDK, имя и расположение проекта

После нажатия кнопки Finish проект сгенерируется и будет почти готов к работе.
Рассмотрим, что у нас получилось:
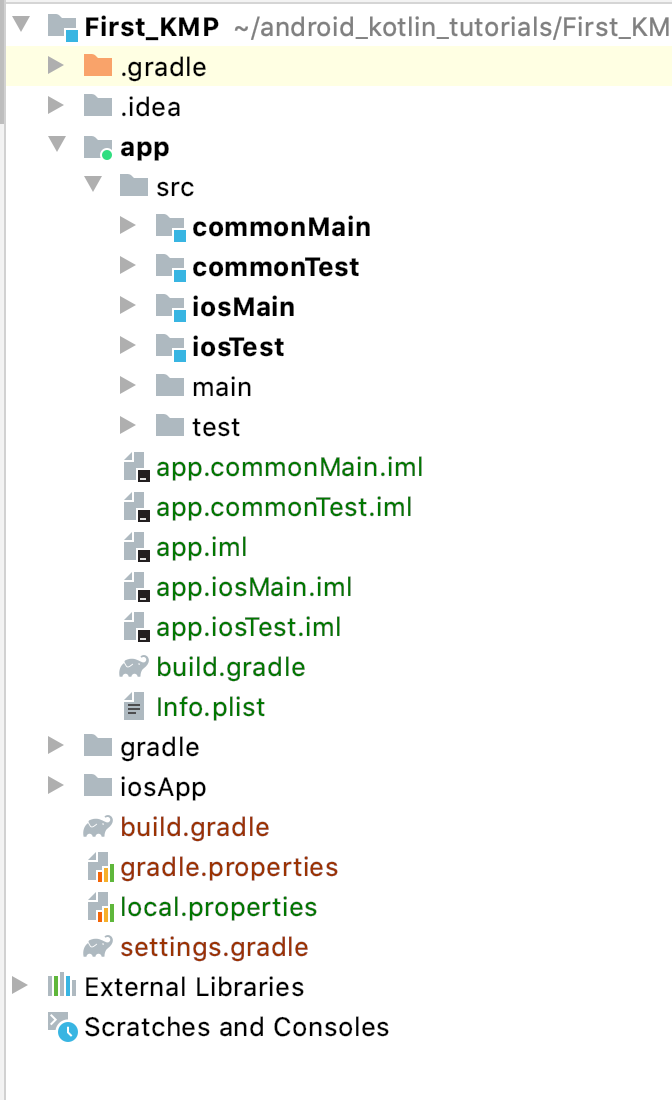
Мультиплатформенные проекты Kotlin обычно делятся на несколько модулей:
- модуль переиспользуемой бизнес-логики (Shared, commonMain и т.п);
- модуль для IOS приложения (iOSMain, iOSTest);
- модуль для Android приложения (androidMain, androidTest).
В них располагается наша бизнес-логика. Сам код базового примера мы разберем немного позже.
Код нативного Android приложения располагается в каталоге main, как если бы мы создавали проект по шаблону обычного Android.
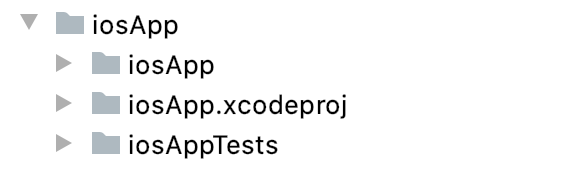
iOS приложение создается автоматически и располагается в каталоге iOSApp:
Перед тем, как мы проверим работоспособность базового решения, необходимо сделать следующие финальные настройки:
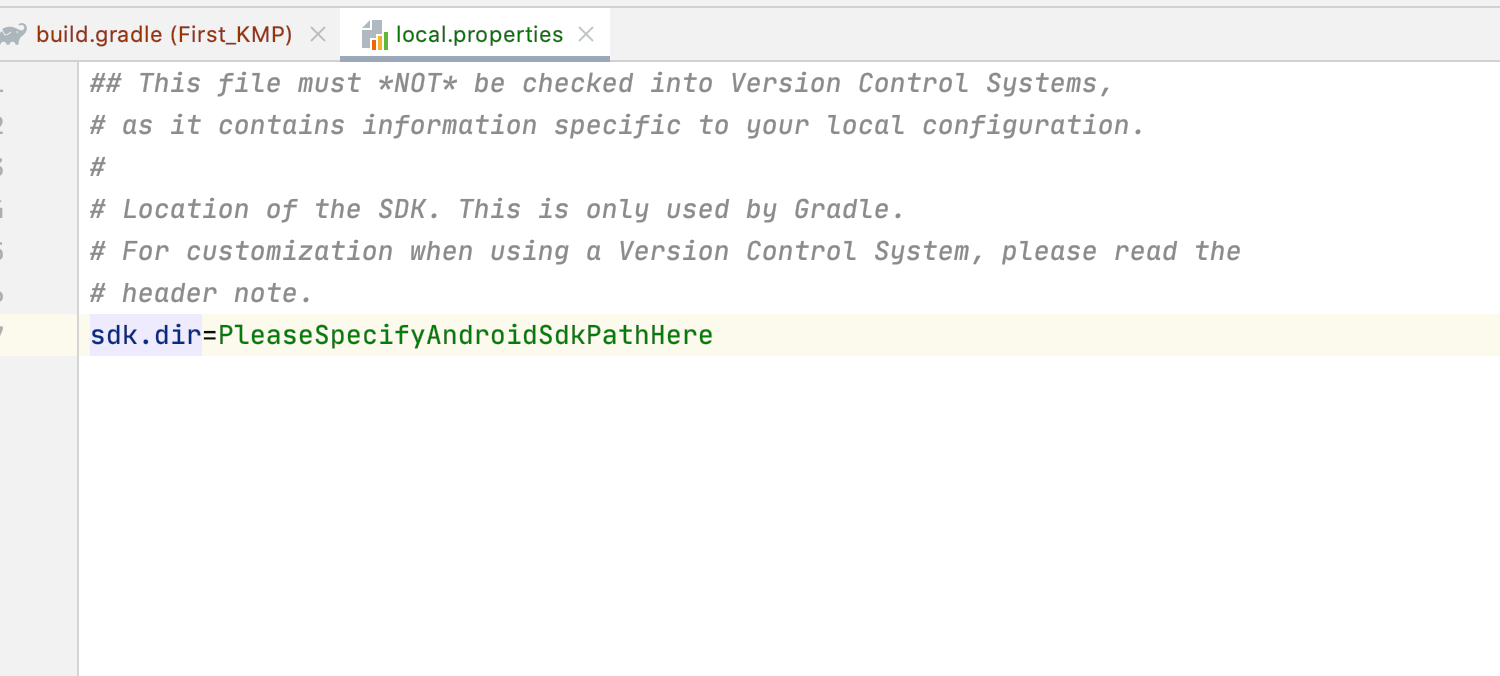
В local.properties зададим путь к SDK Android:
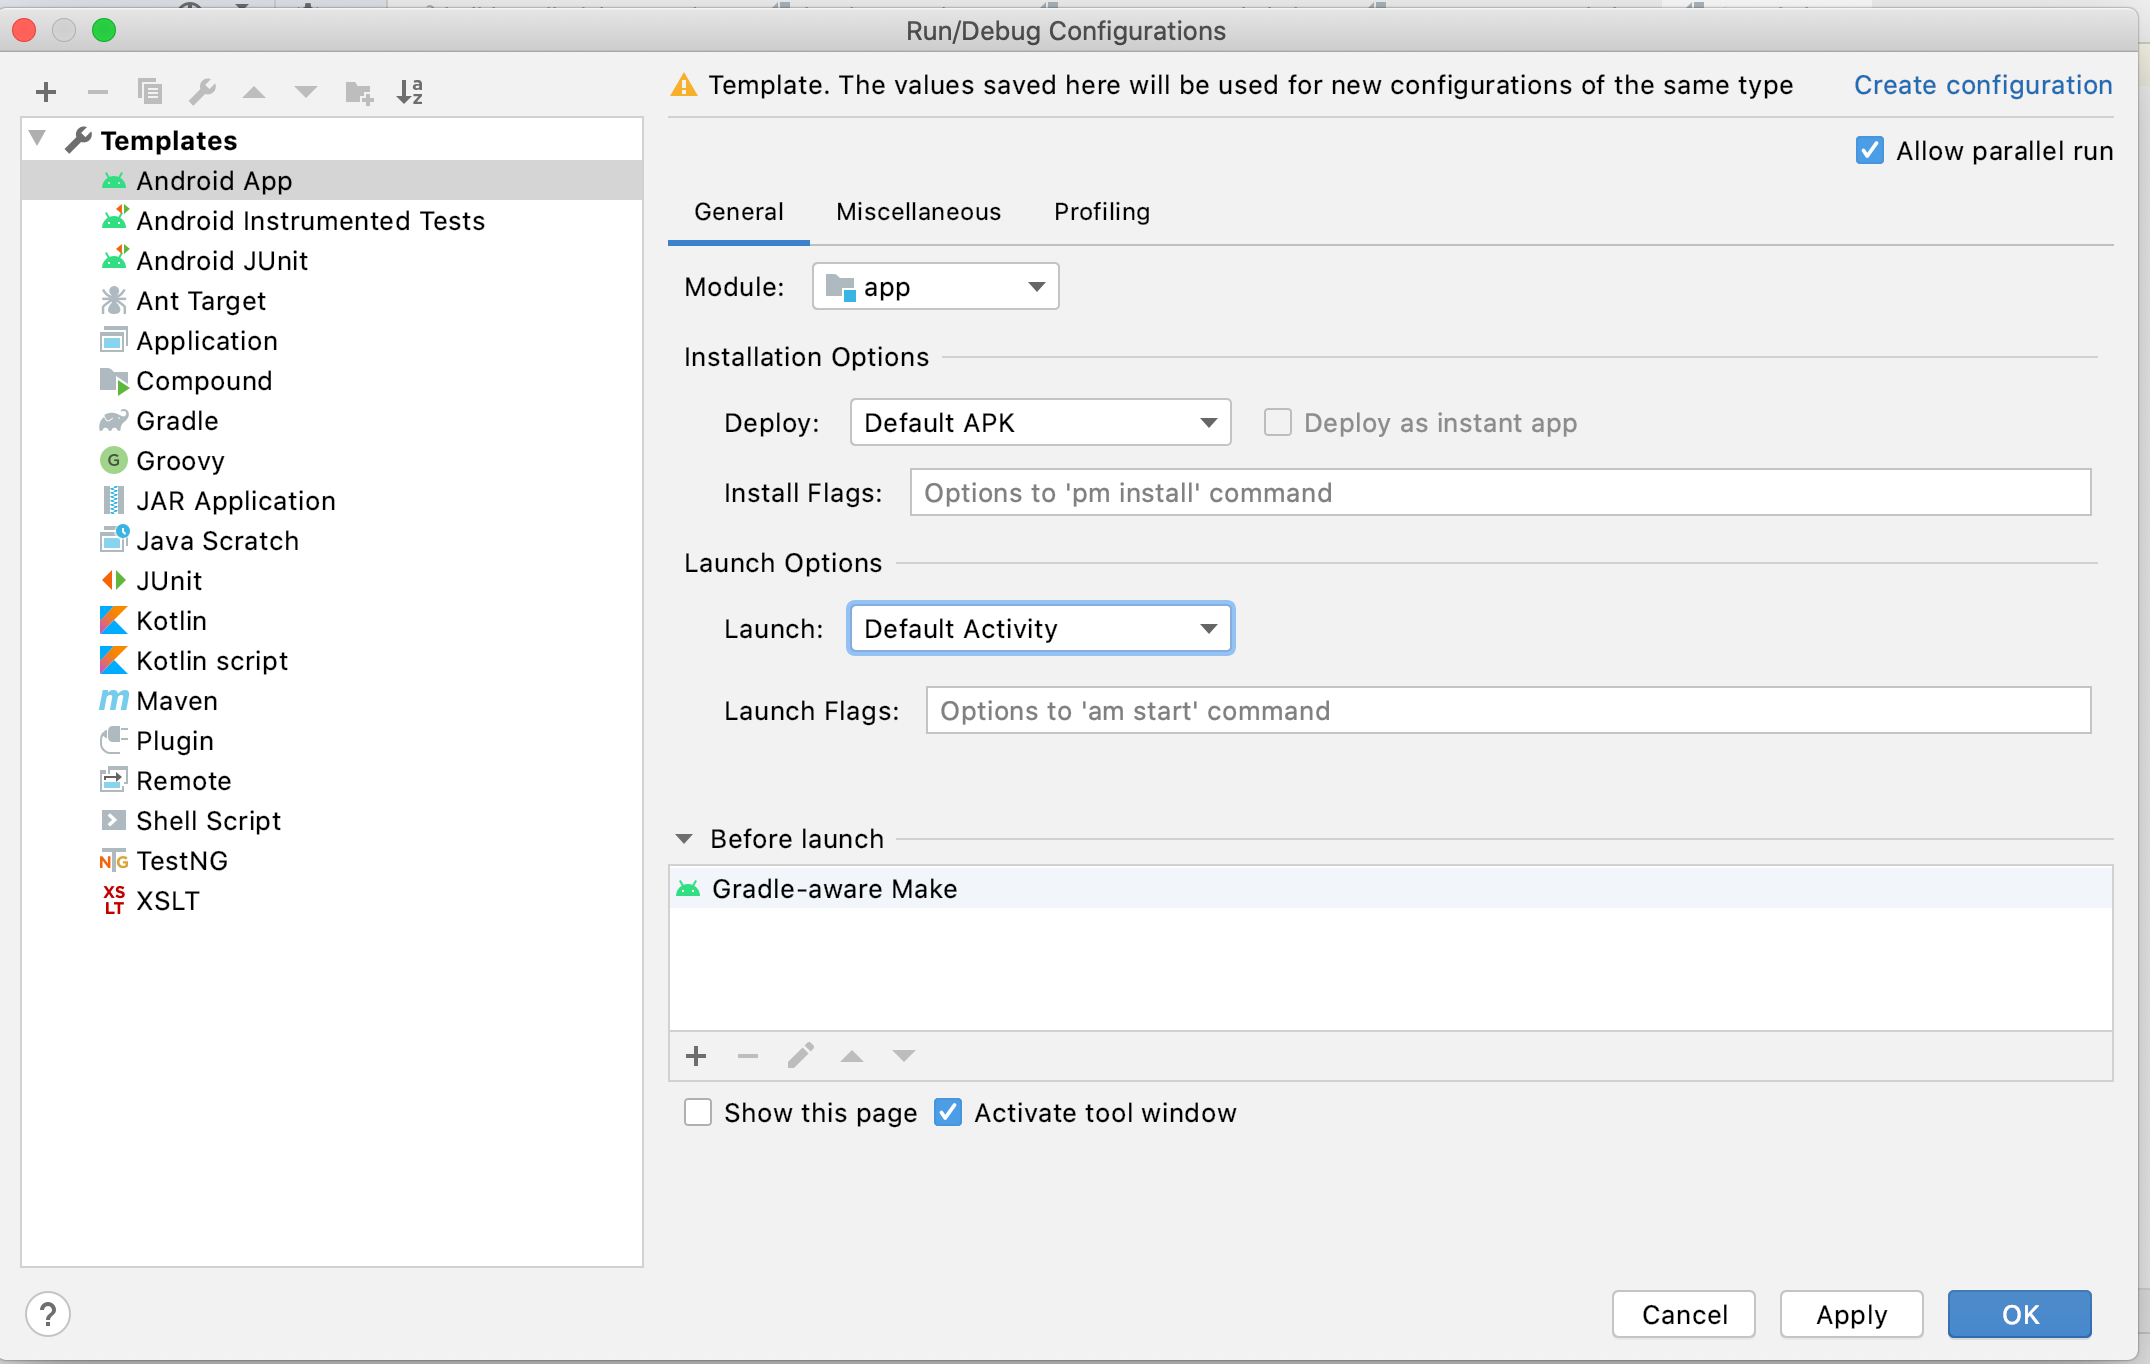
Создадим конфигурацию для работы Android приложения:
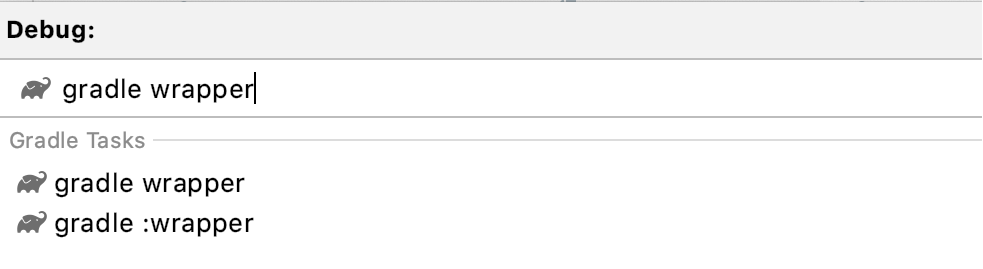
Теперь вызовем команду gradle wrapper для сборки нашего модуля общей логики:
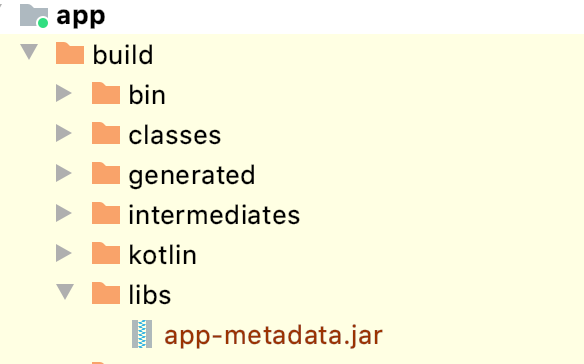
После сборки модуль для бизнес-логики для Android приложения доступен в app/build/libs:
Путь к библиотеке прописывается стандартно, в блоке dependencies файла build.gradle:

Теперь наш проект сконфигурирован для запуска Android приложения: 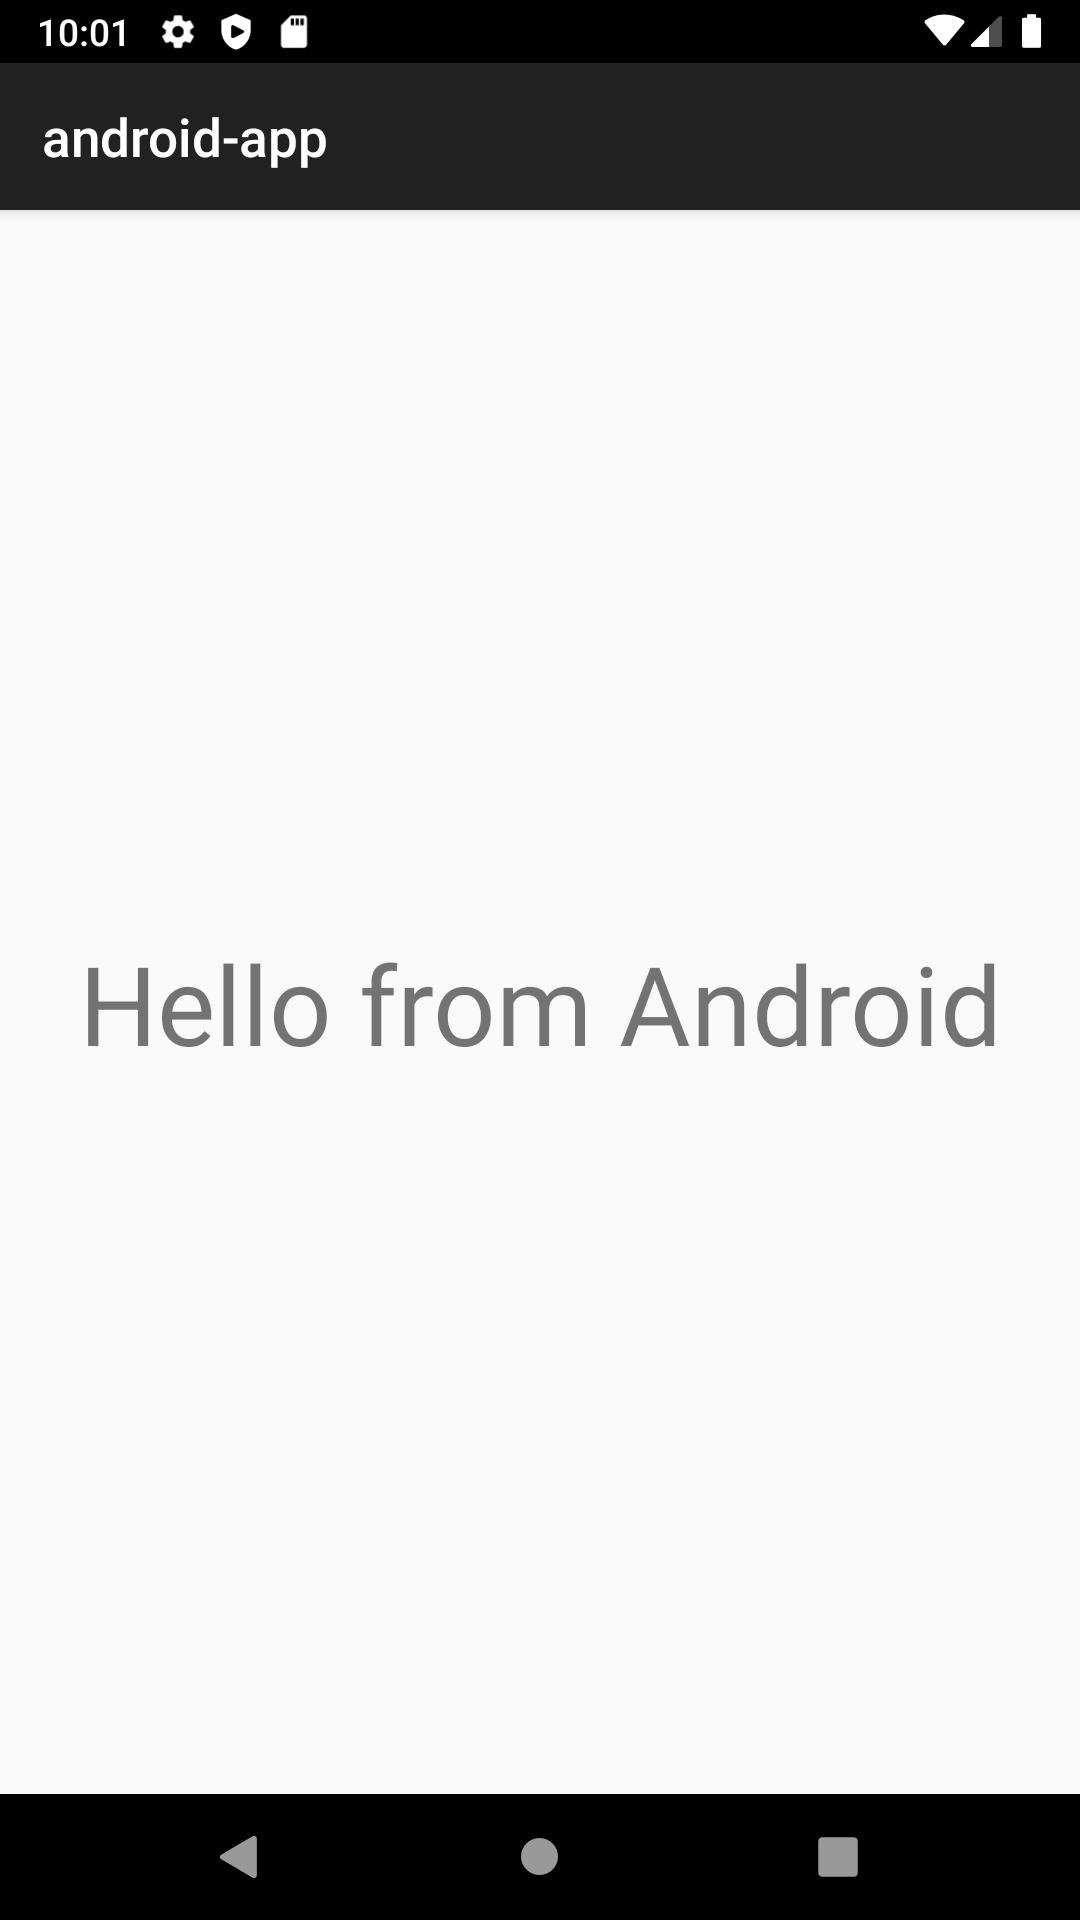
Осталось сделать настройки для запуска приложения iOS.
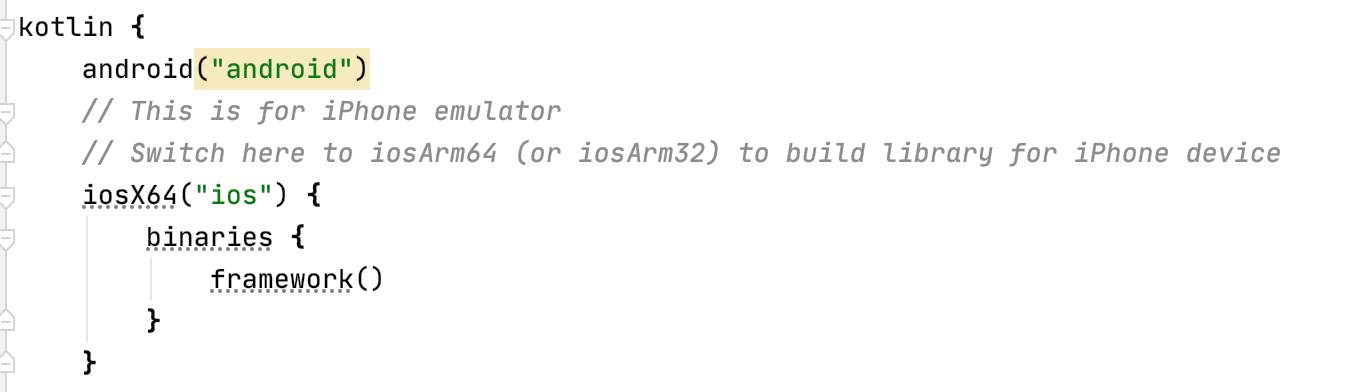
В файле build.gradle(:app) необходимо изменить настройку архитектура проекта, чтобы наше приложение поддерживало как реальные устройства, так и эмуляторы.

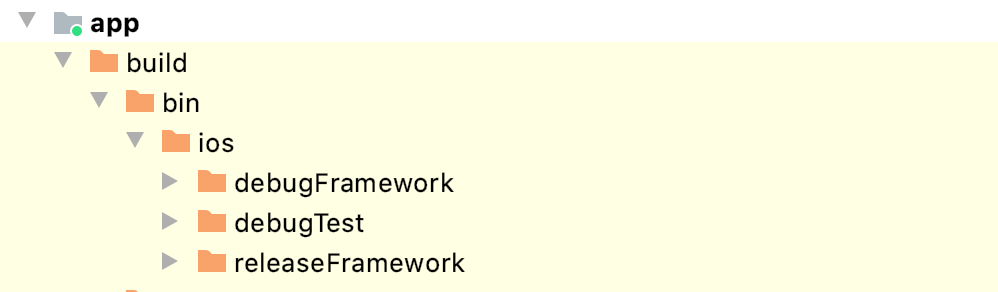
После выполнения сборки создастся фреймворк в app/build/bin/ios:
Intelij IDEA автоматически создает в gradle файле код для генерации, подключения и встраивания фреймворка в IOS проект:
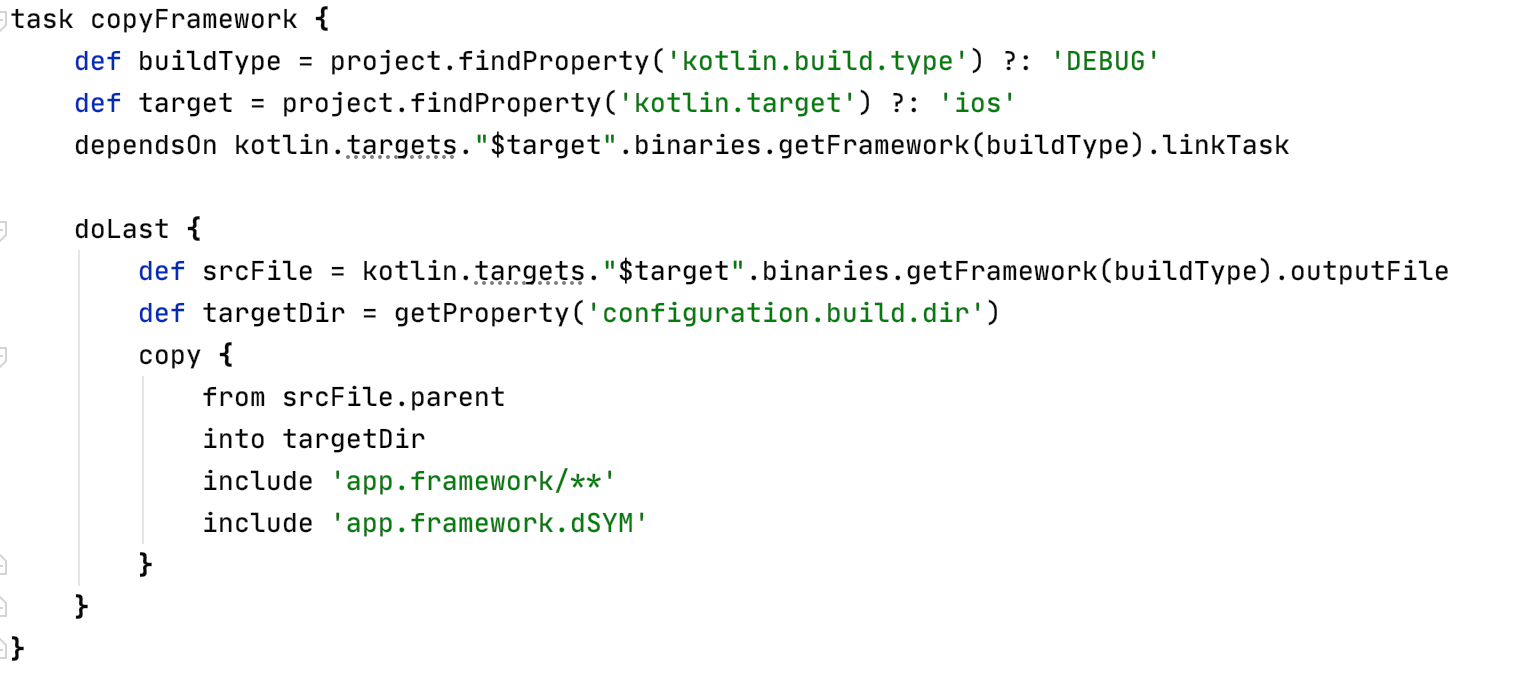
При ручной настройке проекта (например, через Android Studio) этот код потребуется указать самостоятельно.
После синхронизации gradle iOS проект готов к запуску и проверке с помощью XCode.
Проверяем, что у нас получилось. Открываем проект iOS через iosApp.xcodeproj:
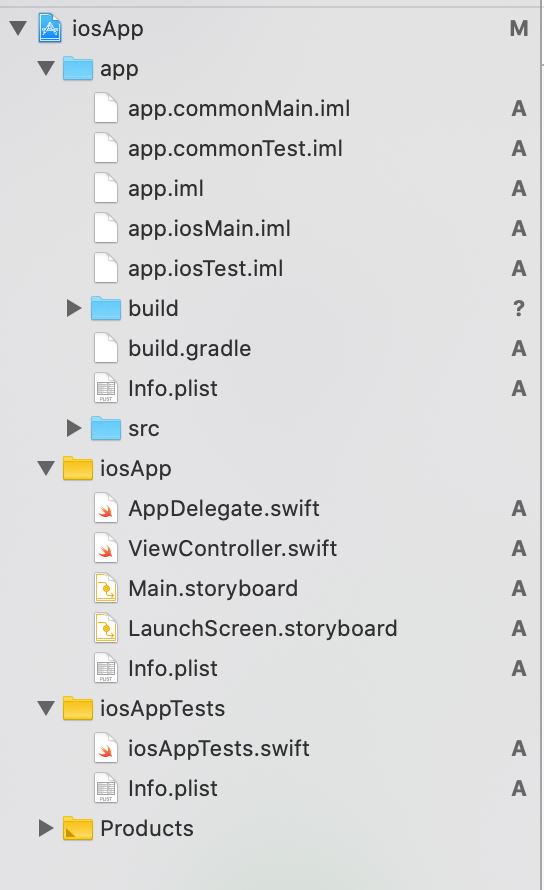
Проект имеет стандартную структуру, за исключением раздела app, где мы получаем доступ к коду наших модулей на Kotlin.
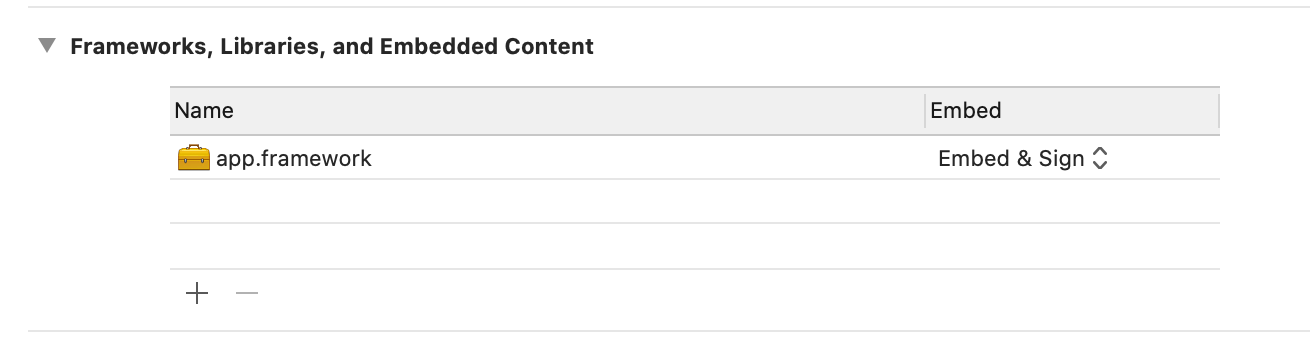
Фреймворк действительно подключен автоматически во всех соответствующих разделах проекта:
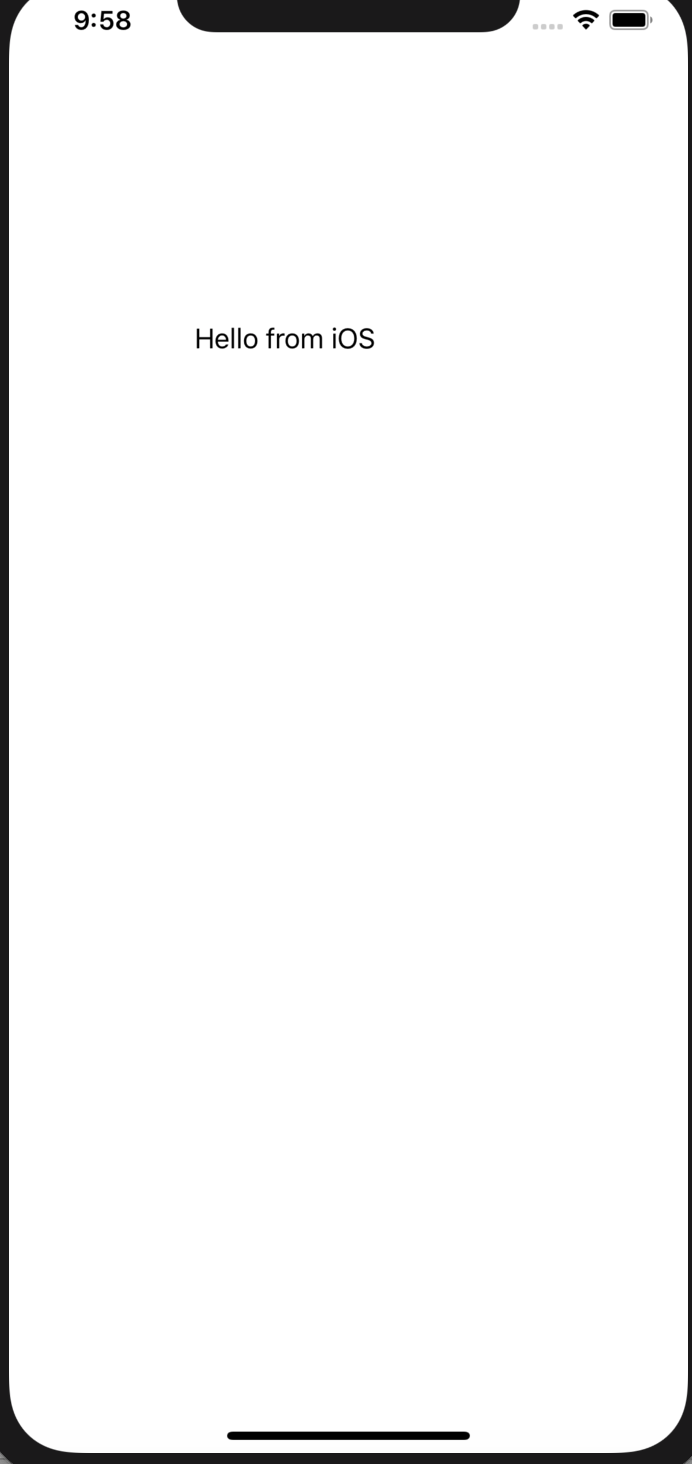
Запускаем проект на эмуляторе:
Теперь разберем код самого приложения на базовом примере.
Используемую в проекте бизнес-логику можно разделить на:
- переиспользуемую (общую);
- платформенную реализацию.
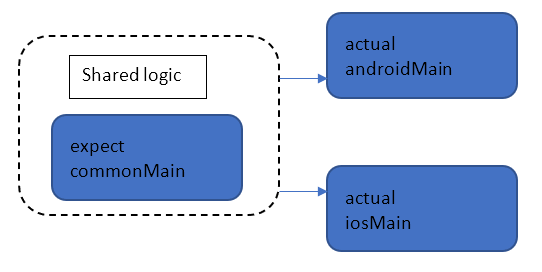
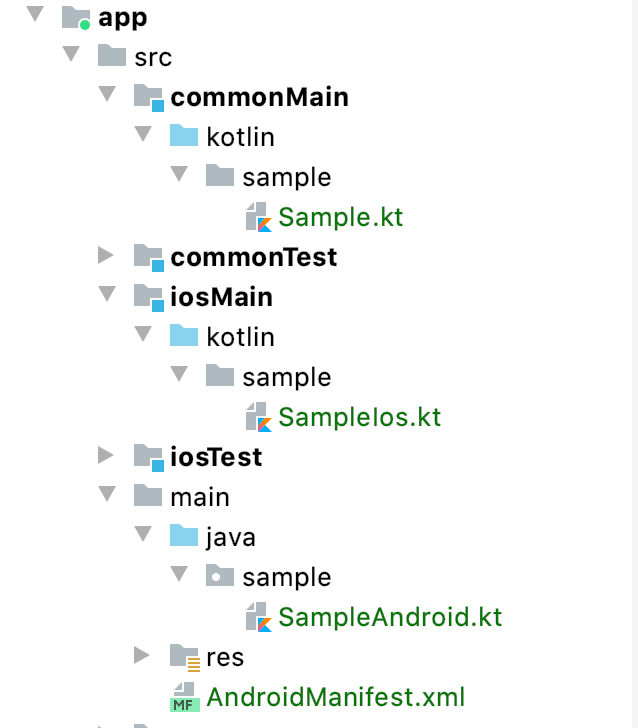
Переиспользуемая логика располагается в проекте commonMain в каталоге kotlin и разделяется на package. Декларации функций, классов и объектов, обязательных к переопределению, помечаются модификатором expect :
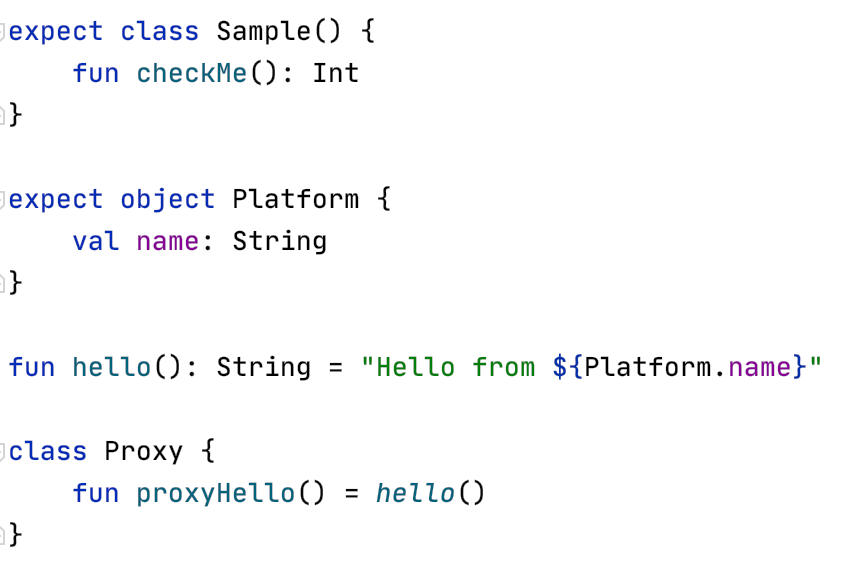
Реализация expect -функционала задается в платформенных модулях и помечается модификатором actual :
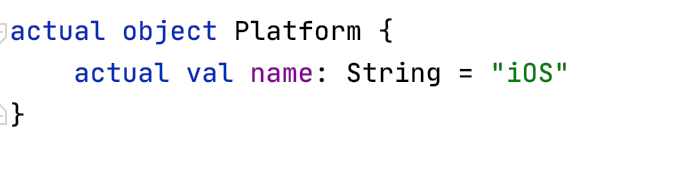
Вызов логики производится в нативном проекте:

Все очень просто.
Теперь попробуем по тем же принципам сделать что-то посложнее и поинтереснее. Например, небольшое приложение для получения и отображение списка новостей для iOS и Android.
Приложение будет иметь следующую структуру:
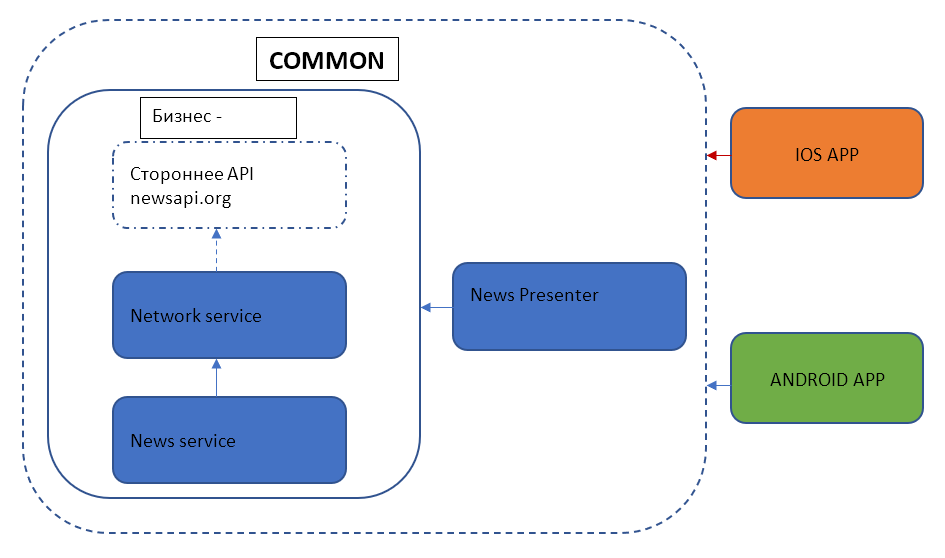
В общей части (Common) расположим бизнес-логику:
- сетевой сервис;
- сервис для запросов новостей.
В модулях iOS/Android приложений оставим только UI компоненты для отображения списка и адаптеры. iOS часть будет написана на Swift, Android – на Kotlin. Здесь в плане работы не будет ничего нового.
Организуем архитектуру приложений по простому паттерну MVP. Презентер, обращающийся к бизнес-логике, также вынесем в Common часть. Также поступим и с протоколом для связи между презентером и экранами UI:
Начнем с бизнес-логики. Т.к весь функционал будет в модуле common, то мы будем использовать в качестве библиотек решения для Kotlin Multiplatform:
1. Ktor – библиотека для работы с сетью и сериализации.
В build.gradle (:app) пропишем следующие зависимости:
Также добавим поддержку плагина сериализации:
2. Kotlin Coroutines – для организации многопоточной работы.
При добавлении зависимости в iOS проект обратите внимание, что версия библиотеки должна быть обязательно native-mt и совместима с версией плагина Kotlin multiplatform.
При организации многопоточности с помощью Coroutines необходимо передавать контекст потока ( CoroutineContext ), в котором логика будет исполняться. Это платформозависимая логика, поэтому используем кастомизацию с помощью expect / actual .
В commonMain создадим Dispatchers.kt, где объявим переменные:
Реализация в androidMain создается легко. Для доступа к соответствующим потокам используем CoroutineDispatchers Main (UI поток) и Default (стандартный для Coroutine ):
С iOS труднее. Та версия Kotlin Native LLVM компилятора, которая используется в Kotlin Multiplatform, не поддерживает background очереди. Это давно известная проблема, которая к сожалению, еще не исправлена
Поэтому попробуем обходной маневр как временное решение проблемы.
Мы создаем свой CoroutineDispatcher , где прописываем выполнение логики в асинхронной очереди dispatch_async .
Также нам понадобится свой scope для работы сетевого клиента:
iOS
Android
Применим это при реализации сетевого клиента на Ktor:
Парсинг реализуем с помощью сериализатора типа KSerializer . В нашем случае это NewsList.serializer() . Пропишем реализацию в сервисе новостей:
Вызывать бизнес-логику будем в презентере. Для полноценной работы с coroutines нам надо будет создать scope:
и добавить его в презентер. Вынесем в базовый класс:
Теперь создадим презентер NewsListPresenter для нашего модуля. В инициализатор передадим defaultDispatcher :
Обратите внимание! Из-за особенностей текущей работы Kotlin Native с многопоточностью в IOS работа с синглтонами может привести к крашу. Поэтому для корректной работы надо добавить аннотацию @ThreadLocal для используемого объекта:
Осталось подключить логику к нативным IOS и Android модулям и обработать ответ от Presenter:
Запускаем сборку common модуля gradle wrapper, чтобы сборки обновились. Проверяем работу приложений:
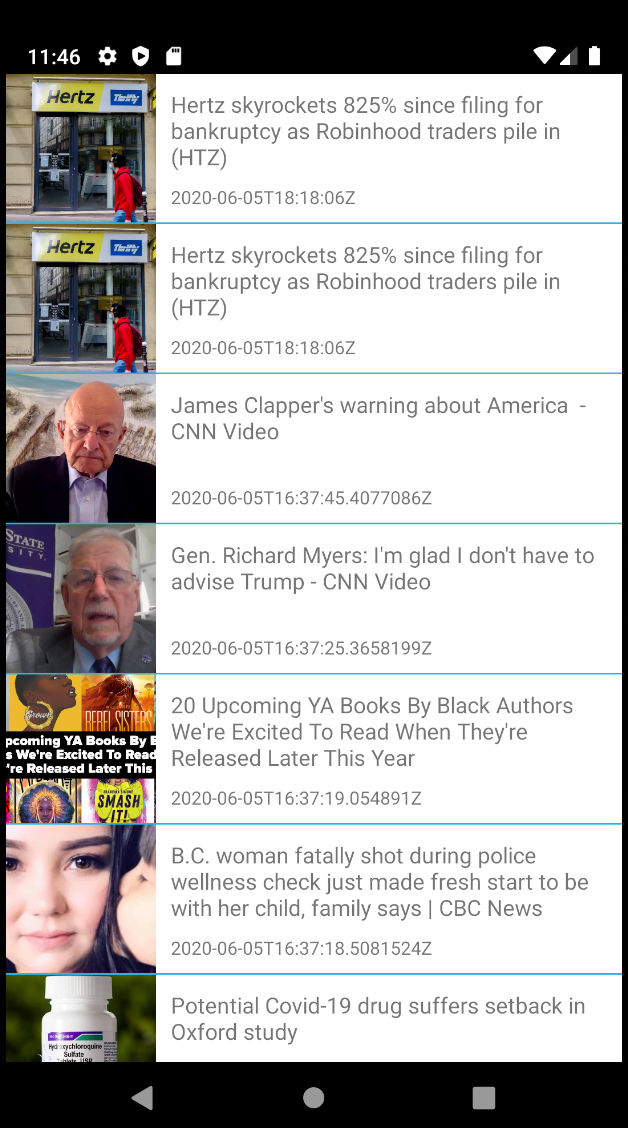
Готово. Вы великолепны.
Оба наши приложения работают и работают одинаково.
Информационные материалы, которые использовались:
Источник


