- Modifying the bundle identifier, package name & app display name in a Flutter app
- Changing the app display name
- Android
- Bundle ID and Package Name
- Changing package name for the Android platform
- Change Bundle Identifier for iOS Platform
- Alternative
- Error Generating APK release AAPT: error: resource string/app_name #24587
- Comments
- maelfosso commented Apr 24, 2019
- Coding Questions
- https://stackoverflow.com/questions/tagged/react-native
- react-native-bot commented Apr 24, 2019
- Santu1245 commented Apr 27, 2019
- wcisco17 commented Aug 1, 2019
- wcisco17 commented Aug 1, 2019 •
- How to Get App Package Name on Android [3 Methods]
- Method 1: Get Android App Package Name via Play Store URL
- On PC
- On Mobile
- Method 2: Get Android App Package Name via a Third-Party App
- Method 3: Get Android App Package Name via ADB Commands
- About Chief Editor
- Sadique Hassan
- Методы лечения различных ошибок в Android Studio при разработке проекта
Modifying the bundle identifier, package name & app display name in a Flutter app


This tutorial is part of the Flutter app build and release series. Here is list of all articles in this series.
- Set app icons in Flutter
- Modifying the bundle identifier, package name & app display name in a Flutter app
Android apps on the play store have a unique package name and iOS apps have bundle identifier that serves the same purpose. Often we create our project with some other package and name and before publish we need to change it so here is a guide for you to change the app display name as well as package/bundle id for both android and iOS platforms.
Changing the app display name
Android
That’s all, your new app name will be displayed on the user’s phone now.
Bundle ID and Package Name
Changing package name for the Android platform
This needs to be changed in 4 places.
This file will be found at 3 places. Repeat the replacement for all three files.
2. App level build.gradle
android/app/src/main/kotlin/your — -package/ MainActivity.kt
If your app is using java instead of kotlin, it will be MainActivity.java within java folder.
Change the top package statement
4. The directory containing the MainActivity.kt file
The file from above step will be within com/example/domainname. You want to replace the ‘ example’ with your domain name.
Right click on ‘ example’ folder. Go to Refractor → Rename.
Change the name and click Refractor.
Now the new path should be like com/newpackage/app/
That is all. Now your android app is ready with new package.
Change Bundle Identifier for iOS Platform
iOS app has the bundle identifier set in Info.plist file as value for the key CFBundleIdentifier. First check and make sure that this key in Info.plist file points to a variable like this:
So now we will find this variable and set its value. It will be present in the following file:
project/ios/Runner.xcodeproj/ project.pbxproj file
Find the PRODUCT_BUNDLE_IDENTIFIER variable and change its value to the identifier you want to use.
This variable will be present in at least 3 places. So, you must run a search and replace all occurrences.
That’s all for the iOS app.
Now just run the following command in your terminal and you are done.
Alternative
Don’t like changing files in such a way? An alternative way would be to use this package.
Источник
Error Generating APK release AAPT: error: resource string/app_name #24587
Comments
maelfosso commented Apr 24, 2019
Coding Questions
I get stuck when trying to generate APK.
I still got this error and I dont know why
https://stackoverflow.com/questions/tagged/react-native
I was on stackoverflow but no response was good until now
How to solve this please ?
The text was updated successfully, but these errors were encountered:
react-native-bot commented Apr 24, 2019
We are automatically closing this issue because it does not appear to follow any of the provided issue templates.
Santu1245 commented Apr 27, 2019
As the Error Message says:
Android resource linking failed the files that are present in the values folder might not properly be linked up with AndroidManifest files
Check if the files present in values folder string, style, color, etc are properly mapped in AndroidManifest.xml
If no, then Map it.
Then run the following commands:
cd android
./gradlew clean
cd ..
and then run:
react-native run-android —variant=release
wcisco17 commented Aug 1, 2019
What do you mean by «Map it»?
wcisco17 commented Aug 1, 2019 •
I’m having the same issue, it’s been two days now, I’ve tried running gradlew clean and even going as far to delete my build folder.
When I first started the app it worked fine, but when I close out of it that’s when it becomes an issue
and this type of error would always pop up:
Источник
How to Get App Package Name on Android [3 Methods]
In this guide, we will share three different methods to get the package name of all the installed apps on your Android device. The apps installed on your device are labeled via two different methods. The first one is the general name that you usually come across such as Facebook, WhatsApp, etc. These are the name that the everyday users deals with and searches for on Play Store.
On the other hand, there’s an associated application ID or app package name, which acts as a unique identifier for each app. For example, Facebook has the package name com.facebook.katana and WhatsApp has com.whatsapp. These are the names used by backend people and developers alike. Furthermore, while you may come across many apps on the Play Store by the name of Facebook, but none could have the com.facebook.katana as their package.
So if you have ever any doubt regarding the app’s authenticity, then you may count on this factor. With that said, how could you get hold of the package name of all the installed apps on your Android device? Well, there are three different methods for the same, and in this guide, we will make you aware of all these three approaches. So without further ado, let’s get started.
Table of Contents
Method 1: Get Android App Package Name via Play Store URL
This method is extremely easy to execute. However, if you are looking to get the name of various installed apps in one go, then it would require quite a lot of manual effort. But for a few apps, this should be your go-to method. Here’s how to use it:
On PC

- First off, head over to the Play Store website on your PC.
- Now search for the desired app (as an example, let’s go with Facebook)
- Then head over to its search bar and check out its URL, it will be something along this line:
- As an example, in the case of Facebook, the URL will be
- Now the portion after be the app’s package name. So for Facebook, it turns out to be com.facebook.katana.
So this was the first method to get the app package name via Play Store and PC. Let’s see how to try out this Play Store trick on your phone.
On Mobile
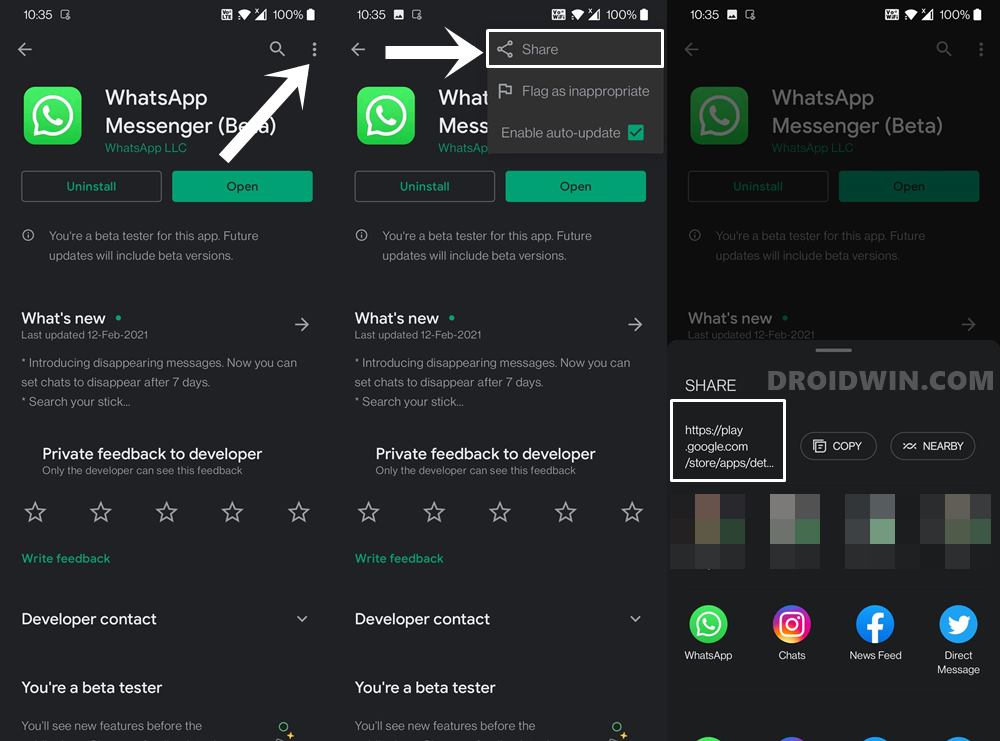
- Open the Play Store app on your device and search for the desired app (let’s say WhatsApp).
- Under the app listing’s page, tap on the overflow icon situated at the top right and select Share.
- Now just share/save this URL anywhere you wish. The URL will be of the same format as mentioned above, i.e.
- As an example, in the case of WhatsApp, the URL turns out to be
- As before the app package name will be the portion after So for WhatsApp, it turns out to be com.whatsapp.
The other method involves opening the Play Store website on your smartphone browser, changing its view to Desktop Mode, and then getting hold of the URL. With that, we round off this first method to get the package name of all the installed apps on your Android device. Let’s now turn our attention towards the other two methods.
Method 2: Get Android App Package Name via a Third-Party App
The benefit of this method is the fact that you require minimal effort. Furthermore, it is able to display both the user installed as well as system apps. The UI is also user-friendly. However, I have never been in favor of using third-party apps and giving them access to my device, unless it is of paramount importance. With that said, if you wish to try it out, then follow the below instructions:

- To begin with, download the App Package Viewer 2.0 from Play Store.
- Then launch it and select the desired app from the list.
- Now tap on that app’s name and you should get its associated package name.
That’s it. This is perhaps the easiest method to get the package name of all the installed apps on your Android device. Now let’s check out the third and final method to carry out this task.
Method 3: Get Android App Package Name via ADB Commands
The benefit of this method is the fact that apart from getting the app’s package name, you could even remove the user-installed and system-installed apps on your device via these ADB Commands. Without Root! On the flip side, this method requires a few prerequisites and some level of technicalities as well. But if you are ready to challenge your inner-geek, then this method is tailored made for you. Follow along.
- To begin with, download and install the Android SDK Platform Tools on your PC. These are the official ABD binary files provided by Google.
- Extract its content to any convenient location on your PC and you should get the platform-tools folder.
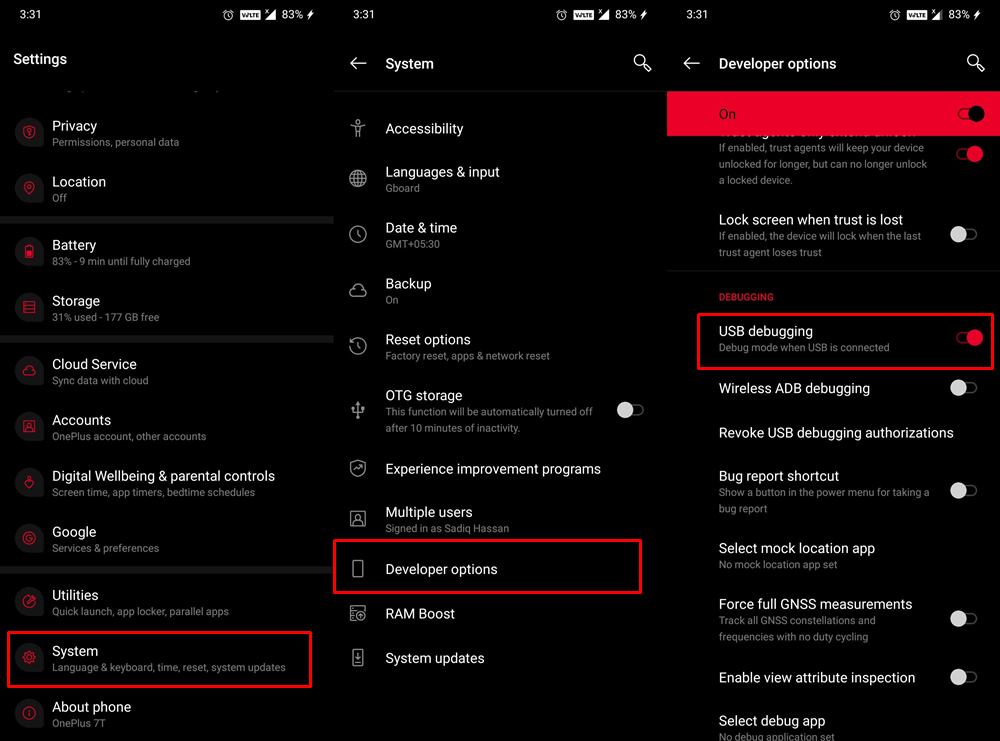
- Now head over to your Android device and enable USB Debugging. This will make your device recognizable by your PC in ADB mode. So head over to Settings > About Phone > Tap on Build Number 7 times > Go back to Settings > System > Developer Options > Enable USB Debugging.

- When that is done, connect your device to the PC via USB cable. Make sure USB Debugging is enabled.
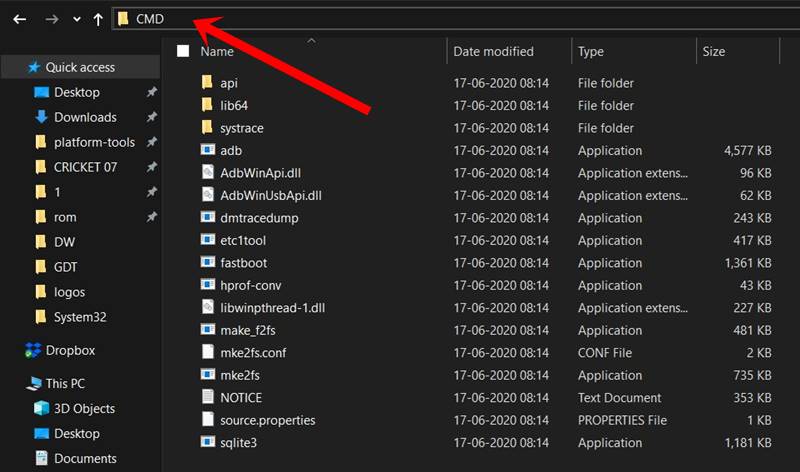
- Then head over to the platform-tools folder, type in CMD in the address bar, and hit Enter. This will launch the Command Prompt.
- Now type in the below command in the CMD window and hit Enter:
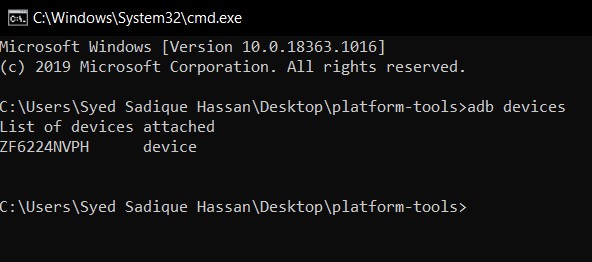


Then type in the below command and you should get a list of all the installed apps:
 List of Apps on my OnePlus 7T. View Full-Size Image
That’s it. With this, we conclude the guide on how to get the package name of all the installed apps on your Android device. We have shared three different methods for the same, do let us know in the comments which one you ultimately settled for.
About Chief Editor
Sadique Hassan
A technical geek by birth, he always has a keen interest in the Android platform right since the birth of the HTC Dream. The open-source environment always seems to intrigue him with the plethora of options available at his fingertips. “MBA by profession, blogger by choice!”
Источник
Методы лечения различных ошибок в Android Studio при разработке проекта
Сегодня хотел бы поделиться своим анализом и способами лечением разных ошибок при разработке своего продукта в Android Studio. Лично я, не раз сталкивался с различными проблемами и ошибками при компиляции и/или тестировании мобильного приложения. Данный процесс, всегда однообразный и в 99% случаев и всегда нужно тратить n-колличество времени на его устранение. Даже, когда ты уже сталкивался с данной проблемой, ты все равно идешь в поисковик и вспоминаешь, как же решить ту или иную ситуацию.
Я для себя завел файлик, в котором отметил самые частые ошибки — потратив на это несколько часов и перечислил самые популярные ошибки (в дальнейшем планирую просто их запомнить), чтоб сократить свое время в дальнейшем.
Итак, начну по порядку с самой распространенной проблемы и дальше буду перечислять их по мере появления:
1) Если подчеркивает красным код, где используются ресурсы: R. — попробовать (но вероятно не поможет): Build -> Clean Project.
В принципе на Build -> Clean Project можно не терять времени, а лучше всего — слева переключиться на Project, открыть каталог .idea, затем каталог libraries и из него удалить все содержимое. Затем нажать кнопку Sync Project. А затем (если все еще красное, но скорее всего уже будет все ок ) Build -> Clean Project.

2) После внезапного выключения компьютера, после перезапуска может быть во всех проектах весь код красным. Перед этим может быть ошибка: Unable to create Debug Bridge: Unable to start adb server: Unable to obtain result of ‘adb version’. Есть три решения — первое помогло, второе нет (но может быть для другого случая), а третье — не пробовал:
а) File — Invalidate Caches/Restart — Invalidate and Restart
б) Закрыть студию. В корне папки проекта удалить файл(ы) .iml и папку .idea. Вновь запустить студию и импортировать проект.
в) Нажать Ctrl-Alt-O и запустить оптимизацию импорта.
Кстати, adb сервер можно проверить на версию (и работоспособность) и затем перезапустить:
3) Если Android Studio выдает приблизительно такую ошибку: Error:Execution failed for task ‘:app:dexDebug’.
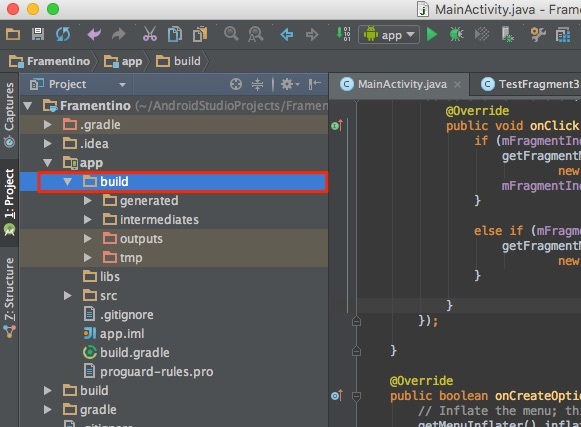
Надо слева переключиться на опцию Project, найти и удалить папку build которая лежит в папке app, т.е. по пути app/build. Затем перестроить весь проект заново: Build -> Rebuild Project.
Такое же решение если ошибка типа: «не могу удалить (создать) папку или файл» и указан путь, который в ведет в app/build. Тоже удаляем папку build и ребилдим проект.
4) В сообщении об ошибке упоминается heap — виртуальная память. А ошибка обычно вызвана ее нехваткой, т.е. невозможностью получить запрашиваемый объем. Поэтому этот запрашиваемый объем надо уменьшить, т.е. переписать дефолтное значение (обычно 2048 MB которое можно изменить в настройках), на меньшее 1024 MB.
В файле проекта gradle.properties пишем:

5) Android Studio пришет примерно такую ошибку: Plugin is too old, please update to a more recent version, or set ANDROID_DAILY_OVERRIDE environment variable to «83648b99316049d63656d7276cb19cc7e95d70a5»
Возможные причины (кроме необходимости регулярного обновления SDK):
а) Загруженный проект был скомпилирован с помощью уже несовместимого старого gradle плагина. В этом случае надо найти и подключить в своем build.gradle проекта этот более старый плагин. т.е. попробовать более старые версии, например: 1.1.3 (часто именно 1.1.x и подходит).
Найти все версии можно здесь.
б) Если в build.gradle проекта используется beta-версия плагина — это означает, что срок ее истек. Посмотреть последние релизы (продакшн и бета) можно также здесь:
6) Иногда при подключении сторонних библиотек могут дублироваться некоторые файлы (обычно связанные с лицензированием). В сообщении будет что-то содержащее слова: duplicate files. Решение — надо посмотреть в сообщении об ошибке или в документации подключенной сторонней библиотеки — какие именно файлы стали избыточными, и перечислить их в build.gradle модуля для исключения (exclude) из билда.
Это делается в директиве packagingOptions (которая, в свою очередь, находится в директиве android).
Источник


