- Android ViewOverlays — Simple Layering
- Setting Up Our Sandbox
- Example: Video Thumbnail
- Example: Bookmarked Item
- Conclusion:
- Corey Johnson
- ShapeableImageView — Material components for android
- Important attributes of ShapeableImageView
- Imageview in circle shape
- Corner Radius Imageview
- Corner cut imageview
- Selected Corner Radius / Cut imageview
- Overlay Multiple Images in a Single ImageView in Android
- Step by Step Implementation
- bjoernQ / AndroidManifest.xml
- Android-приложение поверх других приложений
Android ViewOverlays — Simple Layering

Jan 23, 2019 · 3 min read
If you’ve ever needed to create a layered image, you might be tempted to create multiple ImageViews and load each layer into their respective ImageViews. Or you might have tried to do some fancy Bitmap composition using a Canvas.
There is an easier way! ViewOverlay and ViewGroupOverlay! Added in API 18, these two classes make things relatively simple in terms of setting up an overlaid image. I’ll show two examples of static image overlays, but ViewOverlay can also be extremely useful in animating views (see Suneet Agrawal’s post here for a nice example).
Setting Up Our Sandbox
Create a new Android project in Android Studio, match the minimum SDK version to what your app is, or at the very least API 18. We want to isolate what we’re trying to do in a small project so we have greater flexibility to try our approach out and better understand what we’re doing.
I set my main activity up to have an ImageView and two buttons to toggle between the video thumbnail and the bookmarked item.
I added the following drawables to my project:

Don’t forget to add vectorDrawables.useSupportLibrary = true to your app module’s gradle file.
Example: Video Thumbnail
Add some code to populate the target ImageView with the video thumbnail resource. When you press the button you should be able to see it.
The next step we need to take is creating the LayerDrawable for the overlay. We can create a new ImageView and populate it with our resource, but that’s not what we’re trying to do!
- Create a new Drawable Resource file, name it “ic_play_layered.xml”
- Change the root element from selector to layer-list
- I’d add two drawables, the first is a color drawable that is partially transparent to make the play button pop. The second is the play button:
- Create a function to add the overlay drawable onto the ImageView in MainActivity
- Call this overlayImage function in the button press and pass in the ic_play_layered resId
Note: You can adjust the Rect declaration to pull from whatever width and height you’d like

Example: Bookmarked Item
Okay; so a video thumbnail isn’t too bad, but what if I don’t want something overlaying the whole image? Well, there’s a solution for that too!
- Create a new Drawable Resource. Call this one “ic_bookmark_layered.xml”
- We’re going to set the padding and gravity on the item we add to the layer list.
- To fix the issue of drawables floating off the images, I adjusted my ImageView to be wrapContent for width & height as opposed to a fixed 300dp x 300dp. If you don’t have this issue, don’t worry about it!
- Call the addOverlay function with R.drawable.ic_bookmark_layered as the resId.
Your end result should look something like this due to the padding:

Conclusion:
Using layer drawables can help reduce the complexity of overlaying two images significantly, and utilizes functionality already provided by Android.
I’m providing two rough examples, but feel free to reach out with questions or comments. I’m happy to help if I can!
Corey Johnson
I love to learn; and I love finding ideas hidden in plain sight. Simplicity is key! Android, Rust, C++ are my current tools of choice!
Источник
ShapeableImageView — Material components for android

Do you want to change the shape of your ImageView in android ? . If yes then its the right place to look into it. Material Design 1.2.0 introduced ShapeableImageView that draws the image with the provided Shape in your imageview.
By using ShapeableImageView, you can change the shape of your image to circle, diamond, etc. Also, you can set corner radius to your imageview. You can do much more by using this ShapeableImageView with minimal code.
To work with ShapeableImageView in your android project, you need to add dependency material design 1.2.0 or higher.
Sliders — Material Components also introduced in material design 1.2.0.
Important attributes of ShapeableImageView
app:shapeAppearanceOverlay — This is working as a ThemeOverlay. ShapeAppearanceOverlay apply the defined changes without affecting the active theme.
The key to the overlay behavior is the empty parent attribute. This is what causes the overlay behavior. Lets create imageview in different shapes.
In the above style, cornerSize only affected by the overlay. remaining properties same as active theme.
cornerFamily — corner family to be used for all four corners
cornerFamilyTopLeft — corner family to be used for the top left corner
cornerFamilyTopRight — corner family to be used for the top right corner
cornerFamilyBottomRight — corner family to be used for the bottom right corner
cornerFamilyBottomLeft — corner family to be used for the bottom left corner
cornerFamily is a enum type and the supported values are rounded, cut.
cornerSize — corner size to be used for all four corners
cornerSizeTopLeft — corner size to be used for the top left corner
cornerSizeTopRight — corner size to be used for the top right corner
cornerSizeBottomRight — corner size to be used for the bottom right corner
cornerSizeBottomLeft — corner size to be used for the bottom left corner
Imageview in circle shape

as mentioned above, first we need to set the app:shapeAppearanceOverlay. In the overlay we need to mention the corner radius size to 50% to make the imageview as circle.
In your style.xml add,
If you want to add stroke to circle imageview, you can add stroke attributes in your ShapeableImageView.

Dynamically using Kotlin
set the corner radius in dimens.xml
Corner Radius Imageview

we need to set the app:shapeAppearanceOverlay. In the overlay we need to mention the corner radius size to 10% to set the corner radius.
In your style.xml add,
same way, If you want to add stroke to corner radius imageview, you can add stroke attributes in your ShapeableImageView.

Dynamically using Kotlin
set the corner radius in dimens.xml
Corner cut imageview

For the corner cut imageview, we are going to use cornerFamily attribute.
by default, cornerFamily will be rounded. In our case, we need it to be cut. So we are changes cornerFamily to cut.
By changing the cornerSize, we can make different shapes like diamond, hexagon, etc.
Dynamically using Kotlin
setAllCorners() used to set both cornerFamily and cornerRadius.
Selected Corner Radius / Cut imageview

To set corner radius for the selected position, we need to use both cornerSize and cornerFamily for the particular position.
For example, check the below example to set the corner radius for the right top position of the imageview.
for the cut corner radius in style.xml :
same way for the multiple corners, we need to add cornerRadius and cornerFamily.

Dynamically using Kotlin
setTopRightCorner() used to set the corner radius for the top right corner. To set multiple corners we can use setBottomLeftCorner(), setTopLeftCorner() and setBottomRightCorner() .
Thanks for reading.
You can download the example in github.
Источник
Overlay Multiple Images in a Single ImageView in Android
In Android, an image can be displayed inside an ImageView in the layout. ImageView accepts only a single image at a time as input. However, there can be a need to display two or more images in the same ImageView. Let us say, our application shows the status of airplane mode. When airplane mode is enabled, it must display the image of an airplane and when it is disabled, it must overlay the same image with something like a cross or block symbol. As ImageView accepts only a single input source, it is impossible to set two images as the source. So, in such a case, we will have to create a resource that consists of a list of images and set this resource as the source attribute of the ImageView. So, through this article, we will show you how you could create a resource containing multiple images and set it in the ImageView.
Step by Step Implementation
Step 1: Create a New Project in Android Studio
To create a new project in Android Studio please refer to How to Create/Start a New Project in Android Studio. We demonstrated the application in Kotlin, so make sure you select Kotlin as the primary language while creating a New Project.
Step 2: Import images of your choice in the drawable folder
We imported two vector assets from the local clip art. Store them in the drawable folder.


Step 3: Create a Drawable Resource File with root element as layer-list (layer.xml)
Create a drawable resource file inside the drawable folder with the root element as a layer list. Give it a name like a layer. The generated file has an extension XML.

Step 4: Add items (imported images) to the layer.xml
Add items in such a way that the next item overlaps the previous one.
Источник
bjoernQ / AndroidManifest.xml
This file contains bidirectional Unicode text that may be interpreted or compiled differently than what appears below. To review, open the file in an editor that reveals hidden Unicode characters. Learn more about bidirectional Unicode characters
| xml version = » 1.0 » encoding = » utf-8 » ?> |
| manifest xmlns : android = » http://schemas.android.com/apk/res/android « |
| package = » de.mobilej.overlay « |
| android : versionCode = » 1 « |
| android : versionName = » 1.0 » > |
| uses-sdk android : minSdkVersion = » 14 »/> |
| application android : label = » SystemOverlay » > |
| activity |
| android : name = » de.mobilej.overlay.Main « |
| android : exported = » true » > |
| intent-filter > |
| action android : name = » android.intent.action.MAIN »/> |
| category android : name = » android.intent.category.LAUNCHER »/> |
| intent-filter > |
| activity > |
| service |
| android : name = » de.mobilej.overlay.OverlayShowingService « |
| android : exported = » false »/> |
| application > |
| uses-permission android : name = » android.permission.SYSTEM_ALERT_WINDOW »/> |
| manifest > |
This file contains bidirectional Unicode text that may be interpreted or compiled differently than what appears below. To review, open the file in an editor that reveals hidden Unicode characters. Learn more about bidirectional Unicode characters
| package de.mobilej.overlay ; |
| import android.app.Activity ; |
| import android.content.Intent ; |
| import android.os.Bundle ; |
| public class Main extends Activity < |
| @Override |
| public void onCreate ( Bundle savedInstanceState ) < |
| super . onCreate(savedInstanceState); |
| Intent svc = new Intent ( this , OverlayShowingService . class); |
| startService(svc); |
| finish(); |
| > |
| > |
This file contains bidirectional Unicode text that may be interpreted or compiled differently than what appears below. To review, open the file in an editor that reveals hidden Unicode characters. Learn more about bidirectional Unicode characters
Источник
Android-приложение поверх других приложений
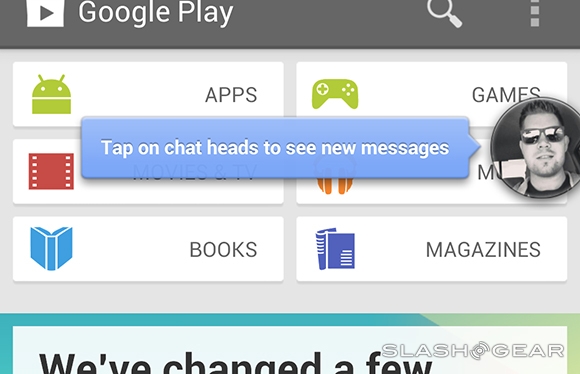
В 2013-году Facebook выпустил функцию Chat Heads для своего мессенджера, который позволяет вести переписку, не открывая сам мессенджер путем нажатия на маленькое круглое окошко, которое всегда висит на дисплее даже поверх других приложений:
Facebook одним из первых продемонстрировал реализацию «Drawing over other apps». Данную возможность разработчики сейчас используют в различных типах приложений — от боковых смарт-меню до записи экрана. В этой статье, хочу продеменстрировать процесс написания приложения-поверх-других-приложений на примере «анти-шпионской» программы Khameleon.
Для начала обозначу цели приложения, который будет реализован как пример приложения-поверх-других-приложений. Допустим нужно, чтобы рядом стоящие люди не могли с легкостью видеть контент моего смарфтона, пока я им пользуюсь. То есть необходима возможность:
- Скрывать часть дисплея, чтобы видеть только необходимую область
- Вместо скрытой области, показывать любой желаемый контент (например заданную веб страницу)
Примерно это может выглядеть так:

С функционалом приложения определились — теперь приступим к самому туториалу. Для написания приложения-поверх-других-приложений есть две самых главных составляющих:
- Service, через который ведется основной контроль и логика приложения
- Layout, который собственно и является GUI
Перед тем как реализовывать эти два компонента, необходимо получить разрешение для приложения-поверх-других-приложений. Для этого в AndroidManifest.xml необходимо добавить:
А для API > 23, т.е. Android M, нужно запросить разрешение в главном Activity:
После того как разрешение получено, укажем Layout, который нужно отобразвить на экране (многие элементы убраны для демонстрации):
В корневой RelativeLayout (по вашему усмотрению) можно поместить любые View’шки как обычно. View с нам нужен для того, чтобы показать как динамично менять размеры Layout. То есть через эту View’шку можно будет расстягивать и сжимать корневой RelativeLayout.
Как только у нас есть минимальный Layout, необходимо реализовать самый обычный Service. Единственная особенность сервиса в добавлении ранее созданного Layout:
На данном этапе наш Layout успешно отображается поверх других приложении. Теперь рассмотрим как можно динамично менять размеры нашего Layout:
Если потянуть за край Layout вверх или вниз, его высота соответственно сжимается и расширяется.
Мы рассмотрели минимальные необходимые шаги для написания приложения-поверх-других-приложений. Полный код для приложенения Khameleon, продемонстрированный выше, можно найти здесь.
Источник


