- 3 Methods To Change Or Rename Android App Package Name in Android Studio
- Method I – How to rename android app package name in Android Studio
- STEP 1
- STEP 2
- STEP 3
- STEP 4
- STEP 5
- STEP 6
- STEP 7
- STEP 8
- STEP 9
- STEP 10
- STEP 11
- Method 2 – How to change full package name of project by creating new package
- STEP 1
- STEP 2
- STEP 3
- STEP 4
- STEP 5
- STEP 6
- STEP 7
- STEP 8
- STEP 9
- STEP 10
- STEP 11
- STEP 12
- Method III – How to rename android app package name in Android Studio using existing package
- STEP 1
- STEP 2
- STEP 3
- STEP 4
- STEP 5
- STEP 6
- STEP 7
- STEP 8
- STEP 9
- STEP 10
- Настройки в Android-приложениях
- 3 Ways to Find Out Android App Package Name or Android App ID
- Find Out Android App Package Name Using ADB
- Find Out Android App Package Name Using an App
- App inspector
- Package Name Viewer 2.0
- Find Out Android App Package Name Using Play Store URL
3 Methods To Change Or Rename Android App Package Name in Android Studio

Sometimes, we make our app using the code from youtube tutorials and blogs and may forget to change the package name at the start. Yes, this happens, most of the time.
We don’t want to display other website name or Youtube channel name to be as our package name, We want a package name that defines us. If you are searching for a tutorial about how to change or rename the Android app package name in Android Studio, then this post is for you.
Method I – How to rename android app package name in Android Studio
In this example, we will change package name com.androidride.myapplication” to “com.xyz.yourapplication”.
STEP 1
- Open Android Studio project, Select package name or Java, Click the gear icon.
STEP 2
- Deselect Hide Empty Middle Packages. This breaks your folder structure into parts.
- The package is brocken down.
STEP 3
- Right Click on AndroidRide, Refactor -> Rename . You can also use Shift + F6.
A warning will appear.
STEP 4
- Click on Rename package
STEP 5
- Clear AndroidRide and put new Name in it. Here “xyz”
STEP 6
- Click Do Refactor
STEP 7
- Repeat the same process.
- Right click on myapplication,Refactor -> Rename and Rename package.
STEP 8
- Change myapplication to yourapplication
STEP 9
- Click on Do Refactor.
STEP 10
- After changing the package name, open build.gradle(module) and change Application Id
STEP 11
- change applicationid “com.androidride.myapplication” to “com.xyz.yourapplication”.
- After changing applicationid, click on sync now.
Method 2 – How to change full package name of project by creating new package
In this method, We are going to change package name “com.androidride.myapplication” to “info.xyz.yourapplication”
STEP 1
- Right click on com.androidride.myapplication package and select Refactor->Move
STEP 2
- Choose Move package “com.androidride.myapplication” to another package and click on OK.
STEP 3
Now you will get a warning dialog shows Multiple directories correspond to package com.androidride.myapplication
- Click on Yes
STEP 4
- Enter the new package name except the last level, For example. If you want to make package name as “info.xyz.yourapplication” then type “info.xyz” only, like above. Avoid the last part, here “yourapplication”.
STEP 5
- Click YES for creating new package.
STEP 6
- Click on Do Refactor. Now package name “com.androidride.myapplication” changes into “info.xyz.myapplication“.
STEP 7
Now we have to change the last package level name,
- Right click on package name -> Refactor -> Rename
STEP 8
- Click on Rename package
STEP 9
- Rename “myapplication” in to “yourapplication”.
STEP 10
- Click on “Do Refactor”
STEP 11
- Use CTRL key and select each package related to old package name and delete. You can use DELETE key in keyboard or right click after selecting old packages and click on delete option from the menu.
STEP 12
- Open build.gradle file, change applicationId and Click on sync now.
Package name successfully changed to “info.xyz.yourapplication“.
Method III – How to rename android app package name in Android Studio using existing package
This method is also same as the second method. Just like second, we change package name “com.androidride.myapplication” to “info.xyz.yourapplication“.
STEP 1
- Right click on Java and select New -> Package
STEP 2
- Next dialog box appears, choose …app\src\main\java as Destination Directory.
STEP 3
- Enter your package name, here info.xyz.yourapplication
STEP 4
- Now move old package files into new package. Here move files from “com.androidride.myapplication” to “info.xyz.yourapplication“. Just use CTRL key to select all files and drag it to new package.
STEP 5
- Open AndroidManifest.xml and change package name into “info.xyz.yourapplication“
STEP 6
- Open build.gradle (Module: app) file, change applicationId also. Change it to “info.xyz.yourapplication” and Click on Sync now.Now you might get errors. It is due to the R file import. There are two scenarios, we can do.
- Remove R file import line from both files and check the error still exists. If not then you can delete old package files now
It’s done. You have successfully changed the package name.
Otherwise, If the error still exists, do the below steps.
STEP 7
- Select R file import line just like above and press CTRL + SHIFT + R . Replace with new package name. Click on replace all.
STEP 8
- Click on replace
STEP 9
- Delete old package and related files
STEP 10
Yes, the package name is changed.
Express your thoughts below and tell your friends about this post. Thank you.
Источник
Настройки в Android-приложениях
Интересуюсь темой разработки под Android. Пишу небольшое приложение. Столкнулся с тем, что не до конца понимаю как правильно делать настройки для приложения. Немного погуглил, нашел статью, которая помогла разобраться. Решил перевести статью для русскоязычного сообщества, включив некоторые комментарии к оригиналу.
Настройки являются важной частью приложений на Android (и не только на Android — здесь и далее примечание переводчика). Это очень важно — позволять пользователям изменять настройки приложения, в зависимости от их предпочтений.
Существует два пути работы с настройками в Android — можно создать файл preferences.xml в директории res/xml, либо работать с настройками из кода. В данной статье я покажу как работать с настройками, используя preferences.xml файл.
Элементы настроек имеют следующие атрибуты:
- android:key — имя настройки, по поторому в дальнейшем можно получить ее значение
- android:title — заголовок элемента настройки
- android:summary — краткое описание элемента настройки
- android:defaultValue — значение по умолчанию
В настоящее время доступны следующие типы элементов настроек:
- CheckBoxPreference — простой чекбокс, который возвращает значения true или false.
- ListPreference — группа переключателей (radioGroup), из которых может быть выбран только один элемент. Атрибут android:entries указывает на массив со значениями в res/values/arrays.xml, а android:entryValues на массив с подписями.
- EditTextPreference — показывает диалоговое окно с полем ввода. Возвращает строку в качестве значения.
- RingtonePreference — группа переключателей с выбором рингтона.
- Preference — настройка, работающая как кнопка.
- PreferenceScreen — экран с настройками. Когда один PreferenceScreen вложен в другой, то открывается новый экран с настройками.
- PreferenceCategory — категория настроек.
Экран с настройками  | EditTextPreference |
| ListPreference | RingtonePreference |
| PreferenceScreen |
Скриншоты выше были сгенерированы при помощи следующего preferences.xml:
Атрибуты android:entries и android:entryValues у ListPreference ссылаются на @array/listArray и @array/listValues соответственно. Значения берутся из res/values/arrays.xml, который в нашем случае выглядит следующим образом:
Для того, чтобы показать пользователю экран с настройками, небходимо создать активити, унаследованное от PreferenceActivity. Пример активити:
А вызвать активити с настройками можно, нажав на кнопку на нашем главном активити:
Для того, чтобы использовать выставленными в настройках значениями, добавим метод getPrefs() в главное активити, который нужно вызывать на событии onStart(). Нужно использовать именно onStart(), а не onCreate(), для того, чтобы быть уверенным в том, что используются актуальные настройки, а не те, что были во время создания гланого активити. Наш метод getPrefs() может выглядеть примерно вот так:
Источник
3 Ways to Find Out Android App Package Name or Android App ID
The names of Android apps and APK packages differ a lot. There are times when we need to know the package name of an app or APK. In this tutorial, we’ll see how to find out Android app package name or Android app ID using 3 different app package name checker methods.
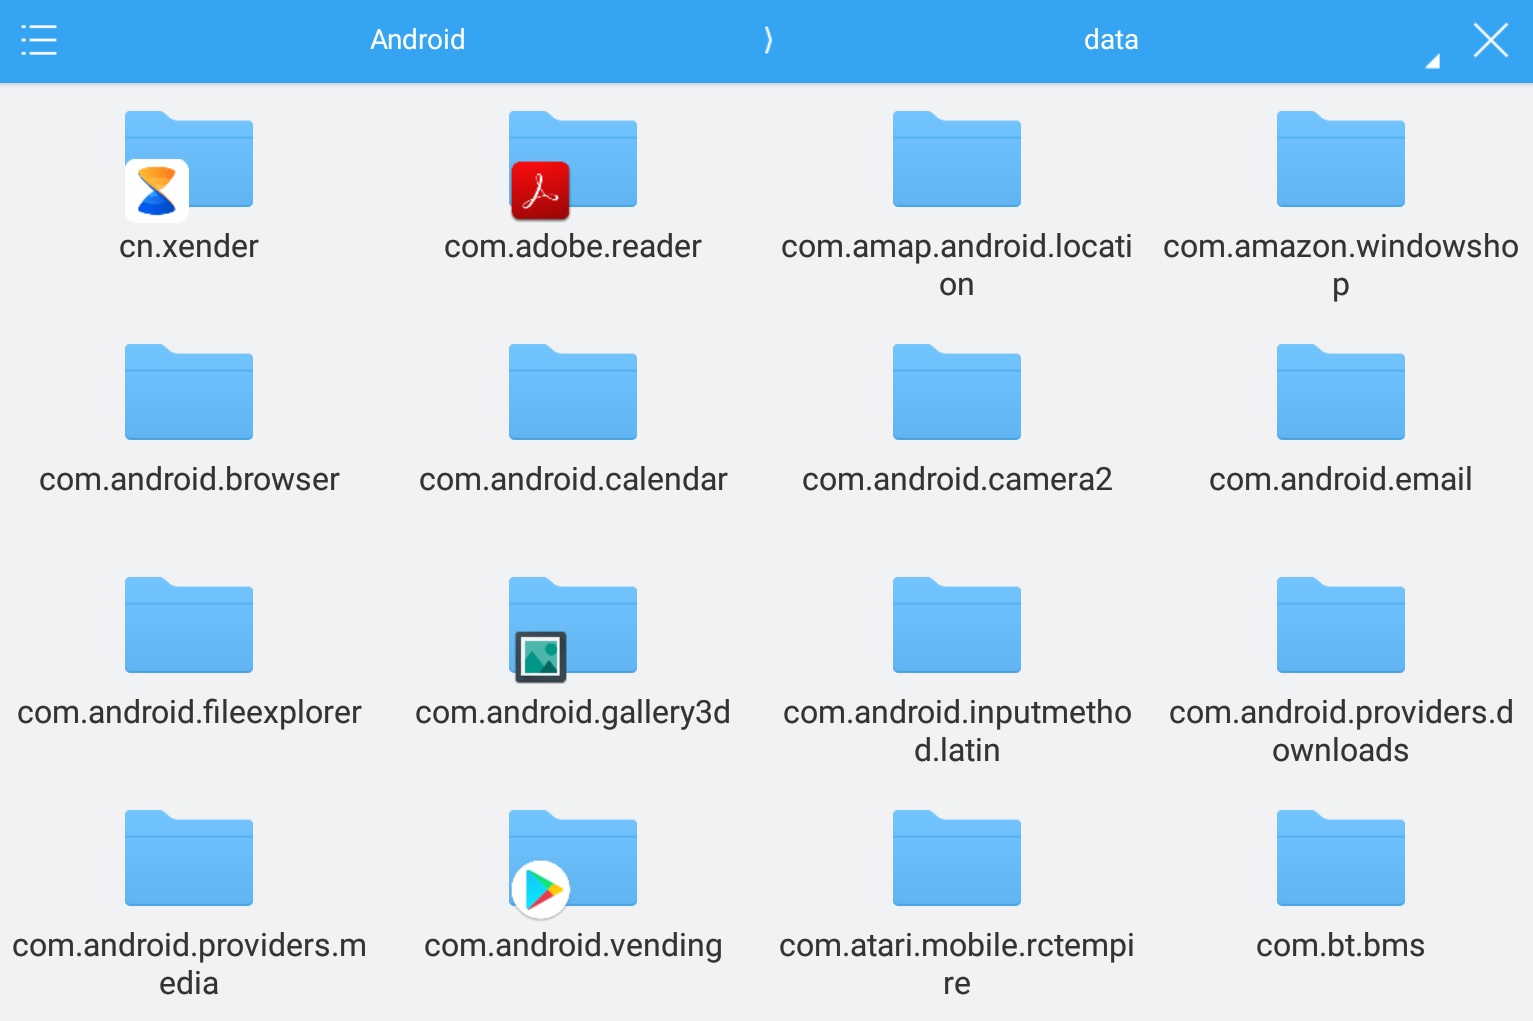
Android is based on the Linux kernel. Hence, like every other Linux operating system, android apps are installed as packages. While this doesn’t concern most users, sometimes you will want to find out the APK package name of an installed app. You’ll need the name if you’re trying to uninstall an app using ADB, for instance. An Android Package Kit, or APK, is named according to the Java naming convention since most of the OS uses the said programming language. These app package names are always written in lower case letters to avoid name conflicts with java classes.
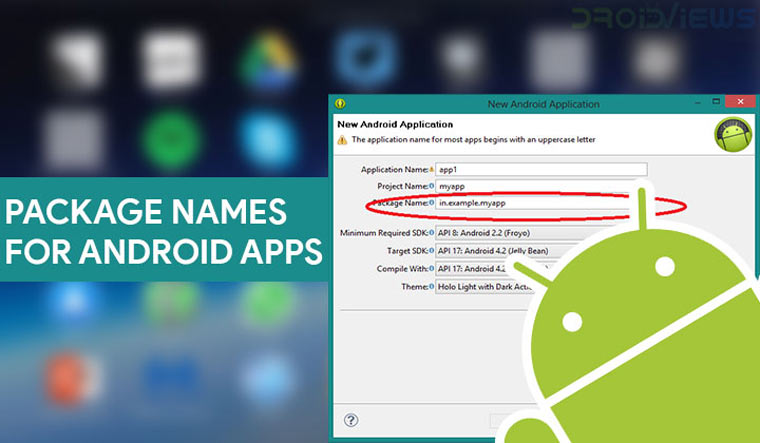
Generally, the package name of an app is in the format domain.company.application. Therefore, a package name generally begins with the top-level domain name of the organization and then the organization’s domain and then any subdomains, listed in reverse order. The organization can then choose a specific name for its package. Subsequent components of the package name vary according to an organization’s own internal naming conventions. We’ve described the naming convention for Android APK files in detail earlier.
Find Out Android App Package Name Using ADB
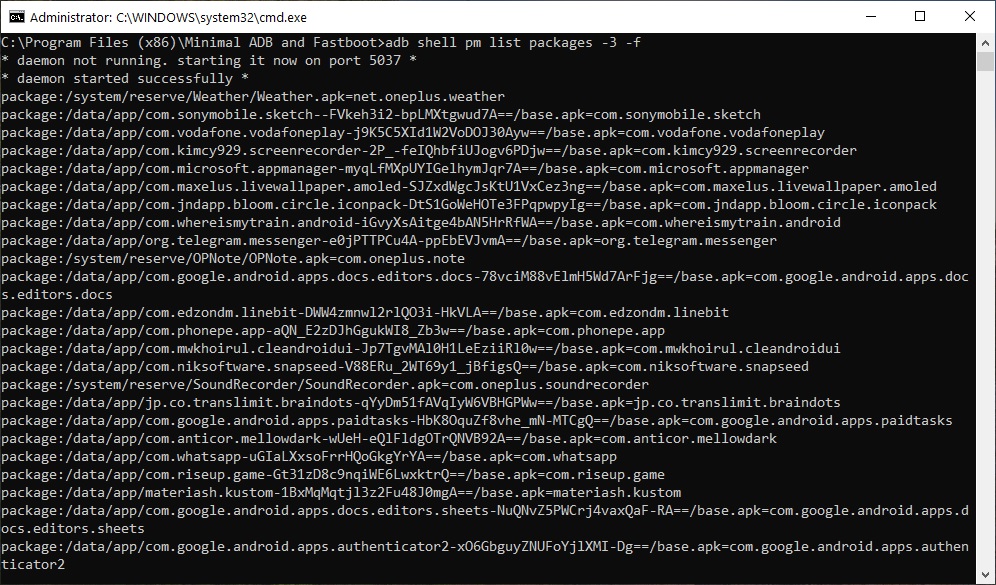
There are a few ways to find out the APK package name for Android apps and one of them is to use ADB. You can run a simple ADB shell command which will list out package names for all the installed apps on the currently connected Android device. This method works for any device that uses Android regardless of the manufacturer of the device. It even works for Amazon Fire TV since that is based on Android as well. You’ll, of course, need ADB and Fastboot installed on your PC and USB Debugging enabled on your Android device for this to work. If you don’t already have ADB and Fastboot setup, we’ve got guides to help you install it on your PC whether you use Windows, Mac, or Linux.
- With everything ready, connect your Android device to your PC with a USB cable. Run the following command to make sure your device is properly connected.
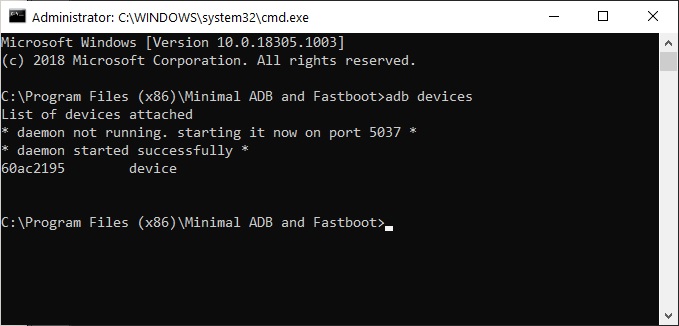
 Find Out Android App Package Name via ADB
Find Out Android App Package Name Using an App
In most cases, the package name is descriptive enough for you to be able to figure out which app it is for. But it is still a chore to go through the list, which can be pretty long if you have a lot of apps. But hey, there’s an app for that… multiple apps, actually. It’s much easier to use apps because they’re meant to be pretty user-friendly, unlike the command line.
App inspector
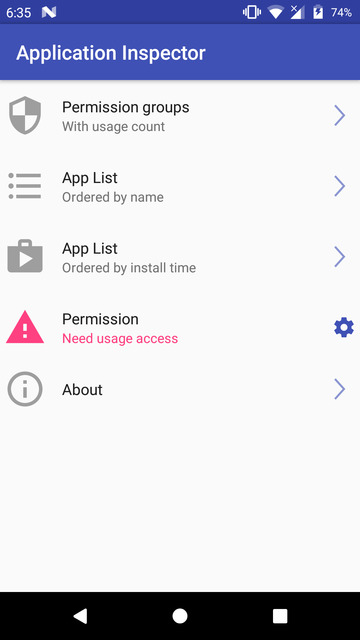
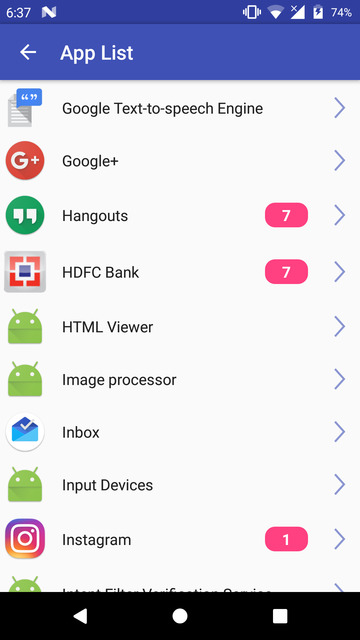
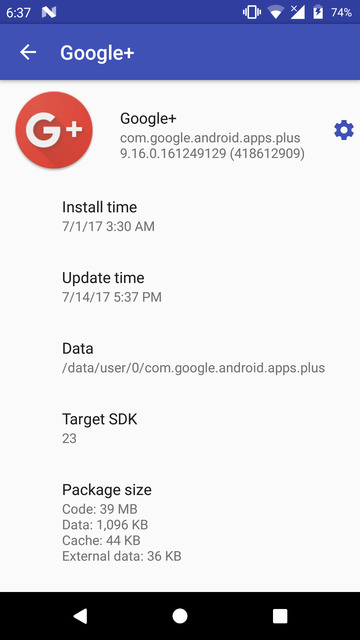
App Inspector is an app we’ve previously suggested a couple of times if you’re looking to find the package name for an installed app. The app is pretty easy to use and lists all the apps, including system and user-installed apps. The apps are in alphabetical order or ordered by install time. This makes looking for a specific app quite easier in comparison to a list of package names in a command window.
Package Name Viewer 2.0
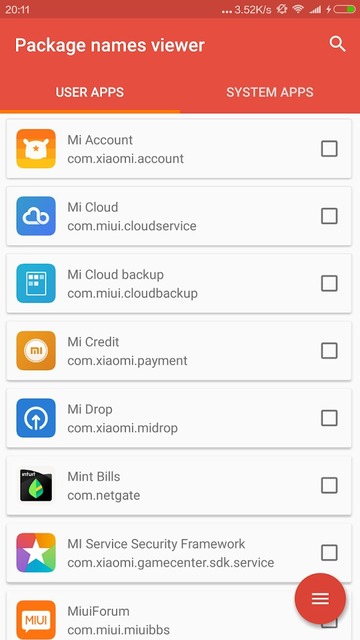
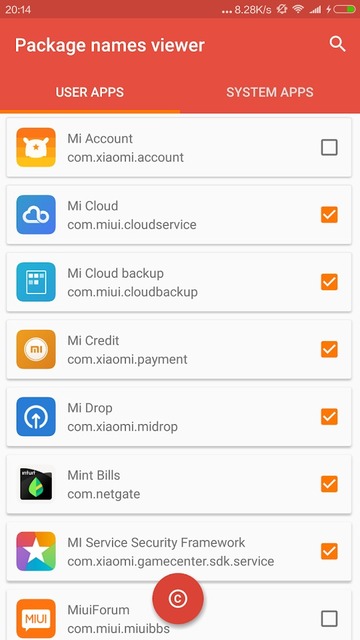
Package Viewer 2.0 is even better since it lets you search for specific apps. You don’t have to tap on an app to see its package name. The package name for each app is displayed right under its name. It also lets you copy multiple package names at once.
Find Out Android App Package Name Using Play Store URL
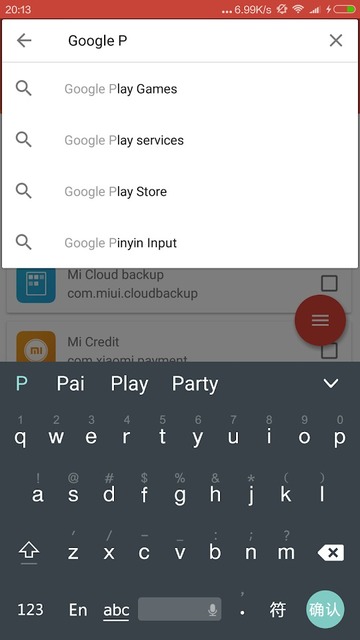
The Google Play Store uses an app’s package name in the URL to that app’s Play Store page. You can find it right after id=. You can only see the URL when you’re browsing the Play Store using a browser. If you’re using the Google Play Store app on your Android device, you can still tap on the three-dot menu with the app’s page open and choose Share> Copy to clipboard. You can then paste the copied link somewhere to see the app package name.
Источник


