- How to sideload apps on the Oculus Quest and Quest 2
- How to unlock developer mode
- With an Android phone
- SideQuest mobile
- Wiring it up
- Sideloading over Wi-Fi
- How to find your Oculus Quest’s IP address
- With a PC
- How to connect your Oculus Quest and SideQuest
- How to install apps through SideQuest
- Installing apps already on SideQuest
- Installing APKs from elsewhere
- How to launch sideloaded games
- Как устанавливать сторонние APK на Oculus Quest
- как устанавливать сторонние приложения на Oculus Quest
How to sideload apps on the Oculus Quest and Quest 2
 Source: Nick Sutrich / Android Central
The Oculus Quest family has a fantastic library of apps and games available, but you can open up new possibilities with the SideQuest marketplace. The Oculus Quest and Oculus Quest 2 are Android devices at their core so that you can put APK files onto it just like an Android phone. This means you can install anything from the Android version of Netflix to games and apps that Facebook wouldn’t normally approve of having on the official Oculus store. As of April 2021, the easiest way to use SideQuest is with an Android phone. You can always use a PC to get the job done if you don’t have one, although it’s quite a bit more complicated.
How to unlock developer mode
No matter which way you end up using SideQuest to connect to your Oculus Quest, you’ll need to enable developer mode on your Oculus Quest. This is done through the Oculus app on your phone.
- Open the Oculus app.
- Select Devices on the bottom navigation bar.
Select Connect below the icon of your Oculus Quest headset.
 Source: Android Central
If this is the first time you’ve enabled developer mode, you’ll need to follow the steps below to create a developer account with Facebook.
- A website will automatically open so you can create a developer account.
- Scroll down and select the link below create an organization.
- Login with your Oculus account.
- Enter the name of your «organization» (this can be anything).
- Select submit.
- Agree to the terms of the agreement.
- You’ll need to enter a credit or debit card for identity verification. There is no charge to be an Oculus developer. However, Facebook’s terms of service require you to verify your identity via this method.
Once you’ve created your developer account, follow the first five steps to enable developer mode. Now that you’ve got that set, it’s time to get Sidequest set up.
With an Android phone
As of April 2021, the easiest way to sideload anything onto your Oculus Quest or Oculus Quest 2 is by using the SideQuest Android app. This app is free on the Google Play Store and should run on all Android devices. Still, you’ll need to make sure your phone or tablet supports USB OTG. USB OTG support, in a nutshell, means you can connect your Quest and phone with a USB cable for simple communication purposes. Don’t worry about doing too much research, though, as the SideQuest app will tell you right off the bat. First, get this SideQuest app:
![]()
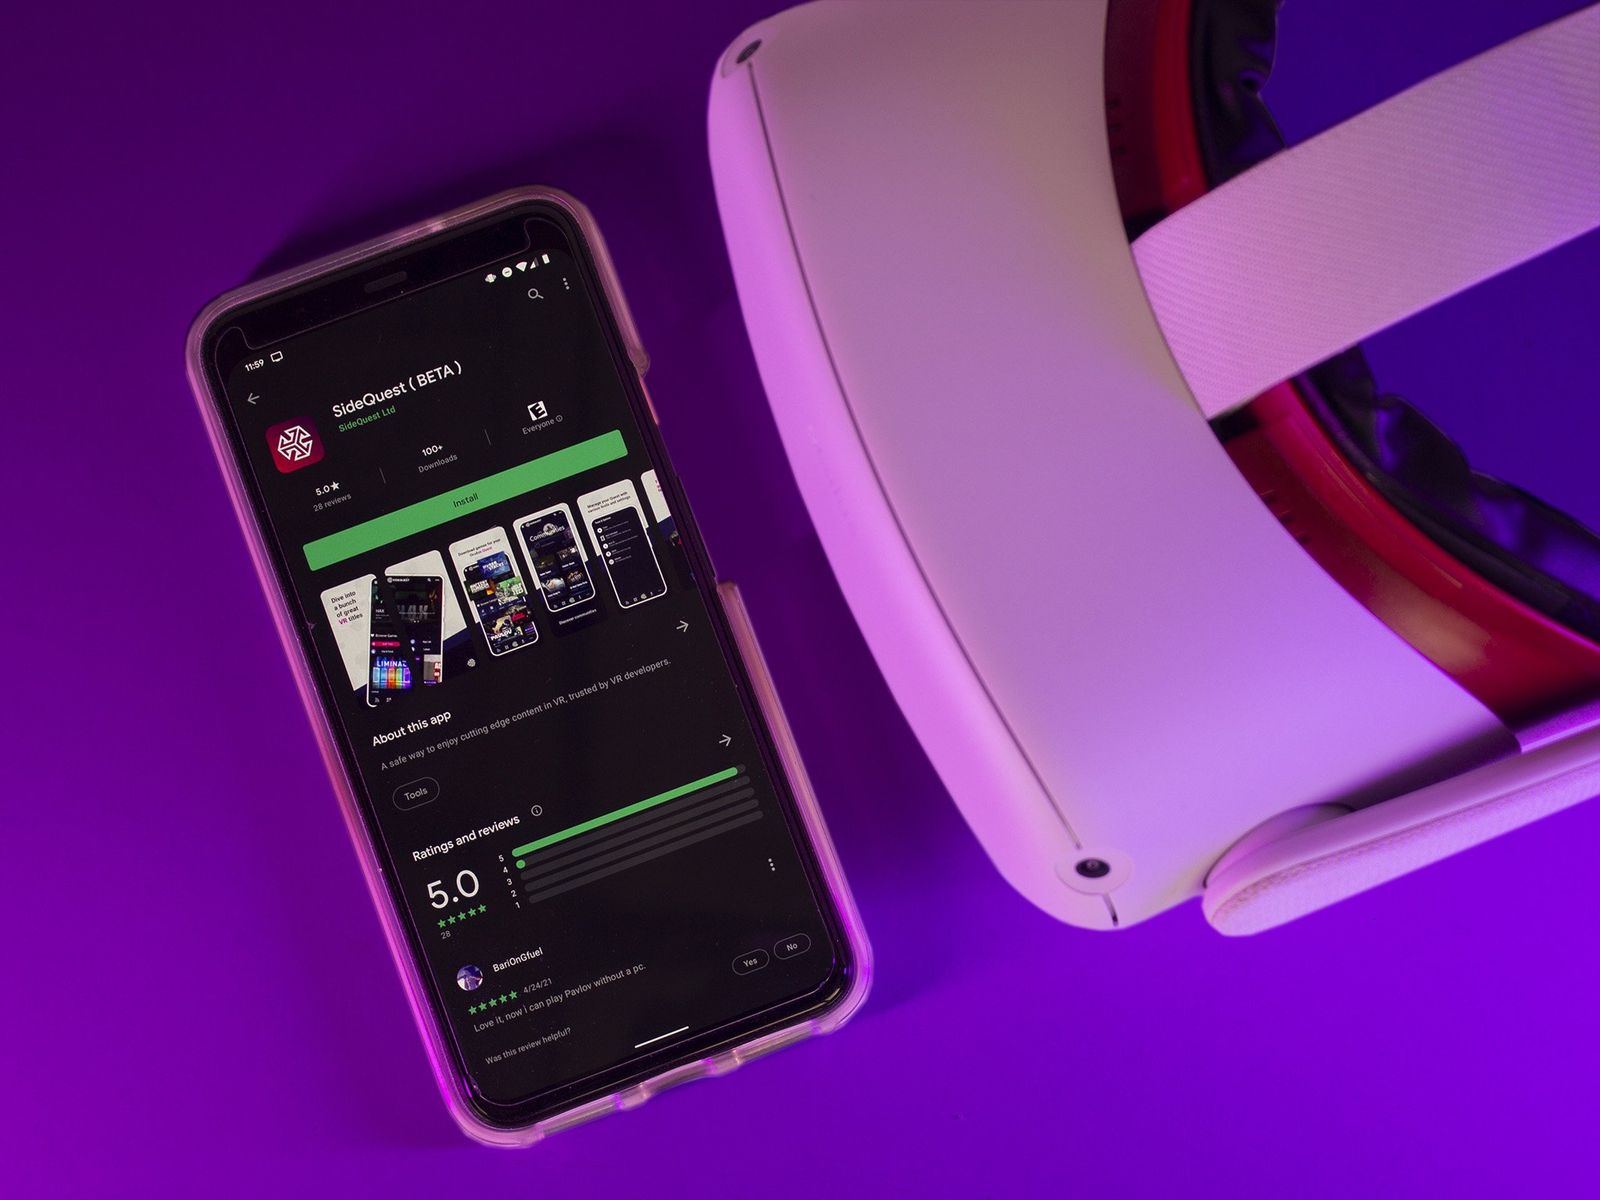
SideQuest mobile
Sideloading games and apps onto your Oculus Quest is now as easy as downloading the smartphone app and connecting to your Quest.
Now to make sure you have USB OTG support.
- Open up the SideQuest app on your phone.
- Select the connections icon on the left side of the bar at the bottom. It looks a bit like a Wi-Fi icon.
In the top section, you’ll see USB OTG Support.
 Source: Android Central
Wiring it up
Grab a USB Type-C to Type-C cable for the connection. If you don’t already have one, here are the best USB cables for Quest.
- Power on your Oculus Quest or Oculus Quest 2.
- Open up the SideQuest app on your phone.
- Using a USB Type-C to Type-C cable, plug one end into your phone and the other end into the Oculus Quest’s USB port.
Your phone should display a permissions prompt to allow SideQuest Installer to access Quest 2. Check the Always open SideQuest Installer when Quest is connected box and select OK.
Source: Android Central
On the main SideQuest screen, you should see a green circle next to the connection status button, located in the middle of the bottom navigation bar in the app.
 Source: Android Central
Your phone is now connected with SideQuest. Have fun sideloading games and apps!
Sideloading over Wi-Fi
Once you’ve followed the steps above, you can enable Wi-Fi sideloading for future sessions. Here’s how to do that:
- On the SideQuest app, select the connections icon on the left side of the bar at the bottom. It looks a bit like a Wi-Fi icon.
In the Wifi/USB Options section, click the Enable Wifi button.
Source: Android Central
On the main SideQuest screen, you should see a green circle next to the connection status button, located in the middle of the bottom navigation bar in the app.
Source: Android Central
How to find your Oculus Quest’s IP address
There’s a likelihood that your Quest’s IP will change over time. If you click connect in the app and it fails, here’s how to find your Oculus Quest’s current IP address:
- With your Oculus Quest on, press the Oculus home button on your right controller.
Click the Wi-Fi status icon located on the left side of the Oculus universal menu bar at the bottom.
Source: Android Central
With a PC
To get started, you’ll need to download SideQuest from GitHub and install it. It’s an executable file, so if you’ve used those before, it should work like any other. You can download it on Windows, Mac, and Linux, but here’s a step-by-step breakdown of the process on Windows.
- Go to SideQuestVR.com.
- Click on the GET SIDEQUEST button at the top of the page.
- Select the version for your computer’s operating system, either Windows, Mac, or Linux.
- Open the downloaded installer file.
Accept any security dialogs that appear and run through the installation process.
Source: Android Central
Once the installer has completed, launch SideQuest from your Start Menu, applications menu, or quick launch bar.
 Source: Android Central
How to connect your Oculus Quest and SideQuest
To set up SideQuest and install any applications, you’ll need to connect your Oculus Quest and your PC.
- Connect your Oculus Quest or Quest 2 to your PC using a USB cable.
SideQuest should recognize the headset and show a green circle with the name of your headset on the top bar.
 Source: Android Central
How to install apps through SideQuest
Now that the setup is out of the way, you can sideload apps. If you’ve done everything correctly, you won’t have to repeat any of the steps above.
SideQuest has a great library of apps and games available directly from the SideQuest app on your computer. To install any of those, follow these steps.
Installing apps already on SideQuest
- Browse or search for an app inside SideQuest using the search bar located at the top of every page.
Click the Install to headset button at the top of the store listing.
Source: Android Central
To check the status, select the tasks button at the top of SideQuest. It looks like a checkmark.
Source: Android Central
That’s it! You can also uninstall an app using the same process, but select uninstall instead of install.
Installing APKs from elsewhere
You can also install APKs that you download from anywhere else.
Click the Install APK file from a folder on computer button at the top of SideQuest.
 Source: Android Central
How to launch sideloaded games
Now that you have your games or apps installed, you need to launch them.
- From the Oculus home screen within the headset, select Library on the bottom bar. If you don’t see the bottom bar, press the Home button on your right controller.
- Select Unknown Sources from the right-most drop-down menu.
Select the game or app you’d like to use.
Source: Android Central
That’s it! SideQuest makes it simple to sideload apps and games and is an excellent resource for the Oculus Quest.
Источник
Как устанавливать сторонние APK на Oculus Quest
В фирменной библиотеке Oculus Quest хороших игрушек и полезных приложений, конечно, немало. Однако они там не все. В то же время эта VR-гарнитура, как полнофункциональный Android-девайс, позволяет устанавливать и так называемые сторонние APK.
То бишь, при желании на Oculus Quest можно доставить практически, что угодно. И не только приложения или игрушки.
К примеру, можно подключить к гарнитуре беспроводные наушники, для чего тоже понадобится софт, которого нет в официальном каталоге.
В общем, в этой публикации расскажем о том.
как устанавливать сторонние приложения на Oculus Quest
Собственно, данную процедуру мы уже фактически расписали в предыдущем посте о наушниках, поэтому для разнообразия приведем еще одну методу.
Она предполагает установку на Oculus Quest сторонних APK с помощью одной очень удобной утилитки, которая называется SideQuest и как раз для этого дела разработана (притом работает не только с Windows, но и с MacOS и c Linux).
Значит, сначала — этап стандартный:
#1 — активируем Режим разработчика в Oculus Quest
На данном этапе нужны смартфон с предустановленным фирменным приложением Oculus и Интернет. Делаем следующее:
- открываем приложение;
- жмем «Настройки» (кнопка внизу экрана) и затем в списке выбираем свою Oculus Quest;
- тапаем по стрелочке, которая появится справа от названия модели;
- в открывшемся меню жмем «Дополнительно» и потом — «Режим разработчика«;
- на следующем экране переводим слайдер в положение «Вкл.«;
- автоматом откроется сайт (но только если «Режим разработчика» на этой гарнитуре вы включаете впервые);
- прокручиваем страницу чуть вниз, логинимся, создаем свою «организацию» (название можно указывать любое) и жмем «Отправить«;
- далее снова открываем приложение Oculus на смартфоне, снова тапаем «Настройки» -> название модели -> стрелочка -> «Дополнительно» -> «Режим разработчика» и снова переводим слайдер в положение «Вкл.«
С этим закончили. Теперь, когда у нас есть Oculus Quest с активным режимом разработчика.
#2 — устанавливаем на комп приложение SideQuest
С этим сложностей совсем никаких:
- идем на sidequestvr.com;
- выбираем и качаем нужную версию программки (мы взяли SideQuest-win32-x64);
- распаковываем, устанавливаем и потом запускаем SideQuest.
#3 — как подключить Oculus Quest к SideQuest
Сначала, само собой, с помощью кабеля USB-C подключаем VR-гарнитуру к компу и далее:
- в SideQuest выбираем «Connect Device«;
- надеваем гарнитуру и в меню выбираем «Разрешить отладку по USB» (Allow USB debugging) и активируем опцию «Всегда разрешать с этого компьютера« (Always allow from this computer) и жмем OK.;
- теперь в SideQuest на ПК переходим в «Настройки» (кнопка Setup в самом верху окна), прокручиваем экран в самый них и жмем «Install App Launcher«;
- по факту установки загрузчик автоматом создаст папку Unknown Sources в библиотеке Oculus Quest, куда и будут устанавливаться все игры и приложения.
#4 — как устанавливать сторонние приложения на Oculus Quest через SideQuest
После подключения гарнитуры к SideQuest первым делом знакомимся с тамошней встроенной Библиотекой, в которой популярных и не очень приложений и игрушек довольно много. На Oculus Quest любая прога из каталога SideQuest устанавливается предельно просто:
- подключаем гарнитуру к компу и открываем SideQuest;
- находим (в т.ч. и через поиск) нужное приложение;
- жмем «More«;
- жмем «Install«.
Удаляется ненужная прога точно так же, только кнопка будет «Uninstall».
Если же надо установить на Oculus Quest программу не из каталога SideQuest, то тогда:

- качаем нужный APK на комп;
- подключаем гарнитуру к компу и открываем SideQuest;
- в левом нижнем углу окна жмем кнопку «Repos«;
- просто перетаскиваем APK-файл в окно SideQuest;
- дожидаемся завершения процедуры установки приложения.
Источник


