- Get started developing for Android using Xamarin.Android
- Requirements
- Create a new Xamarin.Android project
- Create a UI with Android XML
- Add logic code with C#
- Set the current time
- Update the current time once every second
- Add HourOffset
- Create the button Click event handlers
- Wire up the up and down buttons to their corresponding event handlers
- Completed MainActivity.cs file
- Run your app
- Xamarin.Android Application Fundamentals
- Accessibility
- Understanding Android API Levels
- Resources in Android
- Activity Lifecycle
- Localization
- Services
- Broadcast Receivers
- Permissions
- Graphics and Animation
- CPU Architectures
- Handling Rotation
- Android Audio
- Notifications
- Touch
- Приступая к разработке для Android с помощью Xamarin. Android
- Требования
- Создание проекта Xamarin.Android
- Создание пользовательского интерфейса с помощью XML-кода Android
- Добавление кода логики с помощью C #
- Установка текущего времени
- Обновлять текущее время каждую секунду
- Добавить Хауроффсет
- Создание обработчиков событий нажатия кнопки
- Подключайте кнопки вверх и вниз к соответствующим обработчикам событий
- Завершенный файл MainActivity. CS
- Запустите приложение.
- Xamarin.Android samples
- Material Design
- Google Play Services
- Flash Card Pager
- Fragments
- Finger Paint
- RecyclerViewer
- Toolbar
- WatchFace
Get started developing for Android using Xamarin.Android
This guide will help you to get started using Xamarin.Android on Windows to create a cross-platform app that will work on Android devices.
In this article, you will create a simple Android app using Xamarin.Android and Visual Studio 2019.
Requirements
To use this tutorial, you’ll need the following:
- Windows 10
- Visual Studio 2019: Community, Professional, or Enterprise (see note)
- The «Mobile development with .NET» workload for Visual Studio 2019
This guide will work with Visual Studio 2017 or 2019. If you are using Visual Studio 2017, some instructions may be incorrect due to UI differences between the two versions of Visual Studio.
You will also to have an Android phone or configured emulator in which to run your app. See Configuring an Android emulator.
Create a new Xamarin.Android project
Start Visual Studio. Select File > New > Project to create a new project.
In the new project dialog, select the Android App (Xamarin) template and click Next.
Name the project TimeChangerAndroid and click Create.
In the New Cross Platform App dialog, select Blank App. In the Minimum Android Version, select Android 5.0 (Lollipop). Click OK.
Xamarin will create a new solution with a single project named TimeChangerAndroid.
Create a UI with Android XML
In the Resources\layout directory of your project, open activity_main.xml. The XML in this file defines the first screen a user will see when opening TimeChanger.
TimeChanger’s UI is simple. It displays the current time and has buttons to adjust the time in increments of one hour. It uses a vertical LinearLayout to align the time above the buttons and a horizontal LinearLayout to arrange the buttons side-by-side. The content is centered in the screen by setting android:gravity attribute to center in the vertical LinearLayout .
Replace the contents of activity_main.xml with the following code.
At this point you can run TimeChangerAndroid and see the UI you’ve created. In the next section, you will add functionality to your UI displaying the current time and enabling the buttons to perform an action.
Add logic code with C#
Open MainActivity.cs. This file contains the code-behind logic that will add functionality to the UI.
Set the current time
First, get a reference to the TextView that will display the time. Use FindViewById to search all UI elements for the one with the correct android:id (which was set to «@+id/timeDisplay» in the xml from the previous step). This is the TextView that will display the current time.
UI controls must be updated on the UI thread. Changes made from another thread may not properly update the control as it displays on the screen. Because there is no guarantee this code will always be running on the UI thread, use the RunOnUiThread method to make sure any updates display correctly. Here is the complete UpdateTimeLabel method.
Update the current time once every second
At this point, the current time will be accurate for, at most, one second after TimeChangerAndroid is launched. The label must be periodically updated to keep the time accurate. A Timer object will periodically call a callback method that updates the label with the current time.
Add HourOffset
The up and down buttons adjust the time in increments of one hour. Add an HourOffset property to track the current adjustment.
Now update the UpdateTimeLabel method to be aware of the HourOffset property.
Create the button Click event handlers
All the up and down buttons need to do is increment or decrement the HourOffset property and call UpdateTimeLabel.
Wire up the up and down buttons to their corresponding event handlers
To associate the buttons with their corresponding event handlers, first use FindViewById to find the buttons by their ids. Once you have a reference to the button object, you can add an event handler to its Click event.
Completed MainActivity.cs file
When you’re finished, MainActivity.cs should look like this:
Run your app
To run the app, press F5 or click Debug > Start Debugging. Depending on how your debugger is configured, your app will launch on a device or in an emulator.
Источник
Xamarin.Android Application Fundamentals
This section provides a guide on some of the more common things tasks or concepts that developers need to be aware of when developing Android applications.
Accessibility
This page describes how to use the Android Accessibility APIs to build apps according to the accessibility checklist.
Understanding Android API Levels
This guide describes how Android uses API levels to manage app compatibility across different versions of Android, and it explains how to configure Xamarin.Android project settings to deploy these API levels in your app. In addition, this guide explains how to write runtime code that deals with different API levels, and it provides a reference list of all Android API levels, version numbers (such as Android 8.0), Android code names (such as Oreo), and build version codes.
Resources in Android
This article introduces the concept of Android resources in Xamarin.Android and documents how to use them. It covers how to use resources in your Android application to support application localization, and multiple devices including varying screen sizes and densities.
Activity Lifecycle
Activities are a fundamental building block of Android Applications and they can exist in a number of different states. The activity lifecycle begins with instantiation and ends with destruction, and includes many states in between. When an activity changes state, the appropriate lifecycle event method is called, notifying the activity of the impending state change and allowing it to execute code to adapt to that change. This article examines the lifecycle of activities and explains the responsibility that an activity has during each of these state changes to be part of a well-behaved, reliable application.
Localization
This article explains how to localize a Xamarin.Android into other languages by translating strings and providing alternate images.
Services
This article covers Android services, which are Android components that allow work to be done in the background. It explains the different scenarios that services are suited for and shows how to implement them both for performing long-running background tasks as well as to provide an interface for remote procedure calls.
Broadcast Receivers
This guide covers how to create and use broadcast receivers, an Android component that responds to system-wide broadcasts, in Xamarin.Android.
Permissions
You can use the tooling support built into Visual Studio for Mac or Visual Studio to create and add permissions to the Android Manifest. This document describes how to add permissions in Visual Studio and Xamarin Studio.
Graphics and Animation
Android provides a very rich and diverse framework for supporting 2D graphics and animations. This document introduces these frameworks and discusses how to create custom graphics and animations and use them in a Xamarin.Android application.
CPU Architectures
Xamarin.Android supports several CPU architectures, including 32-bit and 64-bit devices. This article explains how to target an app to one or more Android-supported CPU architectures.
Handling Rotation
This article describes how to handle device orientation changes in Xamarin.Android. It covers how to work with the Android resource system to automatically load resources for a particular device orientation as well as how to programmatically handle orientation changes. Then it describes techniques for maintaining state when a device is rotated.
Android Audio
The Android OS provides extensive support for multimedia, encompassing both audio and video. This guide focuses on audio in Android and covers playing and recording audio using the built-in audio player and recorder classes, as well as the low-level audio API. It also covers working with Audio events broadcast by other applications, so that developers can build well-behaved applications.
Notifications
This section explains how to implement local and remote notifications in Xamarin.Android. It describes the various UI elements of an Android notification and discusses the API’s involved with creating and displaying a notification. For remote notifications, both Google Cloud Messaging and Firebase Cloud Messaging are explained. Step-by-step walkthroughs and code samples are included.
Touch
This section explains the concepts and details of implementing touch gestures on Android. Touch APIs are introduced and explained followed by an exploration of gesture recognizers.
Источник
Приступая к разработке для Android с помощью Xamarin. Android
это руководство поможет приступить к работе с Xamarin. Android на Windows, чтобы создать кросс-платформенное приложение, которое будет работать на устройствах Android.
в этой статье вы создадите простое приложение Android с помощью Xamarin. Android и Visual Studio 2019.
Требования
Для работы с этим руководством вам потребуется следующее:
- Windows 10
- Visual Studio 2019: Community, Professional или Enterprise (см. примечание)
- рабочая нагрузка «разработка мобильных приложений с помощью .net» для Visual Studio 2019
это руководством будет работать с Visual Studio 2017 или 2019. если вы используете Visual Studio 2017, некоторые инструкции могут быть неправильными из-за различий в пользовательском интерфейсе между двумя версиями Visual Studio.
Вам также потребуется телефон Android или настроенный эмулятор для запуска приложения. См. раздел Настройка эмулятора Android.
Создание проекта Xamarin.Android
Запустите среду Visual Studio. выберите файл > создать > Project, чтобы создать новый проект.
В диалоговом окне Новый проект выберите шаблон приложение Android (Xamarin) и нажмите кнопку Далее.
Присвойте проекту имя тимечанжерандроид и нажмите кнопку создать.
В диалоговом окне Создание кросс — платформенного приложения выберите пустое приложение. В минимальной версии Androidвыберите Android 5,0 (без описания операций). Нажмите кнопку ОК.
Xamarin создаст новое решение с одним проектом с именем тимечанжерандроид.
Создание пользовательского интерфейса с помощью XML-кода Android
В каталоге ресаурцес\лайаут проекта откройте activity_main.xml. XML-код в этом файле определяет первый экран, который пользователь увидит при открытии Тимечанжер.
Пользовательский интерфейс Тимечанжер прост. Он отображает текущее время и содержит кнопки для корректировки времени с шагом в один час. Он использует вертикальный LinearLayout для выравнивания времени над кнопками и горизонтально, LinearLayout чтобы расположить кнопки рядом друг с другом. Содержимое выравнивается по центру экрана путем задания для атрибута Android: тяжестицентрирования по вертикали .
Замените содержимое activity_main.xml следующим кодом.
На этом этапе можно запустить тимечанжерандроид и просмотреть созданный пользовательский интерфейс. В следующем разделе вы добавите в пользовательский интерфейс функциональные возможности, отображающие текущее время и позволяющие кнопкам выполнить действие.
Добавление кода логики с помощью C #
Откройте файл MainActivity.cs. Этот файл содержит логику кода программной части, которая будет добавлять функции в пользовательский интерфейс.
Установка текущего времени
Сначала получите ссылку на объект TextView , который будет отображать время. Используйте финдвиевбид для поиска всех элементов пользовательского интерфейса с правильным идентификатором Android: ID (который был задан в XML-коде из предыдущего шага). Это то TextView , что будет отображать текущее время.
Элементы управления ИП должны быть обновлены в потоке пользовательского интерфейса. Изменения, внесенные из другого потока, могут неправильно обновлять элемент управления, как он отображается на экране. Поскольку нет никакой гарантии, что этот код всегда будет выполняться в потоке пользовательского интерфейса, используйте метод рунонуисреад , чтобы убедиться, что обновления отображаются правильно. Ниже приведен полный UpdateTimeLabel метод.
Обновлять текущее время каждую секунду
На этом этапе текущее время будет точным для (не более одной секунды после запуска Тимечанжерандроид). Для сохранения точности времени метка должна быть периодически обновлена. Объект таймера будет периодически вызывать метод обратного вызова, который обновляет метку текущим временем.
Добавить Хауроффсет
Кнопки вверх и вниз корректируют время с шагом в один час. Добавьте свойство хауроффсет для контроля текущей корректировки.
Теперь обновите метод Упдатетимелабел, чтобы он знал о свойстве Хауроффсет.
Создание обработчиков событий нажатия кнопки
Все кнопки вверх и вниз необходимо выполнить, увеличив или уменьшая свойство Хауроффсет и вызовите Упдатетимелабел.
Подключайте кнопки вверх и вниз к соответствующим обработчикам событий
Чтобы связать кнопки с соответствующими обработчиками событий, сначала используйте Финдвиевбид, чтобы найти кнопки по их идентификаторам. После получения ссылки на объект Button можно добавить обработчик событий к его Click событию.
Завершенный файл MainActivity. CS
По завершении MainActivity. cs должен выглядеть следующим образом:
Запустите приложение.
Чтобы запустить приложение, нажмите клавишу F5 или кнопку Отладка начать отладку. В зависимости от настройки отладчикаприложение запустится на устройстве или в эмуляторе.
Источник
Xamarin.Android samples
These Xamarin Android sample apps and code demos can help you get started building mobile apps with C# and Xamarin.
Material Design
This sample demonstrates the new Material Design APIs introduced in Android Lollipop.
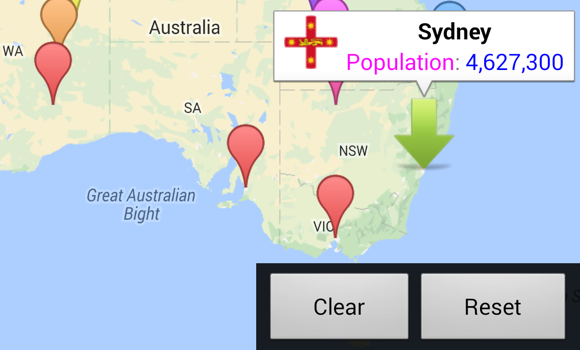
Google Play Services
This solution uses the Xamarin Google Play Services NuGet to demonstrate a few uses of the maps API.
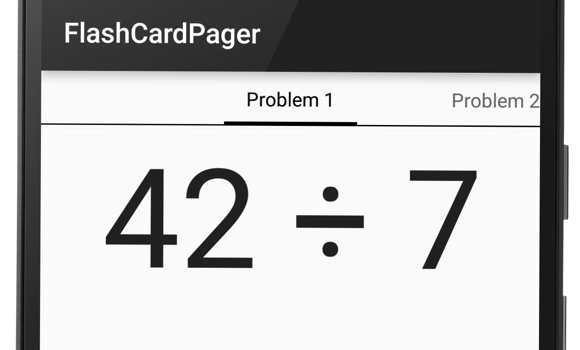
Flash Card Pager
This sample demonstrates how to use ViewPager and PagerTabStrip together to implement an app that presents a series of math problems on flash cards.
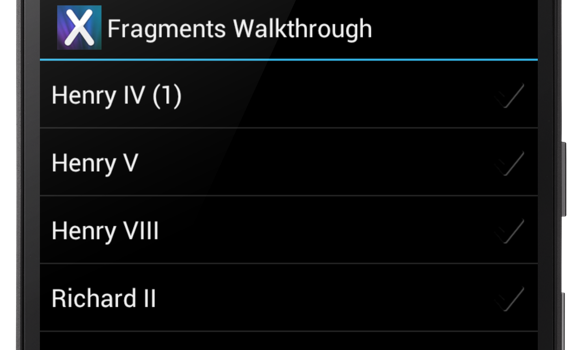
Fragments
Fragments are self-contained, modular components that are used to help address the complexity of writing applications that may run on screens of different sizes.
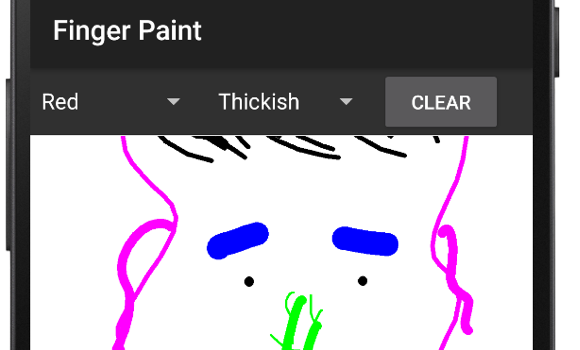
Finger Paint
Colorful finger-painting app using multi-touch tracking on Android.
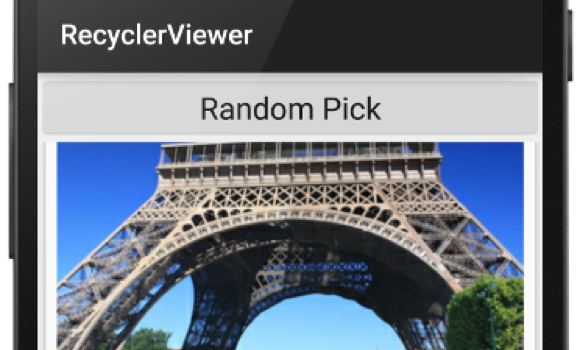
RecyclerViewer
Use this sample to learn how to use the new CardView and RecyclerView widgets introduced with Android 5.0 Lollipop.
Toolbar
Android sample replacing the ActionBar with the new ToolBar in Android 5.0 Lollipop.
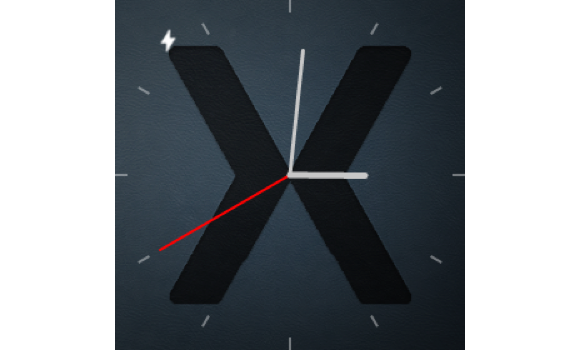
WatchFace
How to implement a custom Android Wear watch face.
Источник


