- Environment Variables
- Querying Environment Variables
- Passing Environment Variables to New Processes
- Platform Dependency Issues
- Android Environments
- Предисловие
- Проблема
- Способ решения проблемы
- Решение
- How to Set Path Environmental Variable for SDK in Windows?
- Установка среды разработки Android
- Что вы создадите
- Что вам потребуется
- Настройка среды для разработки под Android
- Если необходимо, создание виртуального устройства Android
- Setting up the development environment
- Running your React Native application
- Modifying your app
- That’s it!
- Now what?
- Running your app on a simulator or virtual device
- Caveats
- Development OS
- Target OS
- Installing dependencies
- Node & Watchman
- Java Development Kit
- Android development environment
- 1. Install Android Studio
- 2. Install the Android SDK
- 3. Configure the ANDROID_HOME environment variable
- React Native Command Line Interface
- Creating a new application
- [Optional] Using a specific version or template
- Preparing the Android device
- Using a physical device
- Using a virtual device
- Running your React Native application
- Step 1: Start Metro
- Step 2: Start your application
- Modifying your app
- That’s it!
- Now what?
- Installing dependencies
- Node & Watchman
- Xcode
- Command Line Tools
- Installing an iOS Simulator in Xcode
- CocoaPods
- React Native Command Line Interface
- Creating a new application
- [Optional] Using a specific version or template
- Running your React Native application
- Step 1: Start Metro
- Step 2: Start your application
- Running on a device
- Modifying your app
- That’s it!
- Now what?
- Target OS
- Installing dependencies
- Node, JDK
- Android development environment
- 1. Install Android Studio
- 2. Install the Android SDK
- 3. Configure the ANDROID_HOME environment variable
- 4. Add platform-tools to Path
- React Native Command Line Interface
- Creating a new application
- [Optional] Using a specific version or template
- Preparing the Android device
- Using a physical device
- Using a virtual device
- Running your React Native application
- Step 1: Start Metro
- Step 2: Start your application
- Modifying your app
- That’s it!
- Now what?
- Unsupported
- Target OS
- Installing dependencies
- Java Development Kit
- Android development environment
- 1. Install Android Studio
- 2. Install the Android SDK
- 3. Configure the ANDROID_HOME environment variable
- Watchman
- React Native Command Line Interface
- Creating a new application
- [Optional] Using a specific version or template
- Preparing the Android device
- Using a physical device
- Using a virtual device
- Running your React Native application
- Step 1: Start Metro
- Step 2: Start your application
- Modifying your app
- That’s it!
- Now what?
- Unsupported
Environment Variables
Many operating systems use environment variables to pass configuration information to applications. Like properties in the Java platform, environment variables are key/value pairs, where both the key and the value are strings. The conventions for setting and using environment variables vary between operating systems, and also between command line interpreters. To learn how to pass environment variables to applications on your system, refer to your system documentation.
Querying Environment Variables
On the Java platform, an application uses System.getenv to retrieve environment variable values. Without an argument, getenv returns a read-only instance of java.util.Map , where the map keys are the environment variable names, and the map values are the environment variable values. This is demonstrated in the EnvMap example:
With a String argument, getenv returns the value of the specified variable. If the variable is not defined, getenv returns null . The Env example uses getenv this way to query specific environment variables, specified on the command line:
Passing Environment Variables to New Processes
When a Java application uses a ProcessBuilder object to create a new process, the default set of environment variables passed to the new process is the same set provided to the application’s virtual machine process. The application can change this set using ProcessBuilder.environment .
Platform Dependency Issues
There are many subtle differences between the way environment variables are implemented on different systems. For example, Windows ignores case in environment variable names, while UNIX does not. The way environment variables are used also varies. For example, Windows provides the user name in an environment variable called USERNAME , while UNIX implementations might provide the user name in USER , LOGNAME , or both.
Источник
Android Environments
Предисловие
Из далекого 2012, на просторах Хабра мне запомнился коммент:
Топик далеко не про хардварную составляющую. Разбирая свою проблему, я убедился в верности сия суждения и постарался навести порядок на своей пыльной полке.
Недавно ко мне обратился заказчик, который попросил добавить в его проект поддержку нескольких сервисов. Задача заключалась в том, что мне нужно было подключить сервис «А» и перед выкладкой приложения в продакшн, обкатать этот сервис на тестовом окружении. Я решил проанализировать свои предыдущие решения и… ужаснулся.
Для различного типа сборок я использовал различные конфигурационные файлы с описанием переменных окружения. Но проблема заключалась в том, что только лишь для проброса значения в реальный код, на каждый тип приходилось писать один и тот же код.
Проблема
Google дает нам возможность пробрасывать кастомные значения для каждой
сборки.
После анализа build.gradle скрипта, android tools заберет все значения buildConfigFileds из buildTypes и productFlavors и сгенерирует BuildConfig файлы для каждого типа сборок:
Никакой проблемы, на первый взгляд. Особенно, когда в вашем приложении не столь много флейворов и кастомных значений. В моем проекте их было >20 и 3 окружения (internal/alpha/production). Очевидно, что проблема для меня была одна — избавиться от бойлерплейта.
Не менее важная проблема — значения перменных окружения не должны быть отражены в вашем проекте. Даже в конфигурационном файле. Вы обязаны затрекать через VCS ваш build.gradle конфиг. Но вы не должны прописывать ваши ключи напрямую, для этого, вам необходим сторонний механизм(например файл, сервисы вашего CI). В моей практике было несколько проектов, где для release production сборки у меня не было доступа к значениям некоторых библиотек. Это уже проблема бизнеса и в его интересах не делать лишних затрат. Вы не должны использовать ключи предназначенные для продакшена во время отладки или внутреннего тестирования.
Способ решения проблемы
В одном из старых проектов, для хранения значений переменных окружения, мы использовали простые .properties файлы, которые предоставляли доступ к полям через классический key:value map. Проблему биндинга данный подход не решает. Но он решает проблему поставки данных, который следует применить. Кроме того, мы можем взять за основу .properties файлы как определенного рода контракт предоставления данных.
Если вернуться чуть назад, у нас есть промежуточный этап: из buildConfigField в поле класса BuildConfig. Но кто же это делает? Все довольно банально, за это отвечает gradle plugin который вы подключаете абсолютно во всех проектах Android.
Именно он отвечает за то, что после анализа вашего build.gradle файла будет сгенерирован класс BuildConfig для каждого флейвора со своим набором полей. Таким образом, я могу написать свое лекраство, которое расширит возможности com.android.application и избавит
меня от этой головной боли.
Решение проблемы выглядит следующим образом: предоставить контракт,
в котором будут описаны все ключи и значения для всех сборок.
Разложить конфигурационные файлы на подтипы. Отдать все плагину.
Решение
Выше мы разобрались со структурой решения, осталось дело за малым — воплотить все это в жизнь. Казалось бы, тривиальное решение и проблему можно решить простым расширением билд файла. Изначально, я так и поступил.
А вот тут сразу же возникли те трудности, о которых я и не задумывался — пыльная полка.Я решил «продать» свое реше коллегам. Я подготовил доку, пнул дело на обсуждение и… Понял, что все мы люди, а программисты — это ленивые люди. Никому не хочется вставлять неизвестный ему участок кода в проект, его же по хорошему нужно изучить, прочитать? А вдруг он нерабочий? А вдруг он делает еще что-то не так? Это же груви, а я его не знаю и непонятно как с ним работать. А уже давно переехал на котлин скрипт, а портировать с груви я не умею и проч.
Самое интересное, что все эти суждения уже исходили от меня, т.к. я понял, что меня такая интеграция решения не устраивает. Плюс, я заметил несколько моментов, которые мне бы очень хотелось бы улучшить. Внедрив решение в проект А, мне бы хотелось бы его поддержать в проекте Б. Выход один — надо писать плагин.
А какие же проблемы решит плагин и его удаленная поставка пользователю?
- проблему ленивого програмиста. Нам лень углубляться в корень проблемы и возможные способы его решения. Нам куда проще взять что-то, что былоуже сделано до тебя и использовать это.
- поддержка. Она включает в себя поддержку кода, его развитие и расшириения возможностей. При решении своей проблемы, я решал только проброспеременных окружения только лишь в код, совсем позабыв о возможности проброса в ресурсы.
- качество кода. Бытует такое мнение, что некоторые разработчики даже не смотрят на open source код, который не покрыт тестами. На дворе 2019 и мы с легкостью можем подключить себе сервисы для отслеживания качества кода https://sonarcloud.io либо https://codecov.io/
- конфигурация. Расширение билд файла заставляет меня изучить этот код и внести изменения вручную. В моем случае — мне не всегда нужно использовать конфигурацию для buildTypes либо productFlavors, хочу что-то одно или все сразу.
- уборка пыльной полки. Я наконец-то навел порядок на одной из них и смог это решение по-дальше своей комнатушки.
В подробности и проблемы при написании плагина я вдаваться не буду, тянет на новый топик. Взять решение с его интеграцией, предложить свою идею либо внести свой вклад можно
здесь.
Источник
How to Set Path Environmental Variable for SDK in Windows?
In order to run appium automation tests, it is required to set path environmental variables to describe the path of android SDK folders. In addition, you also need to set ANDROID_HOME.
Set ANDROID_HOME and Path Variables
Prerequisite: Install different packages as required.
Step 1. Right-click on ‘My Computer’ and select Properties. Go to Advanced system settings and select ‘Environmental Variables’ option.
Step 2. Under the User Variable table, click New to open New User Variable dialog.
Step 3. Put ANDROID_HOME as Variable name and provide the path of the SDK folder next to Variable value.
Step 4. Click OK to close the dialog box.

Step 5. Go to the folder where SDK has been installed.
Step 6. Inside the SDK folder look for ‘tools’ and ‘platform-tools’ folder.
Step 7. Copy the path for both tools and platform-tools.
Step 8. Open ‘Environmental Variables’ dialog box.
Step 9. Go to System Variables table and locate the Path variable.
Step 10. Edit the path variable from ‘Edit system Variables’ dialog box.
Step 11. Add the ‘tools’ and platform-tools’ folder’s full path, as shown below.

Step 12. Close the entire opened dialog box.
Step 13. This configures the Android. However, to check open the command prompt.
Step 14. Type the command ‘android’. This will open the Android SDK Manager dialog box, as shown below.

Step 15. This ensures that the android is configured properly.
Источник
Установка среды разработки Android
Этот урок описывает установку и настройку среды для разработки под Android.
Что вы создадите
Вы изучите, как установить инструменты для сборки Android приложений. При необходимости, создадите виртуальное устройство Android (AVD).
Что вам потребуется
- Примерно 15 минут свободного времени
- Любимый текстовый редактор или IDE
- JDK 6 и выше
Настройка среды для разработки под Android
Перед тем, как вы сможете собрать Android приложение, вы должны установить Android SDK. При установке Android SDK также устанавливается AVD Manager, графический пользовательский интерфейс для создания и управления Android Virtual Devices (AVDs).
- С сайта Android скачайте актуальную версию Android SDK для вашей операционной системы.
- Распакуйте архив в выбранное вами место. К примеру, в Linux или Mac этим местом может быть пользовательский каталог. Более подробную информацию по установке смотрите на сайте Android Developers.
- Установите значение переменной окружения ANDROID_HOME в местоположение Android SDK. Дополнительно, добавьте в переменную окружения PATH значения ANDROID_HOME/tools и ANDROID_HOME/platform-tools .
Mac OS X
Linux
Windows
Загруженный Android SDK не содержит какую-то конкретную платформу. Для запуска кода этого урока вам необходимо загрузить и установить последнюю версию SDK платформы. Для этого вы можете использовать Android SDK и AVD Manager, которые вы установили в предыдущем разделе.
1. Откройте окно Android SDK Manager:
2. Установите галочку для Tools.
3. Установите галочку для latest Android SDK.
4. В каталоге Extras установите галочку для Android Support Library.
5. Нажмите кнопку Install packages. для завершения загрузки и установки.
Если необходимо, создание виртуального устройства Android
Если у вас нет Android устройства для тестирования, то вы можете использовать виртуальное устройство Android. Для этого у вас должны быть установлены Android SDK и соответствующая версия SDK платформы и пакетов. См. Настройка среды для разработки под Android.
Эта команда создает новое AVD под названием «Default» на основе Android 4.2.2, API Level 19:
Как вариант, вы можете использовать android GUI инструмент для создания AVD.
Ниже приведена информация об использованных параметрах:
- —name Название нового AVD
- —target Назначаемый ID нового AVD
- —abi CPU/ABI, которое будет эмулировано для AVD
Эта команда отображает список доступных заданий. Используйте их для создания различных AVD на основе различных Android версий по необходимости.
Как вы можете увидеть, значение «29» ассоциировано с Android 4.2.2. Обратите внимание на три доступных ABI(CPU) для данного ID. Команда, использованная ранее для создания AVD указывала на ARM CPU.
Просмотр списка доступных AVD производится командой:
Ниже информация о только что созанном AVD:
Проверяем, что AVD работает:
Поздравляем! Вы только что установили и настроили окружение для разработки под Android, которое можно использовать с Spring.
Источник
Setting up the development environment
This page will help you install and build your first React Native app.
If you are new to mobile development, the easiest way to get started is with Expo CLI. Expo is a set of tools built around React Native and, while it has many features, the most relevant feature for us right now is that it can get you writing a React Native app within minutes. You will only need a recent version of Node.js and a phone or emulator. If you’d like to try out React Native directly in your web browser before installing any tools, you can try out Snack.
If you are already familiar with mobile development, you may want to use React Native CLI. It requires Xcode or Android Studio to get started. If you already have one of these tools installed, you should be able to get up and running within a few minutes. If they are not installed, you should expect to spend about an hour installing and configuring them.
- Expo CLI Quickstart
- React Native CLI Quickstart
Assuming that you have Node 12 LTS or greater installed, you can use npm to install the Expo CLI command line utility:
Then run the following commands to create a new React Native project called «AwesomeProject»:
This will start a development server for you.
Running your React Native application
Install the Expo client app on your iOS or Android phone and connect to the same wireless network as your computer. On Android, use the Expo app to scan the QR code from your terminal to open your project. On iOS, use the built-in QR code scanner of the Camera app.
Modifying your app
Now that you have successfully run the app, let’s modify it. Open App.js in your text editor of choice and edit some lines. The application should reload automatically once you save your changes.
That’s it!
Congratulations! You’ve successfully run and modified your first React Native app.

Now what?
Expo also has docs you can reference if you have questions specific to the tool. You can also ask for help at Expo forums.
These tools help you get started quickly, but before committing to building your app with Expo CLI, read about the limitations.
If you have a problem with Expo, before creating a new issue, please see if there’s an existing issue about it:
- in the Expo CLI issues (for issues related to Expo CLI), or
- in the Expo issues (for issues about the Expo client or SDK).
If you’re curious to learn more about React Native, check out the Introduction to React Native.
Running your app on a simulator or virtual device
Expo CLI allows you to run your React Native app on a physical device without setting up a development environment. If you want to run your app on the iOS Simulator or an Android Virtual Device, please refer to the instructions for «React Native CLI Quickstart» to learn how to install Xcode or set up your Android development environment.
Once you’ve set these up, you can launch your app on an Android Virtual Device by running npm run android , or on the iOS Simulator by running npm run ios (macOS only).
Caveats
Because you don’t build any native code when using Expo to create a project, it’s not possible to include custom native modules beyond the React Native APIs and components that are available in the Expo client app.
If you know that you’ll eventually need to include your own native code, Expo is still a good way to get started. In that case you’ll need to «eject» eventually to create your own native builds. If you do eject, the «React Native CLI Quickstart» instructions will be required to continue working on your project.
Expo CLI configures your project to use the most recent React Native version that is supported by the Expo client app. The Expo client app usually gains support for a given React Native version about a week after the React Native version is released as stable. You can check this document to find out what versions are supported.
If you’re integrating React Native into an existing project, you’ll want to skip Expo CLI and go directly to setting up the native build environment. Select «React Native CLI Quickstart» above for instructions on configuring a native build environment for React Native.
Follow these instructions if you need to build native code in your project. For example, if you are integrating React Native into an existing application, or if you «ejected» from Expo, you’ll need this section.
The instructions are a bit different depending on your development operating system, and whether you want to start developing for iOS or Android. If you want to develop for both Android and iOS, that’s fine — you can pick one to start with, since the setup is a bit different.
Development OS
Target OS
Installing dependencies
You will need Node, Watchman, the React Native command line interface, a JDK, and Android Studio.
While you can use any editor of your choice to develop your app, you will need to install Android Studio in order to set up the necessary tooling to build your React Native app for Android.
Node & Watchman
We recommend installing Node and Watchman using Homebrew. Run the following commands in a Terminal after installing Homebrew:
If you have already installed Node on your system, make sure it is Node 12 or newer.
Watchman is a tool by Facebook for watching changes in the filesystem. It is highly recommended you install it for better performance.
Java Development Kit
We recommend installing JDK using Homebrew. Run the following commands in a Terminal after installing Homebrew:
If you have already installed JDK on your system, make sure it is JDK 8 or newer.
Android development environment
Setting up your development environment can be somewhat tedious if you’re new to Android development. If you’re already familiar with Android development, there are a few things you may need to configure. In either case, please make sure to carefully follow the next few steps.
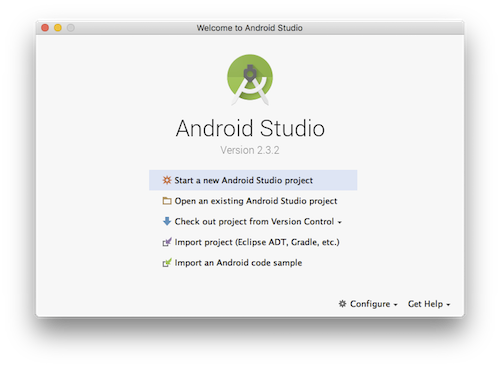
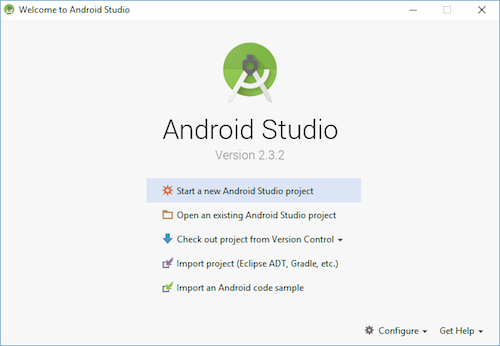
1. Install Android Studio
Download and install Android Studio. While on Android Studio installation wizard, make sure the boxes next to all of the following items are checked:
- Android SDK
- Android SDK Platform
- Android Virtual Device
Then, click «Next» to install all of these components.
If the checkboxes are grayed out, you will have a chance to install these components later on.
Once setup has finalized and you’re presented with the Welcome screen, proceed to the next step.
2. Install the Android SDK
Android Studio installs the latest Android SDK by default. Building a React Native app with native code, however, requires the Android 10 (Q) SDK in particular. Additional Android SDKs can be installed through the SDK Manager in Android Studio.
To do that, open Android Studio, click on «Configure» button and select «SDK Manager».
The SDK Manager can also be found within the Android Studio «Preferences» dialog, under Appearance & Behavior → System Settings → Android SDK.
Select the «SDK Platforms» tab from within the SDK Manager, then check the box next to «Show Package Details» in the bottom right corner. Look for and expand the Android 10 (Q) entry, then make sure the following items are checked:
- Android SDK Platform 29
- Intel x86 Atom_64 System Image or Google APIs Intel x86 Atom System Image
Next, select the «SDK Tools» tab and check the box next to «Show Package Details» here as well. Look for and expand the «Android SDK Build-Tools» entry, then make sure that 29.0.2 is selected and check the «Android SDK Command-line Tools (latest)».
Finally, click «Apply» to download and install the Android SDK and related build tools.
You can also run the following command after setting ANDROID_HOME.
3. Configure the ANDROID_HOME environment variable
The React Native tools require some environment variables to be set up in order to build apps with native code.
Add the following lines to your $HOME/.bash_profile or $HOME/.bashrc (if you are using zsh then
/.zshrc ) config file:
.bash_profile is specific to bash . If you’re using another shell, you will need to edit the appropriate shell-specific config file.
Type source $HOME/.bash_profile for bash or source $HOME/.zprofile to load the config into your current shell. Verify that ANDROID_HOME has been set by running echo $ANDROID_HOME and the appropriate directories have been added to your path by running echo $PATH .
Please make sure you use the correct Android SDK path. You can find the actual location of the SDK in the Android Studio «Preferences» dialog, under Appearance & Behavior → System Settings → Android SDK.
React Native Command Line Interface
React Native has a built-in command line interface. Rather than install and manage a specific version of the CLI globally, we recommend you access the current version at runtime using npx , which ships with Node.js. With npx react-native , the current stable version of the CLI will be downloaded and executed at the time the command is run.
Creating a new application
If you previously installed a global react-native-cli package, please remove it as it may cause unexpected issues.
React Native has a built-in command line interface, which you can use to generate a new project. You can access it without installing anything globally using npx , which ships with Node.js. Let’s create a new React Native project called «AwesomeProject»:
This is not necessary if you are integrating React Native into an existing application, if you «ejected» from Expo, or if you’re adding Android support to an existing React Native project (see Integration with Existing Apps). You can also use a third-party CLI to init your React Native app, such as Ignite CLI.
[Optional] Using a specific version or template
If you want to start a new project with a specific React Native version, you can use the —version argument:
You can also start a project with a custom React Native template, like TypeScript, with —template argument:
Preparing the Android device
You will need an Android device to run your React Native Android app. This can be either a physical Android device, or more commonly, you can use an Android Virtual Device which allows you to emulate an Android device on your computer.
Either way, you will need to prepare the device to run Android apps for development.
Using a physical device
If you have a physical Android device, you can use it for development in place of an AVD by plugging it in to your computer using a USB cable and following the instructions here.
Using a virtual device
If you use Android Studio to open ./AwesomeProject/android , you can see the list of available Android Virtual Devices (AVDs) by opening the «AVD Manager» from within Android Studio. Look for an icon that looks like this:
If you have recently installed Android Studio, you will likely need to create a new AVD. Select «Create Virtual Device. «, then pick any Phone from the list and click «Next», then select the Q API Level 29 image.
Click «Next» then «Finish» to create your AVD. At this point you should be able to click on the green triangle button next to your AVD to launch it, then proceed to the next step.
Running your React Native application
Step 1: Start Metro
First, you will need to start Metro, the JavaScript bundler that ships with React Native. Metro «takes in an entry file and various options, and returns a single JavaScript file that includes all your code and its dependencies.»—Metro Docs
To start Metro, run npx react-native start inside your React Native project folder:
react-native start starts Metro Bundler.
If you use the Yarn package manager, you can use yarn instead of npx when running React Native commands inside an existing project.
If you’re familiar with web development, Metro is a lot like webpack—for React Native apps. Unlike Kotlin or Java, JavaScript isn’t compiled—and neither is React Native. Bundling isn’t the same as compiling, but it can help improve startup performance and translate some platform-specific JavaScript into more widely supported JavaScript.
Step 2: Start your application
Let Metro Bundler run in its own terminal. Open a new terminal inside your React Native project folder. Run the following:
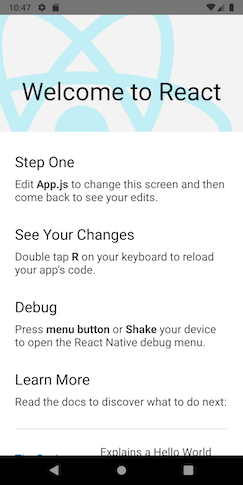
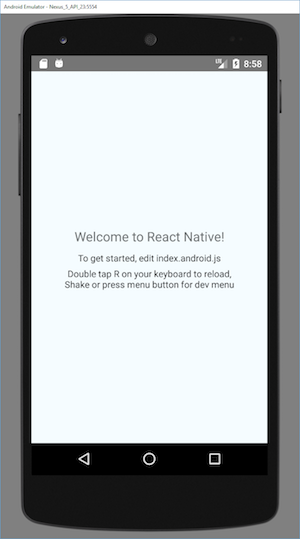
If everything is set up correctly, you should see your new app running in your Android emulator shortly.
npx react-native run-android is one way to run your app — you can also run it directly from within Android Studio.
If you can’t get this to work, see the Troubleshooting page.
Modifying your app
Now that you have successfully run the app, let’s modify it.
- Open App.js in your text editor of choice and edit some lines.
- Press the R key twice or select Reload from the Developer Menu ( ⌘M ) to see your changes!
That’s it!
Congratulations! You’ve successfully run and modified your first React Native app.
Now what?
- If you want to add this new React Native code to an existing application, check out the Integration guide.
If you’re curious to learn more about React Native, check out the Introduction to React Native.
Installing dependencies
You will need Node, Watchman, the React Native command line interface, Xcode and CocoaPods.
While you can use any editor of your choice to develop your app, you will need to install Xcode in order to set up the necessary tooling to build your React Native app for iOS.
Node & Watchman
We recommend installing Node and Watchman using Homebrew. Run the following commands in a Terminal after installing Homebrew:
If you have already installed Node on your system, make sure it is Node 12 or newer.
Watchman is a tool by Facebook for watching changes in the filesystem. It is highly recommended you install it for better performance.
Xcode
The easiest way to install Xcode is via the Mac App Store. Installing Xcode will also install the iOS Simulator and all the necessary tools to build your iOS app.
If you have already installed Xcode on your system, make sure it is version 10 or newer.
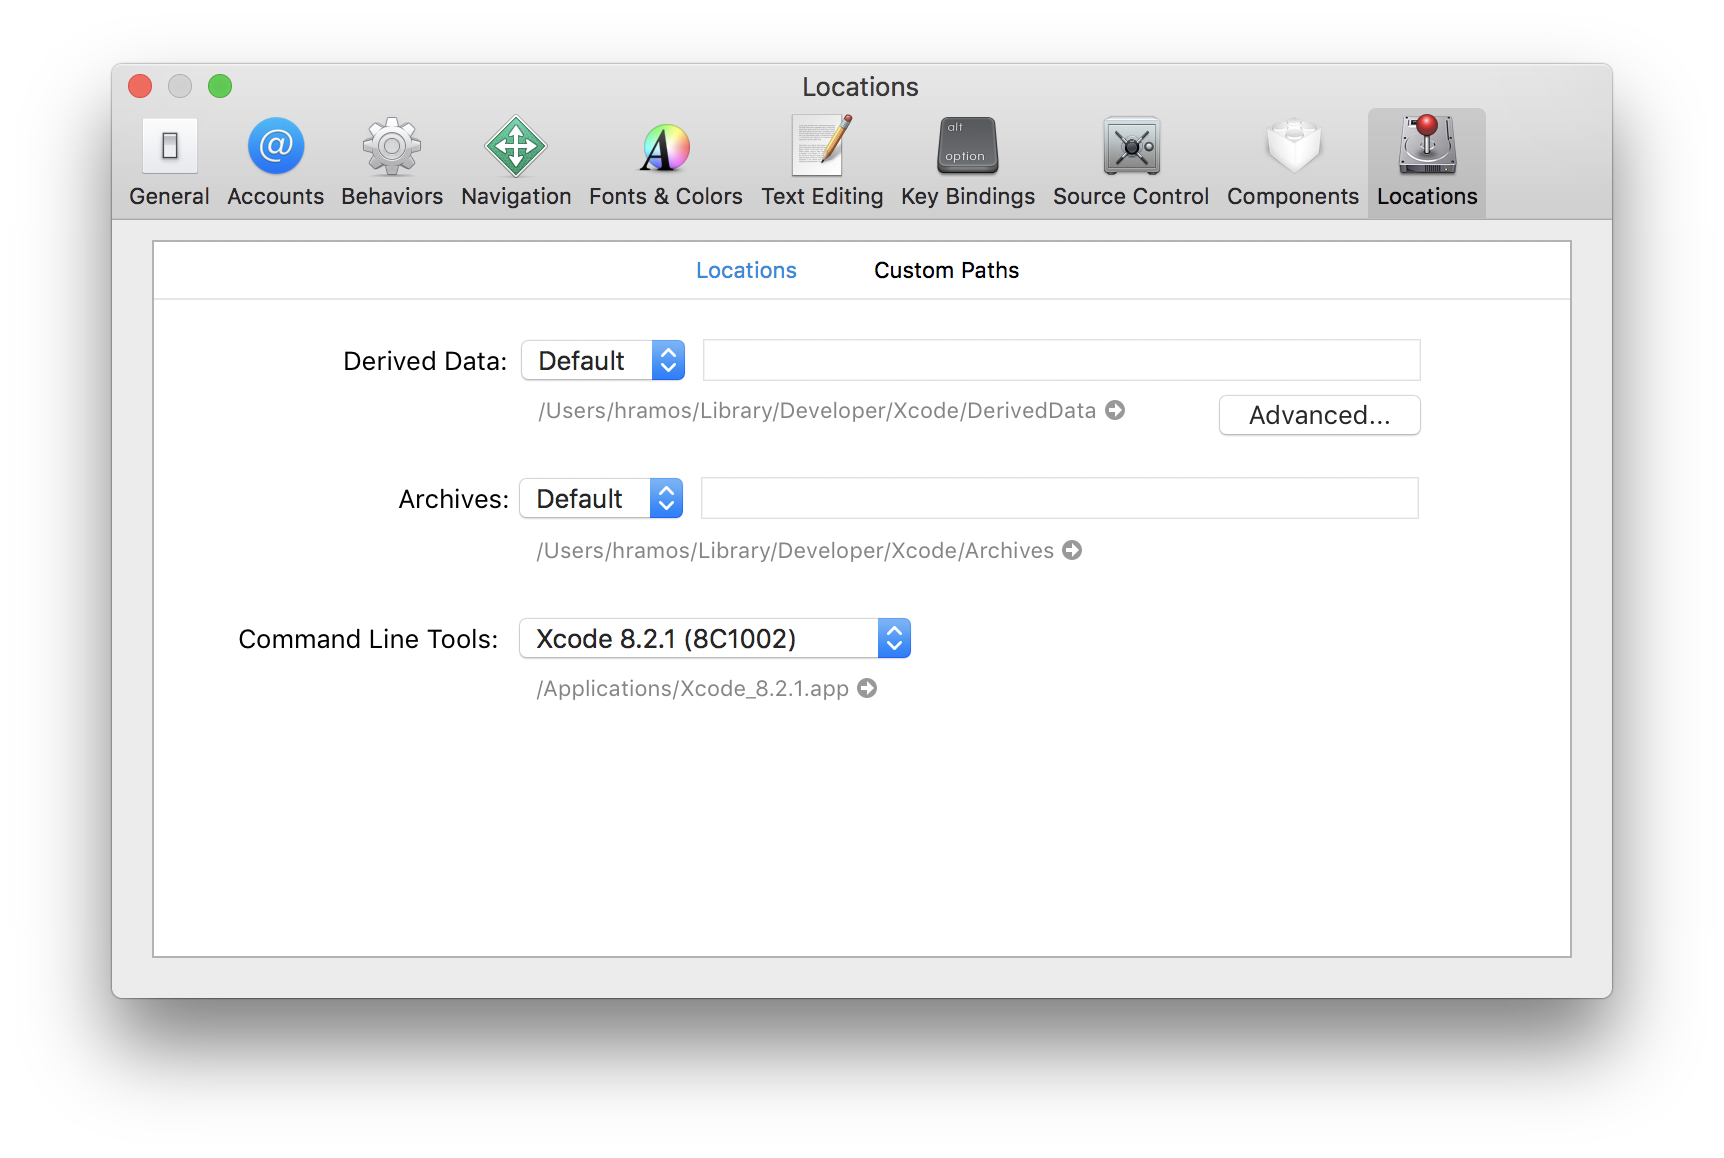
Command Line Tools
You will also need to install the Xcode Command Line Tools. Open Xcode, then choose «Preferences. » from the Xcode menu. Go to the Locations panel and install the tools by selecting the most recent version in the Command Line Tools dropdown.
Installing an iOS Simulator in Xcode
To install a simulator, open Xcode > Preferences. and select the Components tab. Select a simulator with the corresponding version of iOS you wish to use.
CocoaPods
CocoaPods is built with Ruby and it will be installable with the default Ruby available on macOS. You can use a Ruby Version manager, however we recommend that you use the standard Ruby available on macOS unless you know what you’re doing.
Using the default Ruby install will require you to use sudo when installing gems. (This is only an issue for the duration of the gem installation, though.)
For more information, please visit CocoaPods Getting Started guide.
React Native Command Line Interface
React Native has a built-in command line interface. Rather than install and manage a specific version of the CLI globally, we recommend you access the current version at runtime using npx , which ships with Node.js. With npx react-native , the current stable version of the CLI will be downloaded and executed at the time the command is run.
Creating a new application
If you previously installed a global react-native-cli package, please remove it as it may cause unexpected issues.
You can use React Native’s built-in command line interface to generate a new project. Let’s create a new React Native project called «AwesomeProject»:
This is not necessary if you are integrating React Native into an existing application, if you «ejected» from Expo, or if you’re adding iOS support to an existing React Native project (see Integration with Existing Apps). You can also use a third-party CLI to init your React Native app, such as Ignite CLI.
[Optional] Using a specific version or template
If you want to start a new project with a specific React Native version, you can use the —version argument:
You can also start a project with a custom React Native template, like TypeScript, with —template argument:
Note If the above command is failing, you may have old version of react-native or react-native-cli installed globally on your pc. Try uninstalling the cli and run the cli using npx .
Running your React Native application
Step 1: Start Metro
First, you will need to start Metro, the JavaScript bundler that ships with React Native. Metro «takes in an entry file and various options, and returns a single JavaScript file that includes all your code and its dependencies.»—Metro Docs
To start Metro, run npx react-native start inside your React Native project folder:
react-native start starts Metro Bundler.
If you use the Yarn package manager, you can use yarn instead of npx when running React Native commands inside an existing project.
If you’re familiar with web development, Metro is a lot like webpack—for React Native apps. Unlike Kotlin or Java, JavaScript isn’t compiled—and neither is React Native. Bundling isn’t the same as compiling, but it can help improve startup performance and translate some platform-specific JavaScript into more widely supported JavaScript.
Step 2: Start your application
Let Metro Bundler run in its own terminal. Open a new terminal inside your React Native project folder. Run the following:
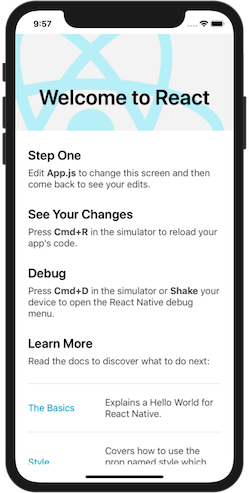
You should see your new app running in the iOS Simulator shortly.
npx react-native run-ios is one way to run your app. You can also run it directly from within Xcode.
If you can’t get this to work, see the Troubleshooting page.
Running on a device
The above command will automatically run your app on the iOS Simulator by default. If you want to run the app on an actual physical iOS device, please follow the instructions here.
Modifying your app
Now that you have successfully run the app, let’s modify it.
- Open App.js in your text editor of choice and edit some lines.
- Hit ⌘R in your iOS Simulator to reload the app and see your changes!
That’s it!
Congratulations! You’ve successfully run and modified your first React Native app.
Now what?
- If you want to add this new React Native code to an existing application, check out the Integration guide.
If you’re curious to learn more about React Native, check out the Introduction to React Native.
Target OS
Installing dependencies
You will need Node, the React Native command line interface, a JDK, and Android Studio.
While you can use any editor of your choice to develop your app, you will need to install Android Studio in order to set up the necessary tooling to build your React Native app for Android.
Node, JDK
We recommend installing Node via Chocolatey, a popular package manager for Windows.
If you want to be able to switch between different Node versions, you might want to install Node via nvm-windows, a Node version manager for Windows.
React Native also requires Java SE Development Kit (JDK), which can be installed using Chocolatey as well.
Open an Administrator Command Prompt (right click Command Prompt and select «Run as Administrator»), then run the following command:
If you have already installed Node on your system, make sure it is Node 12 or newer. If you already have a JDK on your system, make sure it is version 8 or newer.
You can find additional installation options on Node’s Downloads page.
If you’re using the latest version of Java Development Kit, you’ll need to change the Gradle version of your project so it can recognize the JDK. You can do that by going to
\android\gradle\wrapper\gradle-wrapper.properties and changing the distributionUrl value to upgrade the Gradle version. You can check out here the lastest releases of Gradle.
Android development environment
Setting up your development environment can be somewhat tedious if you’re new to Android development. If you’re already familiar with Android development, there are a few things you may need to configure. In either case, please make sure to carefully follow the next few steps.
1. Install Android Studio
Download and install Android Studio. While on Android Studio installation wizard, make sure the boxes next to all of the following items are checked:
- Android SDK
- Android SDK Platform
- Android Virtual Device
- If you are not already using Hyper-V: Performance (Intel ® HAXM) (See here for AMD or Hyper-V)
Then, click «Next» to install all of these components.
If the checkboxes are grayed out, you will have a chance to install these components later on.
Once setup has finalized and you’re presented with the Welcome screen, proceed to the next step.
2. Install the Android SDK
Android Studio installs the latest Android SDK by default. Building a React Native app with native code, however, requires the Android 10 (Q) SDK in particular. Additional Android SDKs can be installed through the SDK Manager in Android Studio.
To do that, open Android Studio, click on «Configure» button and select «SDK Manager».
The SDK Manager can also be found within the Android Studio «Preferences» dialog, under Appearance & Behavior → System Settings → Android SDK.
Select the «SDK Platforms» tab from within the SDK Manager, then check the box next to «Show Package Details» in the bottom right corner. Look for and expand the Android 10 (Q) entry, then make sure the following items are checked:
- Android SDK Platform 29
- Intel x86 Atom_64 System Image or Google APIs Intel x86 Atom System Image
Next, select the «SDK Tools» tab and check the box next to «Show Package Details» here as well. Look for and expand the «Android SDK Build-Tools» entry, then make sure that 29.0.2 is selected.
Finally, click «Apply» to download and install the Android SDK and related build tools.
3. Configure the ANDROID_HOME environment variable
The React Native tools require some environment variables to be set up in order to build apps with native code.
- Open the Windows Control Panel.
- Click on User Accounts, then click User Accounts again
- Click on Change my environment variables
- Click on New. to create a new ANDROID_HOME user variable that points to the path to your Android SDK:
The SDK is installed, by default, at the following location:
You can find the actual location of the SDK in the Android Studio «Settings» dialog, under Appearance & Behavior → System Settings → Android SDK.
Open a new Command Prompt window to ensure the new environment variable is loaded before proceeding to the next step.
- Open powershell
- Copy and paste Get-ChildItem -Path Env: \ into powershell
- Verify ANDROID_HOME has been added
4. Add platform-tools to Path
- Open the Windows Control Panel.
- Click on User Accounts, then click User Accounts again
- Click on Change my environment variables
- Select the Path variable.
- Click Edit.
- Click New and add the path to platform-tools to the list.
The default location for this folder is:
React Native Command Line Interface
React Native has a built-in command line interface. Rather than install and manage a specific version of the CLI globally, we recommend you access the current version at runtime using npx , which ships with Node.js. With npx react-native , the current stable version of the CLI will be downloaded and executed at the time the command is run.
Creating a new application
If you previously installed a global react-native-cli package, please remove it as it may cause unexpected issues.
React Native has a built-in command line interface, which you can use to generate a new project. You can access it without installing anything globally using npx , which ships with Node.js. Let’s create a new React Native project called «AwesomeProject»:
This is not necessary if you are integrating React Native into an existing application, if you «ejected» from Expo, or if you’re adding Android support to an existing React Native project (see Integration with Existing Apps). You can also use a third-party CLI to init your React Native app, such as Ignite CLI.
[Optional] Using a specific version or template
If you want to start a new project with a specific React Native version, you can use the —version argument:
You can also start a project with a custom React Native template, like TypeScript, with —template argument:
Preparing the Android device
You will need an Android device to run your React Native Android app. This can be either a physical Android device, or more commonly, you can use an Android Virtual Device which allows you to emulate an Android device on your computer.
Either way, you will need to prepare the device to run Android apps for development.
Using a physical device
If you have a physical Android device, you can use it for development in place of an AVD by plugging it in to your computer using a USB cable and following the instructions here.
Using a virtual device
If you use Android Studio to open ./AwesomeProject/android , you can see the list of available Android Virtual Devices (AVDs) by opening the «AVD Manager» from within Android Studio. Look for an icon that looks like this:
If you have recently installed Android Studio, you will likely need to create a new AVD. Select «Create Virtual Device. «, then pick any Phone from the list and click «Next», then select the Q API Level 29 image.
If you don’t have HAXM installed, click on «Install HAXM» or follow these instructions to set it up, then go back to the AVD Manager.
Click «Next» then «Finish» to create your AVD. At this point you should be able to click on the green triangle button next to your AVD to launch it, then proceed to the next step.
Running your React Native application
Step 1: Start Metro
First, you will need to start Metro, the JavaScript bundler that ships with React Native. Metro «takes in an entry file and various options, and returns a single JavaScript file that includes all your code and its dependencies.»—Metro Docs
To start Metro, run npx react-native start inside your React Native project folder:
react-native start starts Metro Bundler.
If you use the Yarn package manager, you can use yarn instead of npx when running React Native commands inside an existing project.
If you’re familiar with web development, Metro is a lot like webpack—for React Native apps. Unlike Kotlin or Java, JavaScript isn’t compiled—and neither is React Native. Bundling isn’t the same as compiling, but it can help improve startup performance and translate some platform-specific JavaScript into more widely supported JavaScript.
Step 2: Start your application
Let Metro Bundler run in its own terminal. Open a new terminal inside your React Native project folder. Run the following:
If everything is set up correctly, you should see your new app running in your Android emulator shortly.
npx react-native run-android is one way to run your app — you can also run it directly from within Android Studio.
If you can’t get this to work, see the Troubleshooting page.
Modifying your app
Now that you have successfully run the app, let’s modify it.
- Open App.js in your text editor of choice and edit some lines.
- Press the R key twice or select Reload from the Developer Menu ( Ctrl + M ) to see your changes!
That’s it!
Congratulations! You’ve successfully run and modified your first React Native app.
Now what?
- If you want to add this new React Native code to an existing application, check out the Integration guide.
If you’re curious to learn more about React Native, check out the Introduction to React Native.
Unsupported
A Mac is required to build projects with native code for iOS. You can follow the Expo CLI Quickstart to learn how to build your app using Expo instead.
Target OS
Installing dependencies
You will need Node, the React Native command line interface, a JDK, and Android Studio.
While you can use any editor of your choice to develop your app, you will need to install Android Studio in order to set up the necessary tooling to build your React Native app for Android.
Java Development Kit
React Native requires at least the version 8 of the Java SE Development Kit (JDK). You may download and install OpenJDK from AdoptOpenJDK or your system packager. You may also Download and install Oracle JDK 14 if desired.
Android development environment
Setting up your development environment can be somewhat tedious if you’re new to Android development. If you’re already familiar with Android development, there are a few things you may need to configure. In either case, please make sure to carefully follow the next few steps.
1. Install Android Studio
Download and install Android Studio. While on Android Studio installation wizard, make sure the boxes next to all of the following items are checked:
- Android SDK
- Android SDK Platform
- Android Virtual Device
Then, click «Next» to install all of these components.
If the checkboxes are grayed out, you will have a chance to install these components later on.
Once setup has finalized and you’re presented with the Welcome screen, proceed to the next step.
2. Install the Android SDK
Android Studio installs the latest Android SDK by default. Building a React Native app with native code, however, requires the Android 10 (Q) SDK in particular. Additional Android SDKs can be installed through the SDK Manager in Android Studio.
To do that, open Android Studio, click on «Configure» button and select «SDK Manager».
The SDK Manager can also be found within the Android Studio «Preferences» dialog, under Appearance & Behavior → System Settings → Android SDK.
Select the «SDK Platforms» tab from within the SDK Manager, then check the box next to «Show Package Details» in the bottom right corner. Look for and expand the Android 10 (Q) entry, then make sure the following items are checked:
- Android SDK Platform 29
- Intel x86 Atom_64 System Image or Google APIs Intel x86 Atom System Image
Next, select the «SDK Tools» tab and check the box next to «Show Package Details» here as well. Look for and expand the «Android SDK Build-Tools» entry, then make sure that 29.0.2 is selected.
Finally, click «Apply» to download and install the Android SDK and related build tools.
3. Configure the ANDROID_HOME environment variable
The React Native tools require some environment variables to be set up in order to build apps with native code.
Add the following lines to your $HOME/.bash_profile or $HOME/.bashrc (if you are using zsh then
/.zshrc ) config file:
.bash_profile is specific to bash . If you’re using another shell, you will need to edit the appropriate shell-specific config file.
Type source $HOME/.bash_profile for bash or source $HOME/.zprofile to load the config into your current shell. Verify that ANDROID_HOME has been set by running echo $ANDROID_HOME and the appropriate directories have been added to your path by running echo $PATH .
Please make sure you use the correct Android SDK path. You can find the actual location of the SDK in the Android Studio «Preferences» dialog, under Appearance & Behavior → System Settings → Android SDK.
Watchman
Follow the Watchman installation guide to compile and install Watchman from source.
Watchman is a tool by Facebook for watching changes in the filesystem. It is highly recommended you install it for better performance and increased compatibility in certain edge cases (translation: you may be able to get by without installing this, but your mileage may vary; installing this now may save you from a headache later).
React Native Command Line Interface
React Native has a built-in command line interface. Rather than install and manage a specific version of the CLI globally, we recommend you access the current version at runtime using npx , which ships with Node.js. With npx react-native , the current stable version of the CLI will be downloaded and executed at the time the command is run.
Creating a new application
If you previously installed a global react-native-cli package, please remove it as it may cause unexpected issues.
React Native has a built-in command line interface, which you can use to generate a new project. You can access it without installing anything globally using npx , which ships with Node.js. Let’s create a new React Native project called «AwesomeProject»:
This is not necessary if you are integrating React Native into an existing application, if you «ejected» from Expo, or if you’re adding Android support to an existing React Native project (see Integration with Existing Apps). You can also use a third-party CLI to init your React Native app, such as Ignite CLI.
[Optional] Using a specific version or template
If you want to start a new project with a specific React Native version, you can use the —version argument:
You can also start a project with a custom React Native template, like TypeScript, with —template argument:
Preparing the Android device
You will need an Android device to run your React Native Android app. This can be either a physical Android device, or more commonly, you can use an Android Virtual Device which allows you to emulate an Android device on your computer.
Either way, you will need to prepare the device to run Android apps for development.
Using a physical device
If you have a physical Android device, you can use it for development in place of an AVD by plugging it in to your computer using a USB cable and following the instructions here.
Using a virtual device
If you use Android Studio to open ./AwesomeProject/android , you can see the list of available Android Virtual Devices (AVDs) by opening the «AVD Manager» from within Android Studio. Look for an icon that looks like this:
If you have recently installed Android Studio, you will likely need to create a new AVD. Select «Create Virtual Device. «, then pick any Phone from the list and click «Next», then select the Q API Level 29 image.
We recommend configuring VM acceleration on your system to improve performance. Once you’ve followed those instructions, go back to the AVD Manager.
Click «Next» then «Finish» to create your AVD. At this point you should be able to click on the green triangle button next to your AVD to launch it, then proceed to the next step.
Running your React Native application
Step 1: Start Metro
First, you will need to start Metro, the JavaScript bundler that ships with React Native. Metro «takes in an entry file and various options, and returns a single JavaScript file that includes all your code and its dependencies.»—Metro Docs
To start Metro, run npx react-native start inside your React Native project folder:
react-native start starts Metro Bundler.
If you use the Yarn package manager, you can use yarn instead of npx when running React Native commands inside an existing project.
If you’re familiar with web development, Metro is a lot like webpack—for React Native apps. Unlike Kotlin or Java, JavaScript isn’t compiled—and neither is React Native. Bundling isn’t the same as compiling, but it can help improve startup performance and translate some platform-specific JavaScript into more widely supported JavaScript.
Step 2: Start your application
Let Metro Bundler run in its own terminal. Open a new terminal inside your React Native project folder. Run the following:
If everything is set up correctly, you should see your new app running in your Android emulator shortly.
npx react-native run-android is one way to run your app — you can also run it directly from within Android Studio.
If you can’t get this to work, see the Troubleshooting page.
Modifying your app
Now that you have successfully run the app, let’s modify it.
- Open App.js in your text editor of choice and edit some lines.
- Press the R key twice or select Reload from the Developer Menu ( Ctrl + M ) to see your changes!
That’s it!
Congratulations! You’ve successfully run and modified your first React Native app.
Now what?
- If you want to add this new React Native code to an existing application, check out the Integration guide.
If you’re curious to learn more about React Native, check out the Introduction to React Native.
Unsupported
A Mac is required to build projects with native code for iOS. You can follow the Expo CLI Quickstart to learn how to build your app using Expo instead.
Источник


