Android — Audio Manager
You can easily control your ringer volume and ringer profile i-e:(silent,vibrate,loud e.t.c) in android. Android provides AudioManager class that provides access to these controls.
In order to use AndroidManager class, you have to first create an object of AudioManager class by calling the getSystemService() method. Its syntax is given below.
Once you instantiate the object of AudioManager class, you can use setRingerMode method to set the audio or ringer profile of your device. Its syntax is given below.
The method setRingerMode takes an integer number as a parameter. For each mode , an integer number is assigned that will differentiate between different modes. The possible modes are.
| Sr.No | Mode & Description | ||||||||||||||||||||||||||||||||||||||||||||
|---|---|---|---|---|---|---|---|---|---|---|---|---|---|---|---|---|---|---|---|---|---|---|---|---|---|---|---|---|---|---|---|---|---|---|---|---|---|---|---|---|---|---|---|---|---|
| 1 |
| Sr.No | Method & description | |||||||||||||||||||||||||||||||||||||||||
|---|---|---|---|---|---|---|---|---|---|---|---|---|---|---|---|---|---|---|---|---|---|---|---|---|---|---|---|---|---|---|---|---|---|---|---|---|---|---|---|---|---|---|
| 1 |
| Steps | Description |
|---|---|
| 1 | You will use Android studio IDE to create an Android application under a package com.example.sairamkrishna.myapplication. |
| 2 | Modify src/MainActivity.java file to add AudioManager code |
| 3 | Modify layout XML file res/layout/activity_main.xml add any GUI component if required. |
| 4 | Modify res/values/string.xml file and add necessary string components. |
| 5 | Modify AndroidManifest.xml to add necessary permissions. |
| 6 | Run the application and choose a running android device and install the application on it and verify the results. |
Here is the content of src/MainActivity.java
Here is the content of activity_main.xml
Here abc indicates the logo of tutorialspoint
Here is the content of Strings.xml
Here is the content of AndroidManifest.xml
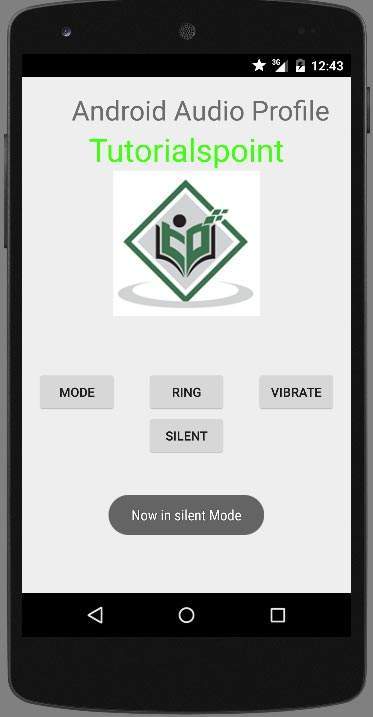
Let’s try to run your application. I assume you have connected your actual Android Mobile device with your computer. To run the app from Android Studio, open one of your project’s activity files and click Run  icon from the tool bar. Android studio will display Images
Now select silent button, you would get silent icon at Notification bar

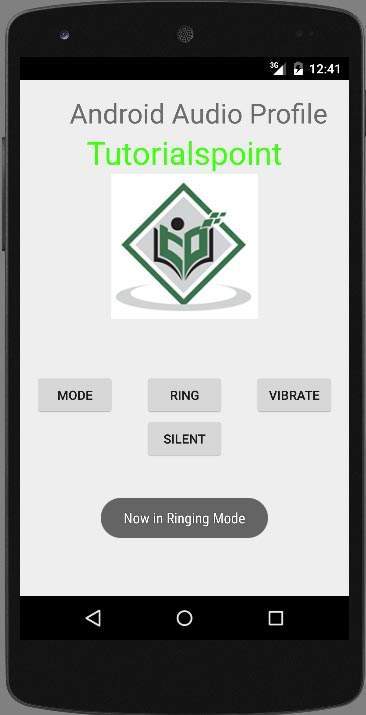
Now just select the ring button and then press the current mode button to see that if its status has been set.
Источник
Android AudioManager with Examples
In android, AudioManager is a class which will provide an access to the volume and ringer modes of the device to adjust the volume or ringing modes (silent, vibration, ringing, etc.) based on our requirements.
To use AudioManager class in our application, we need to create an instance of AudioManager class by calling the getSystemService() method with an argument of Context.AUDIO_SERVICE.
Once we create an instance of AudioManager class, we can use setRingerMode() method to set the volume or ringing modes of our device based on our requirements.
Following is the syntax to use AudioManager class to set the volume or ringer modes (silent, ringing, vibration, etc) of our device in android applications.
aManager .setRingerMode(AudioManager. RINGER_MODE_SILENT );
If you observe above code snippet, we create an instance of AudioManager class and setting the ringer mode as silent using setRingerMode() method.
We need to use following modes to set ringer mode as either normal (ringing) or vibration or silent in mobile device based on our requirements.
| Mode | Description |
|---|---|
| RINGER_MODE_NORMAL | This mode is used to set ringing mode in the device. |
| RINGER_MODE_SILENT | This mode is used to set a silent mode in the device. |
| RINGER_MODE_VIBRATE | This mode is used to set vibration mode in the device. |
In android, by using AudioManager class getRingerMode() method we can easily get the device current ringer mode.
Following is the syntax of getting the device current ringer mode in the android application.
int currentMode = aManager .getRingerMode();
if (currentMode == AudioManager. RINGER_MODE_NORMAL ) <
// Do your code
>
Now we will see how to change the device ringing mode to either ringing or silent or vibration on button click in android application with examples.
Android AudioManager Example
Following is the example of changing the device ringing mode to either ringing or silent or vibration on button click in the android application.
Create a new android application using android studio and give names as AudioManagerExample. In case if you are not aware of creating an app in android studio check this article Android Hello World App.
Once we create an application, open colors.xml file from /res/values folder path and add the color properties like as shown below.
colors.xml
xml version= «1.0» encoding= «utf-8» ?>
resources >
color name= «colorPrimary» >#3F51B5 color >
color name= «colorPrimaryDark» >#303F9F color >
color name= «colorAccent» >#FF4081 color >
color name= «colorWhite» >#FFFFFF color >
resources >
Now open activity_main.xml file from \res\layout folder path and write the code like as shown below.
activity_main.xml
xml version= «1.0» encoding= «utf-8» ?>
LinearLayout xmlns: android = «http://schemas.android.com/apk/res/android»
android :orientation= «vertical» android :layout_width= «match_parent»
android :layout_height= «match_parent» >
Button
android :id= «@+id/btnRing»
android :layout_width= «150dp»
android :layout_height= «wrap_content»
android :layout_marginLeft= «130dp»
android :layout_marginTop= «150dp»
android :background= «@color/colorPrimary»
android :layout_marginBottom= «5dp»
android :text= «Ring Mode»
android :textColor= «@color/colorWhite»/>
Button
android :id= «@+id/btnSilent»
android :layout_width= «150dp»
android :layout_height= «wrap_content»
android :layout_marginLeft= «130dp»
android :background= «@color/colorPrimary»
android :layout_marginBottom= «5dp»
android :text= «Silent Mode»
android :textColor= «@color/colorWhite»/>
Button
android :id= «@+id/btnVibrate»
android :layout_width= «150dp»
android :layout_height= «wrap_content»
android :layout_marginLeft= «130dp»
android :background= «@color/colorPrimary»
android :text= «Vibrate Mode»
android :textColor= «@color/colorWhite»/>
LinearLayout >
Now open your main activity file MainActivity.java from \java\com.tutlane.audiomanagerexample path and write the code like as shown below
MainActivity.java
package com.tutlane.audiomanagerexample;
import android.content.Context;
import android.media.AudioManager;
import android.support.v7.app.AppCompatActivity;
import android.os.Bundle;
import android.view.View;
import android.widget.Button;
import android.widget.Toast;
public class MainActivity extends AppCompatActivity <
Button silentbtn , vibratebtn , ringbtn ;
AudioManager aManager ;
@Override
protected void onCreate(Bundle savedInstanceState) <
super .onCreate(savedInstanceState);
setContentView(R.layout. activity_main );
silentbtn = (Button)findViewById(R.id. btnSilent );
ringbtn = (Button)findViewById(R.id. btnRing );
vibratebtn = (Button)findViewById(R.id. btnVibrate );
aManager = (AudioManager)getSystemService(Context. AUDIO_SERVICE );
int currentMode = aManager .getRingerMode();
if (currentMode == AudioManager. RINGER_MODE_NORMAL )
ringbtn .setBackgroundResource(R.color. colorAccent );
else if (currentMode == AudioManager. RINGER_MODE_SILENT )
silentbtn .setBackgroundResource(R.color. colorAccent );
else if (currentMode == AudioManager. RINGER_MODE_VIBRATE )
vibratebtn .setBackgroundResource(R.color. colorAccent );
silentbtn .setOnClickListener( new View.OnClickListener() <
@Override
public void onClick(View v) <
aManager .setRingerMode(AudioManager. RINGER_MODE_SILENT );
Toast.makeText(getApplicationContext(), «Slient Mode Activated» ,Toast. LENGTH_SHORT ).show();
ringbtn .setBackgroundResource(R.color. colorPrimary );
silentbtn .setBackgroundResource(R.color. colorAccent );
vibratebtn .setBackgroundResource(R.color. colorPrimary );
>
>);
ringbtn .setOnClickListener( new View.OnClickListener() <
@Override
public void onClick(View v) <
aManager .setRingerMode(AudioManager. RINGER_MODE_NORMAL );
Toast.makeText(getApplicationContext(), «Ringing Mode Activated» ,Toast. LENGTH_SHORT ).show();
ringbtn .setBackgroundResource(R.color. colorAccent );
silentbtn .setBackgroundResource(R.color. colorPrimary );
vibratebtn .setBackgroundResource(R.color. colorPrimary );
>
>);
vibratebtn .setOnClickListener( new View.OnClickListener() <
@Override
public void onClick(View v) <
aManager .setRingerMode(AudioManager. RINGER_MODE_VIBRATE );
Toast.makeText(getApplicationContext(), «Vibration Mode Activated» ,Toast. LENGTH_SHORT ).show();
ringbtn .setBackgroundResource(R.color. colorPrimary );
silentbtn .setBackgroundResource(R.color. colorPrimary );
vibratebtn .setBackgroundResource(R.color. colorAccent );
>
>);
>
>
If you observe above code, we used setRingerMode() method of AudioManager class to set the ringer profiles based on our requirements.
Output of Android AudioManager Example
When we run the above program in the android studio we will get the result as shown below.

If you observe the above example, initially the device is in Ringing Mode when we click on the Vibrate Mode button, the device mode will be changed to Vibrate and when we click on Silent Mode button, the device mode will be changed to Silent.
This is how we can use audiomanager in our android applications to control the ringer volume and ringer profiles (ring, silent, vibrate, etc.) based on our requirements.
Источник
Android — аудио менеджер
Вы можете легко контролировать громкость звонка и профиль звонка, т. Е. (Тихо, вибрировать, громко и т. Д.) В Android. Android предоставляет класс AudioManager, который предоставляет доступ к этим элементам управления.
Чтобы использовать класс AndroidManager, сначала необходимо создать объект класса AudioManager, вызвав метод getSystemService () . Его синтаксис приведен ниже.
После создания экземпляра объекта класса AudioManager вы можете использовать метод setRingerMode, чтобы установить профиль аудио или звонка вашего устройства. Его синтаксис приведен ниже.
Метод setRingerMode принимает целое число в качестве параметра. Для каждого режима назначается целое число, которое будет различать разные режимы. Возможные режимы есть.
| Sr.No | Режим и описание | ||||||||||||||||
|---|---|---|---|---|---|---|---|---|---|---|---|---|---|---|---|---|---|
| 1 |
| Sr.No | Метод и описание | |||||||||||||
|---|---|---|---|---|---|---|---|---|---|---|---|---|---|---|
| 1 |
| меры | Описание |
|---|---|
| 1 | Вы будете использовать Android Studio IDE для создания приложения Android в пакете com.example.sairamkrishna.myapplication. |
| 2 | Измените файл src / MainActivity.java, чтобы добавить код AudioManager. |
| 3 | Измените XML-файл макета. Res / layout / activity_main.xml добавьте любой компонент GUI, если это необходимо. |
| 4 | Измените файл res / values / string.xml и добавьте необходимые строковые компоненты. |
| 5 | Измените AndroidManifest.xml, чтобы добавить необходимые разрешения. |
| 6 | Запустите приложение и выберите работающее устройство Android, установите на него приложение и проверьте результаты. |
Вот содержание src / MainActivity.java
Вот содержание activity_main.xml
Здесь abc обозначает логотип пункта обучения
Вот содержимое Strings.xml
Вот содержание AndroidManifest.xml
Давайте попробуем запустить ваше приложение. Я предполагаю, что вы подключили свое фактическое мобильное устройство Android к компьютеру. Чтобы запустить приложение из Android Studio, откройте один из файлов деятельности вашего проекта и нажмите «Выполнить».  значок из панели инструментов. Студия Android будет отображать изображения
Теперь выберите тихую кнопку, вы бы получили значок молчания на панели уведомлений
Теперь просто выберите кнопку звонка, а затем нажмите кнопку текущего режима, чтобы увидеть, установлен ли ее статус.
Теперь нажмите кнопку «Вибрация», а затем нажмите кнопку текущего режима, чтобы увидеть, установлена она или нет. Появится следующий экран.
Источник


