- Фоновое изображение в Layout
- Разметка интерфейса
- Изменение положения устройства
- Метод onConfigurationChanged
- Манифест AndroidManifest.xml
- Активность приложения MainActivity
- Положение portrait
- Положение landscape
- Скачать изображения
- Import image as a background in Android Studio
- 2 Answers 2
- Relative Layout Background Color And Image Example In Android Studio
- Import image as a background in Android Studio
- 2 Answers 2
- Adding a background image to an Android Toolbar in the right way
- The final result
- Getting started
- Making the status bar transparent
- Adding a background image to the AppBarLayout
Фоновое изображение в Layout
Android позволяет устанавливать фоновое (background) изображение в корневой элемент разметки интерфейса Layout. Реализовать это совсем просто; достаточно в описание разметки вставить соответствующий атрибут android:background=»@drawable/earth». Предполагается, что изображение earth хранится в директории проекта res/drawable. На следующем скриншоте представлено изображение земли earth.png, которое будет использовано в описанном ниже примере в качестве фонового изображения разметки интерфейса Layout.
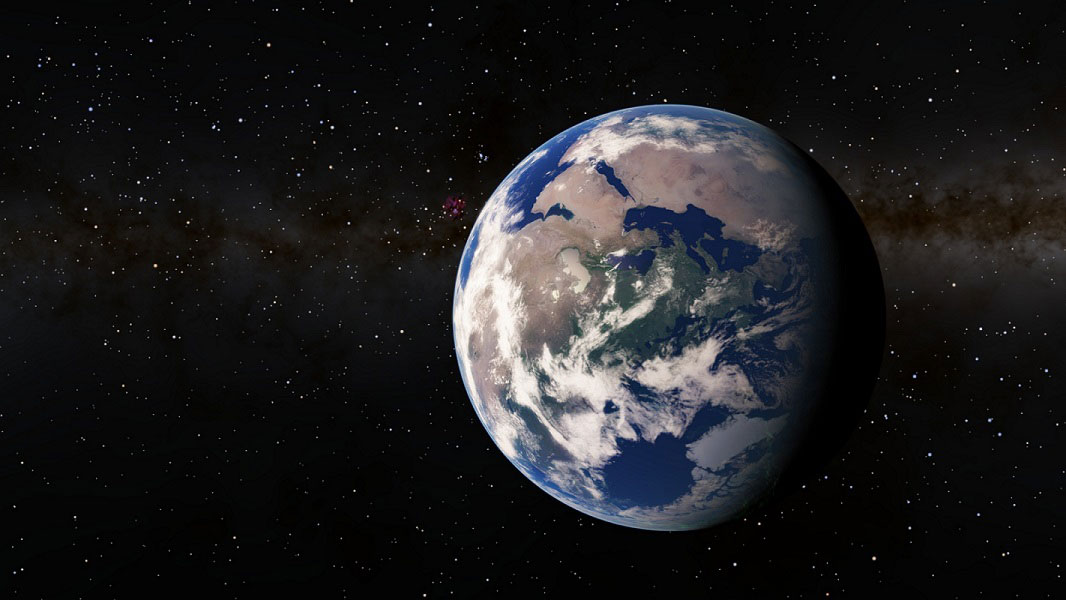
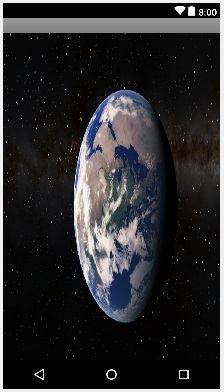
В чем особенность данного фонового изображения? Прямоугольный размер картинки включает расположенное не по центру изображение земли, которое при смене ориентации (orientation) будет «сплющиваться». Все правильные фигуры изображения будут изменять геометрические размеры, поскольку android будет непропорционально растягивать или сжимать фоновое изображения. На следующем скриншоте представлено данное фоновое изображение при повороте устройства android в положение portrait.
В этой статье рассмотрим вопросы размещения и адаптации фонового изображения в разметке интерфейса в зависимости от ориентации устройства. Нам необходимо будет научиться перехватывать обработку события при изменении положения устройства, и устанавливать соответствующее его ориентации фоновое изображение разметки.
Рассмотрим пример использования фонового изображения в разметке интерфейса. Нам необходимо :
- определить фоновое изображение в разметке интерфейса;
- подключиться к событию изменения положения/ориентации устройства;
- определить фоновое изображение согласно положению/ориентации устройства.
Создайте новый модуль Module приложения и разместите два изображения (earth_portrait.png, earth_landscape.png) в директории проекта res/drawable. Правильнее было бы, конечно, создать несколько изображений под разные разрешения, о чем сказано в описании ImageView. Но, для решения текущей задачи обойдемся «малой кровью», т.е. двумя изображениями. Изображения можно скачать в конце статьи.
Разметка интерфейса
В файле описания интерфейса приложения res/layout/activity.xml определяем два атрибута : background и orientation. В атрибуте android:background определяем ресурсный файл одного из изображениий. Атрибут android:orientation добавляем в описание разметки LinearLayout, чтобы среда разработки Android Studio не «ругалась».
Изменение положения устройства
Для того, чтобы подключиться к событию изменения положения устройства необходимо переписать метод активности onConfigurationChanged и соответствующим образом определить атрибут configChanges в файле манифеста проекта, чтобы система вызывала этот метод.
Метод onConfigurationChanged
Метод активности onConfigurationChanged в качестве параметра получает значение конфигурации устройства, которое передается родительскому (super) методу. Новое положение устройства сохраняем в переменной orientation и после этого вызываем метод определения фонового изображения setBackgroundImage.
Для чего нам необходима переменная orientation? Давайте представим ситуацию, что в приложении несколько активностей. В одной из активностей положение устройства изменяется, и после этого открывается данная активность. Система вызовет представленный (переопределенный в листинге) метод onResume, в котором будет определяться соответствующее фоновое изображение вызовом метода setBackgroundImage.
Итак, в листинге были переопределены два метода активности : onConfigurationChanged и onResume. Но, чтобы система вызвала метод onConfigurationChanged, необходимо настроить манифест приложения.
Манифест AndroidManifest.xml
В файле манифеста проекта manifests/AndroidManifest.xml необходимо в описании активности определить атрибут configChanges. Как видно в следующем коде атрибут включает 3 значения (keyboardHidden, orientation, screenSize), разделенных символом «или» ‘|’. То есть система будет реагировать на 3 события.
Дополнительную информацию по настройкам манифеста приложений с несколькими активностями, а также для взаимодействия разных приложений между собой можно получить на странице описания намерений Intent.
Активность приложения MainActivity
В активности приложения только определяется первоначальное значение переменной orientation. В листинг не включены представленные выше методы.
После старта приложения можно изменять положение устройства с portrait на landscape и обратно. Переопределенные в активности методы будут корректно устанавливать соответствующие фоновые изображения.
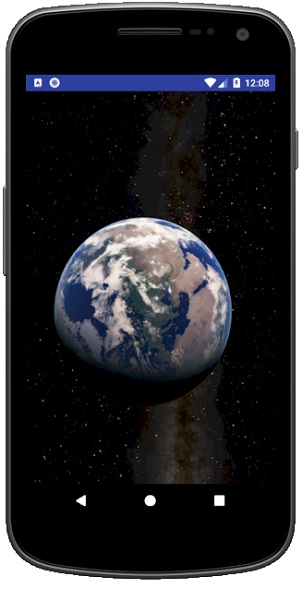
Положение portrait
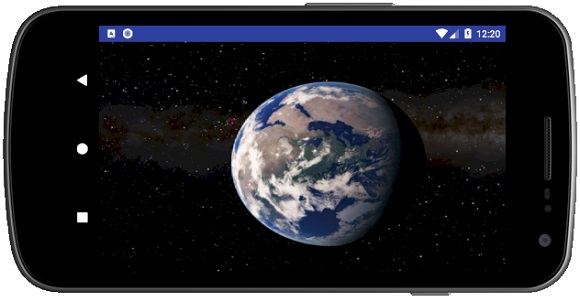
Положение landscape
Скачать изображения
Используемые в примере изображения можно скачать здесь (742 Kб).
Источник
Import image as a background in Android Studio
How should I import .png image that suppose to be the background of my activity? I selected drawable folder from the project panel then opened the New menu: ‘Image Asset‘ , but this option is for importing icons so I guess it’s not right decision (I need to import an image to be spread over all the screen background). I then chosed instead the option ‘scaled drawble’ (maybe it’s not part of the default Android Studio installation but provided as part of some plugin I installed)
This option actually imported the .png to be under my project in different scales (mdpi, hdpi etc.) but is it the the most recommended option in order to add background images to Android Studio? Because I noticed that the xhdpi and xxhdpi became in bigger KB size than the original size of the file that was imported (doesn’t make sense that its size is bigger than the source)

2 Answers 2
Right-click the drawable folder, and optimize imports, then it shows the path of drawable folder, open this path in Windows Explorer, copy any image to the path
I am using that plug-in too. but problem is plugin uses original image as xhdpi and scales others. this means if your image is very big for instance ldpi will be very big too and file sizes will be too large. I am trying to find standard image sizes.
I think using a big image that is big enough for xxxhdpi and paste it in drawable-xxxhdpi or drawable folder is safe way.
if your image is good to scale(I mean something like .svg images) or just don’t care about scaling paste it in xhdpi and system will scale it.
Источник
Relative Layout Background Color And Image Example In Android Studio
Here we show how to change background color and image in Relative Layout with example in Android Studio.
In this example we create a custom layout in which we display two RelativeLayout’s , one is the parent layout and other one is the child layout in which we display two TextView’s. In the background of Parent Relative Layout we set green color and in the background of child RelativeLayout we set a image/drawable. Finally we get the reference of TextView’s in our Activity and then perform setOnClickListener event on TextView’s. Whenever a user click on any TextView the text value is displayed on screen by using a Toast.

Important Note: We can set color or image in the background of RelativeLayout in XML using background attribute or programmatically means in java class using setBackgroundColor() for color and setBackground() method for setting image.
Step 1: Create a new project and name it RelativeLayout’sBackgroundColorAndImage.
Step 2: Open res -> layout ->activity_main.xml (or) main.xml and add following code:
In this step we open xml file and then create a custom layout in which we display two RelativeLayout’s , one is the parent layout and other one is the child layout in which we display two TextView’s. In the background of Parent Relative Layout we set green color and in the background of child RelativeLayout we set an image/drawable.
Step 3: Open src -> package -> MainActivity.java
In this step Firstly we get the reference of TextView’s and then perform setOnClickListener event on TextView’s so Whenever a user click on any TextView the text value is displayed on screen by using a Toast.
Step 4: Open res -> values-> colors.xml
In this step we define the colors (green and white) that used in the background and text color of TextView’s.
Output:
Now run the app and you will see the below output
Источник
Import image as a background in Android Studio
How should I import .png image that suppose to be the background of my activity? I selected drawable folder from the project panel then opened the New menu: ‘Image Asset‘ , but this option is for importing icons so I guess it’s not right decision (I need to import an image to be spread over all the screen background). I then chosed instead the option ‘scaled drawble’ (maybe it’s not part of the default Android Studio installation but provided as part of some plugin I installed)
This option actually imported the .png to be under my project in different scales (mdpi, hdpi etc.) but is it the the most recommended option in order to add background images to Android Studio? Because I noticed that the xhdpi and xxhdpi became in bigger KB size than the original size of the file that was imported (doesn’t make sense that its size is bigger than the source)
2 Answers 2
Right-click the drawable folder, and optimize imports, then it shows the path of drawable folder, open this path in Windows Explorer, copy any image to the path
I am using that plug-in too. but problem is plugin uses original image as xhdpi and scales others. this means if your image is very big for instance ldpi will be very big too and file sizes will be too large. I am trying to find standard image sizes.
I think using a big image that is big enough for xxxhdpi and paste it in drawable-xxxhdpi or drawable folder is safe way.
if your image is good to scale(I mean something like .svg images) or just don’t care about scaling paste it in xhdpi and system will scale it.
Источник
Adding a background image to an Android Toolbar in the right way

At first glance it seems pretty easy to add a background drawable to your Android material design Toolbar. However, if your app bar consists of several views (e.g. an additional tab layout) or if you want a transparent status bar, it gets complicated.

The final result
In this tutorial I will show you how to overcome several difficulties in order to implement a layout similar to the following:

Getting started
We start with a new Tabbed Activity with Action Bar Tabs (with ViewPager). Android Studio generates a layout file and the activity which are the perfect start for this project. We just need to make a few optimizations here and there so that it looks like the end result above. The first step is to get rid of the floating action button in your activity_main.xml and in the MainActivity.java code and after that your app should look like this:

With this being your layout file:
Making the status bar transparent
First of all, you need to change your activity theme to have a transparent status bar. Therefore add a theme to your styles.xml:
And set this theme as your activity theme in the AndroidManifest.xml:
This makes almost no difference to the appearance of your app, only the status bar looks a bit darker. However, this is necessary for your background image to be visible below the status bar.
Adding a background image to the AppBarLayout
After that, you need to add your background drawable resource to your layout by adding the following attribute to your AppBarLayout in your activity_main.xml layout file:
You can download the background drawable I am using here as vector graphic which was created in Adobe Illustrator. Unfortunately, the result looks not as good as expected (your layout can differ based on the size of the background image you chose):

There are several issues with your layout:
1. The Toolbar is not transparent so there is a lot of blue (primary color)
2. The image is not visible under our status bar, even though we made it transparent before
3. You can scroll the Toolbar away
4. The app bar layout changed its size based on the background image
To fix the first issue we simply need to remove the android:background=»?attr/colorPrimary» attribute from our Toolbar to make it transparent instead of filled with the primary color.
Furthermore, to fix the second issue we need to add some android:fitsSystemWindows=»true» attributes to our layout since this attribute is not inherited. So add it to your AppBarLayout and to your Toolbar in order to make the AppBarLayout use the space below the status bar and to position your Toolbar just below the status bar. Additionally, remove the android:paddingTop=»@dimen/appbar_padding_top» attribute from your AppBarLayout.
Moreover, to change the third issue remove the app:layout_scrollFlags=»scroll|enterAlways» attribute from your Toolbar.
Last but not least, the Toolbar is way to big because the background drawable is part of the content of the view and the attribute android:layout_height=»wrap_content» is set for your AppBarLayout. Nevertheless, you can’t just change the height of the app bar layout to a fixed value, since the status bar height differs from phone to phone. Luckily, I can tell you the height of a TabLayout which is 48dp high and the height of a Toolbar which is 56dp high. Consequently, our AppBarLayout needs to have the height 48dp+56dp+StatusBarHeight. You need to set this height programmatically in the onCreate method of your MainActivity.java by using the following code:
Just call the method setAppBarHeight in your onCreate method and that’s it!
Finally, your app should now look like this:
Источник


