- Gradient buttons for android
- Blue button
- Red button
- Purple button
- Green button
- Yellowbutton
- Blackbutton
- Folkert
- 114 thoughts to “Gradient buttons for android”
- Gradient Drawable in Android — Create Gradient Backgrounds
- What is Gradient?
- Step 1: Create a new Project
- Step 2: Creating Gradient Color
- XML attributes of Gradient Drawable
- Step 3: Modify activity_main.xml
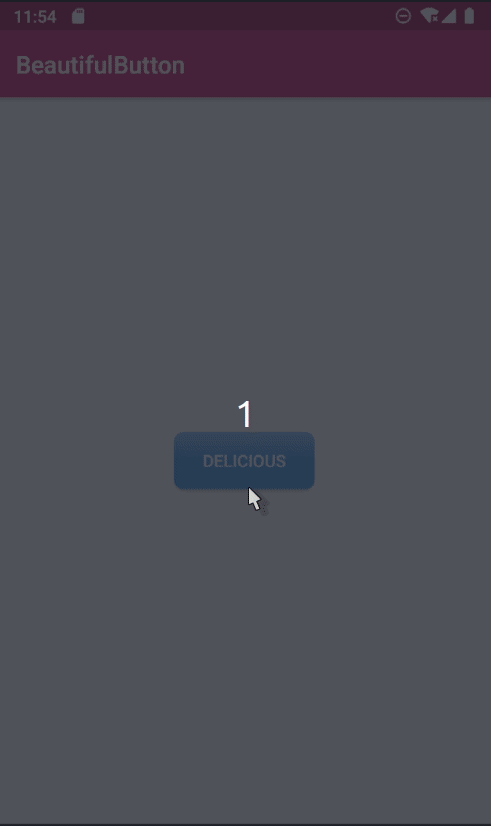
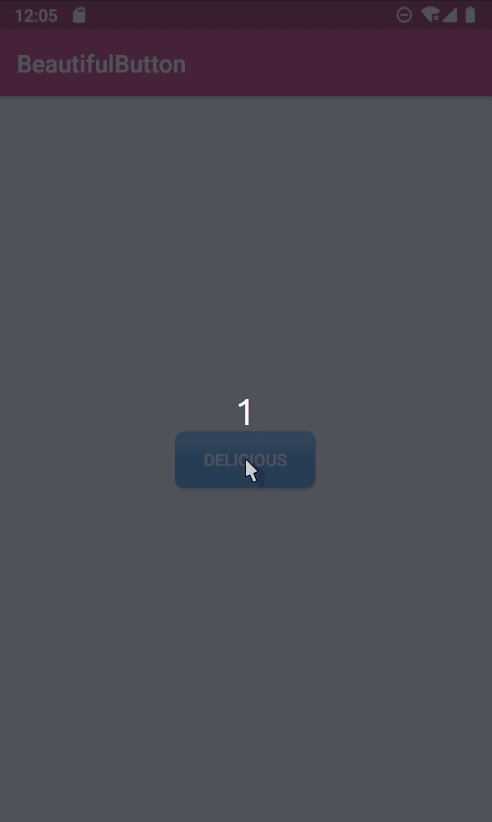
- Gradient background with Button:
- Gradient background with TextView:
- Gradient background with ImageView:
- Gradient background with SeekBar:
- Conclusion:
- Creating a beautiful Button: Android
- Choosing Colors
- Creating Gradients
- Creating a Selector
- Declare a style for button
- Try it!!
- What about Ripple?
Gradient buttons for android
Just some other stuff to share with you, no 3D, no Umbraco bust some new gradient buttons for Android.
Yes I’m into android now, and I just love it. Really fun programming for Android. Because I really like a nice layout here are, for a start some nice button layouts. Use them for a better layout and replace those gray android buttons.
I’ve used two color gradients. The sdk permits a third color, I’ll use a third color maybe in a next post. For the colors I just took 2 colors,not too much differ from each other. Take your own colors if you like.
Blue button
Red button
Purple button
Green button
Yellowbutton
Blackbutton
All text on the buttons will have the same styleso we can define a style in strings.xml:
Together you’ll have a nice collection of nice buttons:
Source code of an activity layout:
Just for this post I’ve used normal colors. In a standard application you’ll define these colors in the string.xml as a color.
TIP: last but not least, read also this post from Kris, a great developer about this topic! If you have any questions from above, the post from Kris will surely answer it.
If you want to see all those buttons in action, I’ve created a demo app with all kinds of buttons and an option to create xml for a button of your choise.
Folkert
I’m a webdeveloper, looking for the best experience, working between development and design. Just a creative programmer. When I’m getting tired of programming C#, i’d love to create 3D images in 3D Studio Max, play the guitar, create an app for Android or crush some plastics on a climbing wall or try to stay alive when i´m descending some nice white powdered snowy mountains on my snowboard.
114 thoughts to “Gradient buttons for android”
wow, great work. I didn’t even know you could do this without 9-patch images!
You do have a lot of options, you can add a middle color to the gradient if you like. But a true ‘glass’ look is not possible because of the hard edges on the middle. You have to use a 9-patch image. However, looking at the Android overall design, there is hardly no glass look noticeable. The glass look fits more in a iPhone-isch environment.
Great stuff, dumping my patch 9.pngs now. 🙂 works perfect
Thank you for your work! Wheres the orange?
That’s a good one,I’ll add orange as soon as possible!
You never did add it :p
2018 where is the fucking orange button ? xD
its a joke man, thank you? hope you’re alive
Such a useful post for us non-designers developing android apps – thanx.
Grade A stuff. I’m unqusetinobaly in your debt.
Awesome really good
Really helpful stuff, I used to work the gradients out with the help of PS, but through coding I was little confused on how those different values map to the actual pic, but this post solved my issues. Thanks
very nice! thanks!!
i have to commend you sharing your code to make it easy for android developers to create colored buttons without the use of images. i find that a big hassle when all i wanted was to change the background color
i will write a post about your work
by the way, did you ever make that post about gradient filled buttons? would be interesting to see. thanks
Very useful information. Thank you. Is it possible to change the background color dynamically? e.g. start with black background color, when the button is touched, change the background color to blue. In the listener code, I tried something like this:
…
acButton = (Button) findViewById(R.id.environ_ac);
Drawable d = Drawable.createFromPath(“/mnt/sdcard/Deployment/blue_button.xml”);
acButton.setBackgroundDrawable(d);
…
but it didn’t work. Hope you can shed some light.
Try something like this:
That works. Thank you.
Wow, thanks for the great examples!
Good Android designer UI resources are rare. Definitively bookmarked, hope we’ll get more of this good stuff 🙂
Hi, thank you for this great tip.
I am new to Android development and am slowly building up an application, but I am relying on good articles at the moment to build my knowledge.
Wonderful! Thanks for this. Really helped me out.
fantastic…. That’s what I’m trying to do. Thanks.
I added the following to the top of each button file so you get a grayed disabled look.
This MUST be the first definition as Android uses them in order found in the file. I also added the following to my res\color directory:
In a file called button_colors.xml
Finally I added the following to my “ButtonText” style
All of this will give a gray button with grayed out text when the button is disabled.
Hi!
Thank you very much for this awesome post and code-sharing.
I have one question I hope you might be able to help me with.
I’m total newbie when it comes to xml and have spendt hours of work trying to get the xml-mojo.
My task is to make buttons like the one you have, but using layer-list. I want to be able to set the color at just one place and put some transparent layers on white and black gradients on depending on the state of the button (pressed, enabled etc.). I just can’t get my head around this.. do you have any suggestions?
I am not really sure what you mean with layer-list. But if you want transparency in your gradients, you can try to use the Alpha Channel in the color defnition. For example #44000000 (this is a semi-transparent black color, the first two digits are the alpha channel and indicate the transparency of the color).
Here is an example of a red gradient background color
With this code I only need to change the top solid color (#FF0000) and the gradient is applied in the other layers – so its easy to make gradient backgrounds with other colors because the code only needs to change one color number.
This work fine if I’m only setting an background color that doesn’t need to do anything fancy on press. But a Button has to change the gradient layer dependent on its state.
Do you think it’s possible to make a gradient botton code that only needs to have the base-color set at one place by using some kind of layer?
(if you could e-mail me if you choose to reply then I would be thankful)
I can’t post the code.. here is the paste http://pastebin.com/rS11h0gw
gr8 job dude 😉 thanks
For Spinner I remembered I can use custom dropdown with ArrayAdapter subclass http://android-er.blogspot.com/2010/12/custom-arrayadapter-for-spinner-with.html
Still don’t know what to do with ToggleButton.
Thanks for the great writeup. This makes a great addition to my library of reusable code for Android. I’m always a fan of something that’s reusable rather than a one-off XML file for every single button!
These gradient selectors also work well for image buttons, since they’re the background and can co-exist with a png with transparency as the foreground (‘src’).
I’m getting just the normal button, but without and borders (so it actually looks like just text). What could I be missing? My code is android:minSdkVersion=”3″, could this have something to do?
Источник
Gradient Drawable in Android — Create Gradient Backgrounds
LAST UPDATED: AUGUST 10, 2021
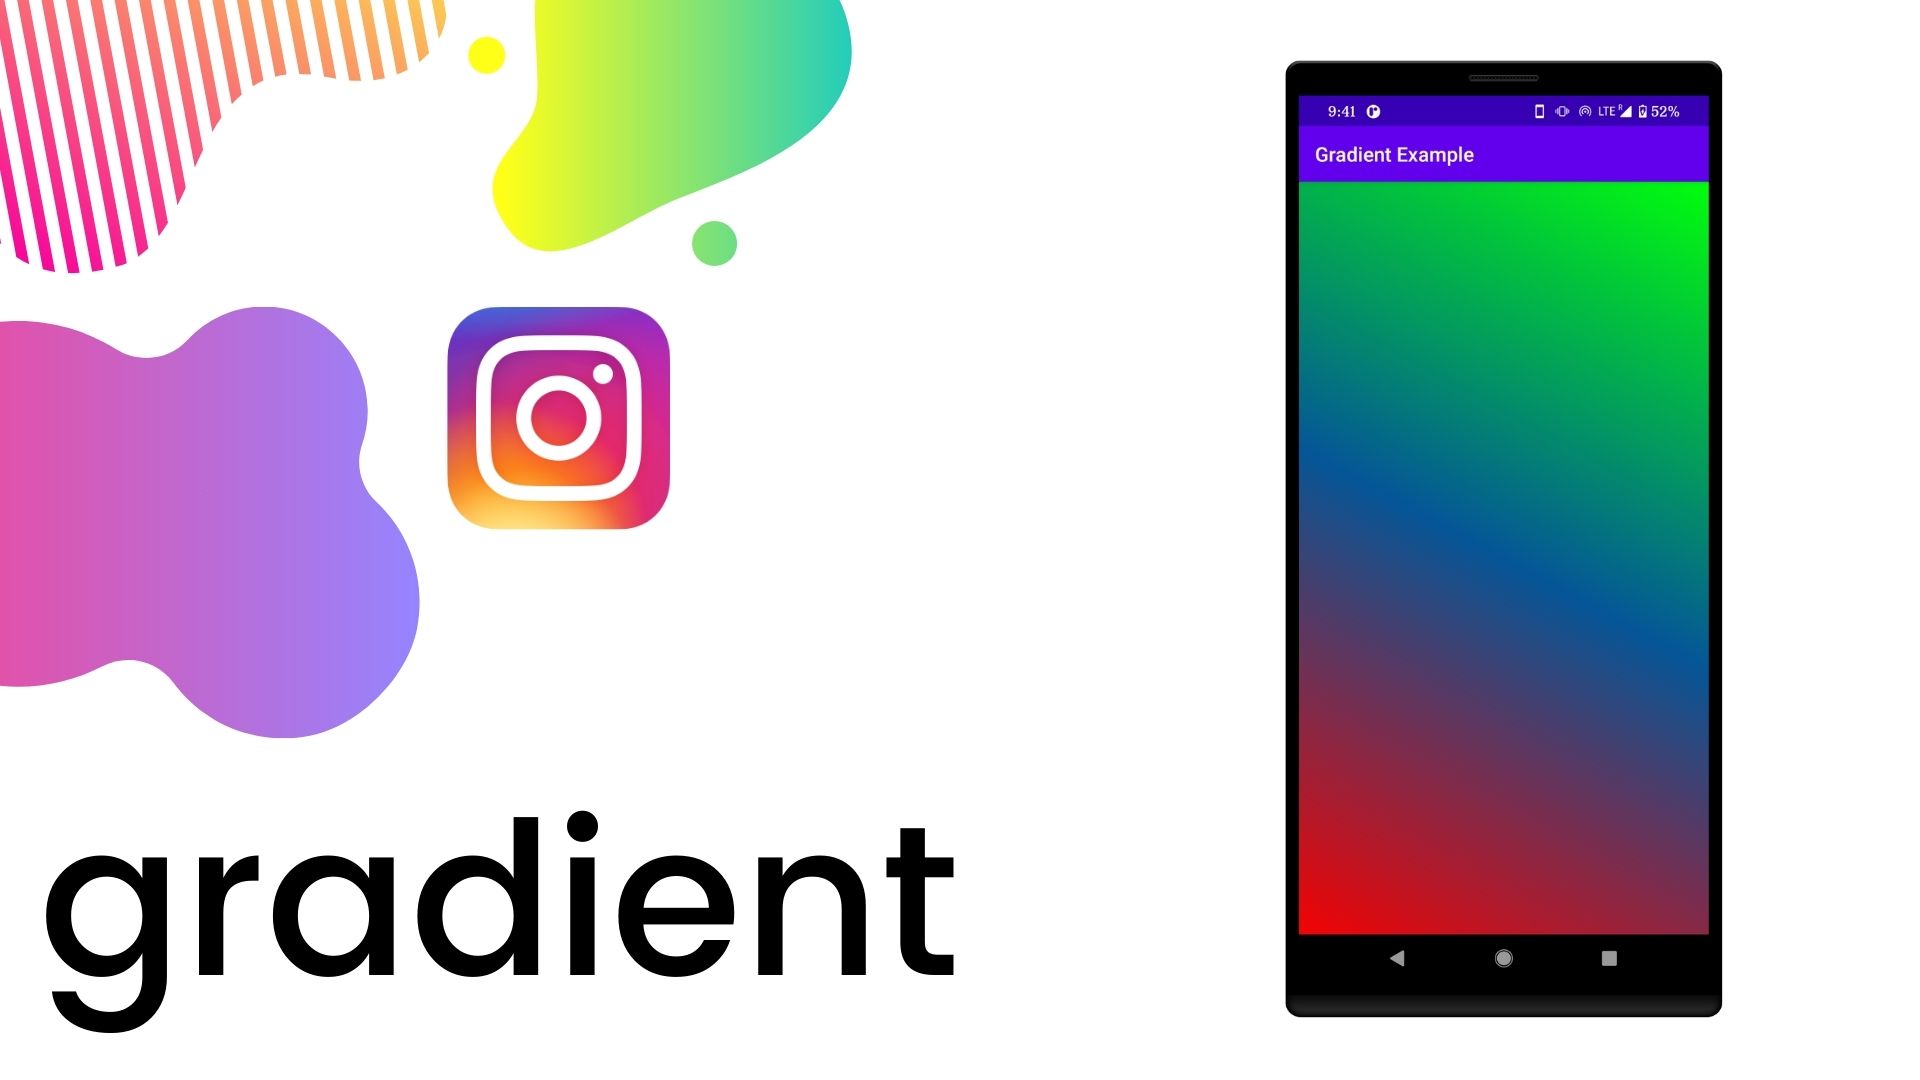
We have seen the Gradient colors on many websites as backgrounds, used in App logos, like in the Instagram logo shown below, App background, buttons, progress bars, etc. A gradient makes the UI of any app, be it Mobile App or a website, more beautiful and vibrant. Many developers are using gradient in their apps and websites to make it look more attractive. So in this tutorial, we will learn how to set a gradient background for our Android App activity.
What is Gradient?
According to Wikipedia:
In computer graphics, a color gradient specifies a range of position-dependent colors, usually used to fill a region. For example, many window managers allow the screen background to be specified as a gradient. The colors produced by a gradient vary continuously with the position, producing smooth color transitions.
A color gradient is also known as a color ramp or a color progression. In assigning colors to a set of values, a gradient is a continuous colormap, a type of color scheme.
So let’s add a simple gradient to our Android App.
Step 1: Create a new Project
Open Your Android Studio Click on «Start a new Android Studio project» (Learn how to setup Android Studio and create your first Android project)
Choose «Empty Activity» from the project template window and click Next
Enter the App Name, Package name, save location, language(Java/Kotlin, we use Java for this tutorial), and minimum SDK(we are using API 19: Android 4.4 (KitKat))
Next click on the Finish button after filling the above details
Now, wait for the project to finish the build.
Step 2: Creating Gradient Color
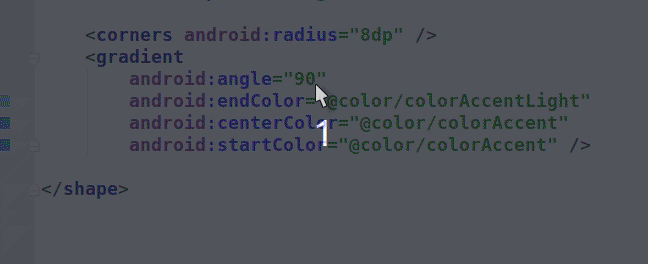
To create a gradient color we need to create a .xml file in the drawable folder. So go to app -> res -> drawable and right-click on drawable -> New -> Drawable Resource File and create gradient_drawable.xml file.
The code of gradient_drawable.xml file is shown below:
As you can see in the code above, we are using the gradient tag along with providing android:startColor , android:centerColor and android:endColor attributes to define the color that will be used in the gradient. So let’s learn about the attributes available in the gradient drawable.
XML attributes of Gradient Drawable
Following are the attributes of the drawable:
| Attributes | Description |
|---|---|
| android:startColor |