- CalendarView
- Получить выбранную дату
- Программно установить дату в CalendarView
- Установить минимальную и максимальную даты
- Дополнительное чтение
- Android Calendar View
- Android Tutorial
- Android Calendar View
- Project Structure
- Android calendarview set date
- Android Custom Calendar with events
- marcohc/roboto-calendar-view
- roboto-calendar-view — Deprecated — Use this amazing calendar instead…
- Roboto Calendar View
- Sample
- Compatibility
- Usage
- Gradle
- SimpleMobileTools/Simple-Calendar
- Simple-Calendar — A simple calendar with events, customizable widget and no ads.
- Simple Calendar
- Applandeo/Material-Calendar-View
- Material-Calendar-View — Material Calendar View for Android
- Material-Calendar-View
- Features
- How to migrate from previous version to 1.4.0?
- How to use?
- Adding events with icons:
- Clicks handling:
- Getting a selected days in the picker mode:
- Setting a current date:
- Setting minumum and maximum dates:
- Setting disabled dates:
- Previous and forward page change listeners:
- Customization
- Colors customization:
- Translations:
- Date Picker Dialog
- Getting date handling:
- Customization:
- Changelog
- Version 1.4.0:
- prolificinteractive/material-calendarview
- material-calendarview — A Material design back port of Android’s CalendarView
- Material Calendar View
- Installation
- Usage
- Documentation
- Customization
- Events, Highlighting, Custom Selectors, and More!
- Recent Changes
- Major Change in 1.5.0
- Major Change in 1.4.0
- Riontech/CustomCalendar
- CustomCalendar — Custom Calendar with Decorator and Detail view
- Custom Android Calendar
- #Usage
- TODOs
- MOLO17/CustomizableCalendar
- CustomizableCalendar is a library that allows you to create your calendar, customizing UI and behaviour
- CustomizableCalendar
- Features
- Limitations
- Gradle
- Dependencies
- How to customize
- HeaderView
- WeekDaysView
- SubView
- CalendarRecyclerView
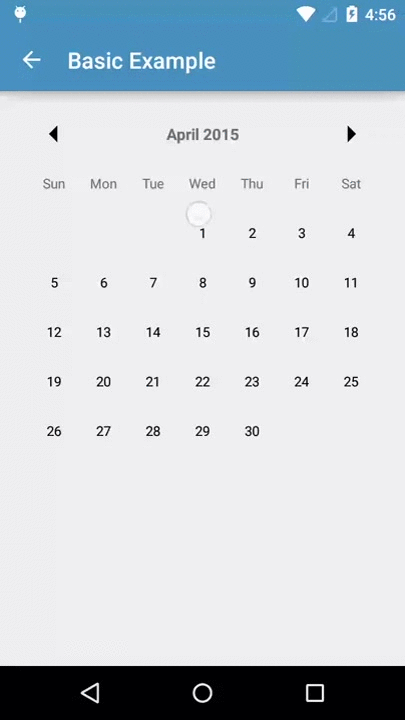
CalendarView
Компонент CalendarView находится в разделе Widgets и выводит на экран календарь.
Описание всех атрибутов можно взять из документации.
В данном случае я выбрал цвет для выбранной недели (красный), цвет для номера недели (синий) и цвет для разделителей (зелёный). Спустя несколько лет обнаружил, что данные атрибуты теперь считаются устаревшими и игнорируются.
Выбранную дату можно отслеживать через метод setOnDateChangeListener():

Получить выбранную дату
В предыдущем примере мы получали выбранную дату через слушатель. Получить выбранную дату по щелчку кнопки по идее можно через метод getDate(). По крайней мере в документации говорится, что возвращается выбранная дата, но в реальности возвращается сегодняшняя дата. Оставил пример для демонстрации взаимодействия между CalendarView и объектом Calendar.
Добавим на экран активности кнопки и напишем код для её щелчка.
Программно установить дату в CalendarView
Сделаем обратную задачу — мы получили дату в виде объекта Calendar и хотим установить её в CalendarView. Не забывайте, что отсчёт месяцев идёт с 0.
Вместо вызова свойства calendarView.date можно вызвать метод setDate(), который имеет перегруженную версию с тремя параметрами.
Установить минимальную и максимальную даты
Компонент позволяет установить минимальную и максимальную даты через атрибуты minDate и maxDate, все остальные даты вне заданного промежутка будут недоступны.
Также можно установить эти даты программно через calendarView.minDate и calendarView.maxDate.
Дополнительное чтение
prolificinteractive/material-calendarview — по уверению автора, лучший вариант календаря, чем системный.
vikramkakkar/SublimePicker позволяет выбрать дату, время и повторяющие интервалы.
Источник
Android Calendar View
Android Tutorial
In this tutorial, we’ll be discussing the Calendar Widget using the CalendarView class in our Android Application.
Android Calendar View
As the name suggests, a Calendar View is used to display and select dates of the Calendar.
To add a CalendarView in the XML Layout do the following:
This is how it looks in the Layout Design editor :

When you’ll run the above application on your device, it’ll show the current date. By default, the Calendar shows the Jan 1, 1970, date.
android:maxDate and android:minDate are used to set a custom range on the calendar. The dates specified are of the format MM/dd/yyyy.
To do the same in Java we use setMaxDate() and setMinDate() methods passing the long instance. The getters methods are available for the same.
To set the current date we do setDate(long date) on the CalendarView instance.
The setDate method has another form: setDate(long date, boolean animate, boolean center) .
By default the second and third parameters are true. When you select a new date it animates to it.
To change the date and week text style we use the attributes:
android:dateTextAppearance and android:weekTextAppearance or their equivalent setters in Java.

The CalendarView consists of the following listener:
This gets triggered whenever the date is changed by the user.
In the following section, we’ll create an android application with a custom theme and add a custom range on the CalendarView along with showing the difference between animation and non-animation date changes.
Project Structure

In the styles.xml file add the following three styles:
android:textColorPrimary by default is white. This color is set on the month date and the left and right indicators.
The code for the activity_main.xml is given below:
We’ve added all the custom styles in the layout above.
The three Buttons are chained in the Constraint Layout.
The code for the MainActivity.java is given below:
calendar.getActualMaximum(Calendar.DATE) gets the end of the month for the current date.
We’ve used SimpleDateFormat to convert the dates into a custom format.
The output of the application in action is given below:

In the first case, we animate to another date with animation. In the last case, the custom range shows only the July Month. The indicators are disabled.
This brings an end to this tutorial. You can download the project from the link below:
Источник
Android calendarview set date
Сегодня мы разберем такой простой и всем известный элемент пользовательского интерфейса Android платформы, как календарь. Чтобы интегрировать стандартный календарь в свое приложение, разработчики используют элемент под названием CalendarView, который появился аж с 3-й версии операционной системы. С помощью различных атрибутов, можно покрутить и настроить вид календаря под свой вкус, хотя настроек не так уж много. Например, присутствуют такие атрибуты:
— android:firstDayOfWeek — выставляем первый день недели;
— android:minDate — минимальная дата, которую будет показывать календарь, которая задается в формате mm/dd/yyyy (месяц, день, год);
— android:selectedWeekBackgroundColor — фоновый цвет для выбранной недели;
— android:showWeekNumber — здесь мы можем выставить, показывать номер недели или нет;
— android:weekNumberColor — цвет для номер недели;
— android:weekSeparatorLineColor — цвет линии, разделяющей недели и тп.
Мы не будем слишком кастомизировать свой календарь, а точнее вообще не будем, мы просто сделаем приложение, отображающее календарь и настроим ему слушателя изменений выбранной даты. Для каждого нажатия по любому дню в календаре мы, используя метод onSelectedDayChange (), будем показывать Toast сообщение с информацией о выбранной дате.
Создаем новый проект, выбираем Blank Activityи минимальную версию Android 4.0+.
В файле activity_main.xml создаем календарь:
Теперь переходим к файлу MainActivity.java. Здесь мы объявляем CalendarView, ссылаемся на наш календарь в файле интерфейса, задаем ему слушателя смены даты setOnDateChangeListener, а также используя метод onSelectedDayChange, при смене даты выводим Toast сообщение с выбранной датой:
Вот и все, на этом знакомство с системным Android календаря заканчивается, запускаем приложение и смотрим на результат:

Работает нормально, правда почему то в Google считают, что январь это 0-й месяц, поэтому май показывает как 4. Чтобы исправить, можно в настройках Toast сообщения, добавить к значению месяца единицу.
Источник
Android Custom Calendar with events

Jun 4, 2018 · 12 min read
Some links for android cutom calendarviews
marcohc/roboto-calendar-view
roboto-calendar-view — Deprecated — Use this amazing calendar instead…
Roboto Calendar View
Android Roboto Calendar View provides an easy and customizable calendar view using the awesome library Calligraphy for fonts
Sample
A sample application is available inside of the library
Compatibility
This library is compatible from API 14.
Usage
Take a look of the sample Activity.
You can override any style and customize your calendar.
Gradle
This library uses the awesome tool
Add the repository to your general build.gradle:
And then add the library in your specific project build.gradle:
SimpleMobileTools/Simple-Calendar
Simple-Calendar — A simple calendar with events, customizable widget and no ads.
Simple Calendar
A simple calendar with events and a customizable widget.
An of f line calendar without any other calendar integration. You can easily create recurring events and setup reminders, it can also display week numbers.
Contains a resizable 4×4 widget where you can customize the color of the text, as well as the alpha and the color of the background.
Contains no ads or unnecessary permissions. It is fully open-source, provides customizable colors.
The Storage permission is needed only for exporting or importing events from .ics files.
The Contacts permission is used only at importing contact birthdays and anniversaries.
This app is just one piece of a bigger series of apps. You can find the rest of them at http://www.simplemobiletools.com


Applandeo/Material-Calendar-View
Material-Calendar-View — Material Calendar View for Android
Material-Calendar-View
Material-Calendar-View is a simple and customizable calendar widget for Android based on Material Design. The widget has two funcionalities: a date picker to select dates (available as an XML widget and a dialog) and a classic calendar. The date picker can work either as a single day picker, many days picker or range picker.
We described a simple usage of the component in this article.


Features
- Material Design
- Single date picker
- Many dates picker
- Range picker
- Events icons
- Fully colors customization
How to migrate from previous version to 1.4.0?
We have renamed setOnPreviousButtonClickListener() and setOnForwardButtonClickListener() so please refer to Previous and forward buttons listeners.
How to use?
Make sure you are using the newest com.android.support:appcompat-v7.
Make sure you have defined the jcenter() repository in project’s build.gradle file:
Add the dependency to module’s build.gradle file:
To your XML layout file add:
Adding events with icons:
Clicks handling:
Getting a selected days in the picker mode:
If you want to get all selected days, especially if you use multi date or range picker you should use the following code:
…or if you want to get the first selected day, for example in case of using single date picker, you can use:
Setting a current date:
Setting minumum and maximum dates:
Setting disabled dates:
Previous and forward page change listeners:
Customization
If you want to use calendar in the picker mode, you have to use the following tags:
- app:type=»one_day_picker»
- app:type=»many_days_picker»
- app:type=»range_picker»
Colors customization:
- Header color: app:headerColor=»[color]»
- Header label color: app:headerLabelColor=»[color]»
- Previous button image resource: app:previousButtonSrc=»[drawable]»
- Forward button image resource: app:forwardButtonSrc=»[drawable]»
- Abbreviations bar color: app:abbreviationsBarColor=»[color]»
- Abbreviations labels color: app:abbreviationsLabelsColor=»[color]»
- Calendar pages color: app:pagesColor=»[color]»
- Selection color in picker mode: app:selectionColor=»[color]»
- Selection label color in picker mode: app:selectionLabelColor=»[color]»
- Days labels color: app:daysLabelsColor=»[color]»
- Color of visible days labels from previous and next month page: app:anotherMonthsDaysLabelsColor=»[color]»
- Disabled days labels color: app:disabledDaysLabelsColor=»[color]»
- Today label color: app:todayLabelColor=»[color]»
Translations:
To translate months names, abbreviations of days, “TODAY”, “OK” and “CANCEL” buttons, just add below tags to your strings.xml file:
Date Picker Dialog
To use another picker type replace CalendarView.ONE_DAY_PICKER with CalendarView.MANY_DAYS_PICKER or CalendarView.RANGE_PICKER .
Getting date handling:
Customization:
Changelog
Version 1.4.0:
- More color customization (abbreviations, calendar pages, labels colors)
- Changed onNavigationButtonClickListeners to onCalendarPageChangeListeners
- Added page change listeners to dialog pickers
- Added onDayClickListener to pickers (not dialog pickers)
- Added ability to insert list of disabled days
prolificinteractive/material-calendarview
material-calendarview — A Material design back port of Android’s CalendarView
Material Calendar View
A Material design back port of Android’s CalendarView. The goal is to have a Material look and feel, rather than 100% parity with the platform’s implementation.
Installation
Step 1. Add the JitPack repository to your build file
Step 2. Add the dependency
Usage
- Add MaterialCalendarView into your layouts or view hierarchy.
- Set a OnDateSelectedListener or call MaterialCalendarView.getSelectedDates() when you need it.
Documentation
Make sure to check all the documentation available here.
Customization
One of the aims of this library is to be customizable. The many options include:
Events, Highlighting, Custom Selectors, and More!
All of this and more can be done via the decorator api. Please check out the decorator documentation.
Recent Changes
Major Change in 1.5.0
We recently updated to the latest gradle and decided to move over our libraries to the hosting service Jitpack. Please refer to the installation section for more details.
Major Change in 1.4.0
- Breaking Change: setFirstDayOfWeek , setMin/MaxDate , and setCalendarDisplayMode are moved to a State object. This was necessary because it was unclear that these were not simple setters—individually, they were side effecting and triggered full adapter/date range recalculations. Typical usage of the view involves setting all these invariants up front during onCreate and it was unknown to the user that setting all 4 of these would create a lot of waste. Not to mention certain things were side effecting—some would reset the current day or selected date. As a result, the same 4 methods called in a different order could result in a different state, which is bad.
- For most cases you will simply need to replace setting those invariants with:
- mcv.state().edit() .setFirstDayOfWeek(Calendar.WEDNESDAY) .setMinimumDate(CalendarDay.from(2016, 4, 3)) .setMaximumDate(CalendarDay.from(2016, 5, 12)) .setCalendarDisplayMode(CalendarMode.WEEKS) .commit();
- mcv.state().edit() will retain previously set values; mcv.newState() will create a new state using default values. Calling commit will trigger the rebuild of adapters and date ranges. It is recommended these state changes occur as the first modification to MCV (before configuring anything else like current date or selected date); we make no guarantee those modifications will be retained when the state is modified.
- See CUSTOMIZATION_BUILDER for usage details.
- New: setSelectionMode(SELECTION_MODE_RANGE) was added to allow 2 dates to be selected and have the entire range of dates selected. Much thanks to papageorgiouk for his work on this feature.
Riontech/CustomCalendar
CustomCalendar — Custom Calendar with Decorator and Detail view
Custom Android Calendar
#Usage
Add the dependency to your build.gradle.
Add the indicator to your layout.
Create object of CustomCalendar in your activity
In your acitivty onCreate initialize the object and set eventDate with count. And add it to customCalendar object by using addAnEvent method.
TODOs
- Add Event with Plus button
- Adding Reminders for Event, Birthday, etc
- Awesome UI-UX
MOLO17/CustomizableCalendar
CustomizableCalendar is a library that allows you to create your calendar, customizing UI and behaviour

CustomizableCalendar
This library allows you to create a completely customizable calendar.
You can use CustomizableCalendar to create your calendar, customizing UI and behaviour.
Features
- Custom header (should be implemented by the user);
- Custom sub view (month name by default);
- Custom weekly days view;
- Custom date view;
- Possibility to implement selection on day click;
- Possibility to implement weekly day calculation;
- Receive updates of Calendar (with AUCalendar);
- Every change to AUCalendar is notified and automatically refreshes UI;
Limitations
- Only portrait orientation is supported
Gradle
Dependencies
- RecyclerView
- Joda-Time
- RxJava2
- ButterKnife used on version ViewInteractor interface (you can find the explanation in the How to customize > Java section).
After that go in the Activity/Fragment where you added the CustomizableCalendar View; here you should specify the first month and the last month, to do this, create a Calendar (located in com.molo17.customizablecalendar.library.model ) object.
An example of CustomizableCalendar init is the following:
How to customize
If you want to customize the components you should create a separeted layout and add the reference to the customizable_calendar View with the tag app:layout=»@layout/your_layout»
An example of a custom layout is the following:
NOTE that ids must not be different from the ones above, so:
- @android:id/primary for HeaderView;
- @android:id/text1 for WeekDaysView;
- @android:id/text2 for SubView;
- @android:id/content for CalendarRecyclerView;

HeaderView
First (red) rectangle of the screenshot above.
It’s a RelativeLayout , you should create your own layout.
WeekDaysView
Third (light blue) rectangle of the screenshot above.
It’s a RecyclerView , the ViewHolder item is already implemented.
You can create your own ViewHolder layout using a RelativeLayout with a TextView that has @android:id/summary as id.
SubView
Second (green) rectangle of the screenshot above.
It’s a RelativeLayout , implemented by default with the name of the month centered.
If you want to create your own layout make sure to have a TextView with id @android:id/summary .
CalendarRecyclerView
Fourth (blue) rectangle of the screenshot above.
It’s a RelativeLayout , implemented by default with a LinearLayout (with a GridLayout inside) for the month and a RelativeLayout for the day.
If you want to create your own month layout you can specify app:month_layout=»@layout/your_layout» for the month and app:cell_layout=»@layout/your_layout» for the day.
Make sure to use @android:id/widget_frame as id for the GridView and @android:id/background , @android:id/startSelectingText , @android:id/stopSelectingText , @android:id/title respectively for single selection background, first day selection background (in multiple selection mode), last day selection background (in multiple selection mode) and the TextView where the day is displayed.
All code customization can be applied using the ViewInteractor .
Here are listed all of the methods with a small description:
Источник


