- Инструменты командной строки Android sdkmanager всегда показывает: Предупреждение: не удалось создать настройки
- How To Install Android SDK Tools On Windows
- Step 1 — Download SDK Tools
- Step 2 — Install Command Line Tools
- Step 3 — Install Platform Tools
- Step 4 — Configure Environment Variable
- Step 5 — Configure Commands
- Step 6 — Using the SDK Manager
- Step 7 — Using the Emulator and AVD Manager
- Summary
Инструменты командной строки Android sdkmanager всегда показывает: Предупреждение: не удалось создать настройки
Я использую новые инструменты командной строки Android, потому что старое хранилище sdk-tools для Android больше не доступно. Поэтому я изменил свой gitlab-ci для загрузки командных инструментов. Но когда я пытаюсь запустить его, я получаю следующую ошибку:
Я уже пытался выполнить эти команды вручную, но я получаю ту же ошибку. Также, если я бегу sdkmanager —version , возникает та же ошибка. Мой gitlab-ci выглядит так:
Это похоже на ошибку в том, как sdkmanager находит папку установки SDK.
Обходной путь — установить флаг —sdk_root . Вы можете переместить объявление ANDROID_HOME выше, а затем использовать его с последующими командами.
Кроме того, в первую команду перенесена команда принятия полной лицензии для очистки echo y деталей.
Как ни странно, если вы запустите sdkmanager —sdk_root=$
Для тех, кто боролся с установкой инструментов командной строки Android для Appium в Windows 10 / x64, просто сделайте следующее:
- Загрузите последние инструменты командной строки с Android, то есть commandlinetools-win-6200805_latest.zip
- Распакуйте загруженный файл
- Создайте каталог для хранения инструментов командной строки где-нибудь на вашем диске, включив следующий путь: android / cmdline-tools / latest В основном, когда вы распаковываете эту строку инструментов Cmd, просто переименуйте каталог инструментов в последний и убедитесь, что вы поместили эту последнюю папку в android / cmdline -tools каталог где-то на вашем диске
- Создайте переменную среды ANDROID_HOME для каталога, в котором хранится расположение каталога инструментов cmdline, например: C: \ YourLocationWhereYouStoreTheDirectory \ android \ cmdline-tools \ latest
- Создать новую запись в переменной среды Path как % ANDROID_HOME% \ bin
Вместо того, чтобы передавать аргумент —sdk_root для каждого отдельного выполнения команды, давайте углубимся в реальную причину.
Начиная с Android SDK Инструменты командной строки 1.0.0 (6200805) , в отличие от Android SDK 26.1.1 (4333796) , tools иерархия каталогов была изменена. Ранее он был помещен прямо внутрь ANDROID_HOME , теперь он все еще называется как tools (единственное, что вы получите после распаковки загруженного zip-файла commandlinetools ), но иначе вы должны поместить его в каталог, который cmdline-tools вызывается самостоятельно. Название cmdline-tools происходит от имени пакета, которое можно получить из команды перечисления пакетов sdkmanager —list , выходные данные которой включают cmdline-tools;1.0 | 1.0 | Android SDK Command-line Tools .
Обтекание tools каталога внутри cmdline-tools каталога сделает его работоспособным и поможет вам избавиться от раздражающего —sdk_root аргумента. Но как насчет других частей?
Ну, это все, что вам нужно изменить. Позвольте мне объяснить больше.
- Король — sdkmanager живет внутри cmdline-tools/tools/bin , тебе лучше установить PATH переменную среды
- cmdline-tools не должен быть установлен как ANDROID_HOME . Потому что позже, при обновлении Android SDK или установке дополнительных пакетов, другие пакеты будут помещены в ANDROID_HOME , но не в cmdline-tools .
- Окончательный, полная ANDROID_HOME структура каталогов должна выглядеть , как показано ниже, включают в себя довольно много подкаталогов: build-tools , cmdline-tools , emulator , licenses , patcher , platform-tools , platforms , system-images . Вы можете легко указать, что build-tools и cmdline-tools братья и сестры, все сидят внутри родителя ANDROID_HOME .
Позвольте мне кратко повторить:
- Установите предпочтительный ANDROID_HOME (как и раньше)
- Загрузите и распакуйте zip-файл commandlinetools в каталог cmdline-tools , который находится внутри ANDROID_HOME
- Добавьте каталог $ANDROID_HOME/cmdline-tools/tools/bin в переменную окружения PATH , чтобы система знала, где найти sdkmanager
Источник
How To Install Android SDK Tools On Windows
It provides all the steps required to install Android Platform Tools and SDK Manager on Windows 10 without using Android Studio.
In this tutorial, we will discuss all the steps required to install Android Platform Tools and SDK Manager on Windows 10. This tutorial provides the steps for Windows 10, though the steps should be the same on other versions of Windows.
This post is useful for the developers using Android Platform Tools and SDK manager without installing Android Studio for the use cases including hybrid app development using Ionic. It also assumes that a valid JAVA_HOME environment variable exists pointing to the installation directory of Java.
You can follow How To Install Java 8 On Windows 10, How To Install Java 11 On Windows, How To Install Java 15 On Windows, or How To Install OpenJDK 15 On Windows to install Java on Windows. In case you are interested in developing Android applications using Android Studio, you can also follow How To Install Android Studio On Windows.
Step 1 — Download SDK Tools
Open the download tab of Android Studio and scroll down to the Command line tools only section. This section shows various options to download the SDK tools as shown in Fig 1.
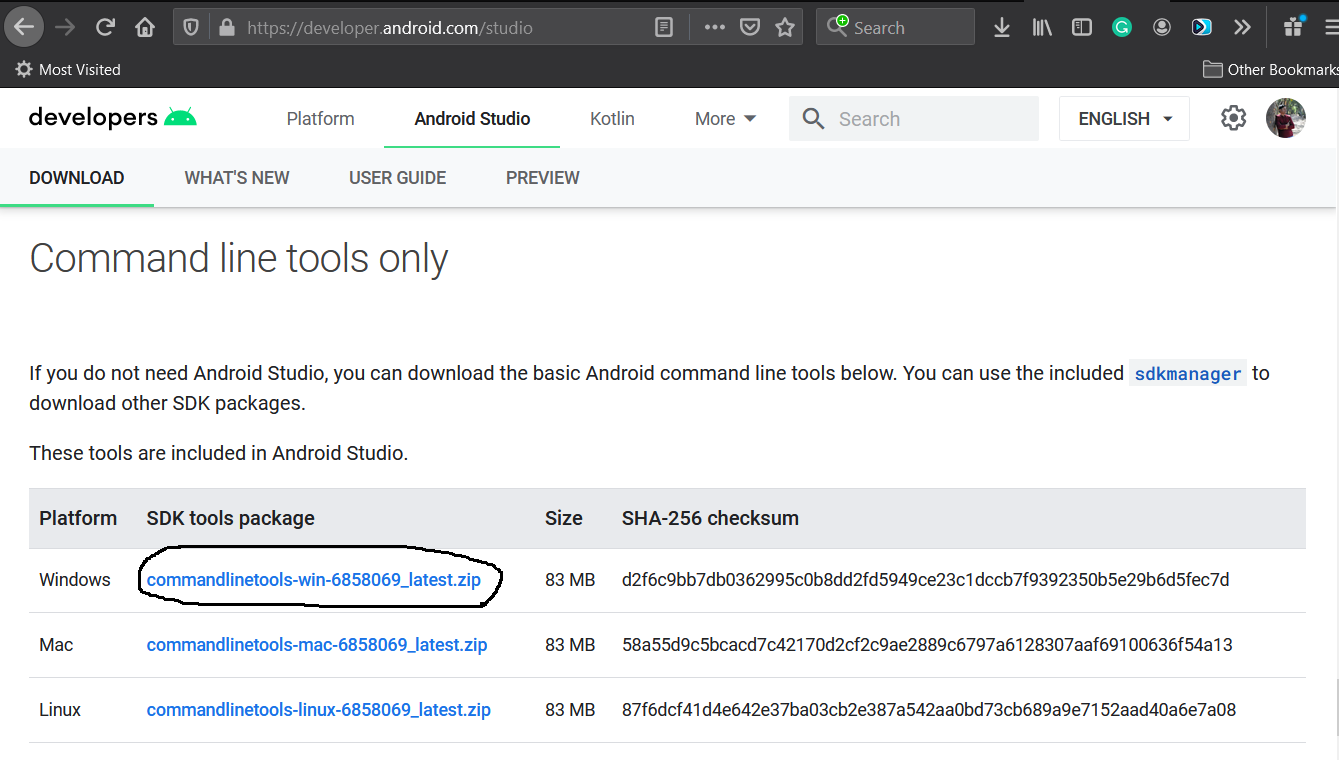
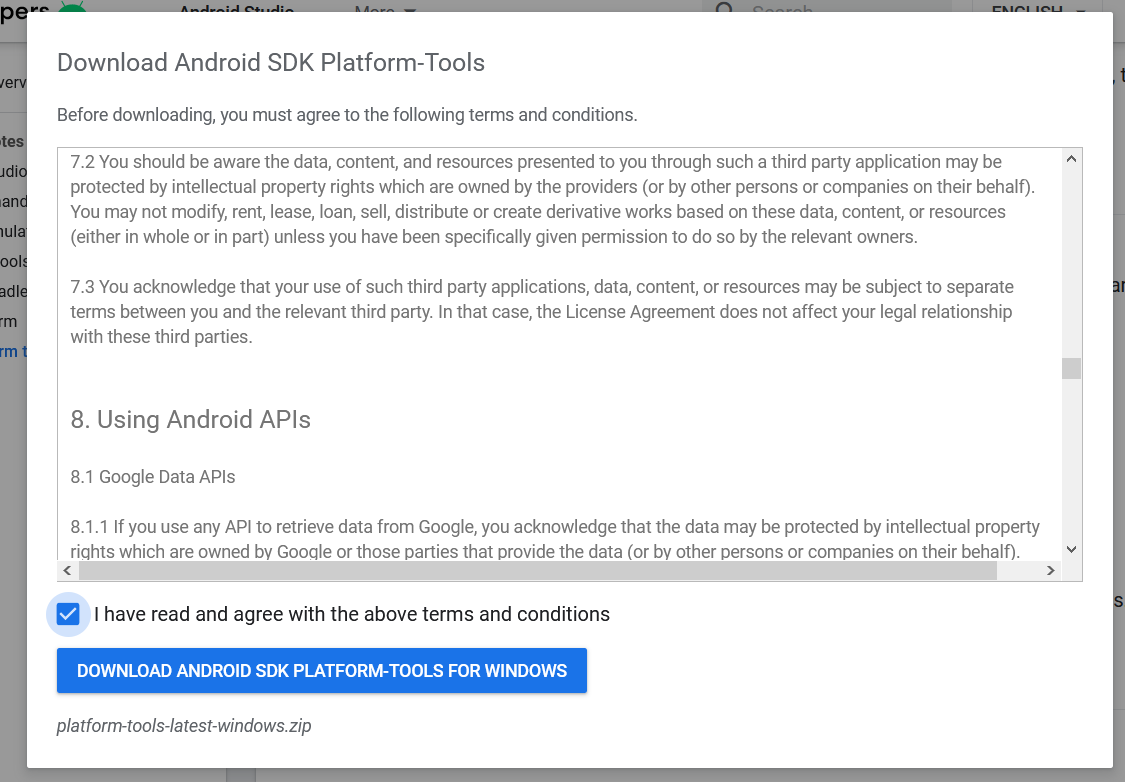
Click the first link having the download option for Windows as highlighted in Fig 1. It will ask to accept to terms and conditions as shown in Fig 2.
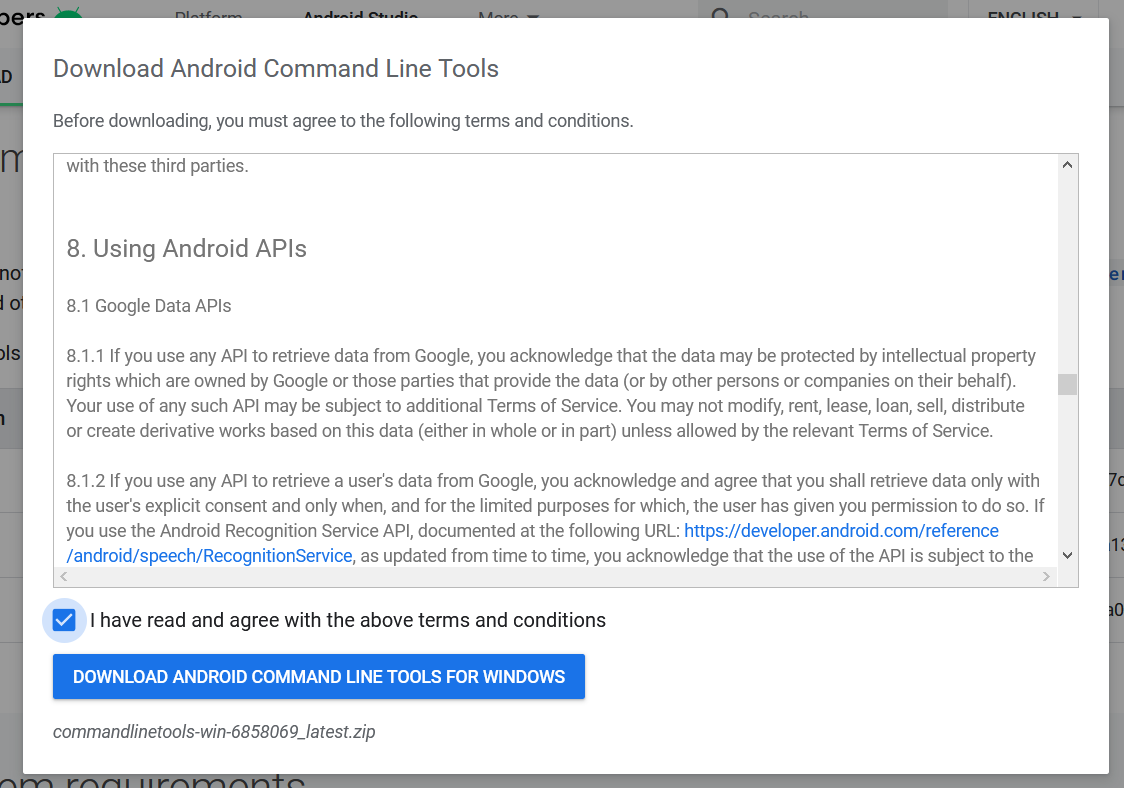
Go through the details, agree on the terms and conditions and click the Download Button to start the download.
Step 2 — Install Command Line Tools
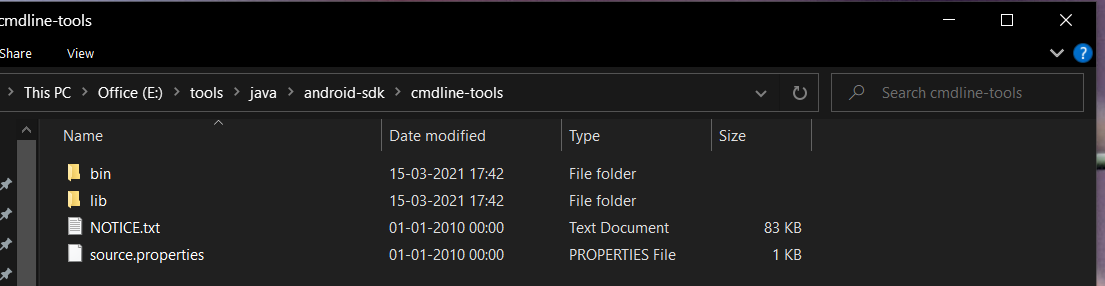
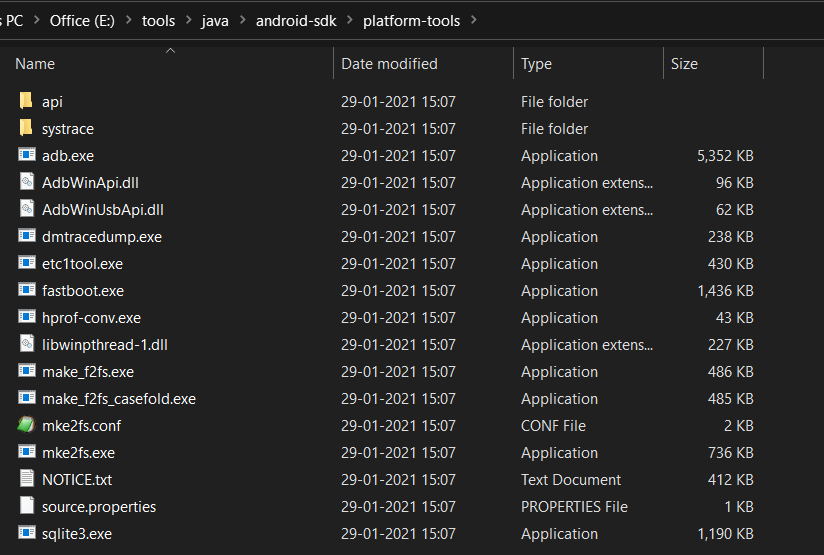
In this step, we will install the Android Command Line Tools on Windows 10. Create the directory android-sdk at your preferred location and extract the content of the downloaded SDK Tools zip to this directory. Make sure that the extracted content is available within the android-sdk directory created by us as shown in Fig 3.
Step 3 — Install Platform Tools
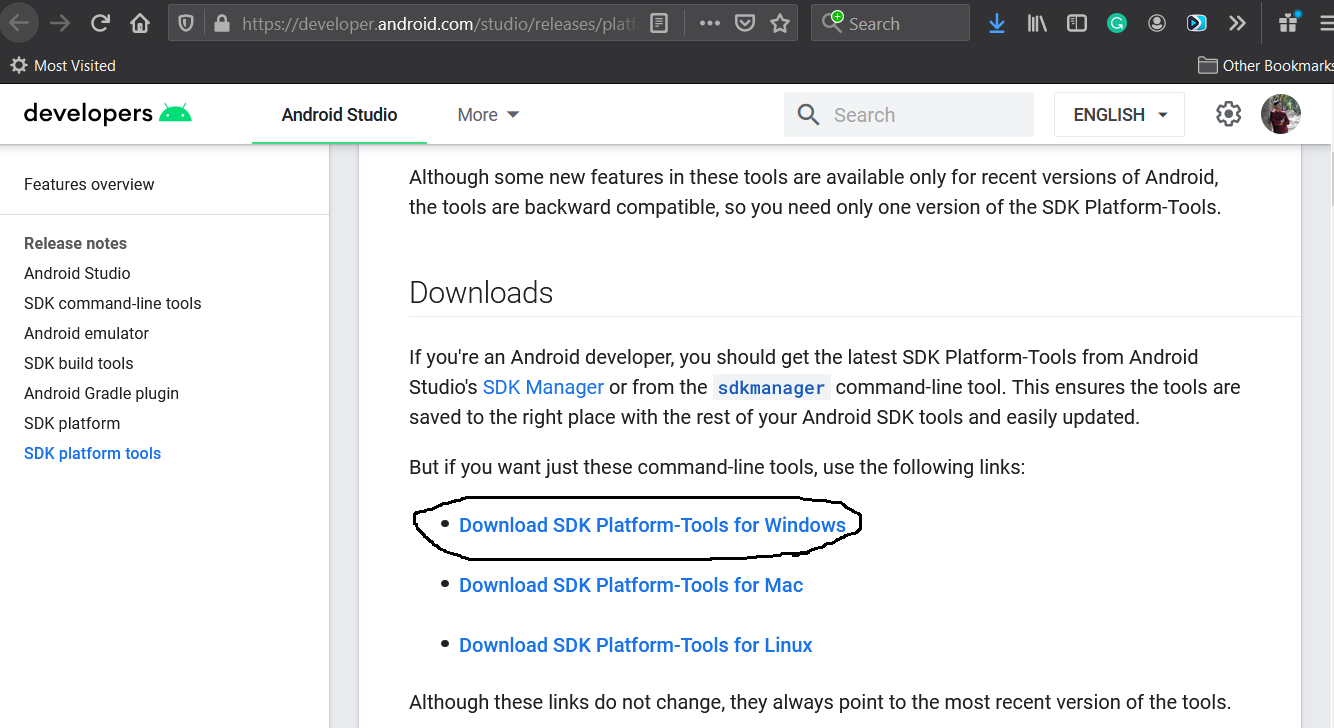
In this step, we will install the Android Platform Tools on Windows 10. Follow the same steps similar to Android SDK Tools to install Android Platform Tools using the download link as shown in Fig 4, Fig 5, and Fig 6.
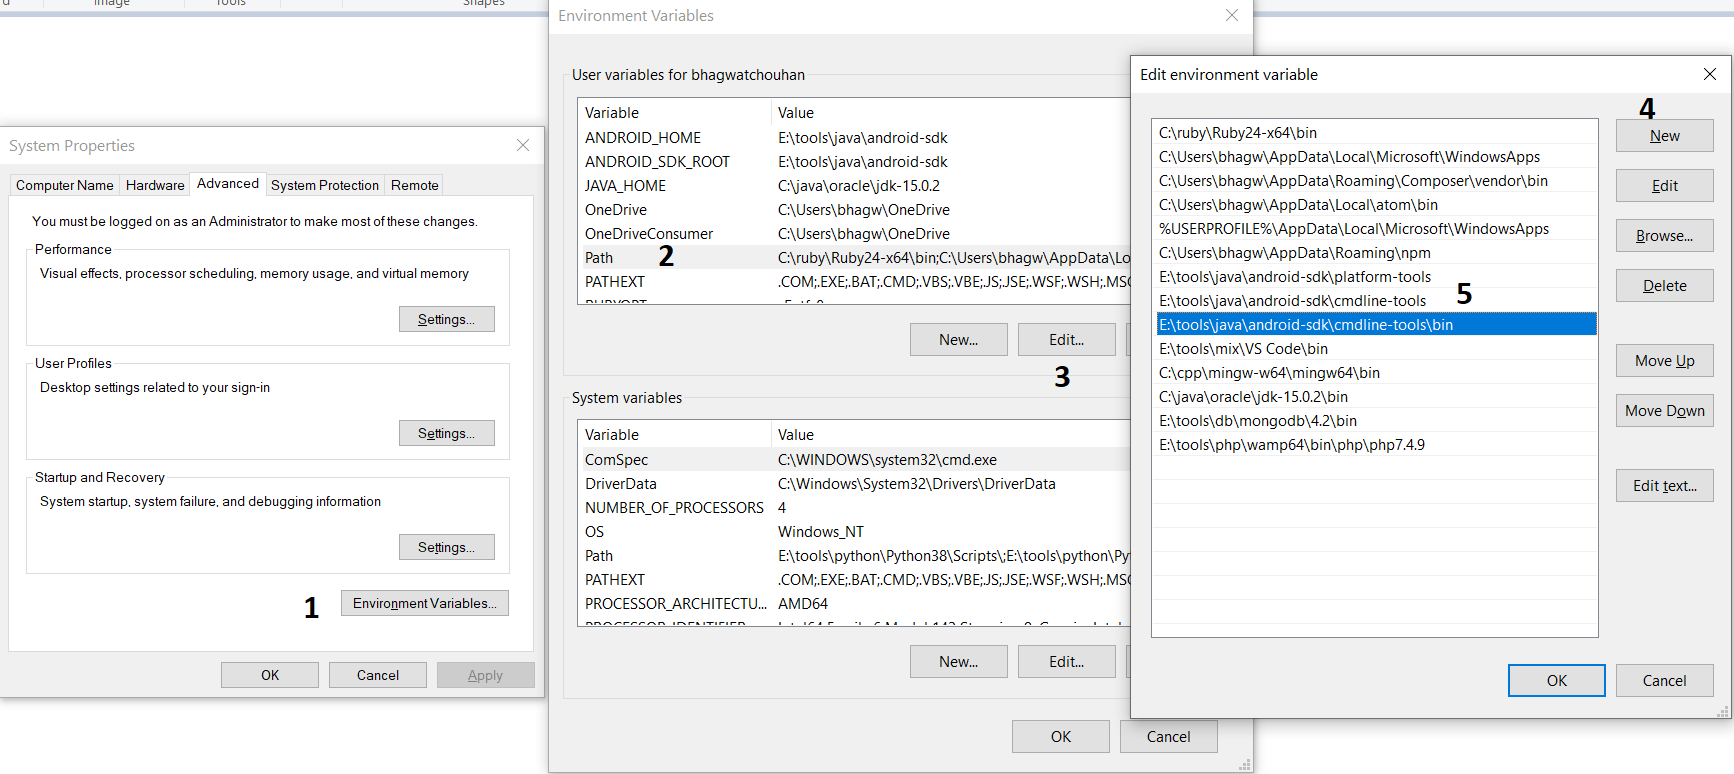
Step 4 — Configure Environment Variable
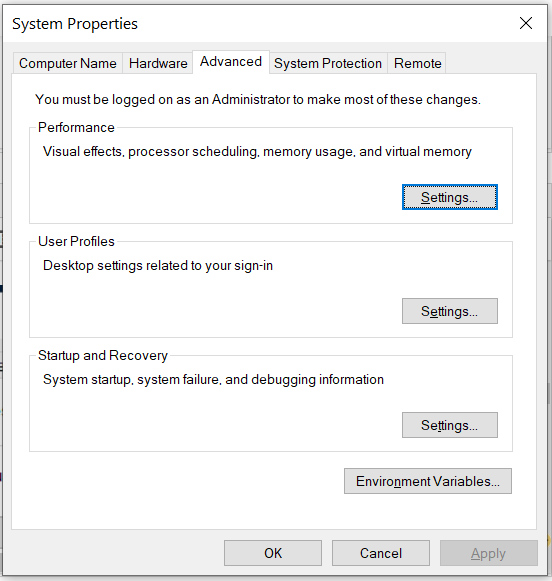
Right-click the My Computer or This PC on the desktop and click the Properties Option. Now click the Advanced system settings. It will show the System Properties dialog having Advanced Tab options as shown in Fig 7.
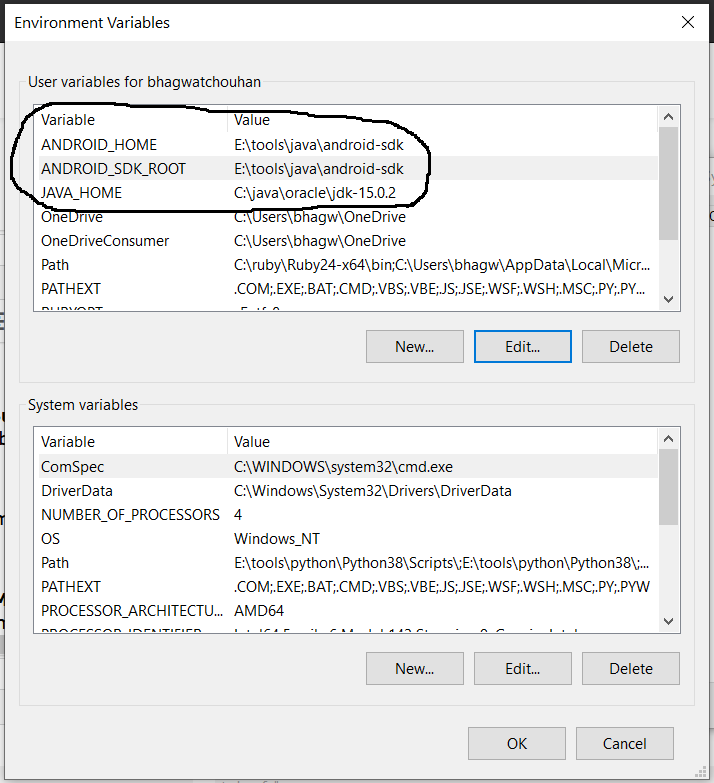
Click the Environment Variables Button and click the New Button in the first section. Set the Variable Name field to ANDROID_HOME and Variable Value to the android-sdk directory created by us in the previous step.
Similarly, also configure the environment variable ANDROID_SDK_ROOT to the android-sdk directory.
Also , make sure that the JAVA_HOME environment variable is set to the JDK installation directory. It must not end with the bin as we do with the system path variable.
Step 5 — Configure Commands
In previous steps, we have downloaded and extracted the Command Line Tools and Platform Tools to the android-sdk directory. Both the tools provide several command-line utilities which we need to run by going to the appropriate directory having the executable files.
We can make these commands available at the system level without going to these directories by adding the path to tools, tools\bin, and platform-tools to the system path as shown in Fig 9. Make sure that these executables do not break other commands having the same name before adding these paths to the PATH environment variable.
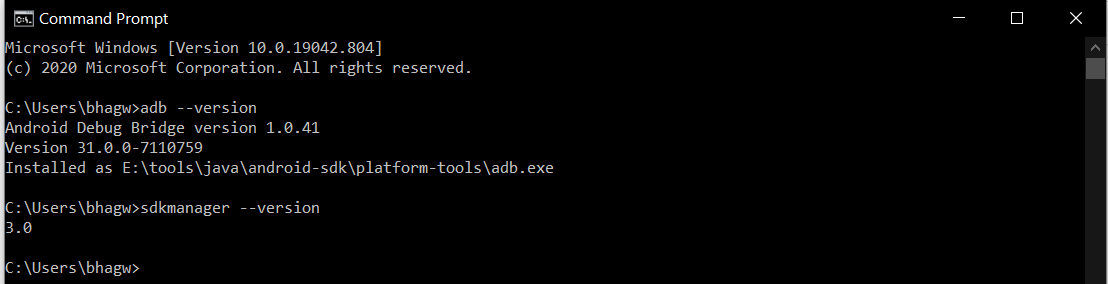
Now open the Command Prompt and check the ADB and SDK Manager versions as shown in Fig 10. You might be required to restart the system to apply the environment variables set by us.
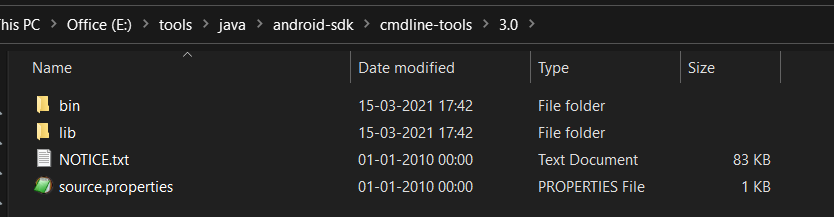
We can see that the ADB command works well and shows the version details, but the sdkmanager shows an error — «error: could not determine sdk root. error: either specify it explicitly with —sdk_root= or move this package into its expected location: \cmdline-tools\latest\» since it expects the Command Line Tools in a version-specific directory. Now open the source.properties file from the cmdline-tools directory to check the version. It will show the version details as shown below.
Now move all the files to the directory cmdline-tools/3.0 as shown in Fig 10.
Also, update the system path as shown in Fig 11.
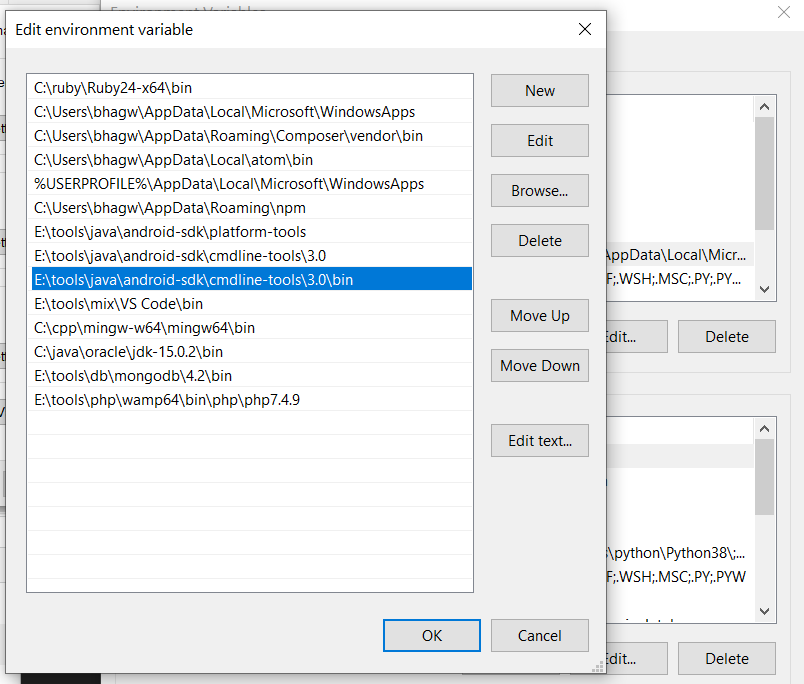
Now close and open the Command Prompt. Also, check the ADB and SDK Manager versions as shown in Fig 12.
Step 6 — Using the SDK Manager
List — We can list the installed and available packages and images using the list command as shown below.
Install Platform — Use the below-mentioned command to install the Android 10 (API level 30) using the SDK manager.
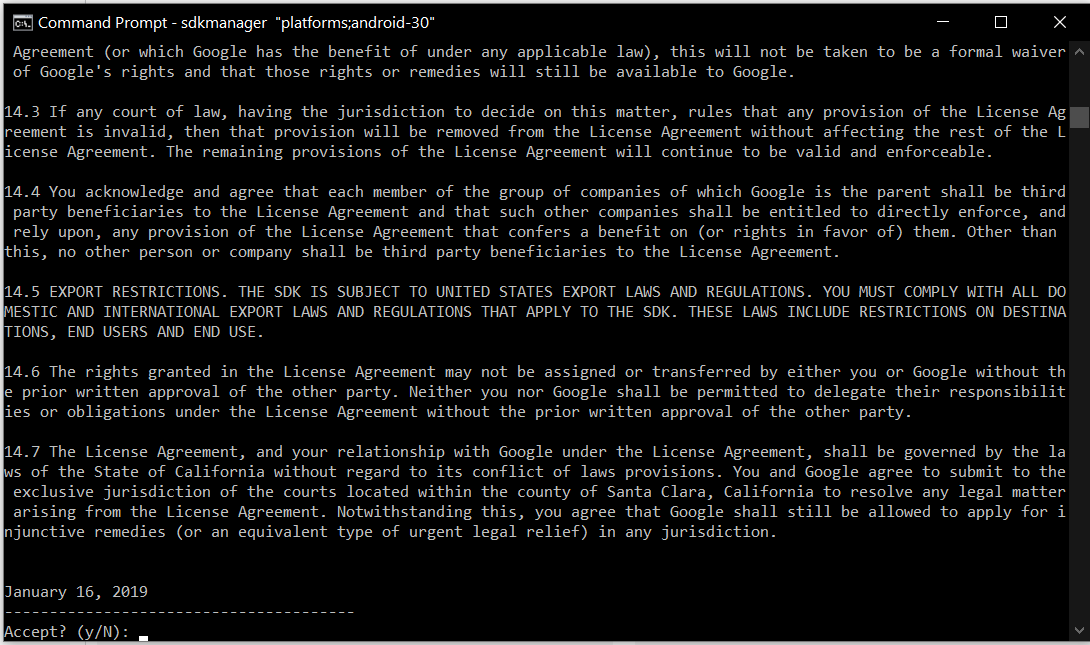
It will ask to accept the terms and conditions as shown in Fig 13. Enter y and hit Enter Key to accept the terms and conditions. This command creates the directory platforms within android-sdk and installs the package android-30 having all the required files to run the emulator for Android 10.
If we again check the installed packages, the list command shows the installed options as shown below.
Update SDK Manager — Update the SDK manager using the below-mentioned command.
Add System Image — We can add system images from available images shown by the list command using the SDK manager as shown below. We are adding the most recent default 64-bit system image.
Accept the License Agreement to complete the download.
There are several projects which need Google Play Services. We need system images specific to Google Play Services as shown below.
Accept the License Agreement to complete the download.
Install Emulator — We need to install the emulator before creating the AVD using SDK Manager.
Accept the License Agreement to complete the download.
Install Build Tools — Install the most recent build tool listed by the list command.
Step 7 — Using the Emulator and AVD Manager
Create Android Emulator — Create the emulator using the system image downloaded in the previous step as shown below. Replace with the actual name preferred by you.
The above commands ask a bunch of questions to configure the AVD if we choose the custom hardware profile option. We have excluded the details of these options from this tutorial since these configuration details depend on the actual needs. After completing all the configurations, it creates the AVD using the name provided by us while configuring it.
Similarly, we can also install the AVD of older versions as shown below.
List Android Emulators — Now go to the tools directory on the command line and check the installed platform as shown below.
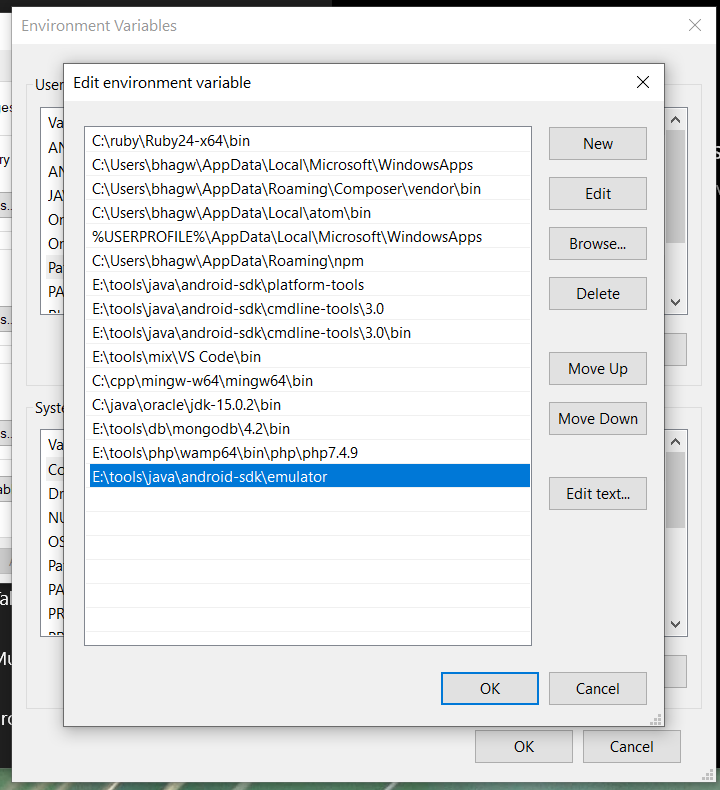
Notes: Add Emulator to the system path as shown in Fig 14.
Close and re-open the Command Prompt to check the AVDs created by us in the previous steps.
It will list all the AVDs installed by us.
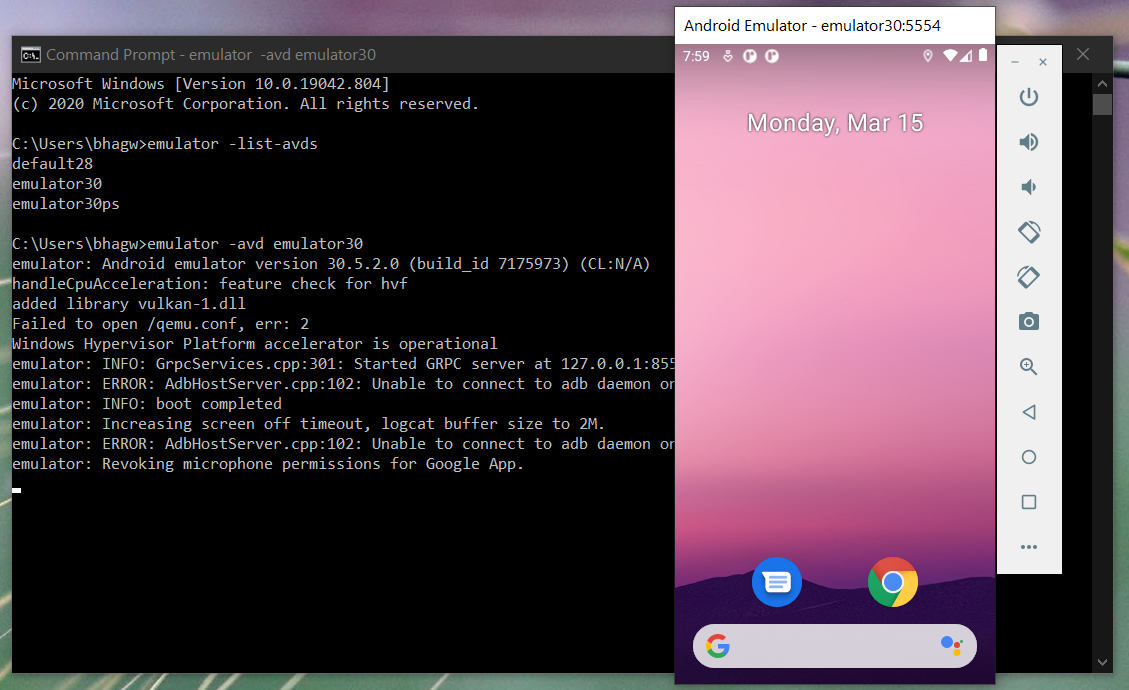
Run Emulator — We can run the emulator created by us as shown below.
The emulator will take some time to completely launch the AVD. The final results should look similar to Fig 15.
Delete Emulator — We can also delete an existing emulator as shown below.
Summary
This tutorial provided all the steps required to install Android Platform Tools and Android SDK Manager on Windows 10. It also provided the steps required to create and launch the AVDs using the Emulator.
Источник


