- How to create Image and Video Thumbnail in Android
- Android — Get camera thumbnail and full image
- Getting a thumbnail
- Getting the real picture
- Where are images stored on Android? What is the DCIM thumbnails folder?
- Written by: Ilia
- Where are pictures stored on Android?
- The DCIM Folder
- Where screenshots are saved on Android phone
- Why we need a thumbnails folder
- Where thumbnails are stored
- How to delete thumbnails on Android phone
- The DCIM folder is empty – now what?
- Clearing the Cache
How to create Image and Video Thumbnail in Android

There are many method and Library are available using which you can load the thumbnail of the video and Image file, but as per my experience Glide is the best solution for loading thumbnail, whether you are loading from Internet or loading from local SD card. Many of the application are using the Glide library for loading the Image and Video thumbnail.
You May Like:-
https://www.nplix.com/2017/02/11/create-animated-video-thumbnail-android/
You can download the Glide Library from here and alternatively, you can include the library directly in your app using Gradle.
One option to download the jar file also from Glide release page. If you are downloading the library then you have to place the library inside your project bin folder.
Here we are going to work with Gradle as its simple to implement w.r.t other methods. In this example, we will create an activity and place one image view and load the video thumbnail into this image view.
First of all, create a project and give a suitable name to your project. For example, here we are taking the name as VideoThmbanail.
So create the new project in the android studio by clicking on file->New>New Project and select the empty activity. It will take some time and project will get created with default activity. xml and other required files.
After this go the activity_main.xml file and modify it and add the image view in this xml file.
I hope you have added the ImageView in your XML file and if not added then you can download the complete source code from my GitHub Example page. GitHub Source code address was given at the end of this blog.
Now we have to add our Glide library in our app level build.gradle file as given below.
After adding the above dependency in your build.gradle file open the MainActivity.java file and add the below code inside onCreate method of MainActivity.
Before Testing our example we need to add two permission in our AndroidManifest.xml file Internet permission in case you need to load the thumbnail online and READ_EXTERNAL_STORAGE to load the file from your SD card.
You can now test the app that you have created in this example. When you will run it will look like as given below. Don’t forget to change the name of the file which you are going to load thumbnail.

Guys, this is a very simple implementation of the Glide but using glide library you can do much more.
You can download the source code of example from GitHub . If you have any question or query then feel free to comment here.
Источник
Android — Get camera thumbnail and full image

Feb 17, 2018 · 5 min read

Hello, My name is Rodrigo and i’m a mobile developer, today i i’ll teach you how to get images from android camera, there are two ways to get one picture from the native camera app from your device, get an thumbnail, small picture with low resolution just to show to user in tiny image view, and the full image resolution.
Fun fact, why you can’t use aways the fu l l resolution image, well there are some problems around that, think in this situation, you get the full-sized image from the camera and you need to show in a another fullscreen activity this image, imagine you transfer one image 1080p or something better, to another activity by the intent, probably you will receive an exception OutOfMemmoryError (One of various exceptions) because android can’t handle large files like this, this is why exists the thumbnail, it is a tiny bitmap which you can handle and transfer like you wish.
You don’t need to get angry anymore when you can’t get one good resolution picture or even one picture of the camera, i already pass by a lot of problems with the Android camera and this is a good solution which i found to fix this.

Getting a thumbnail
First in your activity or fragment when you request a picture from camera you need to do this
You will call a intent passing ACTION_IMAGE_CAPTURE to call the camera, obviously you need to handle the Android permissions before this, otherwise the app will crash. I use the TAKE_PICTURE with the value 1, this variable is the request code, you will need him in onActivityResult method to catch the image.
Now you can implement the method onActivityResult like this
Well let’s explain this, i use the switch to verify which case is, if the case is TAKE_PICTURE we need to check, only for safety reasons if the resultCode is RESULT_OK, this means everything work fine and the camera app give back one photo, and, also check with the intent have data, or your picture. After that you can get the bitmap and set in your imageView.

Getting the real picture
This way is more painful, but don’t worry, to get the full-sized image you need to ask the user to WRITE_EXTERNAL_STORAGE permission also. after that you need to create a fileProvider to android know where he can save the picture file, go to your Manifest and add this code:
Remember where is com.example.android, you need to change with your app package.
Now you need to create the resource telling the path to save the picture file, in the code above we use the name file_paths but you can change to one name as you wish, but remember to change in the provide you have create at Manifest:
Again you need to change com.example.package.name with the package of your app.
Ok now we can start to code, yhayy, first we need to create a file where the Android will save the picture after she was taken, ok i use the code bellow to create a random file with the name actual timeStamp, this guarantee that will never be two files with the same name:
You can use the mCurrentPhotoPath with global access just to reuse the file path after. Ok now we will create the method which will call the camera to take the picture, it’s like if you was trying to catch one thumbnail but with more things lol.
Like before you will have to pass a requestCode to catch the data after onActivityResult, i use the REQUEST_TAKE_PICTURE variable to do that. You need to check if the device have one camera to take the picture, you can do that with:
this guarantee the app will not crash if the camera is unavailable.
Again where is com.example.android you need to change to your app package!
Remember the method we created before to generate a new file? Well here we use him, to create a new file and generate an Uri where android will save the picture. Once you have create an new Uri with the path of the file you need to add this extra in your Intent to tell to Android where he can save the picture.
ok now you just need to catch the data in onActivityResult:
Remember, if you try to catch the full-sized image android will not return the image or the url with the intent, to retrieve the image you need to use the file path you generate before.
Ok, remember the currentPhotoPath we save before well, here we use him to catch the file and generate an Uri which one we will transform in a Bitmap, if you need the file in another formats, you can easy find it on google.

Thats it. Thanks to read this post and i hope it help you. I use the Android Documentation to create the post, if you want more details about how the things work go there and enjoy.
Источник
Where are images stored on Android? What is the DCIM thumbnails folder?

Written by: Ilia
Data recovery specialist, guest author, journalist.
It is convenient to store pictures on your phone,but with time it becomes harder and harder to clean up. Moreover, it isn’t always very clear where the images are stored. Worst of all, whole photo albums might disappear with an unintentional swipe. That’s why it is important to know where the media files are stored.
In this article we will describe:
Where are pictures stored on Android?
Photos taken on Camera (the standard Android app) are stored on either a memory card or in phone memory depending on the settings of the phone.
The location of photos is always the same — it’s the DCIM/Camera folder. The full path looks like this:
How do you get to these folders fast? You need to install a file manager like ES Explorer or Total Commander since the built-in tools of the mobile OS are not very convenient and have limited abilities to work in files and folders.
The DCIM Folder
DCIM stands for Digital Camera Images. This name is standard for digital cameras.
iOS and Android devices support DCF (Design rule for Camera File System); the name DCIM is accepted within the framework of DCF. Desktop and mobile apps can easily open this folder.
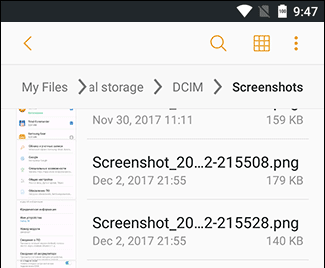
Where screenshots are saved on Android phone
Screenshots taken in the usual way (i.e. by pressing hardware buttons) are saved in the Pictures/Screenshot (or DCIM/Screenshot) folder. If you install a third party Screenshot app on Android OS, you need to check the screenshot location in the Settings.
Why we need a thumbnails folder
As the name suggestions, in this folder you can find thumbnails — smaller versions of pictures and downloaded images, for example, contact photos from Whatsapp or Skype. Thumbnails help a smartphone to open an image from the Gallery more quickly.
Where thumbnails are stored
Thumbnail files are stored in DCIM folder:
How to delete thumbnails on Android phone
It often happens that thumbnail files “eat up” too much space on a phone, up to a few gigabytes. It is useful and sometimes even necessary to clean out the thumbnails folder. You lose nothing, as all the necessary files will be created again when needed.
You can clean out the files in two ways.
Method 1 (manually):
1. Install a file manager on Android (for example, Solid Explorer Classic).
2. Enable the viewing of hidden files in your phone.
3. Go to the thumbnails folder.
4. Delete the Android DCIM thumbnails content by selecting all files.
Method 2 (automatically):
1. Install CCleaner app on Android.
2. Tap the ‘Analyze’ button.
3. Go to the ‘Other Caches’ section.
4. In the results tap the checkbox ‘Thumbnail Cache’ and press ‘Clean’.
The DCIM folder is empty – now what?
This problem occurs when you connect your phone to a PC through a USB cable. The DCIM folder is empty while the pictures can still be displayed through Gallery
- You need to check both locations — on the memory card and on the Android-device memory. (You may need to drag files from one DCIM folder to the other.)
- Then delete cache from External Storage and Media Storage app.
Clearing the Cache
1. Settings > Apps > Tap three dots on top right.
2. Show system apps > Go to ‘External Storage’ and ‘Media storage’.
3. Tap ‘Clear data’ and ‘Clear cache’ buttons.
4. Reboot the mobile phone.
Why is the folder called DCIM?
The abbreviation DCIM stands for Digital Camera Images. For digital cameras this name is a kind of standard.
iOS and Android devices support the DCF specification, within which the DCIM name is adopted. Therefore desktop and mobile apps open this folder with no problems.
I accidentally deleted photos from the Camera folder to make space. I chose the DCIM folder as the one to erase by accident too. Is it possible to recover the photos? It happened 5 days ago.
Thumbnails from the DCIM folder can be recovered even without root access, but it’s required if you want to retrieve the original photos. We’ve already discussed such cases here and we recommend you to go through the cases of other users.
I have a Samsung Galaxy j5 smartphone and all my photos and videos went missing. I looked for them in the DCIM folder but found nothing when the memory of the phone is still occupied.
See the general recovery tips we’ve given in this article. Also consider checking other spaces (such as Samsung Cloud, Google Photos or Dropbox) for any backup copies.
I’ve transferred the photos from my phone to a SD card but instead of them I see a triangle with an exclamation mark. The photos stored in the DCIM camera folder are of poor quality and resolution.
Your files got lost during the transferring process. This often happens when cut-and-paste is used instead of copying and deleting. Your way out of this situation is to try to recover the photos from your phone memory and here you can find the best software for this purpose.
After restarting a device, its SD card was damaged; all the photos/videos stored on it were lost.
The memory card has to be checked for reading errors. Here is the manual on how to do it. If you can’t fix the storage drive, give a try to recovering the photos and videos via PhotoRec software. In order to do it, connect the SD card via a card reader to a PC.
After I take a picture I used to put it on autocorrect and it would send it to DCIM folder which was thin located in my gallery when I scrolled down but it is not there anymore and I cannot find my DCIM folder. Where are my photos? I’ve already gone through your instructions and do not understand a word they’re saying. I want my DCIM folder back because the pictures look better.
I have a Samsung galaxy j5 and some saved images on my phone went missing. I went through my files and DCIM folder but found nothing, although no additional free memory appeared. I receive Android notifications saying that I need to free up some memory. What should I do?
I transferred photos from my phone to its memory card, but they disappeared and instead of them there is a triangle with an exclamation mark… I found the photos (on your advice) in DCIM camera folder, but their quality leaves much to be desired (the focus is completely gone!).
I transferred the photos from my phone memory to its sd card. I made it via a stationary computer by connecting the phone through a USB port. I have access to Android Gallery and photos are stored in DCIM/Camera folder. But there is no access to the photos and videos from Viber and WhatsApp.
Please help me to recover the files from my phone. When I connect it to my computer, the photos stored in DCIM folder (internal memory) can’t be viewed, although there are no problems with it when viewing them via the phone. I wanted to transfer them to the computer. As a result, I’ve done something wrong. Now all the photos in this folder are in the form of a gray square with an exclamation mark. When I try to open them, the cursor hangs and starts spinning and then I receive a notification saying that the format isn’t supported. I have no clue how but two DCIM folders merged and then were replaced. As a result, there is some free space in the internal memory of the phone. In such case is it possible to retrieve photos and videos from that folder and if yes, than how?
Источник


