- Android: draw a custom view
- Introduction
- Constructor
- onAttachedToWindow
- onMeasure
- onLayout
- onDraw
- View Update
- Animation
- Android SDK: Creating Custom Views
- Step 1: Create an Android Project
- Step 2: Create a View Class
- Step 3: Create Attribute Resources
- Step 4: Add the View to the Layout
- Step 5: Retrieve the Attributes
- Step 6: Draw the View
- Step 7: Provide Get and Set Methods
- Step 8: Manipulate the View from the Activity
- Conclusion
Android: draw a custom view


Introduction
Every day we use various applications and despite of their diverse intentions, most of them are very similar or even resemble each other in terms of design. That’s why a lot of customers are requesting specific, customized layouts and appearances that no other application has embodied yet, in order to make the Android application unique and contrast from others.
If a specific feature requires a very customized functionality that could not be created by android built-in views — then here comes custom view drawing. What that means in most cases, is that it will take quite a while to complete it. But it doesn’t mean that we should not do this, moreover it’s very exciting and interesting to implement.
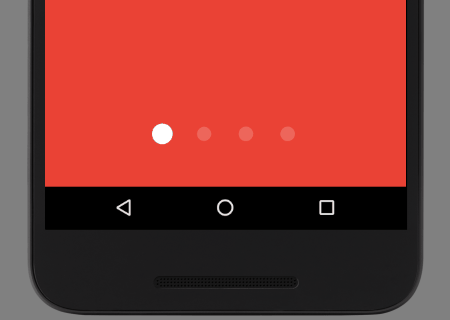
I recently got into a similar situation: my task was to create a page indicator for Android ViewPager. Unlike iOS, Android does not provide such view, so I had to implement it as a custom one.
I spent a decent amount of time trying to implement it. Fortunately enough that view is quite reusable in projects nowadays , so to save personal time and the time of other developers, I decided to make a public library based on that view. If you have similar functionality and lack the time to implement it by yourself, then find it on github repo.

Well, since most of custom views are more time consuming than the regular ones, you should only make it, if there is no easier way to implement a specific feature or you have the following issues that custom view could have resolved:
- Performance. If you have a lots of views in your layout and you want to optimize it by drawing a single custom view to make it lighter.
- A big view hierarchy that is complex to operate and support.
- A complete custom view that requires manually drawing.
If you have not tried working out a custom view, then this article is a great opportunity to stay closer to drawing your own flat custom view. It will show you the overall view structure, how to implement specific things, how to avoid common mistakes and even how to animate your view!
The very first thing we need to do, is jump into View lifecycle. For some reason Google does not provide an official diagram of view lifecycle, it is quite a widespread misunderstanding between developers that leads to unexpected bugs and issues, so lets keep our eye on it!

Constructor
Every view starts it’s life from a Constructor. And what it gives us, is a great opportunity to prepare it for an initial drawing, make various calculation, set default values or whatever we need.
But to make our view easy to use and setup, there is useful AttributeSet interface. It’s easy to implement and is definitely worth the time to spend on it, because it will help you (and your team) to setup your view with some static parameters on further screens.
First, create a new file and call it attrs.xml. In that file could be all the attributes for different custom views. As you can see in this example we have a view called PageIndicatorView and single attribute piv_count.

Secondary in your View constructor you need to obtain attributes and use it as shown below.
- While creating custom attributes make a simple prefix to avoid name conflicts between other views with similar attribute names. Mostly it is abbreviation of view name, just like we have piv_ .
- if you are using Android Studio, Lint will advise you to call recycle() method as long as you are done with your attributes. The reason is just to get rid of inefficiently bound data that’s not gonna be used again.
onAttachedToWindow
After parent view calls addView(View) that view will be attached to a window. At this stage our view will know the other views that it is surrounded by. If your view is working with user’s other views located in same layout.xml it is good place to find them by id (which you can set by attributes) and save as a global reference (if needed).
onMeasure
Means that our custom view is on stage to find out it’s own size. It’s very important method, as for most cases you will need your view to have specific size to fit in your layout.
While overriding this method, what you need to do this is to set setMeasuredDimension(int width, int height).

While setting size of a custom view you should handle case, that view could have specific size that user will set in layout.xml or programmatically. To calculate it properly, a few steps need to be done.
- Calculate your view content desired size (width and height).
- Get your view MeasureSpec(width and height) for size and mode.
3. Check MeasureSpec mode that user set and adjust size of your view (for width and height).
- MeasureSpec.EXACTLY means that user hardcoded size value, so
regardless your view size, you should set specified width or height. - MeasureSpec.AT_MOST used for making your view as large as it wants up to the specified size.
- MeasureSpec.UNSPECIFIED is actually a wrap size of view. So with
this parameter you can use desired size that you calculated above.
Before setting final values to setMeasuredDimension just in case check if those values is not negative. That will avoid issues in layout preview.
onLayout
This method, incorporates assigning a size and position to each of its children. Because of that, we are looking into a flat custom view (that extends a simple View) that does not have any children so there is no reason to override this method.
onDraw
That’s where the magic happens. Having both Canvas and Paint objects will allow you draw anything you need.
A Canvas instance comes as onDraw parameter, it basicly respond for drawing a different shapes, while Paint object defines that color that shape will get. Simply, Canvas respond for drawing an object, while Paint for styling it. And it used mostly everywhere whether it is going to be a line, circle or rectangle.

While making a custom view, always keep in mind that onDraw calls lots of time, like really alot. While having some changes, scrolling, swiping your will be redrawn. So that’s why even Android Studio recommend to avoid object allocation during onDraw operation, instead to create it once and reuse further on.


- While performing drawing always keep in mind to reuse objects instead of creating new ones. Don’t rely on your IDE that will highlight a potential issue, but do it yourself because IDE could not see it if you create objects inside methods called from onDraw .
- Don’t hard code your view size while drawing. Handle case that other developers could have same view but in different size, so draw your view depending on what size it has.
View Update
From a view lifecycle diagram you may notices that there are two methods that leads view to redraw itself. invalidate() and requestLayout() methods will help you to make an interactive custom view, that may change its look on runtime. But why there are two of them?
- invalidate()method used to simple redrawing view. While your view for example updates its text, color or touch interactivity. It means that view will only call onDraw() method once more to update its state.
- requestLayout()method, as you can see will produce view update through its lifecycle just from onMeasure() method. And what it means that you will need it while after your view updates, it changed it’s size and you need to measure it once again to draw it depending on new size.
Animation
Animations in custom view is frame by frame process. It means that if you for example want to make a circle radius animate from smaller to bigger you will need to increase it one by one and after each step call invalidate() to draw it.
Your best friend in custom view animations is ValueAnimator. This class will help you to animate any value from start to the end with even Interpolator support (if you need).
Note :
Don’t forget to call invalidate() every time new animated values comes out.
Hopefully this article will help you to draw your first custom view and if you want to learn more about it, watch a decent presentation video.
Источник
Android SDK: Creating Custom Views
The Android platform provides an extensive range of user interface items that are sufficient for the needs of most apps. However, there may be occasions on which you feel the need to implement a custom user interface for a project you are working on. In this tutorial we will work through the process of creating a custom View.
To create and use our custom View, we will extend the View class, define and specify some custom attributes, add the View to our layout XML, override the onDraw method to tailor the View appearance and manipulate it from our app’s main Activity.
Step 1: Create an Android Project
Create a new Android project in Eclipse. You can choose whatever settings you like as long as your app has a main Activity class and a layout file for it. We do not need any amendments to the Manifest file. In the source code download file the main Activity is named «LovelyActivity» and the layout file is «activity_lovely.xml» — alter the code to suit your own names if necessary. We will be creating and adding to a few additional files as we go along.
Step 2: Create a View Class
Our custom View can extend any of the existing Android View classes such as Button or TextView. However, we will create a direct subclass of View. Extending an existing class allows you to use the existing functionality and styling associated with that class, while providing processing to suit your own additional needs.
Create a new class in your application by selecting the app’s main package in Eclipse and choosing «File», «New», «Class». Enter a name of your choice and click «Finish». The tutorial code uses the class name «LovelyView» — you will need to alter it in all of the below code if you choose a different name. Make your new class extend View by adding to its opening declaration line:
Add the following import statements above this:
Step 3: Create Attribute Resources
In order to use our custom View as we would use a standard View (i.e. set its attributes in layout XML and refer to them in our Java code), we will declare attribute resources. In Eclipse, create a new file in your project «res/values» folder by selecting it and choosing «File», «New», «File». Enter «attrs.xml» as the file name and click «Finish».
In the attributes file we first need to indicate that we are listing resources, so add the following parent element:
Inside this element, we are going to declare three attributes for the View that will allow us to style it. Let’s keep things relatively simple — the View is going to display a circle with some text in the middle. The three attributes will be the circle color, the text String, and the text color. Add the following inside your resources element:
The declare-styleable element specifies the View name. Each attribute has a name and format. We will be able to specify these attributes in the layout XML when we add the custom View and also retrieve them in the View class. We will also be able to retrieve and set the attributes from our Java Activity class. The values provided for each attribute will need to be of the type listed here as format.
Step 4: Add the View to the Layout
Let’s add an instance of the custom View to our app’s main layout file. In order to specify the custom View and its attributes, we need to add an attribute to the parent layout element. In the source download, it is a RelativeLayout but you can use whichever type you prefer. Add the following attribute to your layout’s parent element:
Alter «your.package.name» to reflect the package your app is in. This specifies the namespace for our app, allowing us to use the attributes we defined within it. Now we can add an instance of the new View. Inside the layout, add it as follows:
Again, alter the package name to suit your own, and the class name if necessary. We will use the ID to refer to the View in our Activity code. Notice that the element lists standard View attributes alongside custom attributes. The custom attributes are preceded by «custom:» and use the names we specified in our attributes XML file. Note also that we have specified values of the types we indicated using the format attributes in the «attrs.xml» file. We will retrieve and interpret these values in our View class.
Step 5: Retrieve the Attributes
Now let’s turn back to the View class we created. Inside the class declaration, add some instance variables as follows:
We will use the first three of these to keep track of the current settings for color and text. The Paint object is for when we draw the View. After these variables, add a constructor method for your class:
As we are extending the View class, the first thing we do is call the superclass method. After the super call, let’s extend the method to setup the View. First instantiate the Paint object:
Now let’s retrieve the attribute values we set in XML:
This typed array will provide access to the attribute values. Notice that we use the resource name we specified in the «attrs.xml» file. Let’s now attempt to retrieve the attribute values, using a try block in case anything goes wrong:
We read the attributes into our instance variables. Notice that we use the names we listed for each in «attrs.xml» again. The colors are retrieved as integer values and the text label as a String.
That’s the constructor method complete — by the time it has executed, the class should have retrieved the selected View attributes we defined in the attribute resources file and set values for in the layout XML.
Step 6: Draw the View
Now we have our View attributes in the class, so we can go ahead and draw it. To do this, we need to override the onDraw method. Add its outline after your constructor method as follows:
Since we’re going to draw a circle, let’s get some information about the available space, inside the onDraw method:
Now we can calculate the circle radius:
Now let’s set some properties for painting with:
Now we will use the selected circle color as stored in our instance variable:
This means that the circle will be drawn with whatever color we listed in the layout XML. Let’s draw it now using these details:
Now let’s add the text. First set the color using the value retrieved from the layout XML:
Now set some more properties:
Finally we can draw the text, using the text string retrieved:
That’s onDraw complete.


Step 7: Provide Get and Set Methods
When you create a custom View with your own attributes, it is recommended that you also provide get and set methods for them in your View class. After the onDraw method, first add the get methods for the three customizable attributes:
Each method simply returns the value requested. Now add the set methods for the color attributes:
These methods accept int parameters representing the color to set. In both cases we update the instance variable in question, then prompt the View to be redrawn. This will make the onDraw method execute again, so that the new values affect the View displayed to the user. Now add the set method for the text:
This is the same as the other two set methods except for the String parameter. We will call on these methods in our Activity class next.
Step 8: Manipulate the View from the Activity
Now we have the basics of our custom View in place, let’s demonstrate using the methods within our Activity class. In the app’s main Activity class, add the following import statements:
Before the onCreate method, inside the class declaration, add an instance variable representing the instance of the custom View displayed:
Inside the onCreate method, after the existing code, retrieve this using its ID as included in the XML layout file:
To demonstrate setting the View attribute values from the Activity, we will add a simple button. Open your layout file and add it after the custom View element:
We specify a method to execute on user clicks — we will add this to the Activity class. First add the String to your «res/values/strings» XML file:


Now go back to the Activity class and add the method listed for clicks on the button:
Let’s use the set methods we defined to update the custom View appearance:
This is of course just to demonstrate how you can interact with a custom View within your Activity code. When the user clicks the button, the appearance of the custom View will change.


Conclusion
In general, it’s advisable to use existing Android View classes where possible. However, if you do feel that you need a level of customization beyond the default settings, creating your own custom Views is typically straightforward. What we have covered in this tutorial is really just the beginning when it comes to creating tailored Android user interfaces. See the official guide for information on adding interactivity and optimization to your customizations.
Источник


