- Wireless Debugging through ADB in Android using WiFi
- Step 1 : Connect your adb host computer and your android phone to same network
- STEP 2 : If you are connecting to a Wear OS device, turn off Bluetooth on the phone that’s paired with the device.
- STEP 3: Connect the device to the host computer with a USB cable.
- STEP 4: locate your SDK
- STEP 5 : Check whether your device is properly connected
- Step 6 : Set the target device to listen for a TCP/IP connection on port 5555
- STEP 7 : Find the IP address of the Android device.
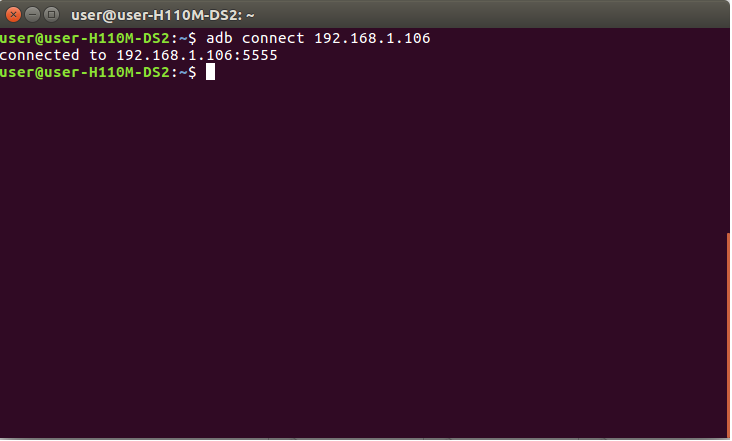
- STEP 8 : Connect to the device by its IP address.
- STEP 9 : Remove the USB cable
- STEP 10 : Confirm that your host computer is connected to the target device
- You’re now good to go! 🎉
- Беспроводная отладка Android 11
- How to Debug Your Android App over WiFi (without Root!)
- Moonshoot
- Steps to Revolutionize your Android Coding Experience
- Do I Have to Repeat the Process Every Time?
- Get Notified on New Future Studio Content and Platform Updates
- How to Debug Android app over WiFi
- Debug your Android (or Unity) application through Wi-Fi
- Valentino Urbano
- Enable and Test Wi-Fi debugging
- Caveats
Wireless Debugging through ADB in Android using WiFi

Jan 4, 2019 · 3 min read

In this article I am going to show you how you can debug your android app over WiFi.
Yes I know it is very hectic to debug your Android app with USB cable if your cable is broken or not functioning or you don’t have a cable and you have borrowed it from someone for few minutes.
It will require only few steps to get this done.
Step 1 : Connect your adb host computer and your android phone to same network
Make sure that your android phone and your host computer are connected on the same network then you will be able to debug your app.
STEP 2 : If you are connecting to a Wear OS device, turn off Bluetooth on the phone that’s paired with the device.
STEP 3: Connect the device to the host computer with a USB cable.
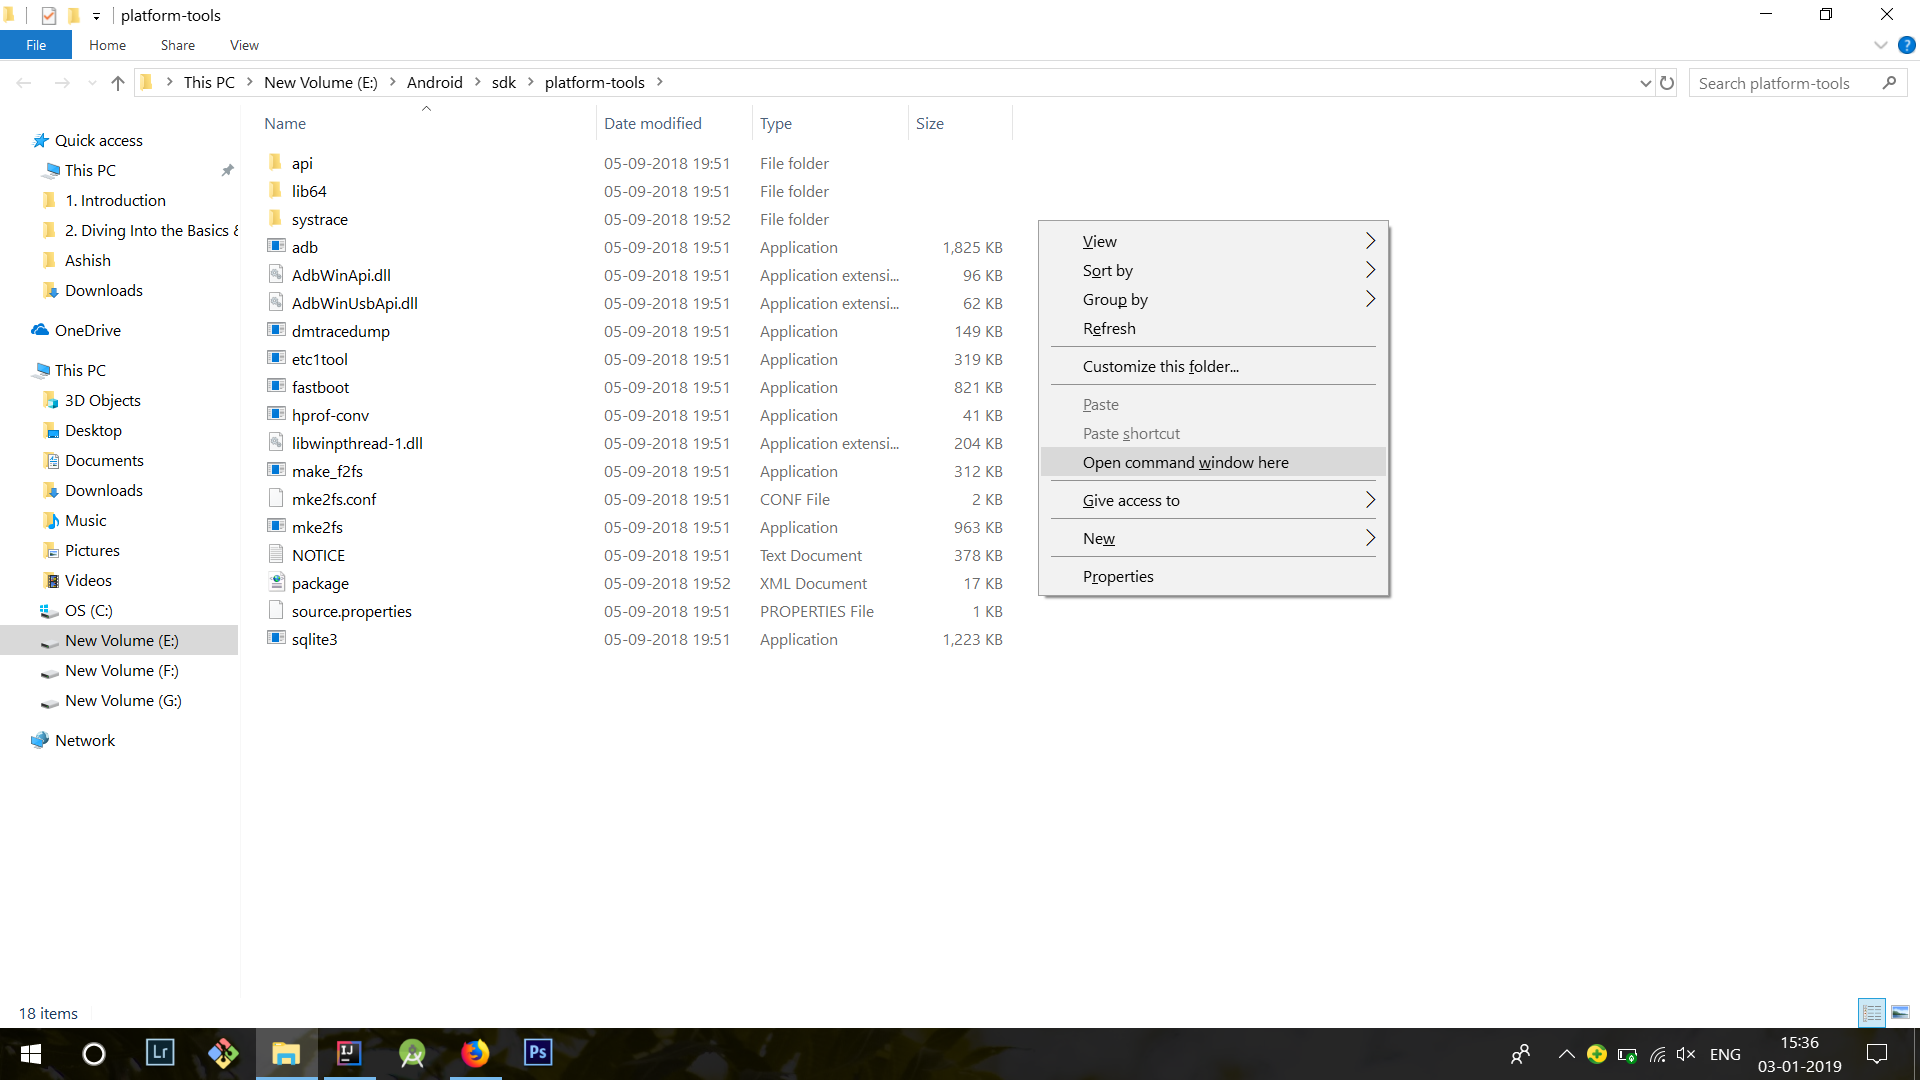
STEP 4: locate your SDK
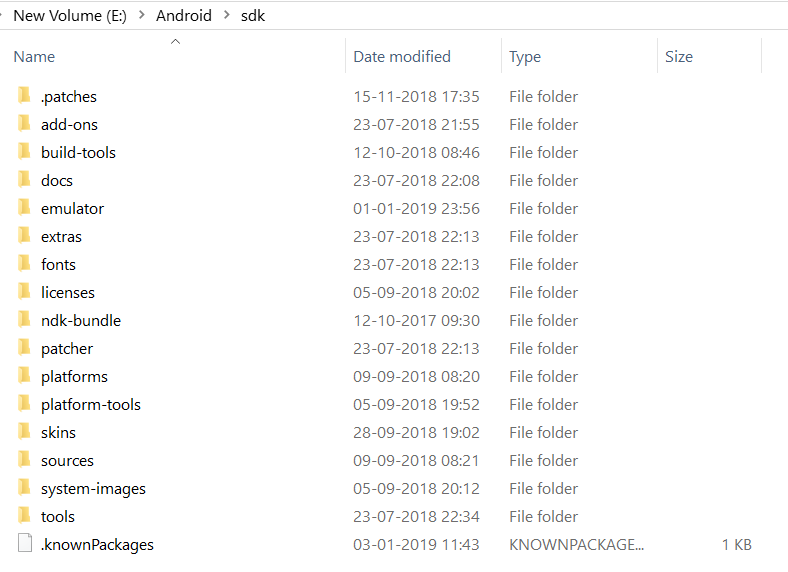
In the SDK you will find platform-tools

S e t this location as path on Command Prompt
On the platform-tools folder
Select Open Command window here
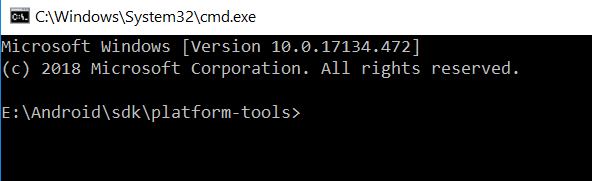
STEP 5 : Check whether your device is properly connected
This will show all the devices connect through WiFi.
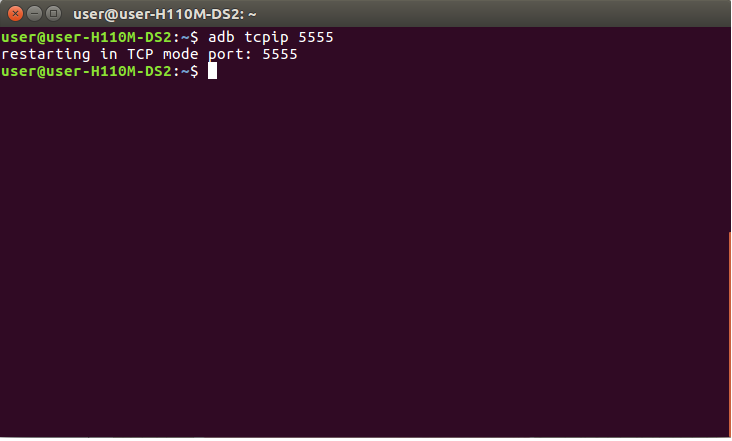
Step 6 : Set the target device to listen for a TCP/IP connection on port 5555

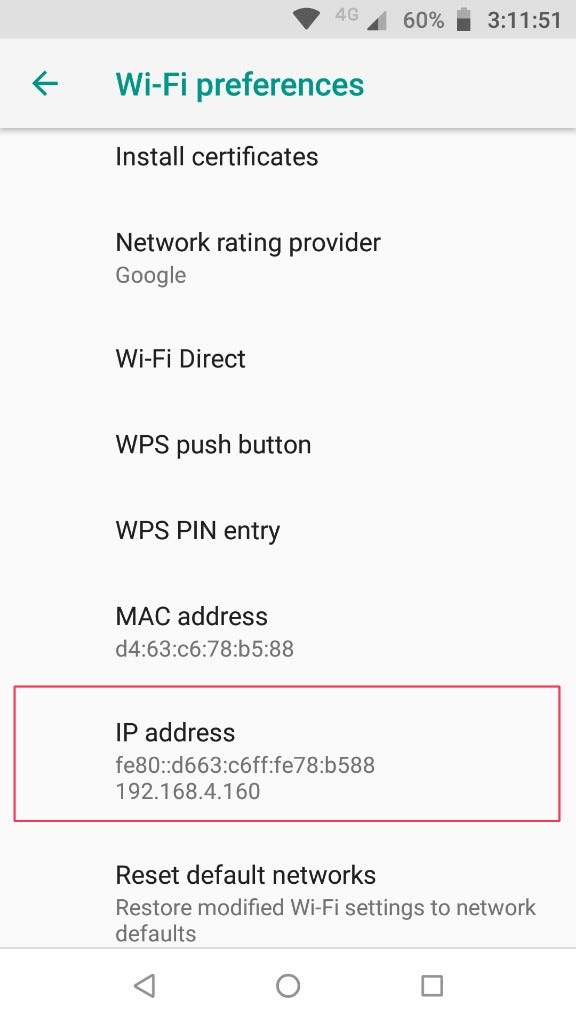
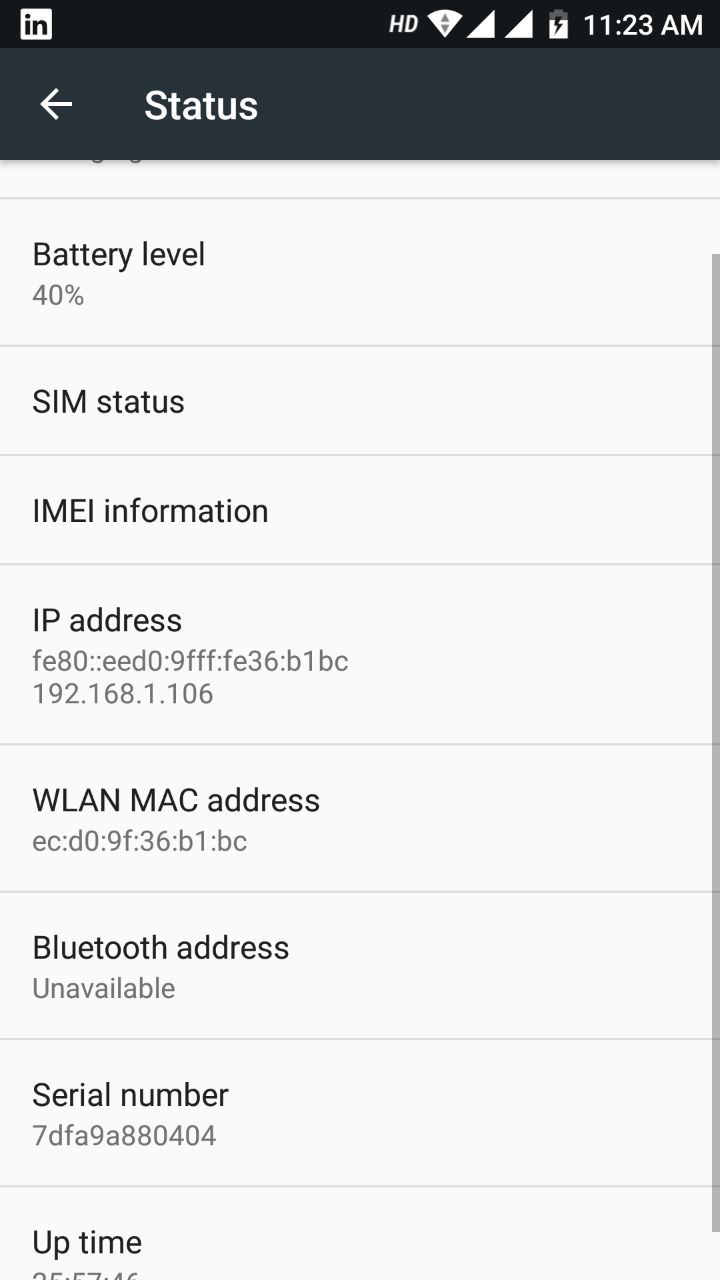
STEP 7 : Find the IP address of the Android device.
you can find the IP address at Settings > Wi-Fi Settings > Advanced > IP address.
STEP 8 : Connect to the device by its IP address.

STEP 9 : Remove the USB cable
Remove the USB cable and you should be connected to your device. If you don’t see it in adb devices then just reconnect using the previous steps command
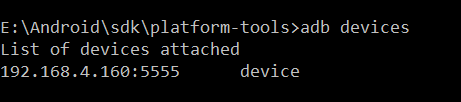
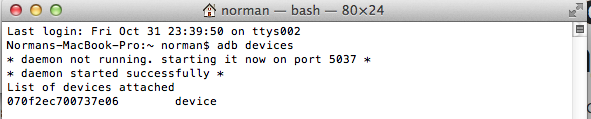
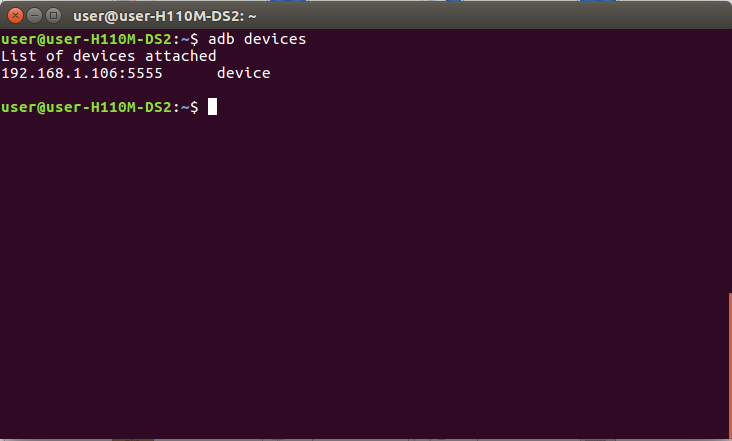
STEP 10 : Confirm that your host computer is connected to the target device
$ adb devices
List of devices attached
device_ip_address:5555 device
You’re now good to go! 🎉
If the adb connection is ever lost:
- Make sure that your host is still connected to the same Wi-Fi network your Android device is.
- Reconnect by executing the adb connect step again.
- Or if that doesn’t work, reset your adb host:
Then start over from the beginning.
Hope this helps you, if you have any query let me know in the comments section.
Источник
Беспроводная отладка Android 11
Режим дебага по WiFi теперь доступен, начиная с версии ОС Android 11. Давайте разберемся, как подключить устройство по Wi-Fi и смотреть логи в Logcat.

Нам необходимо убедиться, что у нас имеется все необходимое для соединения, а именно:
- установлен компонент Android SDK Platform-Tools версии не ниже 30.0.0 (April 2020), но естественно необходимо поставить последнюю версию, в которой разработчики пофиксили существующие на данный момент баги;
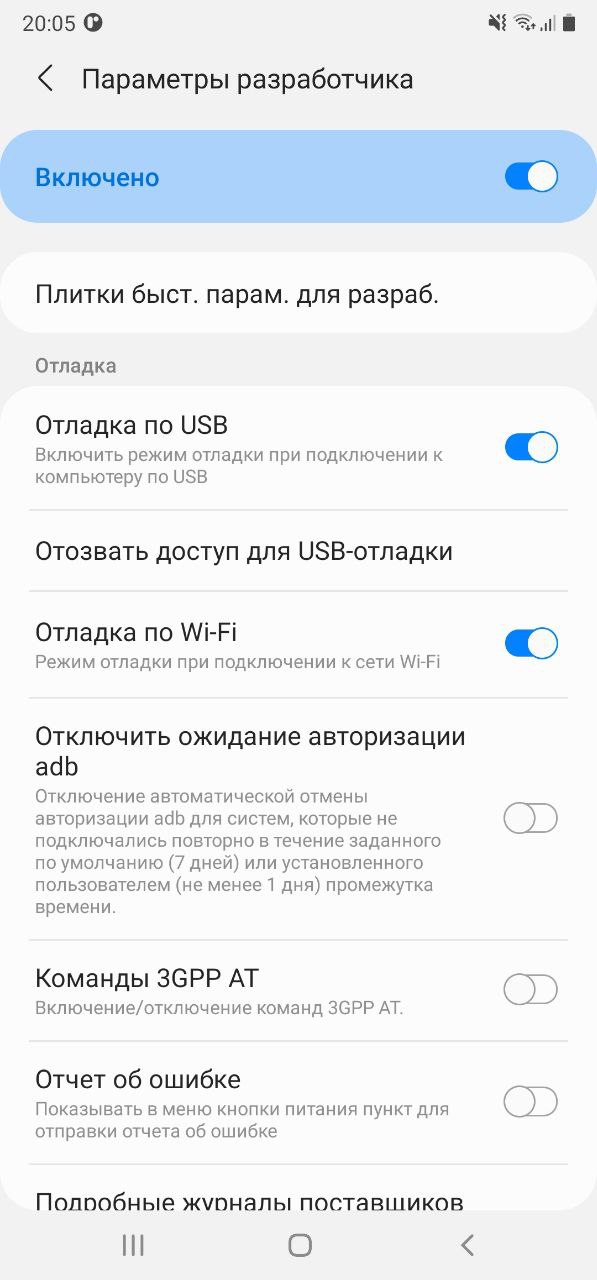
- включенрежим разработчика на вашем устройстве;
- на устройстве версия ОС Android 11.
Переходим в режим разработчика на нашем устройстве и активируем «Отладку по Wi-Fi».
Далее необходимо выбрать раздел «Подключить устройство с помощью кода подключения».
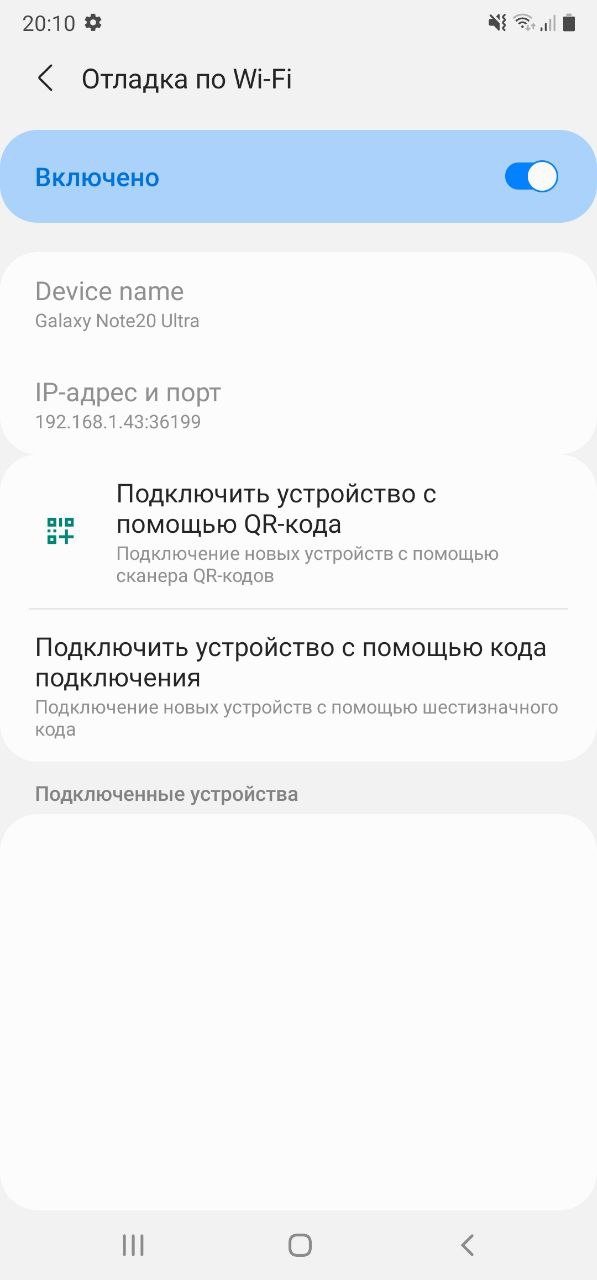
В боттомшите отобразится сам код подключения к устройству и IP-адрес и порт.

Откроем Android Studio, перейдем во вкладку Terminal, далее введем и выполним команду adb pair ipaddr:port где ipaddr и port — данные из боттомшита «Подключение к устройству». Следующим шагом — вводим код подключения и получим push на устройство об успешном подключении.
Перейдем на вкладку Logcat и все, что нам осталось — выбрать наше устройстве из списка подключенных устройств, в конкретном примере это Samsung SM-N985F.
Источник
How to Debug Your Android App over WiFi (without Root!)
Moonshoot
Moonshoot is a
Student Feature.
I discovered this little trick a year ago and it was immensely helpful. So far, whenever I was working on my Android apps, I had to connect it to my laptop with a USB cable. The USB cable is annoying and limits my movements. Consequently, I was researching, if there is an option to do the debugging over WiFi.
Luckily, there is a super simple way! All you need is a USB cable (for the initial setup) and have both devices in the same network. The screenshots in the following section are from my MacBook Pro, but it works on any operating system.
Steps to Revolutionize your Android Coding Experience
You need to connect your device to your computer via USB cable. Make sure USB debugging is working. You can check if it shows up when running adb devices .
Run adb tcpip 5555

Disconnect your device (remove the USB cable).
Go to the Settings -> About phone -> Status to view the IP address of your phone.
Run adb connect :5555

If you run adb devices again, you should see your device.

Now you can execute adb commands or use your favorite IDE for android development — wireless!
Do I Have to Repeat the Process Every Time?
Now you might ask, what do I have to do when I move into a different work space and change WiFi networks? You do not have to repeat steps 1 to 3 (these set your phone into WiFi-debug mode). You do have to connect to your phone again by executing steps 4 to 6.
Unfortunately, the android phones lose the WiFi-debug mode when restarting. Thus, if your battery died, you have to start over. Otherwise, if you keep an eye on your battery and do not restart your phone, you can live without a cable for weeks!
Happy wireless coding!
Get Notified on New Future Studio
Content and Platform Updates
Get your weekly push notification about new and trending
Future Studio content and recent platform enhancements
Источник
How to Debug Android app over WiFi
We mostly connect Android device to computers with a USB cable for debugging purposes. It is better to use adb over a wifi connection than a USB to save some wire-related hassles in our lives and many a times device is disconnected when we debug the app.
There is a simple way to connect Android devices to our computer. You will be needing a USB cable (for the initial setup) and make sure that both the devices should be on the same network. For connecting Android devices to your computer, follow the below steps.
Step 1 Connect your device on the same Wifi network:
You need to connect your device to your computer via USB cable. Make sure that the USB debugging is working; also your adb host computer and Android device must be on the same Wifi network.
Step 2 Get the list of connected devices :
Connect the Android device to the computer using your USB cable. After doing this, your device will be detected by your host computer. Also, adb will start running in the USB mode on the computer. You can check the attached devices with the command: adb devices and make sure that the adb is running in the USB mode by executing the command: adb usb. You can write command in terminal or cmd.
You can get the connected list of devices using the below command.
List of devices attached
Step 3 Restart TCP Mode:
Write the below command to restart adb in tcpip mode.
restarting in TCP mode port: 5555
Step 4 Find IP address from mobile device:
Find out the IP address of the Android device:
Go to phone Settings -> About phone/tablet -> Status -> IP address
Step 5 Connect device to Computer:
Now you are aware about the IP address of your device; connect your adb host to it. You can connect your device using the below command.
$ adb connect 192.168.0.102
connected to 192.168.0.102:5555
Step 6 Re-connecting the device to your computer:
Remove the USB cable and you will be connected to your device. Now check whether the device is connected or not through this command: adb devices; if you do not see your device connected, then just reconnect it using the previous step’s command.
Now your device is successfully connected to your computer. Hence, you can debug the app in your connected device.
Step 7 Disconnecting the device to your computer:
For disconnecting the connected device, write the below command:
$ adb disconnect 192.168.0.102
On continuous usage of connecting your Android phone to the computer system using USB cable, there are chances of damaging the phone battery as well as the USB cable due to continuous charging of battery while the cable is attached. Also, it will be quite difficult for us to use our phone for debugging various apps especially the sensor based apps when the mobile is connected with the USB.
So debugging apps over wifi is very useful. It saves the batteries and cables; also makes debugging the sensor based apps easier. Hence, just follow the above steps and debug your Android apps over Wifi.
Источник
Debug your Android (or Unity) application through Wi-Fi
Valentino Urbano
This is not a tutorial, it’s more of a note so I’m going to remember how to do something the next time I stumble again on the problem.
I don’t have many ports on my MacBook Pro and even though I’ve been forced into buying a dongle plugging it in and out each time I need to take the Mac with me is an hassle so if I can avoid using it I do. 1
Enable and Test Wi-Fi debugging
- Connect your device using usb, first run the app once using usb to check that everything is working fine
- Open Terminal and run adb tcpip 5555
- Get the phone ip address by going to Settings > About Phone > Status
- Run adb connect IPADDRESS:5555 substituting “IPADDRESS” with your phone local IP address
- Run adb devices to check you are connected by both usb and Wi-Fi
- Disconnect the USB cable and try running adb devices again, it will only show the device connected via Wi-Fi.
Caveats
You need to be mindful that you’re over a Wi-Fi connection now and that if you have a not to stellar router it will clog your LAN with lots of packets as its transferring the whole apk to the device.
Dear Apple, the MacBook Pro should be for Professionals. And I assure you that most professionals needs port. I don’t ask for much, but I’d have liked to have at least a USB port, and ethernet port and an HDMI port ↩
Источник


