- Статический анализатор Detekt для Kotlin
- Пора полюбить статические анализаторы! Встречайте Detekt на Kotlin
- Что-же это такое?
- Какие бывают статические анализаторы?
- Внедряем Detekt в проект
- Этап 1:
- Этап 2:
- Этап 3:
- Этап 4:
- В заключение
- Распознавание объектов на android с помощью TensorFlow: от подготовки данных до запуска на устройстве
- Подготовка данных
- String resources
- String
- Kotlin
- String array
- Kotlin
- Quantity strings (plurals)
- Kotlin
- Format and style
- Handle special characters
- Formatting strings
- Kotlin
- Styling with HTML markup
- Kotlin
- Kotlin
- Styling with spannables
- Kotlin
- Kotlin
- Kotlin
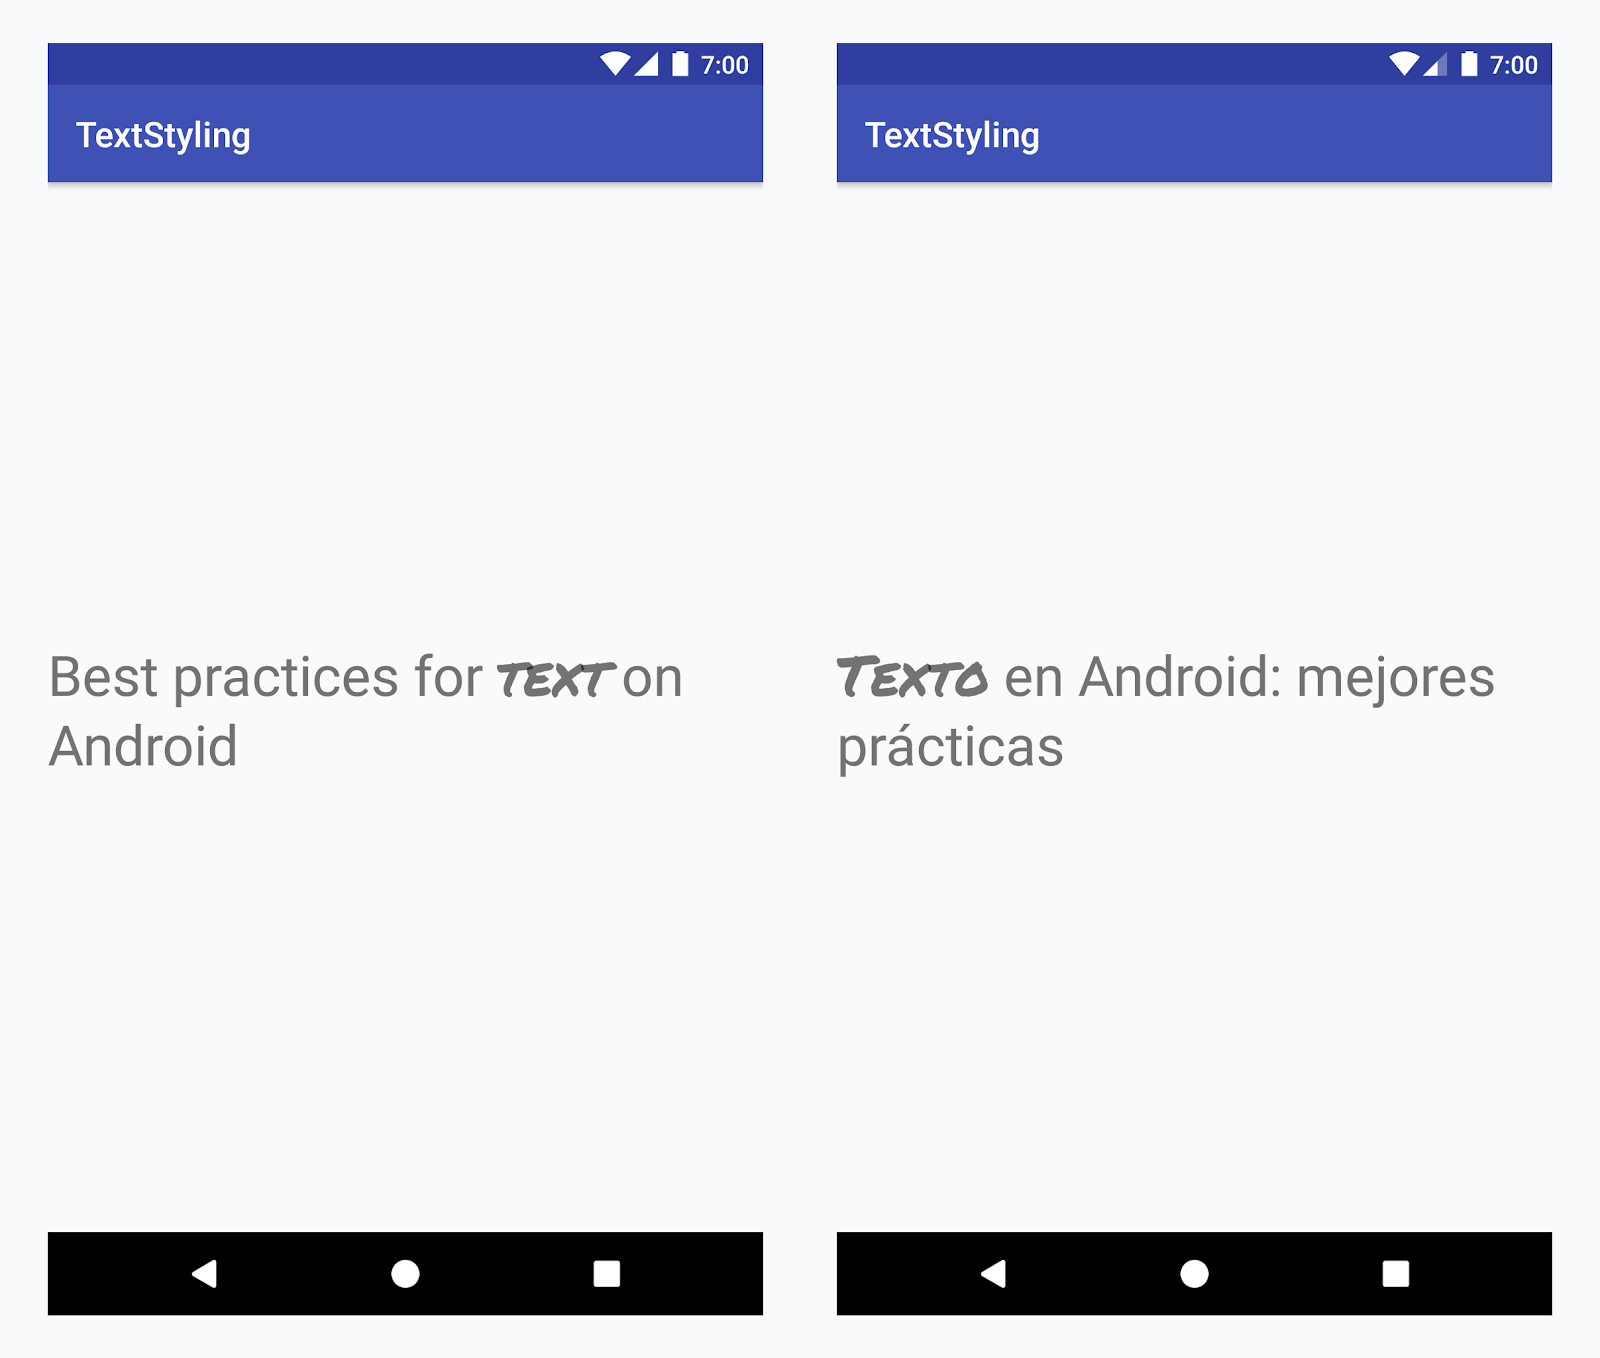
- Styling with annotations
- Example — adding a custom typeface
- Kotlin
- Annotation spans and text parceling
- Kotlin
- Kotlin
Статический анализатор Detekt для Kotlin
Пора полюбить статические анализаторы! Встречайте Detekt на Kotlin
Если Вы уже знаете о чем пойдет речь и Вас интересут только внедрение в проект, переходите сразу к пункту установки.
Что-же это такое?

Анализ программного обеспечения, производимый (в отличие от динамического анализа) без реального выполнения исследуемых программ. Википедия
А своими словами — это удобный инструмент, помогающий в соблюдении правил хорошего кода. Позволяющий очень гибко настраивать фильры по определению плохого кода. Который при каждом запуске сформирует некий отчет, включающий статистические данные об обнаруженных конфликтах, информацию о них, позволяющую определить где произошел конфликт и его тип.
Статические анализаторы облегчают работу ревьюера и в целом экономит время команды на разработку.
Допустим, у нас есть хороший PR, однако автор дал слишком длинные имена переменным, написал код, который можно легко упростить или нарушил одно из множества устанавливаемых правил в конфигурационном файле Detekt, правила не сложные, но code-review такой PR не пройдет.
Автору же придется опять переключаться между проектами, так-же и ревьюерам, уверен, мало удовольствия доставит повторное ревью.
Автоматизируйте, если это быстро и не дорого. (С) Здравый смысл
Какие бывают статические анализаторы?
- Detekt
- Ktlint
Отвечаю на возникший у Вас в голове вопрос, Spot-bugs на Kotlin не работает.
Внедряем Detekt в проект
Detekt можно установить несколькими способами:
- Plugin для AndroidStudio
- Gradle
Я считаю настройка через Gradle является более гибкой и рассказываю именно про нее.
На официальном сайте есть несколько способов установки Detekt в проет, в зависимости от версии Gradle, того, является ли он Android проектом. Но, по моему опыту внедрения в android проект, некоторые инструкции не работают. На данный момент проект очень близок к выходу 1.0. Последняя версия на момент написания статьи — release candidate 1.0.0-RC14
Заходим на официальный сайт Gradle и видим инструкцию к установке.
Именно этого решения я и советую придерживаться для проекта Android.
Вы наверняка заметили, что я убрал строку apply: plugin, так как я советую отделить Detekt в отдельный файл и уже в нем применить apply.
Этап 1:
Итак, копируем этот код в build.gradle уровня приложения.
Там-же в блоке allprojects мы должны написать строку применения нашего файла содержащего настройки detekt.
Этап 2:
Затем необходимо создать файл detekt.gradle
Этап 3:
Теперь необходимо создать конфигурационный файл detekt-config.yml
Это стандартный конфигурационный файл с официального сайта.
Этап 4:
Откройте консоль и выполните команду: gradlew detekt
Теперь у Вас готовы статистические данные по вашему проекту. Они отображаются в консоли, а так-же Вы можете найти их по пути:
В заключение
Очень удобно использовать Detekt при сборке в Jenkins
Время исполнения задачи в проете с более чем 2000 классов составляет 4-7 секунд*.
Хочу сказать, что использование статического анализатора немного упрощает нашу работу. Ускоряет процесс разработки и экономит деньги бизнеса.
Источник
Распознавание объектов на android с помощью TensorFlow: от подготовки данных до запуска на устройстве
Обучение нейросети распознаванию образов — долгий и ресурсоемкий процесс. Особенно когда под рукой есть только недорогой ноут, а не компьютер с мощной видеокартой. В этом случае на помощь придёт Google Colaboratory, которая предлагает совершенно бесплатно воспользоваться GPU уровня Tesla K80 (подробнее).
В этой статье описан процесс подготовки данных, обучения модели tensorflow в Google Colaboratory и её запуск на android устройстве.
Подготовка данных
В качестве примера попробуем обучить нейросеть распознавать белые игральные кости на черном фоне. Соответственно, для начала, надо создать набор данных, достаточный для обучения (пока остановимся на
Для обучения воспользуемся Tensorflow Object Detection API. Все необходимые для обучения данные мы подготовим на ноутбуке. Нам понадобится менеджер управления окружением и зависимостями conda. Инструкция по установке тут.
Создадим окружение для работы:
И активируем его:
Установим зависимости которые нам понадобятся:
Создадим папку object_detection, и положим все наши фотографии в папку object_detection/images.
В Google Colab есть ограничение на использование памяти, поэтому перед разметкой данных нужно снизить разрешение фотографий, чтобы в процессе обучения не столкнутся с ошибкой «tcmalloc: large alloc. «.
Создадим папку object_detection/preprocessing и добавим в неё подготовленные скрипты.
Для изменения размера фото используем скрипт:
Этот скрипт пробежится по папке с указанными фото, изменит их размер до 800×600 и сложит их в object_detection/images/resized. Теперь можно заменить ими оригинальные фотографии в object_detection/images.
Для разметки данных воспользуемся тулзой labelImg.
Клонируем репозиторий labelImg в object_detection
Переходим в папку labelImg
и выполняем команду:
После этого можно приступить к разметке данных (это самый долгий и скучный этап):
В “Open dir” указываем папку object_detection/images и проходим по всем фото, выделяя объекты для распознавания и указывая их класс. В нашем случае это номиналы игральных костей (1, 2, 3, 4, 5, 6). Сохраним метаданные (файлы *.xml) в той же папке.
Создадим папку object_detection/training_demo, которую мы чуть позже зальем в Google Colab для обучения.
Разделим наши фото (с метаданными) на тренировочные и тестовые в соотношение 80/20 и переместим их в соответствующие папки object_detection/training_demo/images/train и object_detection/training_demo/images/test.
Создадим папку object_detection/training_demo/annotations, в которую будем складывать файлы с метаданными необходимыми для обучения. Первым из них будет label_map.pbtxt, в котором укажем отношение класса объекта и целочисленного значения. В нашем случае это:
Помните метаданные, которые мы получили в процессе разметки данных? Чтобы использовать их для обучения, необходимо конвертировать их в формат TFRecord. Для конвертации воспользуемся скриптами из источника [1].
Проведем конвертацию в два этапа: xml -> csv и csv -> record
Источник
String resources
A string resource provides text strings for your application with optional text styling and formatting. There are three types of resources that can provide your application with strings:
String XML resource that provides a single string. String Array XML resource that provides an array of strings. Quantity Strings (Plurals) XML resource that carries different strings for pluralization.
All strings are capable of applying some styling markup and formatting arguments. For information about styling and formatting strings, see the section about Formatting and Styling.
String
A single string that can be referenced from the application or from other resource files (such as an XML layout).
Note: A string is a simple resource that is referenced using the value provided in the name attribute (not the name of the XML file). So, you can combine string resources with other simple resources in the one XML file, under one element.
file location: res/values/filename.xml
The filename is arbitrary. The element’s name is used as the resource ID. compiled resource datatype: Resource pointer to a String . resource reference: In Java: R.string.string_name
In XML: @string/string_name syntax: elements: Required. This must be the root node.
A string, which can include styling tags. Beware that you must escape apostrophes and quotation marks. For more information about how to properly style and format your strings see Formatting and Styling, below.
name String. A name for the string. This name is used as the resource ID. example: XML file saved at res/values/strings.xml :
This layout XML applies a string to a View:
This application code retrieves a string:
Kotlin
You can use either getString(int) or getText(int) to retrieve a string. getText(int) retains any rich text styling applied to the string.
String array
An array of strings that can be referenced from the application.
Note: A string array is a simple resource that is referenced using the value provided in the name attribute (not the name of the XML file). As such, you can combine string array resources with other simple resources in the one XML file, under one element.
file location: res/values/filename.xml
The filename is arbitrary. The element’s name is used as the resource ID. compiled resource datatype: Resource pointer to an array of String s. resource reference: In Java: R.array.string_array_name
In XML: @[package:]array/string_array_name syntax: elements: Required. This must be the root node.
Defines an array of strings. Contains one or more elements.
name String. A name for the array. This name is used as the resource ID to reference the array. A string, which can include styling tags. The value can be a reference to another string resource. Must be a child of a element. Beware that you must escape apostrophes and quotation marks. See Formatting and Styling, below, for information about to properly style and format your strings.
example: XML file saved at res/values/strings.xml :
This application code retrieves a string array:
Kotlin
Quantity strings (plurals)
Different languages have different rules for grammatical agreement with quantity. In English, for example, the quantity 1 is a special case. We write «1 book», but for any other quantity we’d write «n books». This distinction between singular and plural is very common, but other languages make finer distinctions. The full set supported by Android is zero , one , two , few , many , and other .
The rules for deciding which case to use for a given language and quantity can be very complex, so Android provides you with methods such as getQuantityString() to select the appropriate resource for you.
Although historically called «quantity strings» (and still called that in API), quantity strings should only be used for plurals. It would be a mistake to use quantity strings to implement something like Gmail’s «Inbox» versus «Inbox (12)» when there are unread messages, for example. It might seem convenient to use quantity strings instead of an if statement, but it’s important to note that some languages (such as Chinese) don’t make these grammatical distinctions at all, so you’ll always get the other string.
The selection of which string to use is made solely based on grammatical necessity. In English, a string for zero is ignored even if the quantity is 0, because 0 isn’t grammatically different from 2, or any other number except 1 («zero books», «one book», «two books», and so on). Conversely, in Korean only the other string is ever used.
Don’t be misled either by the fact that, say, two sounds like it could only apply to the quantity 2: a language may require that 2, 12, 102 (and so on) are all treated like one another but differently to other quantities. Rely on your translator to know what distinctions their language actually insists upon.
It’s often possible to avoid quantity strings by using quantity-neutral formulations such as «Books: 1». This makes your life and your translators’ lives easier, if it’s an acceptable style for your application.
Note: A plurals collection is a simple resource that is referenced using the value provided in the name attribute (not the name of the XML file). As such, you can combine plurals resources with other simple resources in the one XML file, under one element.
file location: res/values/filename.xml
The filename is arbitrary. The
element’s name is used as the resource ID. resource reference: In Java: R.plurals.plural_name syntax: elements: Required. This must be the root node.
A collection of strings, of which, one string is provided depending on the amount of something. Contains one or more elements.
name String. A name for the pair of strings. This name is used as the resource ID. A plural or singular string. The value can be a reference to another string resource. Must be a child of a
element. Beware that you must escape apostrophes and quotation marks. See Formatting and Styling, below, for information about to properly style and format your strings.
quantity Keyword. A value indicating when this string should be used. Valid values, with non-exhaustive examples in parentheses:
| Value | Description |
|---|---|
| zero | When the language requires special treatment of the number 0 (as in Arabic). |
| one | When the language requires special treatment of numbers like one (as with the number 1 in English and most other languages; in Russian, any number ending in 1 but not ending in 11 is in this class). |
| two | When the language requires special treatment of numbers like two (as with 2 in Welsh, or 102 in Slovenian). |
| few | When the language requires special treatment of «small» numbers (as with 2, 3, and 4 in Czech; or numbers ending 2, 3, or 4 but not 12, 13, or 14 in Polish). |
| many | When the language requires special treatment of «large» numbers (as with numbers ending 11-99 in Maltese). |
| other | When the language does not require special treatment of the given quantity (as with all numbers in Chinese, or 42 in English). |
example: XML file saved at res/values/strings.xml :
XML file saved at res/values-pl/strings.xml :
Kotlin
When using the getQuantityString() method, you need to pass the count twice if your string includes string formatting with a number. For example, for the string %d songs found , the first count parameter selects the appropriate plural string and the second count parameter is inserted into the %d placeholder. If your plural strings do not include string formatting, you don’t need to pass the third parameter to getQuantityString .
Format and style
Here are a few important things you should know about how to properly format and style your string resources.
Handle special characters
When a string contains characters that have special usage in XML, you must escape the characters according to the standard XML/HTML escaping rules. If you need to escape a character that has special meaning in Android you should use a preceding backslash.
By default Android will collapse sequences of whitespace characters into a single space. You can avoid this by enclosing the relevant part of your string in double quotes. In this case all whitespace characters (including new lines) will get preserved within the quoted region. Double quotes will allow you to use regular single unescaped quotes as well.
| Character | Escaped form(s) |
|---|---|
| @ | \@ |
| ? | \? |
| New line | \n |
| Tab | \t |
| U+XXXX Unicode character | \uXXXX |
| Single quote ( ‘ ) | |
| Double quote ( » ) | \» Note that surrounding the string with single quotes does not work. Whitespace collapsing and Android escaping happens after your resource file gets parsed as XML. This means that (space, punctuation space, Unicode Em space) all collapse to a single space ( » » ), because they are all Unicode spaces after the file is parsed as an XML. To preserve those spaces as they are, you can either quote them ( » » ) or use Android escaping ( \u0032 \u8200 \u8195 ). Note: From XML parser’s perspective, there is no difference between «Test this» and «Test this» whatsoever. Both forms will not show any quotes but trigger Android whitespace-preserving quoting (that will have no practical effect in this case). Formatting stringsIf you need to format your strings, then you can do so by putting your format arguments in the string resource, as demonstrated by the following example resource. In this example, the format string has two arguments: %1$s is a string and %2$d is a decimal number. Then, format the string by calling getString(int, Object. ) . For example: KotlinStyling with HTML markupYou can add styling to your strings with HTML markup. For example: The following HTML elements are supported:
If you aren’t applying formatting, you can set TextView text directly by calling setText(java.lang.CharSequence) . In some cases, however, you may want to create a styled text resource that is also used as a format string. Normally, this doesn’t work because the format(String, Object. ) and getString(int, Object. ) methods strip all the style information from the string. The work-around to this is to write the HTML tags with escaped entities, which are then recovered with fromHtml(String) , after the formatting takes place. For example:
In this formatted string, a element is added. Notice that the opening bracket is HTML-escaped, using the notation. Then format the string as usual, but also call fromHtml(String) to convert the HTML text into styled text: KotlinBecause the fromHtml(String) method formats all HTML entities, be sure to escape any possible HTML characters in the strings you use with the formatted text, using htmlEncode(String) . For instance, if you are formatting a string that contains characters such as » fromHtml(String) , the characters come out the way they were originally written. For example: KotlinStyling with spannablesA Spannable is a text object that you can style with typeface properties such as color and font weight. You use SpannableStringBuilder to build your text and then apply styles defined in the android.text.style package to the text. You can use the following helper methods to set up much of the work of creating spannable text: KotlinThe following bold , italic , and color methods wrap the helper methods above and demonstrate specific examples of applying styles defined in the android.text.style package. You can create similar methods to do other types of text styling. KotlinHere’s an example of how to chain these methods together to apply various styles to individual words within a phrase: KotlinThe core-ktx Kotlin module also contains extension functions that make working with spans even easier. You can check out the android.text package documentation on GitHub to learn more. For more information on working with spans, see the following links: Styling with annotations
Example — adding a custom typefaceLoad the string resource and find the annotations with the font key. Then create a custom span and replace the existing span. KotlinIf you’re using the same text multiple times, you should construct the SpannableString object once and reuse it as needed to avoid potential performance and memory issues. For more examples of annotation usage, see Styling internationalized text in Android Annotation spans and text parcelingBecause Annotation spans are also ParcelableSpans , the key-value pairs are parceled and unparceled. As long as the receiver of the parcel knows how to interpret the annotations, you can use Annotation spans to apply custom styling to the parceled text. To keep your custom styling when you pass the text to an Intent Bundle, you first need to add Annotation spans to your text. You can do this in the XML resources via the tag, as shown in the example above, or in code by creating a new Annotation and setting it as a span, as shown below: KotlinRetrieve the text from the Bundle as a SpannableString and then parse the annotations attached, as shown in the example above. KotlinFor more information on text styling, see the following links: Content and code samples on this page are subject to the licenses described in the Content License. Java is a registered trademark of Oracle and/or its affiliates. Источник  Когда к мобильному устройству присоединены наушники  ОС Google Android развивается, и по всему видимому |