- Android elevation что это
- Поиграем с высотой объектов в Android
- Чем являются тени
- Изменение высоты в действии
- Последнее, прежде чем вы уйдете
- Mastering Shadows in Android
- What is 3D?
- What is Depth in Android?
- What is Z-value in Android?
- Playing with elevation in Android
- What is that shadow all about
- Elevation tweaks in action
- One last thing before you go
Android elevation что это
Полный текст статьи и исходники программы доступны только зарегистрированным участникам сайта.
Прочитайте внимательно условия! В начале каждой статьи указывается, к какому курсу относится данная статья. Например, если статья из 4 курса, значит нужно заплатить за все курсы по четвёртый включительно.
Стоимость регистрации — символические 350 рублей. После регистрации у вас будет доступ ко второму курсу.
Для регистрации сначала необходимо пополнить ЮMoney(бывший Яндекс.Кошелек) 410011383280263 на указанную сумму (или Webmoney-кошелек P894989790291 (старый R390884954122) или QIWI (перевод по никнейму), а затем прислать письмо на адрес alexander.klimoff@gmail.com с указанием, на какой кошелёк вы делали оплату и реквизиты, по которым можно вас определить (не прикрепляйте к письму картинки или файлы). Учитывайте комиссию при переводах.
Не присылайте в письме мои номера кошельков — поверьте, я их знаю и без вас.
В ответном письме вы получите учётные данные для чтения статей из закрытой зоны за второй курс.
Доступ к третьему курсу обучения доступен только после оплаты второго курса и составляет 350 руб.
Доступ к четвёртому курсу обучения доступен после оплаты третьего курса и составляет 350 руб. и т.д.
При оплате сразу всех курсов одновременно (2-9) цена составит 2800 руб.
Доступ даётся как минимум на один год. Для тех, кто оплатил третий и другие курсы, сроки доступа увеличиваются.
Также возможен приём на PayPal (только для зарубежных пользователей). Обратите внимание, что в этом случае стоимость одного курса составляет 7$.
Источник
Поиграем с высотой объектов в Android
Sep 27, 2018 · 5 min read
Всем известно, что в Material Desing присутствуют тени. Многие также знают, что в Android есть возможность контролировать виртуальную Z-координату посредством изменения свойства elevation , чтобы менять тень объектов. И лишь немногим известно, что можно сделать гораздо больше, чтобы настроить тени, создаваемые UI-элементами.
Чем являются тени
В Material Design elevation — это реализация виртуальной Z-координаты слоя относительно “базового” слоя экрана.
Пример:

В системе Material Design существует два источника света. Вверху экрана находится источник основного(направленного) света, и прямо над центром экрана — заполняющего:

Каждый источник создает с вою тень, источник основного света создает наиболее ощутимую тень рядом с нижними гранями объекта, а второй источник(заполняющего света) затрагивает все грани.
Свойство elevation напрямую контролирует очертание получившейся тени; это можно отчетливо заметить на кнопках, elevation которых зависит от их текущего состояния нажатия:

Вы можете подумать, что свойство elevation это единственный способ, как можно контролировать внешний вид теней, но это не так.
В Android существует малоизвестное API под названием Outline , которое обеспечивает поверхность (Material sheet) необходимой информацией для проецирования тени. Стандартное поведение View заключается в делегировании определения их Outline своему фону. Например, ShapeDrawable отдает Outline соответствующий его форме, в то время как ColorDrawable , BitmapDrawable и др. отдают прямоугольный контур совпадающий с их предельными границам. Но это не означает, что мы не можем подменить возвращаемый контур, можно сказать View использовать другой ViewOutlineProvider , используя метод setOutlineProvider() :
Если мы будем контролировать ViewOutlineProvider , мы сможем изменять Outline объекта, чтобы операционная система рисовала тень, как мы хотим:
Вы можете использовать elevation и Outline , чтобы совершать любые изменения формы и позиции тени:

Вы можете заметить, как тень не только приспосабливается под разные значения elevation , но также перемещается и становится больше или меньше объекта, который её отбрасывает.
Ещё одна вещь, которую вы можете сделать это присвоить тени форму, отличную от действительной формы объекта, который эту тень будет отбрасывать — я не могу представить ситуацию в которой это может быть необходимо, но все может быть. Единственное ограничение — фигура должна быть выпуклой. У Outline существуют вспомогательные методы, позволяющие получить эллипсы, прямоугольники и скругленные прямоугольники, но ещё вы можете использовать произвольный Path , пока он выпуклый.
К сожалению, не получится сильно увеличивать некоторые эффекты, как вы видите, при отображении тени начинают появляться довольно неприятные артефакты.
Если вам интересно, как происходит визуализация теней в Android, вы можете посмотреть код из пакета hwui в AOSP — начните с AmbientShadow.cpp .
Ещё одно ограничение заключается в том, что вы не можете менять оттенок тени, мы остаемся с стандартным серым цветом, но по правде говоря, я не считаю, что это плохо 😉
Изменение высоты в действии
Я использую вышеперечисленные техники для необычного внешнего вида карточек в приложении Squanchy, это приложение с открытым исходным кодом для конференции, над которым я работал в прошлом году:

Как вы можете видеть, тень от карточек выглядит куда более размытой, чем стандартная. Это получается за счет использования Outline , который на 4dp меньше чем сама карточка и elevation со значением 4dp :
Карточки так же имеют свой android:stateListAnimator который тоже изменяет их elevation и translationZ основанный на их состоянии нажатия, как это происходит с кнопками в Material Design. Вы можете видеть, как атрибуты cardInset* используются в коде CardLayout , чтобы сжимать контур тени, который передается системе.
Когда вы перемещаете список карточек в Squanchy, можно заметить как тень от карточки изменяет свой размер относительно оси Y.

Если эффект не заметен на gif, можно сравнить карточку вверху и внизу списка на картинке:
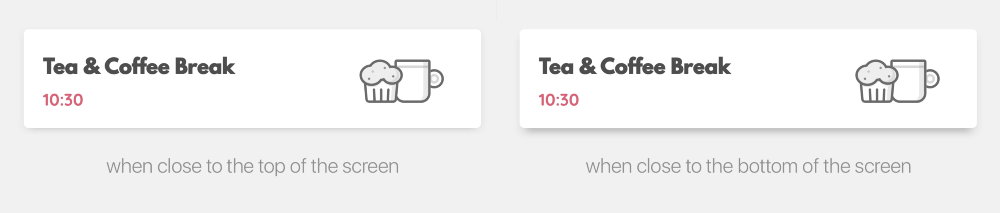
Почему это происходит? Мы точно не меняли высоту и контуры основываясь на y-координате карточки(мы, конечно, можем так делать, но это очень плохая идея, потому что придется совершать пересчет на каждом событии перемещения).
Вы должны помнить, ранее я упоминал, что в среде Material Desing существует два источника света, один над верхней частью экрана, а другой над его серединой. Когда объект удаляется от источника света в верхней части экрана, тень от него становится больше. На самом деле это то, что всегда присутствует в Android, но обычно это настолько естественно, что вы этого не замечаете. Стили в Squanchy делают такой эффект более очевидным, и вы можете тоже его преувеличить, используя большее значение свойства elevation :

Последнее, прежде чем вы уйдете
В заключение, помните, что Outline используется не только для теней, по умолчанию они также используются для обрезки view ! Если у вашей view необычный контур и вы не хотите, чтобы он влиял на её форму во время рисования, вы должны вызвать метод setClipToOutline(false) , чтобы избежать неприятных сюрпризов.
Это важно только в том случае, если Outline который вы обеспечиваете, возвращает true при вызове canClip() , как в случаях, когда контур является обычным/скругленным прямоугольником или кругом. Не круглые овалы или произвольные ломанные не поддерживают обрезку, по-этому setClipToOutline() в этих случаях не даст никакого результата.
Забавный факт: все прямоугольники и круги являются разным представлением скругленных прямоугольников. Прямоугольник имеет радиус скругления равный нулю, а круг имеет радиус скругления равный половине стороны исходного квадрата
Ещё больше информации по теме вы можете найти на сайте Android Developers — ”Create Shadows and Clip Views” вместе с примерами кода и ссылками на документацию.
Чтобы вы могли поиграться с тенями на своем устройстве, я подготовил тестовое приложение:


Исходный код тестового приложения находится на GitHub.
Источник
Mastering Shadows in Android

Jan 9, 2018 · 6 min read
If we want to create better apps, I believe that we need to follow material design guideline.In general terms, Material design is a three-dimensional environment containing light, material, and cast shadows. Light and Shadow are important for us if we want to follow material design guideline in our application development process.
I will try to explain following topics in this article.
- 3D in Android
- Depth
- Z value, elevation and Translation Z
- Light
- Button state (Pressed and Resting)
- Outline
- Custom Outline with ViewOutlineProvider
Before deep dive into shadow and light, I want to show you what our environment is.
What is 3D?
The material environmen t is a 3D space, which means all objects have x, y, and z dimensions. The z-axis is perpendicularly aligned to the plane of the display, with the positive z-axis extending towards the viewer. In Material Design world, every object has 1 dp thickness.

What is Depth in Android?
Material design differs from other design guides because It has depth. We can say that depth defines view’s importance level in user interface. We can think there is a paper layer in our desk. If we put another paper on it, our eyes will perceive that it has a depth.
Let’s imagine it with an app screenshot from the material design guideline.
Let’s see our elements in the screen.
- Screen (Surface layer — 0 depth)
- Cardviews
- Appbar Layout
- Floating Action Button
Every element has a priority to another. Cardviews can scroll in its recyclerview. So we can say that our first layer is scrollable content. The second layer is appbar layout. The third layer (Top layer) is the floating action button.
So how do we define the order? How do we make the user feel the depth? Answer: Z- value.
What is Z-value in Android?
The Z value for a view has two components:
- Elevation: The static component.
- Translation Z: The dynamic component used for animations.
I always wonder that what is the difference between elevation and translation.
Elevation is static. So you don’t change it dynamically. If you want to animate your view in Z-axis (like pressing and resting) you need to use translation-Z attribute.
Translation Z is dynamic. In your empty project, If you create a button and press it, you will see that shadow gets bigger with an animation. Actually, elevation value is not changing. Translation Z property is changing. Android is using default state list animator changes translation Z property of the view.
Z-Value = Elevation + TranslationZ
What if we change the value of Z of two views that intersect. Does Android handle the order on the screen? Yes. Let me show you that with a diagram that I designed.
Источник
Playing with elevation in Android
Everyone knows that Material Design has shadows. Most know that you can control the virtual Z coordinate of Material elements in Android by using the elevation property, to control the shadow. Very few know that there’s so much more you can do to tweak the shadows your UI elements cast!
Update 6th Nov 2018: I just published a follow-up to this article with new APIs added in P, and a bunch of other goodies. Do check it out!

What is that shadow all about
In Material Design, the elevation is a manifestation of the virtual Z coordinate of a material plane relative to the screen’s “base” plane. For example:
 Image shamelessly ripped from the Material Design guidelines.
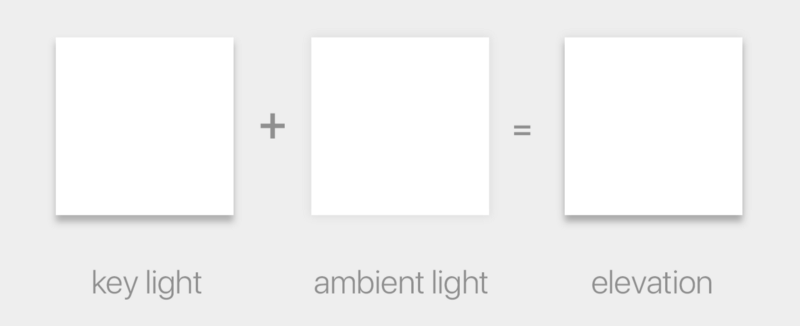
In the Material Design system, there are two light sources. One is a key light that sits above the top of the screen, and an ambient light that sits directly above the centre of the screen:
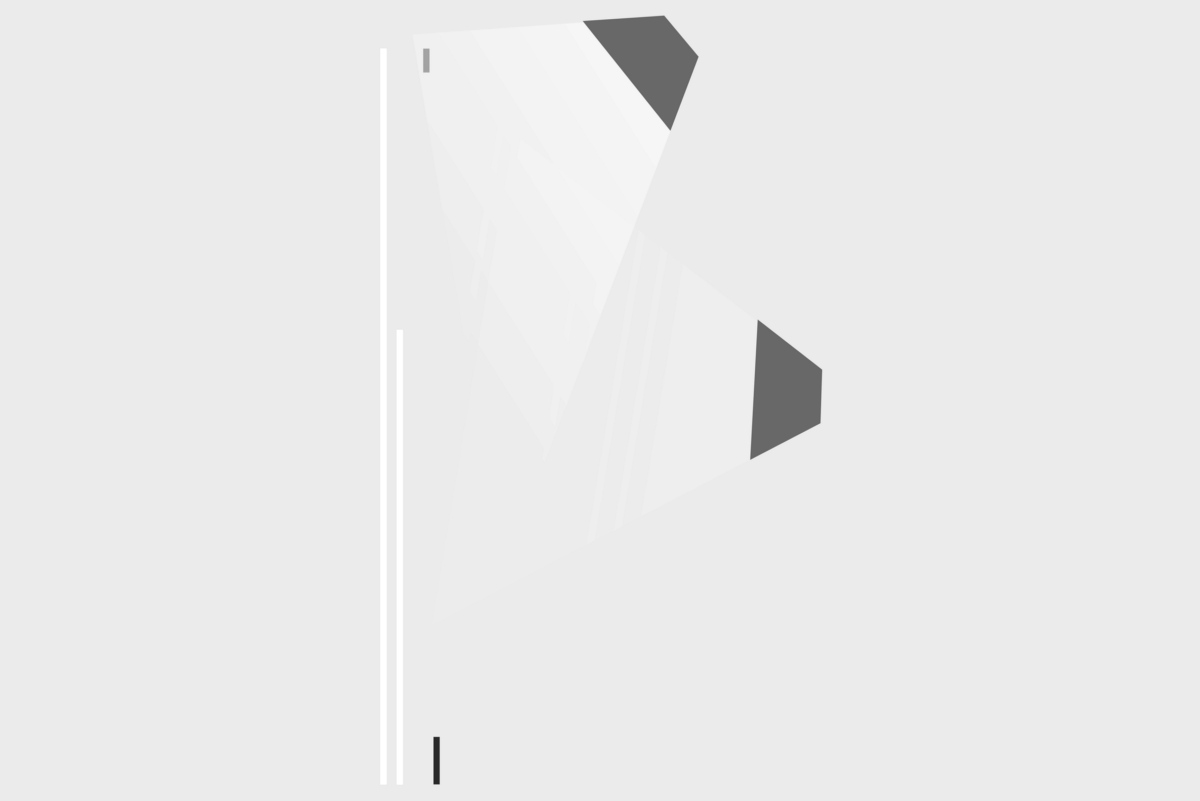 Image shamelessly ripped from the Touchlab blog.
These two lights cast each their own shadow, one which is mostly affecting the bottom edge of a material sheet (key light), and the other which is affecting all edges (ambient light):
 Image derived from the Material Design guidelines.
The elevation property directly controls the shape of the resulting shadow; you can see this clearly with buttons, which change their elevation based on their state:
 Image from Vadim Gromov’s Dribbble.
You may think that the elevation property is the only way to control how shadows look, but that’s not true.
In Android, there is a very little known API called Outline that is providing the required information for a Material sheet to project a shadow. The default behaviour for View s is to delegate the outline definition to their background drawable. ShapeDrawable s for example provide outlines that match their shapes, while ColorDrawable s, BitmapDrawable s, etc. provide a rectangle matching their bounds. But nothing says we cannot change that, and tell a view to use a different ViewOutlineProvider , using the setOutlineProvider() method:
If we control the ViewOutlineProvider , we can tweak the resulting Outline , tricking the OS into drawing whatever shadow we want:
You can use elevation and Outline to do all sorts of tweaks to the shape and position of an elevation shadow:
 Believe it or not, I have actually captured this one myself on my phone.
You will notice how the shadow here does not just adapt to different elevation values, but is also translated around and gets a larger or smaller size than the view itself.
Another thing you can do is to assign a shape that is different from the actual outline of the view itself — I cannot think of any situation in which this would make sense, but you could. The only limitation is that the shape must be convex. There are convenience methods on Outline to have ellipses, rectangles and rounded rectangles, but you could also use any arbitrary Path , as long as it’s convex.
Unfortunately it’s not possible to exaggerate some effects too much, since as you can see there are some shortcuts the system takes when rendering the shadows which will create some rather annoying artefacts when you hit them.
In case you are curious how shadows are rendered in Android, the relevant code is in the hwui package in AOSP — you can start looking at AmbientShadow.cpp (note: starting with Android 10, hwui is not really used anymore, and everything is rendered by Skia instead).
Another limitation is that we cannot tint the elevation shadow, we’re stuck with the default grey, but to be honest I don’t believe that’s a bad thing 😉
Elevation tweaks in action
I’ve used this technique to come up with a peculiar elevation appearance for the cards in Squanchy, an open source conference app I’ve been working on in the last year:
As you can see, the cards have a shadow that looks way more diffuse than the regular elevation shadows. This is obtained by having an Outline that is 4dp smaller than the card, and an elevation of 4dp :
The cards have an android:stateListAnimator that also tweaks their elevation and translationZ based on their pressed state, like Material buttons do. You can see how the cardInset* attributes are then used in the CardLayout code to shrink the Outline that we provide to the system.
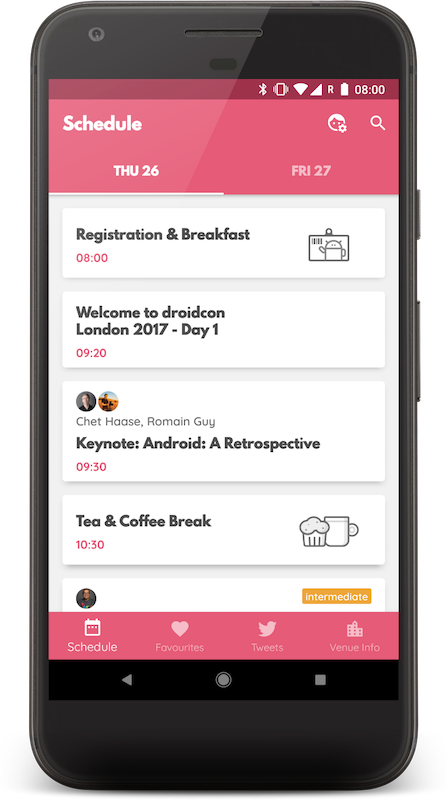
When you scroll the schedule in Squanchy, you might notice that the shadow tends to change size as a card scrolls along the Y axis:

If the effect is too subtle in a gif for you to see, this image makes it crystal clear:
How is that possible? We definitely don’t change the elevation and outline based on the y-position of an item (we could, but it’s really not a good idea as it requires recalculating outlines on each scroll event).
You’ll remember I mentioned earlier how there are two shadows in the Material Design environment, one which sits above the top of the screen, and one that sits directly above the centre. Well, the top light — that is the key light — is casting a longer shadow when an item gets farther away from it. This is actually something that is always true in Android, you just don’t notice it as much in normal circumstances. The Squanchy style makes it more obvious though, and you can even exaggerate it further by using a higher elevation value:

One last thing before you go
Lastly, remember that Outlines aren’t just used for shadows, but by default they define the clipping of the view too! If you have a weird outline and don’t want it to influence the drawing of your actual view, you’ll want to call setClipToOutline(false) on it to avoid nasty surprises.
This is only important when the Outline you provide has canClip() returning true , which is the case when the outline is a rectangle, a rounded rectangle, or a circle. Non-round ovals, and arbitrary paths, are not able to provide clipping, so setClipToOutline() has no effect in those cases.
Fun fact: rectangles and circles are all internally represented as special cases of rounded rectangles. A rectangle is a rounded rectangle with a corner radius of zero, and a circle is a rounded rectangle whose corner radius is equal to half the circle height/width.
If you want to read some more on the topic, the Android Developers website has a page on Defining shadows and clipping views, that goes through the same topics with code examples, and links to some more javadocs.
To play around with elevations on your own Android device, I have cooked up a simple playground app:
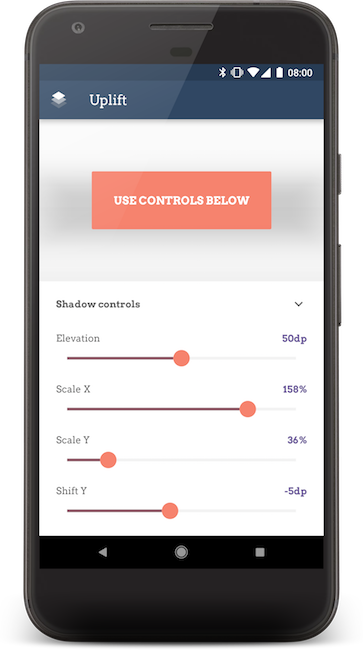

The code for the playground app is open source on GitHub.
Источник


