- Android Emulator
- In this document
- See also
- Keyboard Commands
- Command Line Parameters
- How to Set Up an Android Emulator using Command Line
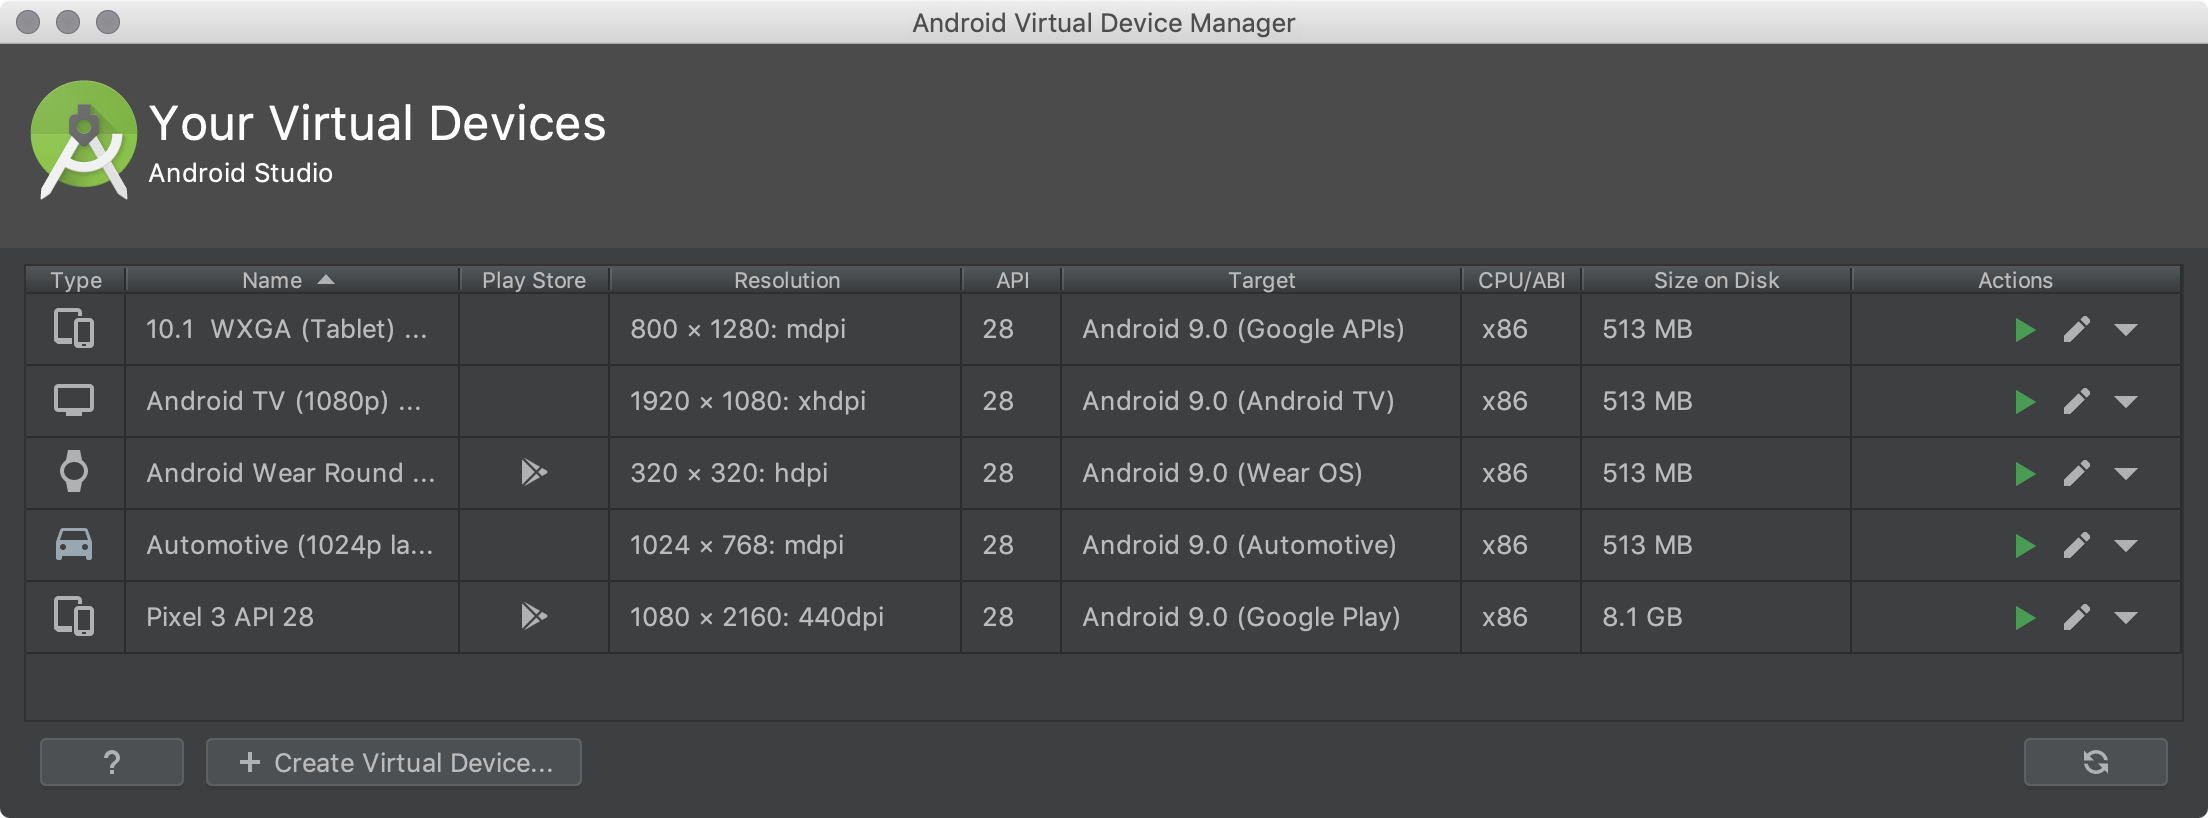
- Create and manage virtual devices
- About AVDs
- Hardware profile
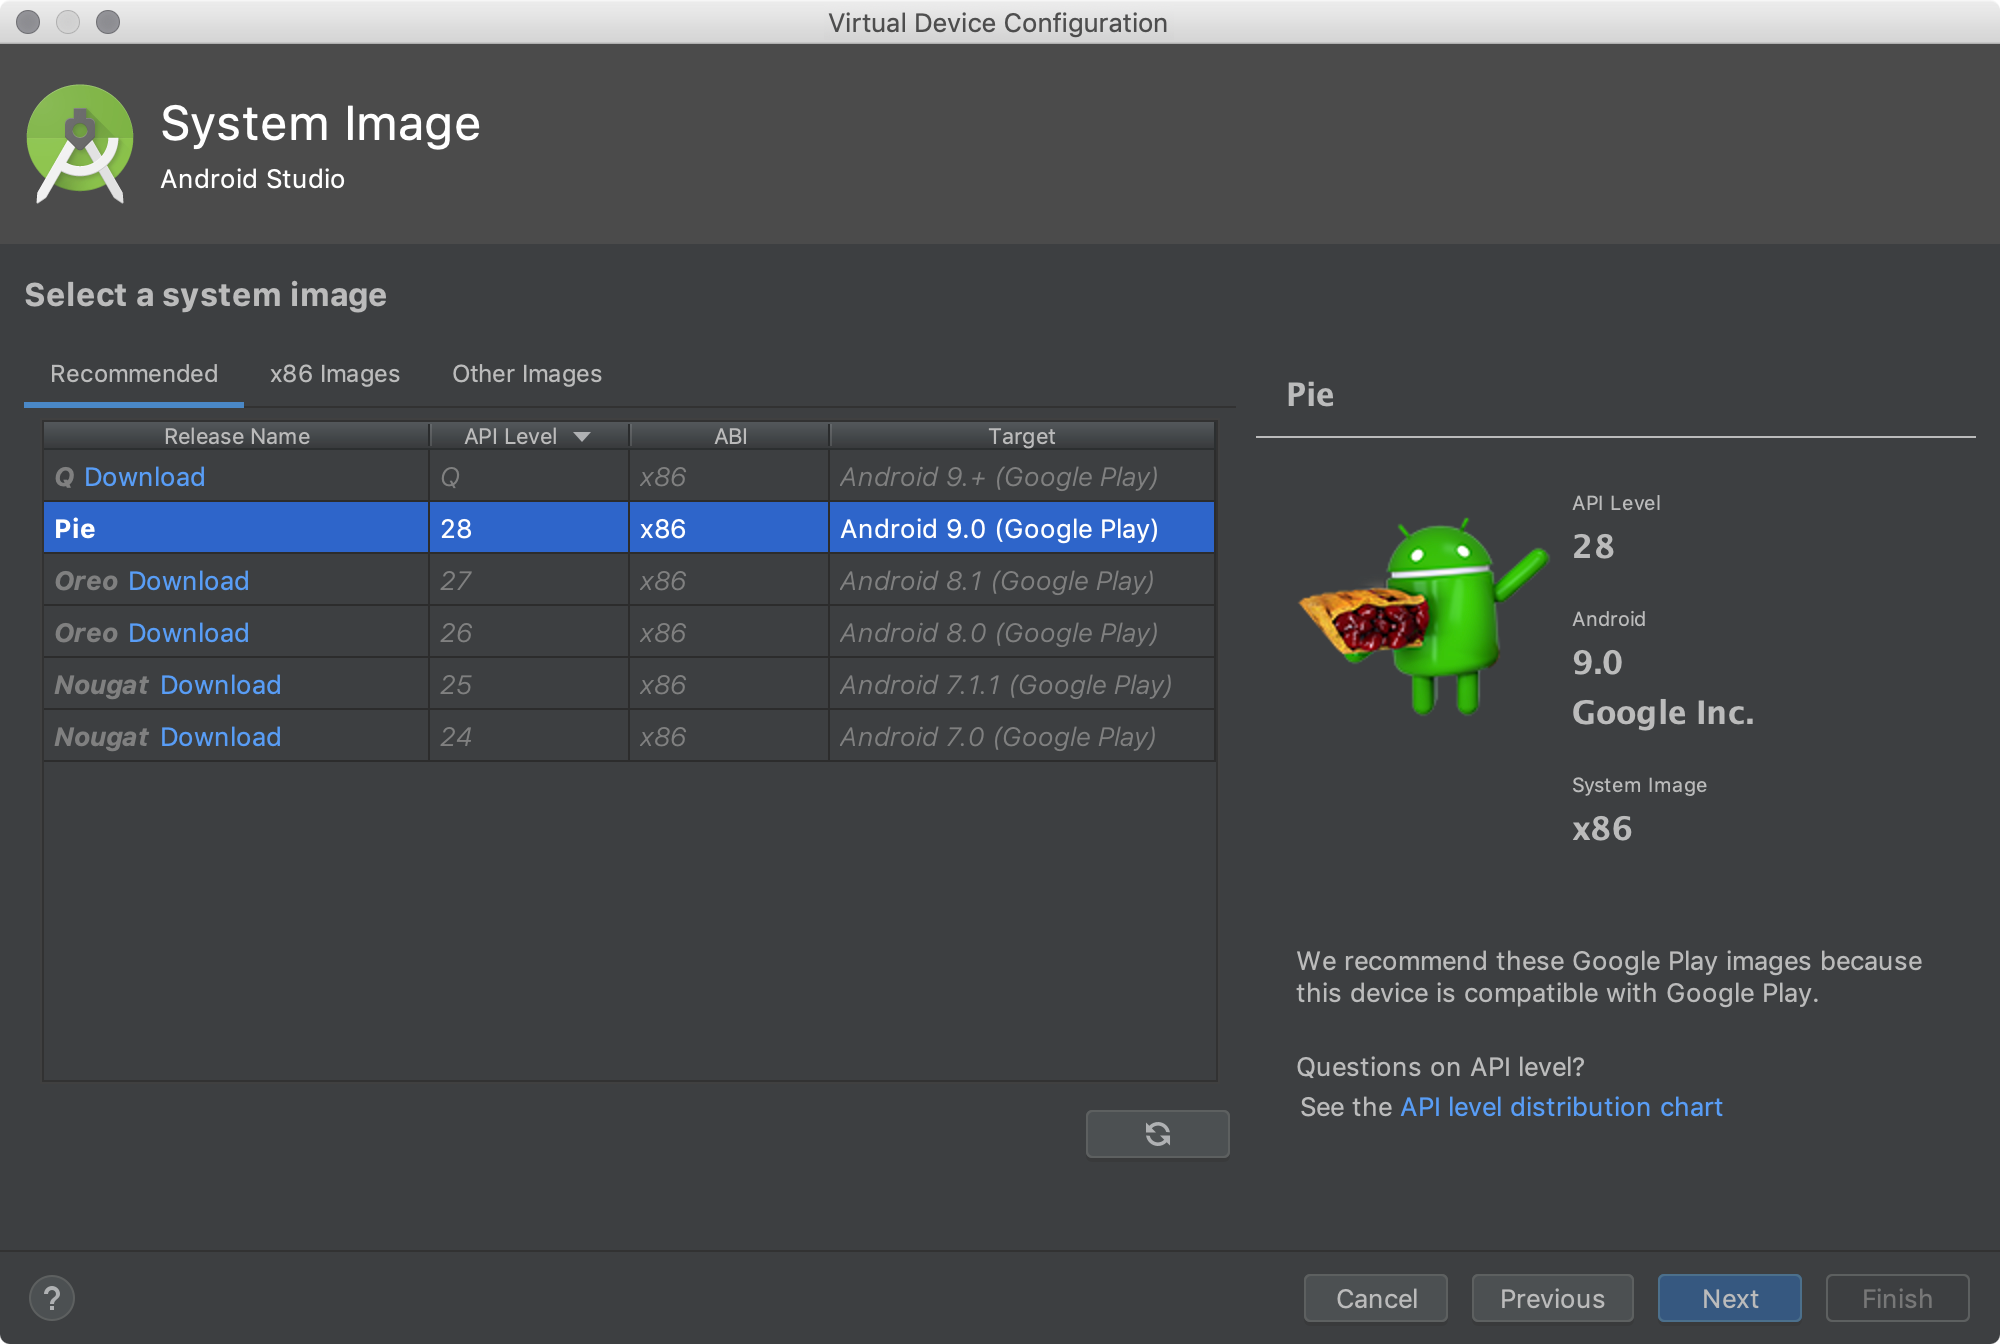
- System images
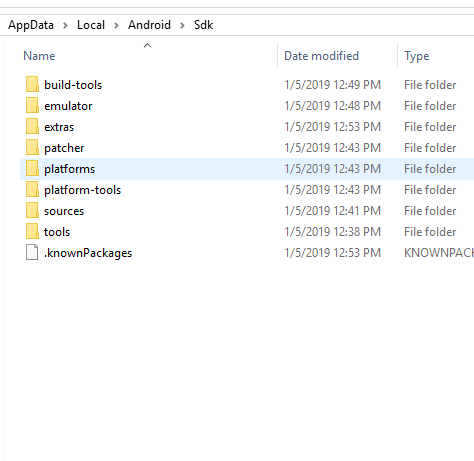
- Storage area
- AVD and app features
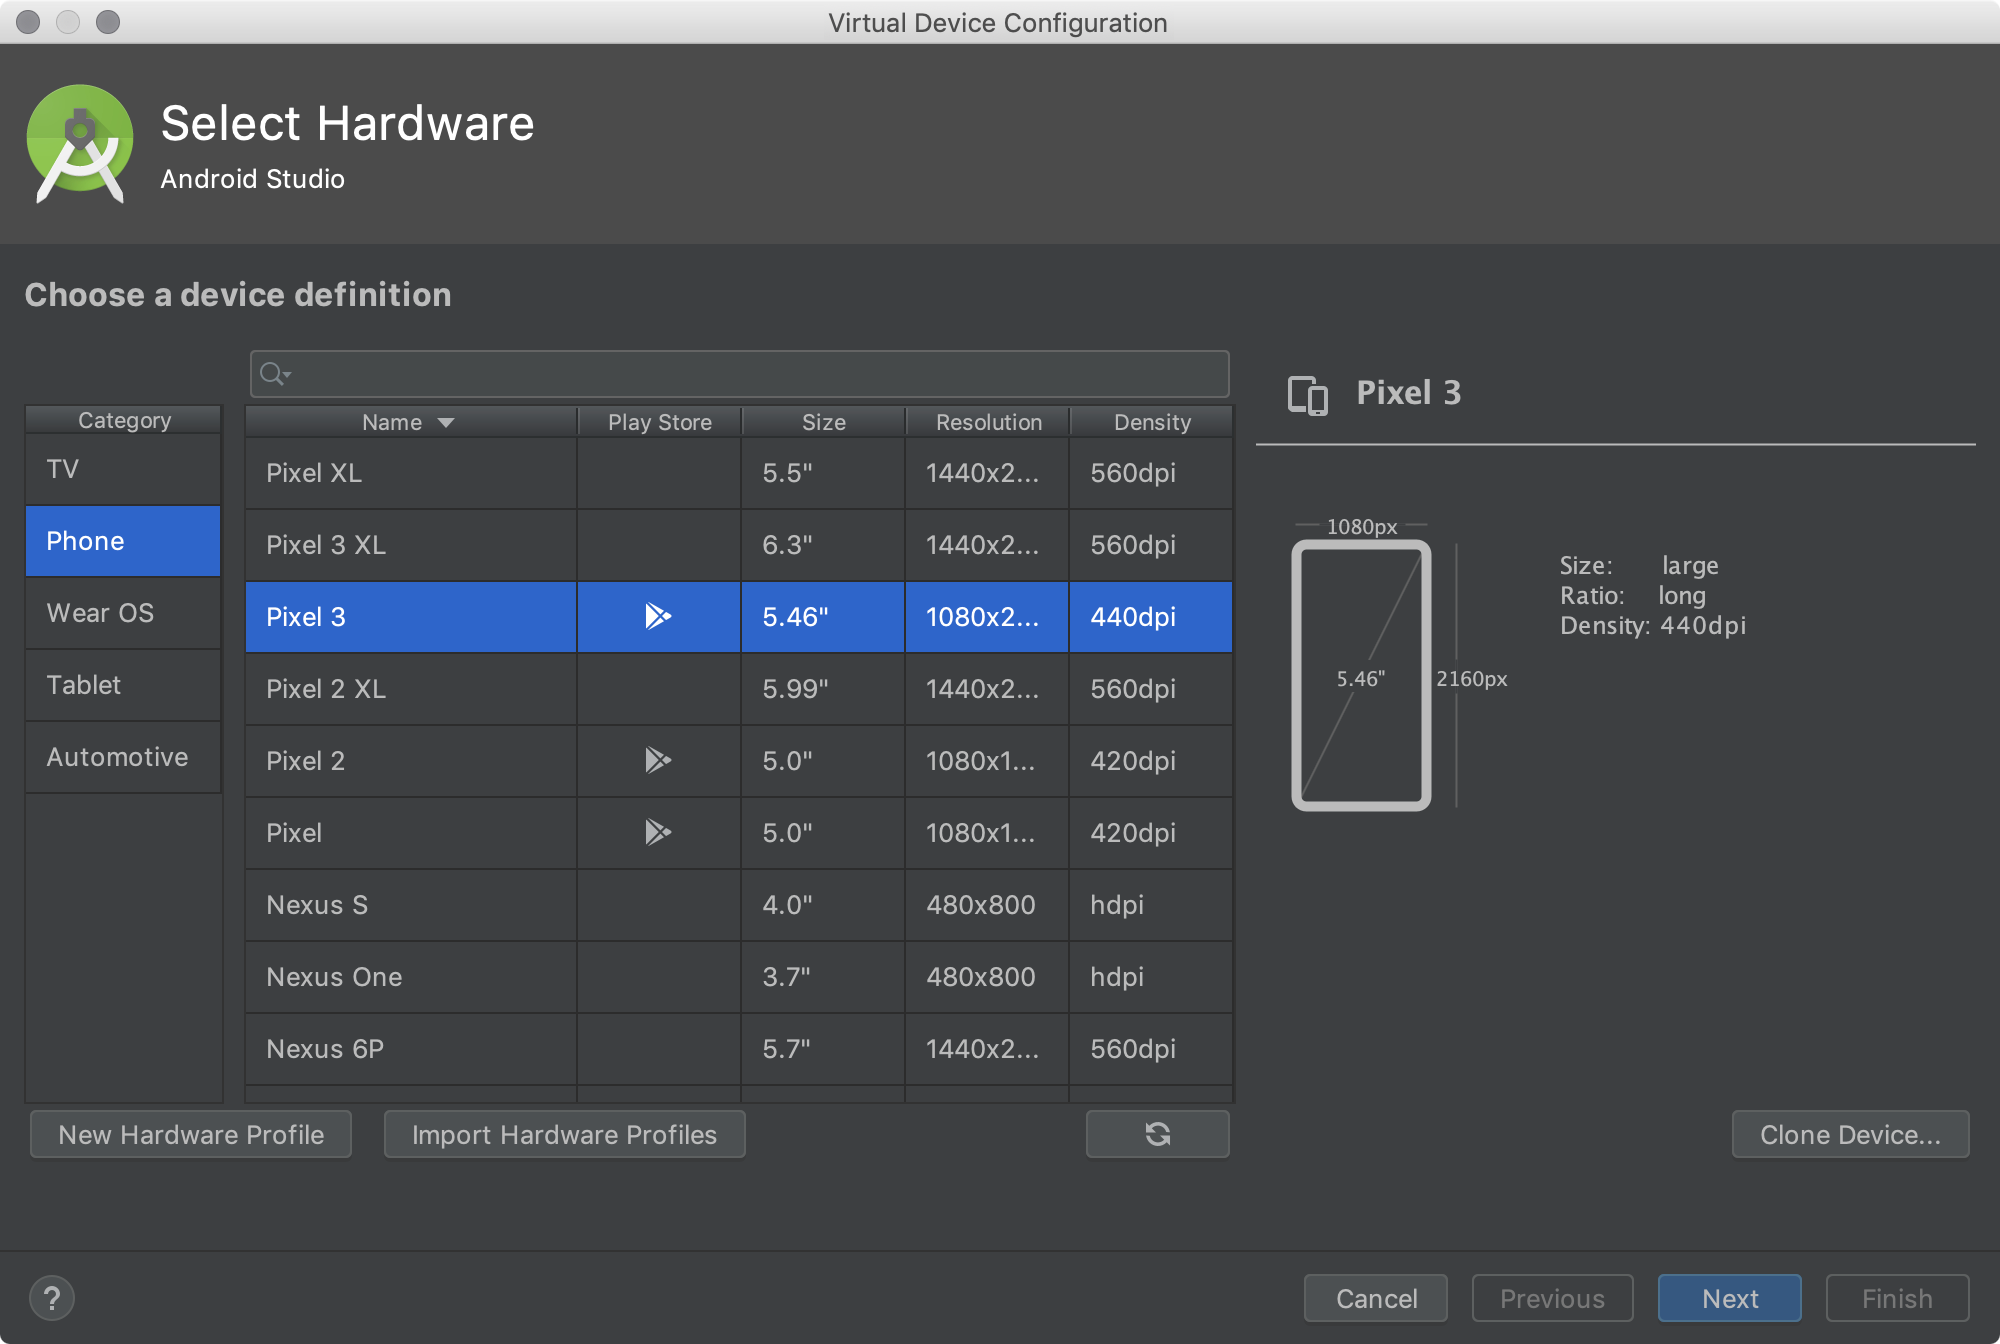
- Create an AVD
- Create a hardware profile
- Edit existing AVDs
- Edit existing hardware profiles
- Run and stop an emulator, and clear data
- Import and export hardware profiles
- Hardware profile properties
- AVD properties
- Create an emulator skin
Android Emulator
In this document
See also
The Android SDK includes a mobile device emulator — a virtual mobile device that runs on your computer. The emulator lets you develop and test Android applications without using a physical device.
This document is a reference to the available command line options and the keyboard mapping to device keys. For a complete guide to using the Android Emulator, see Using the Android Emulator.
Keyboard Commands
Table 1 summarizes the mappings between the emulator keys and the keys of your keyboard.
Table 1. Emulator keyboard mapping
| Emulated Device Key | Keyboard Key |
|---|---|
| Home | HOME |
| Menu (left softkey) | F2 or Page-up button |
| Star (right softkey) | Shift-F2 or Page Down |
| Back | ESC |
| Call/dial button | F3 |
| Hangup/end call button | F4 |
| Search | F5 |
| Power button | F7 |
| Audio volume up button | KEYPAD_PLUS, Ctrl-F5 |
| Audio volume down button | KEYPAD_MINUS, Ctrl-F6 |
| Camera button | Ctrl-KEYPAD_5, Ctrl-F3 |
| Switch to previous layout orientation (for example, portrait, landscape) | KEYPAD_7, Ctrl-F11 |
| Switch to next layout orientation (for example, portrait, landscape) | KEYPAD_9, Ctrl-F12 |
| Toggle cell networking on/off | F8 |
| Toggle code profiling | F9 (only with -trace startup option) |
| Toggle fullscreen mode | Alt-Enter |
| Toggle trackball mode | F6 |
| Enter trackball mode temporarily (while key is pressed) | Delete |
| DPad left/up/right/down | KEYPAD_4/8/6/2 |
| DPad center click | KEYPAD_5 |
| Onion alpha increase/decrease | KEYPAD_MULTIPLY(*) / KEYPAD_DIVIDE(/) |
Command Line Parameters
The emulator supports a variety of options that you can specify when launching the emulator, to control its appearance or behavior. Here’s the command-line syntax of the options available to the emulator program:
Table 2. Emulator command line parameters
| Category | Option | Description | Comments | |||||||||||||||||||||||||||||||||||||||||||||||||||||||||||
|---|---|---|---|---|---|---|---|---|---|---|---|---|---|---|---|---|---|---|---|---|---|---|---|---|---|---|---|---|---|---|---|---|---|---|---|---|---|---|---|---|---|---|---|---|---|---|---|---|---|---|---|---|---|---|---|---|---|---|---|---|---|---|
| AVD | -avd or @ | Required. Specifies the AVD to load for this emulator instance. | You must create an AVD configuration before launching the emulator. For information, see Managing AVDs with AVD Manager. | |||||||||||||||||||||||||||||||||||||||||||||||||||||||||||
| Disk Images | -cache | Use as the working cache partition image. | An absolute or relative path to the current working directory. If no cache file is specified, the emulator’s default behavior is to use a temporary file instead. For more information on disk images, use -help-disk-images . | |||||||||||||||||||||||||||||||||||||||||||||||||||||||||||
| -data | Use as the working user-data disk image. | Optionally, you can specify a path relative to the current working directory. If -data is not used, the emulator looks for a file named userdata-qemu.img in the storage area of the AVD being used (see -avd ). | Search for the user-data disk image specified in -data in | is a path relative to the current working directory. If you do not specify -datadir , the emulator looks for the user-data image in the storage area of the AVD being used (see -avd ) For more information on disk images, use -help-disk-images . —> -image | Use as the system image. | Optionally, you can specify a path relative to the current working directory. Default is /system.img. | ||||||||||||||||||||||||||||||||||||||||||||||||||||||||
| -initdata | When resetting the user-data image (through -wipe-data ), copy the contents of this file to the new user-data disk image. By default, the emulator copies the /userdata.img . | Optionally, you can specify a path relative to the current working directory. See also -wipe-data . For more information on disk images, use -help-disk-images . | ||||||||||||||||||||||||||||||||||||||||||||||||||||||||||||
| -nocache | Start the emulator without a cache partition. | See also -cache . | ||||||||||||||||||||||||||||||||||||||||||||||||||||||||||||
| -ramdisk | Use as the ramdisk image. | Default value is /ramdisk.img . Optionally, you can specify a path relative to the current working directory. For more information on disk images, use -help-disk-images . | ||||||||||||||||||||||||||||||||||||||||||||||||||||||||||||
| -sdcard | Use as the SD card image. | Default value is /sdcard.img . Optionally, you can specify a path relative to the current working directory. For more information on disk images, use -help-disk-images . | Search for system, ramdisk and user data images in . | is a directory path relative to the current working directory. | ||||||||||||||||||||||||||||||||||||||||||||||||||||||||||
| -wipe-data | Reset the current user-data disk image (that is, the file specified by -datadir and -data , or the default file). The emulator deletes all data from the user data image file, then copies the contents of the file at -inidata data to the image file before starting. | See also -initdata . For more information on disk images, use -help-disk-images . | ||||||||||||||||||||||||||||||||||||||||||||||||||||||||||||
| Debug | -debug | Enable/disable debug messages for the specified debug tags. | is a space/comma/column-separated list of debug component names. Use -help-debug-tags to print a list of debug component names that you can use. | |||||||||||||||||||||||||||||||||||||||||||||||||||||||||||
| -debug- | Enable/disable debug messages for the specified debug tag. | Use -help-debug-tags to print a list of debug component names that you can use in . | ||||||||||||||||||||||||||||||||||||||||||||||||||||||||||||
| -debug-no- | Disable debug messages for the specified debug tag. | |||||||||||||||||||||||||||||||||||||||||||||||||||||||||||||
| -logcat | Enable logcat output with given tags. | If the environment variable ANDROID_LOG_TAGS is defined and not empty, its value will be used to enable logcat output by default. | ||||||||||||||||||||||||||||||||||||||||||||||||||||||||||||
| -shell | Create a root shell console on the current terminal. | You can use this command even if the adb daemon in the emulated system is broken. Pressing Ctrl-c from the shell stops the emulator instead of the shell. | ||||||||||||||||||||||||||||||||||||||||||||||||||||||||||||
| -shell-serial | Enable the root shell (as in -shell and specify the QEMU character device to use for communication with the shell. | must be a QEMU device type. See the documentation for ‘-serial dev‘ at http://wiki.qemu.org/download/qemu-doc.html for a list of device types. Here are some examples:
| ||||||||||||||||||||||||||||||||||||||||||||||||||||||||||||
| -show-kernel | Display kernel messages. | |||||||||||||||||||||||||||||||||||||||||||||||||||||||||||||
| -trace | Enable code profiling (press F9 to start), written to a specified file. | |||||||||||||||||||||||||||||||||||||||||||||||||||||||||||||
| -verbose | Enable verbose output. | Equivalent to -debug-init . You can define the default verbose output options used by emulator instances in the Android environment variable ANDROID_VERBOSE. Define the options you want to use in a comma-delimited list, specifying only the stem of each option: -debug- . Here’s an example showing ANDROID_VERBOSE defined with the -debug-init and -debug-modem options: For more information about debug tags, use . | ||||||||||||||||||||||||||||||||||||||||||||||||||||||||||||
| Media | -audio | Use the specified audio backend. | ||||||||||||||||||||||||||||||||||||||||||||||||||||||||||||
| -audio-in | Use the specified audio-input backend. | |||||||||||||||||||||||||||||||||||||||||||||||||||||||||||||
| -audio-out | Use the specified audio-output backend. | Use device or WAV file for audio input. | ||||||||||||||||||||||||||||||||||||||||||||||||||||||||||||
| -noaudio | Disable audio support in the current emulator instance. | |||||||||||||||||||||||||||||||||||||||||||||||||||||||||||||
| -radio | Redirect radio modem interface to a host character device. | |||||||||||||||||||||||||||||||||||||||||||||||||||||||||||||
| -useaudio | Enable audio support in the current emulator instance. | Enabled by default. | ||||||||||||||||||||||||||||||||||||||||||||||||||||||||||||
| Network | -dns-server | Use the specified DNS server(s). | The value of must be a comma-separated list of up to 4 DNS server names or IP addresses. | |||||||||||||||||||||||||||||||||||||||||||||||||||||||||||
| -http-proxy | Make all TCP connections through a specified HTTP/HTTPS proxy | The value of can be one of the following: The http:// prefix can be omitted. If the -http-proxy command is not supplied, the emulator looks up the http_proxy environment variable and automatically uses any value matching the format described above. | ||||||||||||||||||||||||||||||||||||||||||||||||||||||||||||
| -netdelay | Set network latency emulation to . | Default value is none . See the table in Network Delay Emulation for supported values. | ||||||||||||||||||||||||||||||||||||||||||||||||||||||||||||
| -netfast | Shortcut for -netspeed full -netdelay none | |||||||||||||||||||||||||||||||||||||||||||||||||||||||||||||
| -netspeed | Set network speed emulation to . | Default value is full . See the table in Network Speed Emulation for supported values. | ||||||||||||||||||||||||||||||||||||||||||||||||||||||||||||
| -port | Set the console port number for this emulator instance to . | The console port number must be an even integer between 5554 and 5584, inclusive. +1 must also be free and will be reserved for ADB. | ||||||||||||||||||||||||||||||||||||||||||||||||||||||||||||
| -report-console | Report the assigned console port for this emulator instance to a remote third party before starting the emulation. | must use one of these formats: to view more information about this topic. | ||||||||||||||||||||||||||||||||||||||||||||||||||||||||||||
| System | -cpu-delay | Slow down emulated CPU speed by | Supported values for are integers between 0 and 1000. Note that the does not correlate to clock speed or other absolute metrics — it simply represents an abstract, relative delay factor applied non-deterministically in the emulator. Effective performance does not always scale in direct relationship with values. | |||||||||||||||||||||||||||||||||||||||||||||||||||||||||||
| -gps | Redirect NMEA GPS to character device. | Use this command to emulate an NMEA-compatible GPS unit connected to an external character device or socket. The format of must be QEMU-specific serial device specification. See the documentation for ‘serial -dev’ at http://wiki.qemu.org/download/qemu-doc.html. | ||||||||||||||||||||||||||||||||||||||||||||||||||||||||||||
| -nojni | Disable JNI checks in the Dalvik runtime. | |||||||||||||||||||||||||||||||||||||||||||||||||||||||||||||
| -qemu | Pass arguments to the qemu emulator software. |
 .
.| Hardware Profile Property | Description |
|---|---|
| Device Name | Name of the hardware profile. The name can contain uppercase or lowercase letters, numbers from 0 to 9, periods (.), underscores (_), parentheses ( () ), and spaces. The name of the file storing the hardware profile is derived from the hardware profile name. |
| Device Type | Select one of the following:
|
| Screen Size | The physical size of the screen, in inches, measured at the diagonal. If the size is larger than your computer screen, it’s reduced in size at launch. |
| Screen Resolution | Type a width and height in pixels to specify the total number of pixels on the simulated screen. |
| Round | Select this option if the device has a round screen, such as some Wear OS devices. |
| Memory: RAM | Type a RAM size for the device and select the units, one of B (byte), KB (kilobyte), MB (megabyte), GB (gigabyte), or TB (terabyte). |
| Input: Has Hardware Buttons (Back/Home/Menu) | Select this option if your device has hardware navigation buttons. Deselect it if these buttons are implemented in software only. If you select this option, the buttons won’t appear on the screen. You can use the emulator side panel to «press» the buttons, in either case. |
| Input: Has Hardware Keyboard | Select this option if your device has a hardware keyboard. Deselect it if it doesn’t. If you select this option, a keyboard won’t appear on the screen. You can use your computer keyboard to send keystrokes to the emulator, in either case. |
| Navigation Style | |
| Sensors: Accelerometer | Select if the device has hardware that helps the device determine its orientation. |
| Sensors: Gyroscope | Select if the device has hardware that detects rotation or twist. In combination with an accelerometer, it can provide smoother orientation detection and support a six-axis orientation system. |
| Sensors: GPS | Select if the device has hardware that supports the Global Positioning System (GPS) satellite-based navigation system. |
| Sensors: Proximity Sensor | Select if the device has hardware that detects if the device is close to your face during a phone call to disable input from the screen. |
| Default Skin | Select a skin that controls what the device looks like when displayed in the emulator. Remember that specifying a screen size that’s too big for the resolution can mean that the screen is cut off, so you can’t see the whole screen. See Create an emulator skin for more information. |
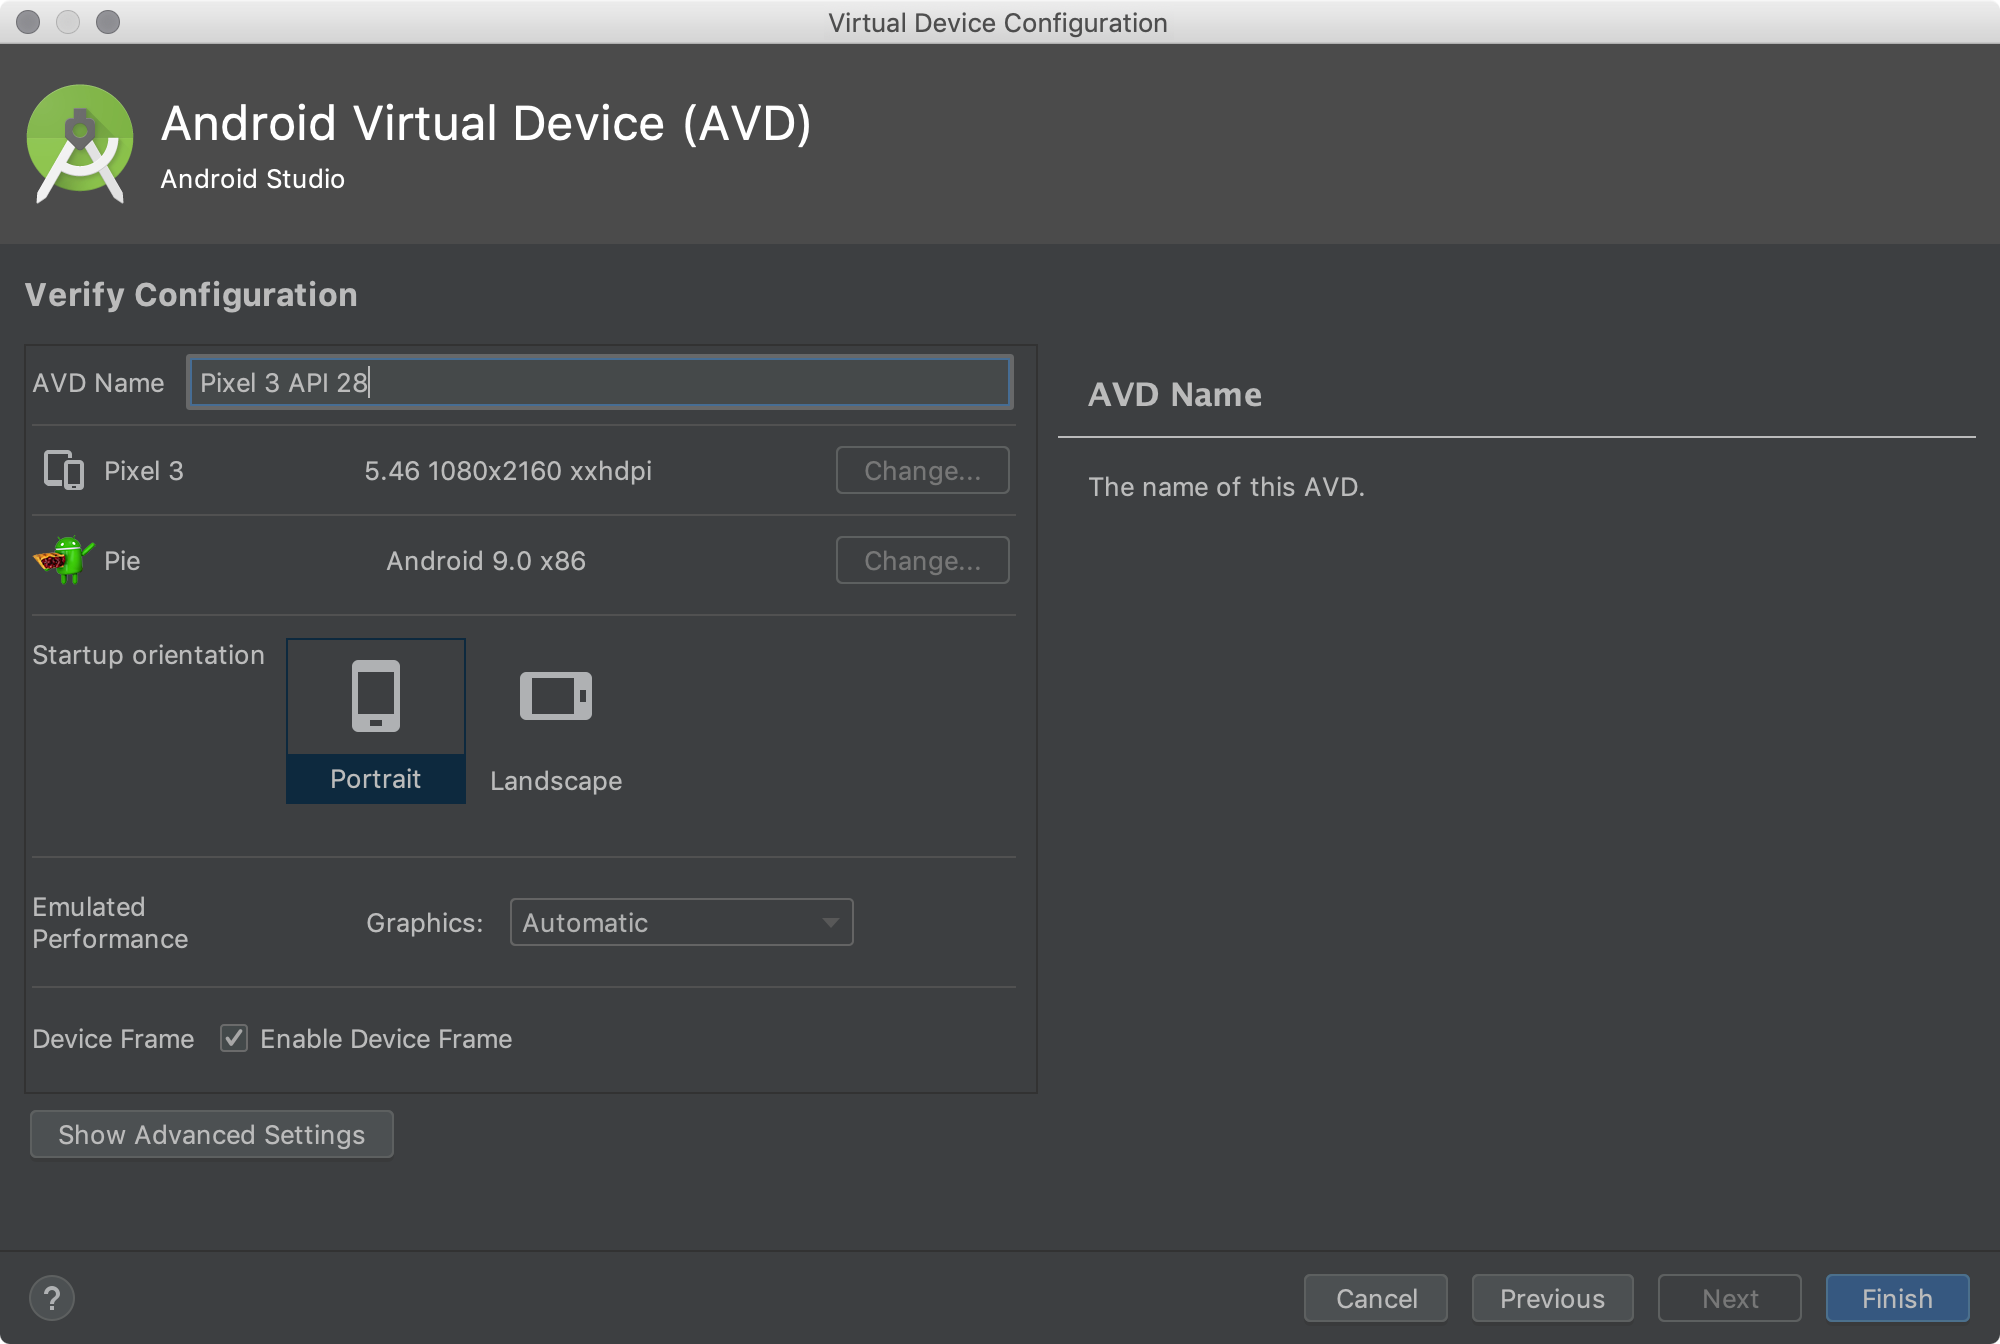
AVD properties
You can specify the following properties for AVD configurations in the Verify Configuration page. The AVD configuration specifies the interaction between the development computer and the emulator, as well as properties you want to override in the hardware profile.
AVD configuration properties override hardware profile properties. Emulator properties that you set while the emulator is running override them both.
| AVD Property | Description |
|---|---|
| AVD Name | Name of the AVD. The name can contain uppercase or lowercase letters, numbers from 0 to 9, periods (.), underscores (_), parentheses ( () ), dashes (-), and spaces. The name of the file storing the AVD configuration is derived from the AVD name. |
| AVD ID (Advanced) | The AVD filename is derived from the ID, and you can use the ID to refer to the AVD from the command line. |
| Hardware Profile | Click Change to select a different hardware profile in the Select Hardware page. |
| System Image | Click Change to select a different system image in the System Image page. An active internet connection is required to download a new image. |
| Startup Orientation | |
| Network: Latency (Advanced) | Select a network protocol to set how much time (delay) it takes for the protocol to transfer a data packet from one point to another point. |
| Emulated Performance: Graphics | |
| Emulated Performance: Boot option (Advanced) |
|
| Emulated Performance: Multi-Core CPU (Advanced) | Select the number of processor cores on your computer that you’d like to use for the emulator. Using more processor cores speeds up the emulator. |
| Memory and Storage: RAM | The amount of RAM on the device. This value is set by the hardware manufacturer, but you can override it, if needed, such as for faster emulator operation. Increasing the size uses more resources on your computer. Type a RAM size and select the units, one of B (byte), KB (kilobyte), MB (megabyte), GB (gigabyte), or TB (terabyte). |
| Memory and Storage: VM Heap | The VM heap size. This value is set by the hardware manufacturer, but you can override it, if needed. Type a heap size and select the units, one of B (byte), KB (kilobyte), MB (megabyte), GB (gigabyte), or TB (terabyte). For more information on Android VMs, see Memory Management for Different Virtual Machines. |
| Memory and Storage: Internal Storage | The amount of nonremovable memory space available on the device. This value is set by the hardware manufacturer, but you can override it, if needed. Type a size and select the units, one of B (byte), KB (kilobyte), MB (megabyte), GB (gigabyte), or TB (terabyte). |
| Memory and Storage: SD Card | The amount of removable memory space available to store data on the device. To use a virtual SD card managed by Android Studio, select Studio-managed, type a size, and select the units, one of B (byte), KB (kilobyte), MB (megabyte), GB (gigabyte), or TB (terabyte). A minimum of 100 MB is recommended to use the camera. To manage the space in a file, select External file and click . to specify the file and location. For more information, see mksdcard and AVD data directory. |
| Device Frame: Enable Device Frame | Select to enable a frame around the emulator window that mimics the look of a real device. |
| Custom Skin Definition (Advanced) | Select a skin that controls what the device looks like when displayed in the emulator. Remember that specifying a screen size that’s too big for the skin can mean that the screen is cut off, so you can’t see the whole screen. See Create an emulator skin for more information. |
| Keyboard: Enable Keyboard Input (Advanced) | Select this option if you want to use your hardware keyboard to interact with the emulator. It’s disabled for Wear OS and Android TV. |
Create an emulator skin
An Android emulator skin is a collection of files that define the visual and control elements of an emulator display. If the skin definitions available in the AVD settings don’t meet your requirements, you can create your own custom skin definition, and then apply it to your AVD.
Each emulator skin contains:
- A hardware.ini file
- Layout files for supported orientations (landscape, portrait) and physical configuration
- Image files for display elements, such as background, keys and buttons
To create and use a custom skin:
- Create a new directory where you will save your skin configuration files.
- Define the visual appearance of the skin in a text file named layout . This file defines many characteristics of the skin, such as the size and image assets for specific buttons. For example:
For more detailed information about creating emulator skins, see the Android Emulator Skin File Specification in the tools source code.
Content and code samples on this page are subject to the licenses described in the Content License. Java is a registered trademark of Oracle and/or its affiliates.
Источник


