- Android — SQLite Database
- Database — Package
- Database — Creation
- Database — Insertion
- Database — Fetching
- Database — Helper class
- Example
- Android SQLite Database Tutorial
- 1. The Notes App
- 2. Creating New Project
- 2.1 Writing SQLite Helper Class
- a. Inserting Note
- b. Reading Notes
- c. Updating Note
- d. Deleting Note
- 3. Adding Notes UI
- 3.1 Adding Create / Edit Note Dialog
- 5. Further Reading
Android — SQLite Database
SQLite is a opensource SQL database that stores data to a text file on a device. Android comes in with built in SQLite database implementation.
SQLite supports all the relational database features. In order to access this database, you don’t need to establish any kind of connections for it like JDBC,ODBC e.t.c
Database — Package
The main package is android.database.sqlite that contains the classes to manage your own databases
Database — Creation
In order to create a database you just need to call this method openOrCreateDatabase with your database name and mode as a parameter. It returns an instance of SQLite database which you have to receive in your own object.Its syntax is given below
Apart from this , there are other functions available in the database package , that does this job. They are listed below
| Sr.No | Method & Description | |||||||||||||||||||||||||||||
|---|---|---|---|---|---|---|---|---|---|---|---|---|---|---|---|---|---|---|---|---|---|---|---|---|---|---|---|---|---|---|
| 1 |
| Sr.No | Method & Description | ||||||||||||||||||||||||||
|---|---|---|---|---|---|---|---|---|---|---|---|---|---|---|---|---|---|---|---|---|---|---|---|---|---|---|---|
| 1 |
| Sr.No | Method & Description | |||||||||||||||||||||||
|---|---|---|---|---|---|---|---|---|---|---|---|---|---|---|---|---|---|---|---|---|---|---|---|---|
| 1 |
| Steps | Description |
|---|---|
| 1 | You will use Android studio to create an Android application under a package com.example.sairamkrishna.myapplication. |
| 2 | Modify src/MainActivity.java file to get references of all the XML components and populate the contacts on listView. |
| 3 | Create new src/DBHelper.java that will manage the database work |
| 4 | Create a new Activity as DisplayContact.java that will display the contact on the screen |
| 5 | Modify the res/layout/activity_main to add respective XML components |
| 6 | Modify the res/layout/activity_display_contact.xml to add respective XML components |
| 7 | Modify the res/values/string.xml to add necessary string components |
| 8 | Modify the res/menu/display_contact.xml to add necessary menu components |
| 9 | Create a new menu as res/menu/mainmenu.xml to add the insert contact option |
| 10 | Run the application and choose a running android device and install the application on it and verify the results. |
Following is the content of the modified MainActivity.java.
Following is the modified content of display contact activity DisplayContact.java
Following is the content of Database class DBHelper.java
Following is the content of the res/layout/activity_main.xml
Following is the content of the res/layout/activity_display_contact.xml
Following is the content of the res/value/string.xml
Following is the content of the res/menu/main_menu.xml
Following is the content of the res/menu/display_contact.xml
This is the defualt AndroidManifest.xml of this project
Let’s try to run your application. I assume you have connected your actual Android Mobile device with your computer. To run the app from Android studio , open one of your project’s activity files and click Run  icon from the tool bar. Before starting your application,Android studio will display following window to select an option where you want to run your Android application.

Select your mobile device as an option and then check your mobile device which will display following screen −
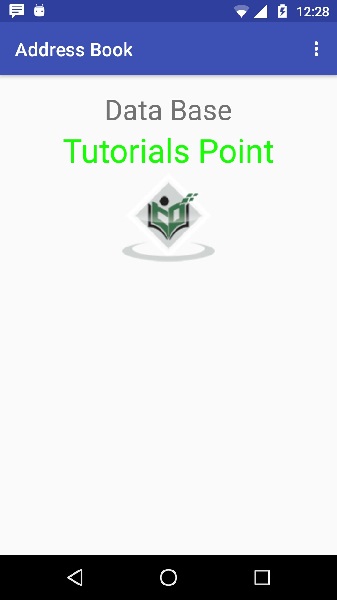
Now open your optional menu, it will show as below image: Optional menu appears different places on different versions
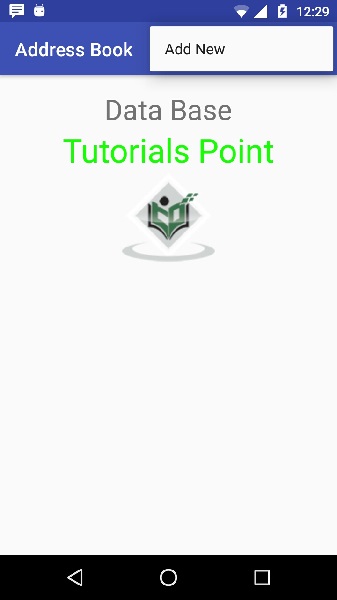
Click on the add button of the menu screen to add a new contact. It will display the following screen −
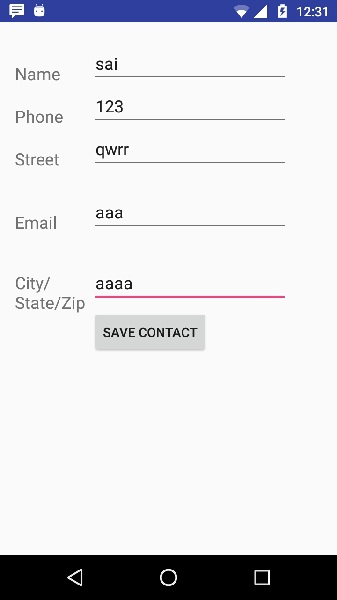
It will display the following fields. Please enter the required information and click on save contact. It will bring you back to main screen.
Источник
Android SQLite Database Tutorial
In Android, there are several ways to store persistent data. SQLite is one way of storing app data. It is very lightweight database that comes with Android OS. In Android, integrating SQLite is a tedious task as it needs writing lot of boilerplate code to store simple data. Consider SQLite when your app needs to store simple data objects. Alternatively you can consider Room Persistence Library for better APIs and easier integration.
In this article we are going to learn basics of SQLite database with a realtime example of Notes App.
VIDEO DEMO
1. The Notes App
We are going to create a simple Notes App with SQLite as database storage. The app will be very minimal and will have only one screen to manage the notes.
Below are the screenshots of the app.


Now let’s start by creating new project in Android Studio.
2. Creating New Project
1. Create a new project in Android Studio from File ⇒ New Project and select Basic Activity from the templates.
2. Open build.gradle under app directory and add RecyclerView dependency. The RecyclerView will be used to display the Notes in list manner.
3. Add the below resources to colors.xml, dimens.xml and strings.xml
4. Quickly create few packages named database, database/model, utils and view. Below is the final project structure and files we gonna need.

2.1 Writing SQLite Helper Class
We need to create a class that extends from SQLiteOpenHelper. This class perform CRUD operations (Create, Read, Update and Delete) on the database.
We also need a model class to create Note objects to manage the notes easily.
5. Under database/model package, create a class named Note.java. In this class we define the SQLite table name, column names and create table SQL query along with getter / setter methods.
- The `notes` table needs three columns i.e `id`, `note` and `timestamp`.
- Column `id` is defined as Primary Key and Auto Increment which means each note will be uniquely identified by its id.
- Column `note` stores the actual note text.
- Column `timestamp` stores the date and time of the note that is created.
6. Under database package, create a class named DatabaseHelper.java and extend the class from SQLiteOpenHelper. This class holds the database related methods to perform the CRUD operations.
- onCreate() will be called only once when the app is installed. In this method, we execute the create table sql statements to create necessary tables.
- onUpgrade() called when an update is released. You need to modify the DATABASE_VERSION in order to execute this method. You have to take care of database migrations here without loosing the older data if necessary. For now, we just drop the older tables and recreate them again.
Now we’ll see the methods required to store or retrieve the notes. Add the following methods to same class.
a. Inserting Note
Inserting data requires getting writable instance (getReadableDatabase()) on database. Below, we are inserting new note in database.
- ContentValues() is used to define the column name and its data to be stored. Here, we are just setting the note value only ignoring `id` and `timestamp` as these two will be inserted automatically.
- Every time the database connection has to be closed once you are done with database access. Calling db.close() closes the connection.
- Once the note is inserted, the `id` of newly inserted note will be returned.
b. Reading Notes
Reading data requires only read access (getReadableDatabase()) on the database.
- getNote() takes already existed note `id` and fetches the note object.
- getAllNotes() fetches all the notes in descending order by timestamp.
- getNotesCount() returns the count of notes stored in database.
c. Updating Note
Updating data again requires writable access. Below the note is updated by its `id`.
d. Deleting Note
Deleting data also requires writable access. Below method deletes a note by finding its `id`.
After adding all the methods, the DatabaseHelper.java class should be like this.
7. Under utils package, create two classes named RecyclerTouchListener.java and MyDividerItemDecoration.java
- RecyclerTouchListener class adds touch event to RecyclerView row.
- MyDividerItemDecoration class adds divider line between rows.
3. Adding Notes UI
Now we have the database helper class ready. Let’s quickly build the main interface and integrate it with the database.
First we need an adapter to display the notes in list manner. For this, we need a layout file and Adapter class.
8. Create new xml layout named note_list_row.xml. This layout holds the design of single note item in the list.
9. Under view package, create a class named NotesAdapter.java. This adapter class renders the RecyclerView with defined layout and data set.
3.1 Adding Create / Edit Note Dialog
If you observe the app design, a note is created or updated using a Dialog. So, we need to create a custom layout with EditText input and inflate it in AlertDialog.
10. Create another layout named note_dialog.xml
11. Open the layout files of main activity (activity_main.xml and content_main.xml) and add RecyclerView widget. I am also changing the icon of FAB here.
12. Finally open MainActivity.java and do the below changes.
- showNoteDialog() open the alert dialog to create new note. This dialog will be shown by tapping FAB.
- createNote() inserts new note in database and adds the newly inserted note in RecyclerView list.
- showActionsDialog() shows a dialog with Edit and Delete options. This dialog can be invoked by long pressing the note in the list.
- Selecting Edit, opens the update note dialog with already existed note text. You can modify the note text and update it in database by calling updateNote() method.
- deleteNote() deletes a note from database. The deleted note is again removed from list by calling notifyItemRemoved() on adapter.
- toggleEmptyNotes() toggles the visibility of notes and empty note view depending on the count (db.getNotesCount() > 0) of notes.
If you have followed the article carefully, you can see the app running very smoothly as shown in the video demo.
5. Further Reading
Once you are comfortable with SQLite, check out Android SQLite Database with Multiple Tables that explains how to handle SQLite when your app needs more than one table.
| Updated On | 16th Mar 2018 (Updated code and introduced Notes App) |
Ravi is hardcore Android programmer and Android programming has been his passion since he compiled his first hello-world program. Solving real problems of Android developers through tutorials has always been interesting part for him.
Источник


