- Как исправить невозможность смонтировать хранилище в TWRP Recovery
- Причина невозможности смонтировать хранилище в TWRP
- Как исправить невозможность смонтировать хранилище в TWRP Recovery
- Исправление 1: удалить экран блокировки
- Исправление 2: восстановить или изменить файловую систему
- Исправление 3: форматирование внутренней памяти
- twrp error — unable to mount system_root (invalid argument)
- Breadcrumb
- lars0815
- geoanto555
- lars0815
- br4t0
- br4t0
- br4t0
- Cannot mount system_root and /product read only
- Breadcrumb
- geraIT
- dvait008
- reliot
- geraIT
- cgdams
- E:failed to mount /system (Invalid argument ) can’t mount ‘/system ‘ (Invalid argumen
- Breadcrumb
- veterannoob
- ReznorNInchNails
- veterannoob
- ReznorNInchNails
- veterannoob
- ReznorNInchNails
- veterannoob
- veterannoob
- bodycode
- How to Fix failed to mount /system (invalid argument) in TWRP
- How to Fix failed to mount /system (invalid argument) in TWRP
- Fix 1: Install Stock Firmware via TWRP
- Fix 2: Repair System Partition via TWRP
- Fix 3: Refresh EXT4 File System via TWRP
- FAQs: Wipe System Partition via Fastboot Commands
- About Chief Editor
- Sadique Hassan
Как исправить невозможность смонтировать хранилище в TWRP Recovery
В этом руководстве мы покажем вам шаги по исправлению невозможности смонтировать хранилище в TWRP Recovery. Экосистема Android, благодаря своей природе с открытым исходным кодом, допускает множество настроек.
Единственное требование — разблокировать загрузчик устройства. Как только вы этого добьетесь, вы сможете запустить множество пользовательских двоичных файлов, модов, пользовательских ПЗУ и даже Magisk для рутирования вашего устройства. Однако стандартное восстановление не может установить эти файлы. Вам нужно будет установить кастомное рекавери, например TWRP.
После того, как ваше устройство загрузится в это восстановление, вы можете стереть различные разделы устройства, выполнить резервное копирование Nandroid и, конечно, прошить вышеупомянутые файлы. Однако несколько раз вы можете столкнуться с ошибкой или двумя.
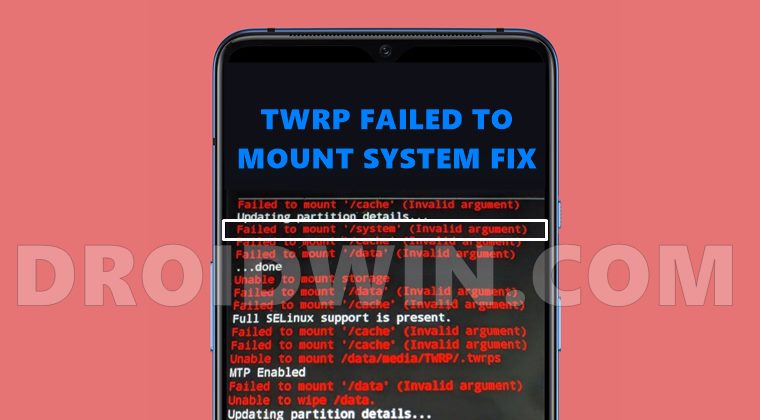
Среди них самые распространенные и пугающие, похоже, не могут смонтировать ошибку хранилища при отображении TWRP. В этом руководстве мы рассмотрим различные причины этой ошибки, а затем перечислим возможные исправления для исправления этой ошибки. Следуйте.
Причина невозможности смонтировать хранилище в TWRP
Первая причина, по-видимому, связана с тем, что внутреннее хранилище вашего устройства зашифровано. В результате TWRP не может расшифровать его на ходу и, следовательно, не может получить доступ к файлам, хранящимся на вашем устройстве.
Это причина, по которой эта ошибка чаще всего возникает, когда вы собираетесь прошить файл с помощью этого восстановления.
В других случаях ваш раздел данных может быть поврежден из-за того, что мигает неправильный файл или файл в неправильном разделе. Во всех этих сценариях ваш TWRP может отображать внутреннее хранилище как имеющее 0 МБ занятого места.
Но не волнуйтесь, это не так, и ваши данные на данный момент могут быть все еще нетронутыми. Итак, с учетом сказанного, вот различные методы исправления невозможности монтировать хранилище в TWRP Recovery.
Как исправить невозможность смонтировать хранилище в TWRP Recovery
Мы поделимся тремя разными способами решения этой проблемы. Следуйте инструкциям в том же порядке, как указано. Просто убедитесь, что ваше устройство уже загружено в TWRP. Е
Исправление 1: удалить экран блокировки
Если вы используете графический ключ на своем устройстве, TWRP не сможет его расшифровать. Рекомендуется переключиться на пин-код или пароль.
- Для этого, если вы загружены в TWRP, перезагрузите устройство в Системе.
- После загрузки перейдите в Настройки > Безопасность и экран блокировки > Блокировка экрана.
- Выберите из списка PIN-код или пароль. Теперь перезагрузите устройство обратно в TWRP.
- Теперь программа восстановления попросит вас ввести PIN-код / пароль. Введите его, и ваше хранилище будет зашифровано.
Теперь попробуйте прошить нужные файлы и посмотрите, исправлена ли проблема с невозможностью монтировать хранилище в TWRP Recovery.
Исправление 2: восстановить или изменить файловую систему
Вы также можете попробовать восстановить или изменить файловую систему вашего устройства. Все это можно было сделать прямо из самого TWRP.
- Итак, загрузите ваше устройство в TWRP Recovery.
- Затем перейдите в Wipe > Advanced Wipe, нажмите Wipe и нажмите Advanced Wipe.
- Теперь выберите раздел данных и нажмите на опцию «Восстановить» или «Изменить файловую систему». Затем нажмите «Восстановить файловую систему» и дождитесь завершения процесса. Проверьте, может ли он исправить проблему с монтированием.
- Если он все еще там, то снова зайдите в «Восстановить или изменить файловую систему» и на этот раз нажмите «Изменить файловую систему».
- В появившемся меню выберите EXT 2 и проведите пальцем вправо для подтверждения.
- После этого вернитесь к EXT 4 и проведите пальцем вправо, чтобы подтвердить это.
- Теперь перейдите в главное меню TWRP и перейдите к опции Mount
- Выберите раздел Data и попробуйте прошить нужные файлы.
Убедитесь, что вы по-прежнему получаете сообщение об ошибке «Невозможно смонтировать хранилище при восстановлении TWRP».
Исправление 3: форматирование внутренней памяти
Если ни один из вышеперечисленных методов не помог устранить проблему с монтированием, возможно, вам придется выбрать ядерный вариант. Форматирование внутреннего хранилища кажется единственным выходом. Это, в свою очередь, сотрет все данные, имеющиеся на вашем устройстве.
Убедитесь, что вы создали эту резервную копию на SD-карте или USB OTG, а не в памяти телефона, так как мы собираемся полностью стереть этот раздел. Когда вы закончите резервное копирование, выполните следующие действия.
- Загрузите устройство в TWRP Recovery.
- Перейдите в Wipe > Advanced Wipe и выберите Internal Storage.
- Наконец, проведите пальцем вправо, чтобы отформатировать этот раздел (все данные будут стерты).
- Как только это будет сделано, ошибка монтирования будет исправлена. Имейте в виду, что внутреннее хранилище может по-прежнему отображаться как 0 МБ. Но на этот раз это данные в реальном времени (ваше внутреннее хранилище очищается, следовательно, используется 0 МБ пространства).
Мы поделились тремя разными методами для одного и того же, дайте нам знать, какой из них сработал за вас.
Источник
twrp error — unable to mount system_root (invalid argument)
Breadcrumb
lars0815
New member
Hi guys. i was an lineage but decided to go back to stock rom. Now twrp can’t install the rom-zip.
Message: «unable to update logical partition: /system_root» (same meassage with /vendor and /product)
It seems that the system partition is missing ’cause twrp can’t wipe it.
Anyone a idea how to fix?
geoanto555
Senior Member
lars0815
New member
br4t0
Member
I’m stucked as well. From MIUI12 Android 10 I flashed
[ArrowOS] [R] Xiaomi Mi 10t Lite [gauguin] [NIGHTLIES] [UNIFIED]
to be on Android R and to flash
[ROM][11.0][gauguin] Havoc-OS 4.4 [OFFICIAL] [21-04-2021].
So I could install ArrowOS but since now I cant flash Havoc / Magisk / Gapps via TWRP or OrangeFox.
It always says
Failed to mount ‘/system_root’ (No such file or directory)
Failed to mount ‘/vendor’ (Invalid argument)
Failed to mount ‘/product’ (No such file or directory)
I’m sitting and searching for a solution since 5 hours..wtf. i was close to throw the phone against the wall..
br4t0
Member
I tried to flash «Xiaomi Mi 10T Lite Latest Europe Stable Version Fastboot». During the flash this error message popped up

Strangely it somehow worked because I’m having MIUI12 with Android 11 on the device. so after 5 hours back and forward, I’m at the situation as before, what a waste of time. If someone can help me, I’m willing to do another try.
br4t0
Member
It finally worked. Here were my steps of going crazy, but finally reached the goal:
Источник
Cannot mount system_root and /product read only
Breadcrumb
geraIT
Member
Hello,
I have installed xiaomi eu and magisk (using twrp) and then removed some google apps using root uninstaller. Now my phone is stuck on fastboot.
When I try to restore factory settings in twrp I get errors:
Failed to mount /system_root (read only file system)
Failed to mount /product (read only file system)
How can I mount this partition as read write?
Is there any other workaround?
[Edit]
I do not have backup of partitions
dvait008
Member
Hello,
I have installed xiaomi eu and magisk (using twrp) and then removed some google apps using root uninstaller. Now my phone is stuck on fastboot.
When I try to restore factory settings in twrp I get errors:
Failed to mount /system_root (read only file system)
Failed to mount /product (read only file system)
How can I mount this partition as read write?
Is there any other workaround?
[Edit]
I do not have backup of partitions
reliot
Member
geraIT
Member
Thank you for info. I was able to fix this problem. I am not a specialist so I do not know if all steps are required (someone more experienced can verify). Do it on your own risk:
1) in twrp terminal I executed: mount -o rw,remount,a (rw for read write, a is for all partitions)
2) wipe cache, Dalvik
3) format data
4) I have flashed magisk uninstaller (I don’t know if it has any impact)
5) reboot to twrp
6) connect to PC, moved rom (xiaomi.eu) to device
7) mount all possible partitions
8) install rom
9) I got an error
10) reboot to twrp and flash rom again — it worked now
11) install magisk (optional)
12) done
I hope it’ll help others but it needs verification first.
cgdams
Senior Member
Thank you for info. I was able to fix this problem. I am not a specialist so I do not know if all steps are required (someone more experienced can verify). Do it on your own risk:
1) in twrp terminal I executed: mount -o rw,remount,a (rw for read write, a is for all partitions)
2) wipe cache, Dalvik
3) format data
4) I have flashed magisk uninstaller (I don’t know if it has any impact)
5) reboot to twrp
6) connect to PC, moved rom (xiaomi.eu) to device
7) mount all possible partitions
8) install rom
9) I got an error
10) reboot to twrp and flash rom again — it worked now
11) install magisk (optional)
12) done
I hope it’ll help others but it needs verification first.
I had the same problem, too, out of the blue.
I flashed xiaomi.eu Miui 12 stable last wednesday, installed magisk and adaway immediately afterwards and even did some restarts in the last days.
Today i did another restart, and the phone went into a fastboot mode bootloop immediately.
I was able to boot to TWRP by holding down the VolUp-Key while rebooting. TWRP was unable to mount the system and product partitions.
I followed your steps to solve the problem, and it did indeed work. Two things i did differently, though:
— After formatting data, i booted into recovery again before continuing. In my experience, this is essential if you want to copy things from your pc to the newly formatted data partition.
— I skipped step 7 (mount all possible partitions) completely.
First flash of the ROM went without error, i did not need to flash twice.
I don’t know what caused the problem in the first place. I did not uninstall system apps.
I did use Magisk Manager to enable systemless hostfiles, to enable Adaway, so maybe that’s the culprit.
I’ll try to retrace my steps, to see where it goes wrong. If i find anything, i’ll let you know. If anyone else knows the reason, please let me know.
EDIT: I can’t find the reason. It’s not Magisk itself, it’s not Magisk Manager enabling systemless host, it’s not Adaway.
Источник
E:failed to mount /system (Invalid argument ) can’t mount ‘/system ‘ (Invalid argumen
Breadcrumb
veterannoob
Member

ReznorNInchNails
Senior Member
veterannoob
Member
I tried wipe data and reset and factory reset and still will not boot
ReznorNInchNails
Senior Member
Then your only choice is to flash your phone since it is, hopefully, just software fault. Maybe your filesystem got damaged (corrupted). Anyway, you can try odin or flash some of zips, search your model on xda (note II android development)
Here’s excerpt
If you want to flash custom rom then first flash appropiate recovery (cwm, twrp, it should be mentioned in rom thread).
Gesendet von meinem MT11i mit Tapatalk 2
veterannoob
Member
Thank you so much for all the info. its still a lil complicated for me is there anyway u can simplifit further by steps am truly sorry for the inconvenience and trouble
Then your only choice is to flash your phone since it is, hopefully, just software fault. Maybe your filesystem got damaged (corrupted). Anyway, you can try odin or flash some of zips, search your model on xda (note II android development)
Here’s excerpt
If you want to flash custom rom then first flash appropiate recovery (cwm, twrp, it should be mentioned in rom thread).
Gesendet von meinem MT11i mit Tapatalk 2
ReznorNInchNails
Senior Member
Gesendet von meinem MT11i mit Tapatalk 2
veterannoob
Member
veterannoob
Member
bodycode
Member
/system cannot be mounted? My solution that worked perfectly.
The E:Failed to mount /system problem, that is, that the system does not have the ability to actually mount the all-important /system dir, was totally solved (FOR ME) by simply deleting a previously created Boot Slot in SafeStrap 3.75.
Check your slots. If you HAVE NOT created any stocks, and, just have your «stock slot» created (hope to God you do Then I personally think that you’ll have bigger fish to fry.
However. Deleting all other slots except Stock Slot, was the solution for me.
Not that I can boot my machine. I still can’t (bummer) but I don’t give up too easily.
Hope this helps your system mount problem.
I have suspicians about why my machine can’t boot, relating to Slot 1’s System partition size being zero, but that’s another thread, right?
Ok then, hope this dumb, no-programmer n00bie helped.
Источник
How to Fix failed to mount /system (invalid argument) in TWRP
In this guide, we will show you the steps to fix the failed to mount /system (invalid argument) error in TWRP. Each device has quite a few partitions. Some of them include the boot, recovery (in A-only device), vendor, vbmeta, userdata, system, etc. While the number, type, and size of partitions might vary across various devices, the aforementioned partitions could be found on near about every device.
And while each of these partitions are important in their own rights, it is the system partition that could be categorized as the most important one. The reason is pretty simple: it holds your OS. However, if there’s an issue with this partition, there are bound to be issues. Among the various issues, the most common is associated with TWRP.
Many concerned users have complained that they are unable to mount the system partition on their device. As a result, every time they are about to flash a Custom ROM, TWRP displays the failed to mount /system (invalid argument) error message. While this issue is justifiably concerning, fortunately, it could be fixed via a few workarounds. So without further ado, let’s check them out.
Table of Contents
How to Fix failed to mount /system (invalid argument) in TWRP
Before trying out any of the below-mentioned fixes, it is highly recommended to take a backup of all the data on your device. Droidwin and its members wouldn’t be held responsible in case of a thermonuclear war, your alarm doesn’t wake you up, or if anything happens to your device and data by performing the below steps.
Fix 1: Install Stock Firmware via TWRP
In this method, we will be wiping all the device partitions and then flashing the stock OS via TWRP. While most devices come with a Recovery ROM (including OnePlus’s OxygenOS and Xiaomi’s MIUI Recovery ROM), there are some that don’t have a custom recovery-supported flashable ROM.
For those set of devices, they should refer to our guide to Flash Stock Firmware via Fastboot Commands. Whereas for other users who could flash stock ROM via TWRP, they should proceed with the below instructions:
- To begin with, boot your device to the TWRP Recovery. Then go to Wipe and tap on Advanced Wipe.
- Select Dalvik/ART Cache, System, Data, and Vendor partitions and perform a right swipe to wipe them. [if you cannot select the System partition, then refer to the FAQ at the end of this guide].
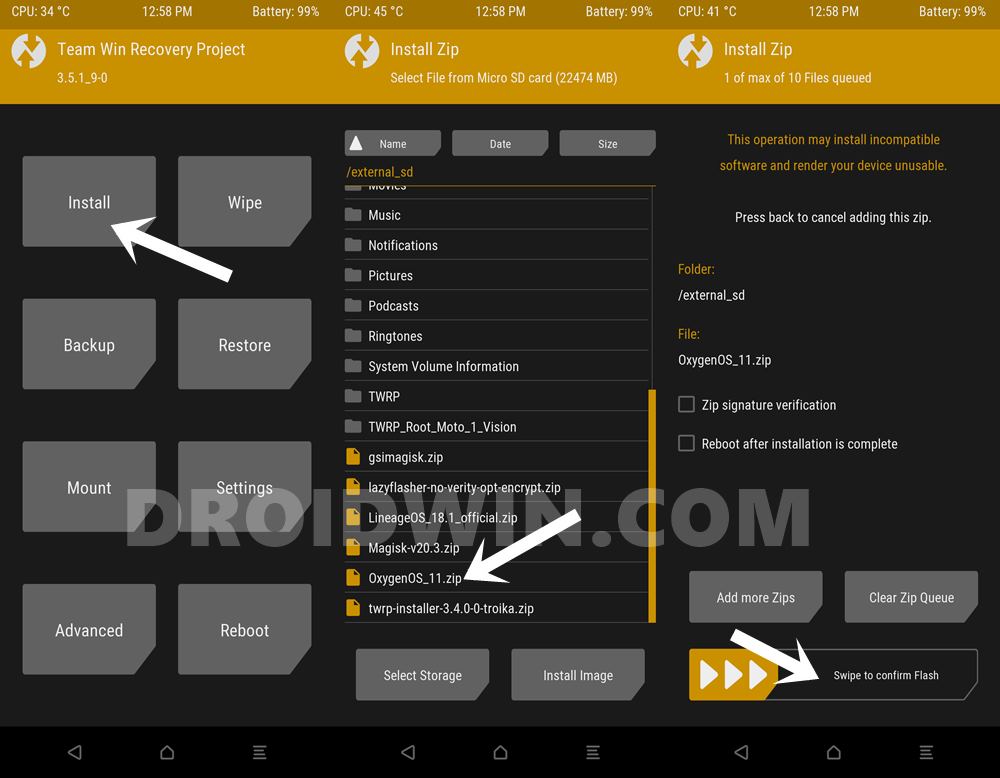
- Once that is done, transfer the Recovery ROM to your device. For that, go to Mount and tap on Enable MTP. Likewise, you may use the ADB Sideload or try via the USB-OTG. All these have been explained in the guide: 3 Methods To Transfer or Install Files via TWRP Recovery.
- Once the file has been transferred, go to Install. Select the ROM ZIP file and perform a right swipe to flash it.
- After this, you may now reboot the device to the OS. For that, go to Reboot and select System. Check if it is able to fix the failed to mount /system (invalid argument) error in TWRP.

Fix 2: Repair System Partition via TWRP
You could also use the TWRP’s built-in Repair File System feature to repair the system partition on your device. Here’s how:

- Boot your device to the TWRP Recovery and go to Wipe.
- Then select Advanced Wipe and checkmark the System partition.
- After that, tap on Repair or Change File System and then tap on the Repair File System button.
- Finally, perform a right swipe to repair the System partition.
- Once done, go to Reboot and select System. Your device shall now be booted to OS and see if the failed to mount /system (invalid argument) error in TWRP has been fixed or not.

Fix 3: Refresh EXT4 File System via TWRP
By default, your device would be having the EXT4 File System. In this section, we would change it to EXT2 and then revert to the original EXT4. Here’s how it could be done:

- From TWRP, go to Wipe and select Advanced Wipe.
- Select the System partition and tap on Repair or Change File System
- Check the top of the menu, if File System says: EXT4 (as will be the case with most devices, then we would switch to EXT2 and then back to EXT4).
- On the other hand, if it says EXT2, then you should switch to EXT4 and back to EXT2. As for this guide, we are going ahead with the former (since our device has EXT4 by default).
- So tap on the Change File System button and select EXT2 and perform a right swipe to confirm it.
- Once done, again go to this screen, and this time tap on EXT4 to switch to your original file system.
- Once that is done, reboot the device to the OS via Reboot > System. The issue should now have been fixed.

So with this, we conclude the guide on how to fix the failed to mount /system (invalid argument) error in TWRP. If you have any queries concerning the aforementioned steps, do let us know in the comments. We will get back to you with a solution at the earliest.
FAQs: Wipe System Partition via Fastboot Commands
If you cannot select the System Partition via TWRP, then you would have to wipe it via Fastboot Commands. Here’s how it could be done:
- To begin with, go to the Reboot section of TWRP and select System.
- Then install the Android SDK Platform Tools on your PC.
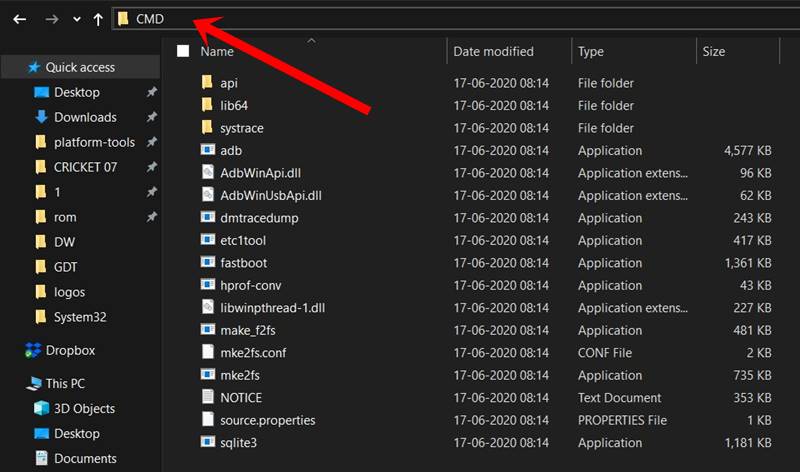
- Go to this platform-tools folder, type in CMD in the address bar, and hit Enter. This will launch the CMD window.
- Connect your device to the PC via USB cable.
- Now type in the below command in the CMD window to wipe the system partition:
- After this, you will have to reboot your device to TWRP. Use the below command for that:
- Once your device boots to TWRP, wipe the other partitions (Dalvik/ART Cache, Data, and Vendor).
- You may now flash the ROM ZIP file as mentioned above and fix the failed to mount /system (invalid argument) error in TWRP.
About Chief Editor
Sadique Hassan
A technical geek by birth, he always has a keen interest in the Android platform right since the birth of the HTC Dream. The open-source environment always seems to intrigue him with the plethora of options available at his fingertips. “MBA by profession, blogger by choice!”
Источник


