- Класс File
- Методы класса File
- Каталог
- Список каталогов
- Метод listFiles()
- Полный список
- Внутренняя память
- SD карта
- Saving Files
- This lesson teaches you to
- You should also read
- Choose Internal or External Storage
- Obtain Permissions for External Storage
- Save a File on Internal Storage
- Save a File on External Storage
- Query Free Space
- Delete a File
Класс File
В отличие от большинства классов ввода/вывода, класс File работает не с потоками, а непосредственно с файлами. Данный класс позволяет получить информацию о файле: права доступа, время и дата создания, путь к каталогу. А также осуществлять навигацию по иерархиям подкаталогов.
Класс java.io.File может представлять имя определённого файла, а также имена группы файлов, находящихся в каталоге. Если класс представляет каталог, то его метод list() возвращает массив строк с именами всех файлов.
Для создания объектов класса File можно использовать один из следующих конструкторов.
- File(File dir, String name) — указывается объекта класса File (каталог) и имя файла
- File(String path) — указывается путь к файлу без указания имени файла
- File(String dirPath, Sring name) — указывается путь к файлу и имя файла
- File(URI uri) — указывается объекта URI, описывающий файл
Методы класса File
Класс File может использоваться для создания каталога или дерева каталогов. Также можно узнать свойства файлов (размер, дату последнего изменения, режим чтения/записи), определить к какому типу (файл или каталог) относится объект File, удалить файл. У класса очень много методов, перечислим некоторые.
- getAbsolutePath() — абсолютный путь файла, начиная с корня системы. В Android корневым элементом является символ слеша (/)
- canRead() — доступно для чтения
- canWrite() — доступно для записи
- exists() — файл существует или нет
- getName() — возвращает имя файла
- getParent() — возвращает имя родительского каталога
- getPath() — путь
- lastModified() — дата последнего изменения
- isFile() — объект является файлом, а не каталогом
- isDirectory — объект является каталогом
- isAbsolute() — возвращает true, если файл имеет абсолютный путь
- renameTo(File newPath) — переименовывает файл. В параметре указывается имя нового имени файла. Если переименование прошло неудачно, то возвращается false
- delete() — удаляет файл. Также можно удалить пустой каталог
Каталог
Каталог — это объект класса File, который содержит список других файлов и каталогов. После создания объекта класса File, являющего каталогом, его метод isDirectory() вернёт значение true. И тогда вы можете вызывать метод list().
Для создания каталога можно использовать метод mkdir(), который вернёт true в успешном случае. Если указанный путь уже существует или каталог нельзя создать из-за отсутствия полного пути к нему, то вернётся false.
Метод mkdirs() создаёт сам каталог, так и всех его родителей.
Список каталогов
Если вы хотите получить содержимое каталога, то можно вызвать метод list() без аргументов. Вам вернётся полный список (массив) имён файлов и каталогов, содержащихся в данном каталоге. Есть ещё похожий метод listFiles(), который возвращает массив файлов (объектов, а не их имён), о котором поговорим отдельно.
Если вам нужен только список файлов с расширением .java, то можно использовать специальный фильтр-класс, который описывает критерии отбора объектов File с помощью интерфейса FilenameFilter.
Интерфейс FilenameFilter определяет единственный метод accept(), вызываемый по одному разу с каждым файлом в списке.
Метод возвращает true для файлов каталога, указанного в dir, которые должны быть включены в список, и false — для файлов, которые следует исключить.
Метод listFiles()
Метод имеет несколько перегруженных версий. Он возвращает список файлов в виде массива объектов класса File. Одна из версий метода также использует интерфейс FilenameFilter. Другая версия использует интерфейс FileFilter и возвращает те файлы, путевые имена которых соответствует интерфейсу.
Пример использования методов класса File показан в уроке Файловый менеджер и в других примерах.
Источник
Полный список
— работаем с файлами
Работа с файлами в Android не сильно отличается от таковой в Java. В этом уроке рассмотрим, как записать/прочесть файл во внутреннюю память и на SD-карту.
Project name: P0751_Files
Build Target: Android 2.3.3
Application name: Files
Package name: ru.startandroid.develop.p0751files
Create Activity: MainActivity
Рисуем экран main.xml:
4 кнопки, смысл которых понятен по тексту на них.
В onclick обрабатываем нажатия 4-х кнопок и вызываем соответствующие методы.
writeFile – запись файла во внутреннюю память. Используется метод openFileOutput, который на вход берет имя файла и режим записи: MODE_PRIVATE – файл доступен только этому приложению, MODE_WORLD_READABLE – файл доступен для чтения всем, MODE_WORLD_WRITEABLE — файл доступен для записи всем, MODE_APPEND – файл будет дописан, а не начат заново.
readFile – чтение файла из внутренней памяти. Используем метод openFileInput, принимающий на вход имя файла. Здесь и в методе записи внутреннего файла вы можете задать только имя файла, а каталог для ваших файлов вам уже выделен.
writeFileSD – запись файла на SD. Используем метод getExternalStorageState для получения состояния SD-карты. Здесь можно посмотреть какие бывают состояния. Нам нужно MEDIA_MOUNTED – когда SD-карта вставлена и готова к работе. Далее мы получаем путь к SD-карте (метод getExternalStorageDirectory), добавляем свой каталог и имя файла, создаем каталог и пишем данные в файл.
readFileSD – чтение файла с SD. Все аналогично предыдущему методу, только файл не пишем, а читаем.
Осталось в манифест добавить разрешение на работу с файлами на SD — android.permission.WRITE_EXTERNAL_STORAGE.
Все сохраним и запустим. Видим экран с 4-мя кнопками:
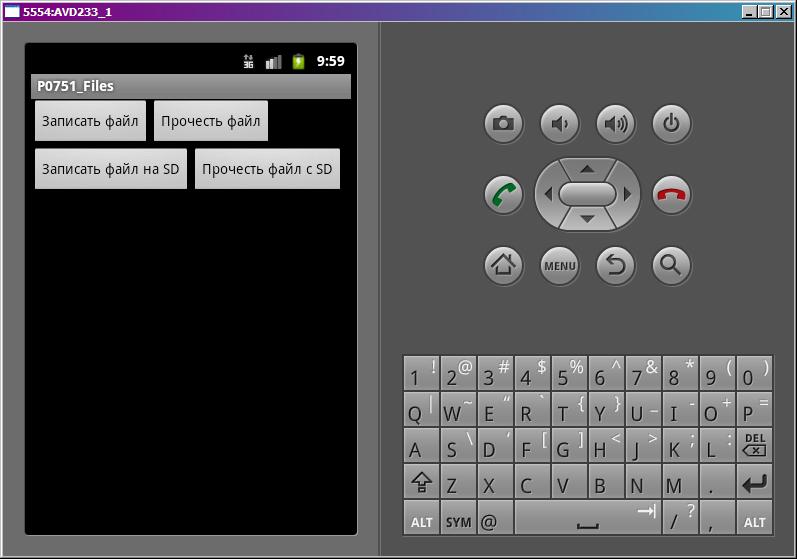
Внутренняя память
Жмем кнопку Записать файл. Видим в логе:
Проверим. Идем в File Explorer (Window > Show View > Other > Android > File Explorer) и открываем там папку data/data/ru.startandroid.develop.p0751files/files и видим там наш файл file.
Возвращаемся в эмулятор. Жмем Прочесть файл и в логе видим:
Это тот текст, который мы записывали в файл.
SD карта
Теперь жмем Записать файл на SD.
Файл записан на SD: /mnt/sdcard/MyFiles/fileSD
Проверяем. Идем в FileExplorer и открываем там папку mnt/sdcard/MyFiles/ а в ней файл fileSD.
Возвращаемся в эмулятор и жмем кнопку Прочесть файл с SD. В логе видим:
Содержимое файла на SD
Этот текст мы и записывали.
mnt/sdcard — обычно этот путь ведет к содержимому SD-карты. Возможно у вас он будет другой.
В общем, при работе с файлами на SD вы используете стандартные java механизмы. А при работе с внутренним хранилищем для удобства можно использовать методы-оболочки от Activity:
openFileOutput – открыть файл на запись
openFileInput – открыть файл на чтение
И есть метод getFilesDir – возвращает объект File, соответствующий каталогу для файлов вашей программы. Используйте его, чтобы работать напрямую, без методов-оболочек.
Подробности работы в java с файловой системой я здесь описывать не буду. На нашем форуме пользователь SKR сделал отличную памятку по работе с файлами. Скорее всего, вы найдете там все что нужно.
Если у вас проверка SD-карты показывает, что карта недоступна (см. лог), то убедитесь в свойствах AVD, что у вас для SDCard указан Size или File. Если указаны, то попробуйте перезапустить AVD.
На следующем уроке:
— создаем экран с вкладками
— используем иконку в названии вкладки
— используем обработчик перехода между вкладками
Присоединяйтесь к нам в Telegram:
— в канале StartAndroid публикуются ссылки на новые статьи с сайта startandroid.ru и интересные материалы с хабра, medium.com и т.п.
— в чатах решаем возникающие вопросы и проблемы по различным темам: Android, Kotlin, RxJava, Dagger, Тестирование
— ну и если просто хочется поговорить с коллегами по разработке, то есть чат Флудильня
— новый чат Performance для обсуждения проблем производительности и для ваших пожеланий по содержанию курса по этой теме
Источник
Saving Files
This lesson teaches you to
You should also read
Android uses a file system that’s similar to disk-based file systems on other platforms. This lesson describes how to work with the Android file system to read and write files with the File APIs.
A File object is suited to reading or writing large amounts of data in start-to-finish order without skipping around. For example, it’s good for image files or anything exchanged over a network.
This lesson shows how to perform basic file-related tasks in your app. The lesson assumes that you are familiar with the basics of the Linux file system and the standard file input/output APIs in java.io .
Choose Internal or External Storage
All Android devices have two file storage areas: «internal» and «external» storage. These names come from the early days of Android, when most devices offered built-in non-volatile memory (internal storage), plus a removable storage medium such as a micro SD card (external storage). Some devices divide the permanent storage space into «internal» and «external» partitions, so even without a removable storage medium, there are always two storage spaces and the API behavior is the same whether the external storage is removable or not. The following lists summarize the facts about each storage space.
- It’s always available.
- Files saved here are accessible by only your app by default.
- When the user uninstalls your app, the system removes all your app’s files from internal storage.
Internal storage is best when you want to be sure that neither the user nor other apps can access your files.
- It’s not always available, because the user can mount the external storage as USB storage and in some cases remove it from the device.
- It’s world-readable, so files saved here may be read outside of your control.
- When the user uninstalls your app, the system removes your app’s files from here only if you save them in the directory from getExternalFilesDir() .
External storage is the best place for files that don’t require access restrictions and for files that you want to share with other apps or allow the user to access with a computer.
Tip: Although apps are installed onto the internal storage by default, you can specify the android:installLocation attribute in your manifest so your app may be installed on external storage. Users appreciate this option when the APK size is very large and they have an external storage space that’s larger than the internal storage. For more information, see App Install Location.
Obtain Permissions for External Storage
To write to the external storage, you must request the WRITE_EXTERNAL_STORAGE permission in your manifest file:
Caution: Currently, all apps have the ability to read the external storage without a special permission. However, this will change in a future release. If your app needs to read the external storage (but not write to it), then you will need to declare the READ_EXTERNAL_STORAGE permission. To ensure that your app continues to work as expected, you should declare this permission now, before the change takes effect.
However, if your app uses the WRITE_EXTERNAL_STORAGE permission, then it implicitly has permission to read the external storage as well.
You don’t need any permissions to save files on the internal storage. Your application always has permission to read and write files in its internal storage directory.
Save a File on Internal Storage
When saving a file to internal storage, you can acquire the appropriate directory as a File by calling one of two methods:
getFilesDir() Returns a File representing an internal directory for your app. getCacheDir() Returns a File representing an internal directory for your app’s temporary cache files. Be sure to delete each file once it is no longer needed and implement a reasonable size limit for the amount of memory you use at any given time, such as 1MB. If the system begins running low on storage, it may delete your cache files without warning.
To create a new file in one of these directories, you can use the File() constructor, passing the File provided by one of the above methods that specifies your internal storage directory. For example:
Alternatively, you can call openFileOutput() to get a FileOutputStream that writes to a file in your internal directory. For example, here’s how to write some text to a file:
Or, if you need to cache some files, you should instead use createTempFile() . For example, the following method extracts the file name from a URL and creates a file with that name in your app’s internal cache directory:
Note: Your app’s internal storage directory is specified by your app’s package name in a special location of the Android file system. Technically, another app can read your internal files if you set the file mode to be readable. However, the other app would also need to know your app package name and file names. Other apps cannot browse your internal directories and do not have read or write access unless you explicitly set the files to be readable or writable. So as long as you use MODE_PRIVATE for your files on the internal storage, they are never accessible to other apps.
Save a File on External Storage
Because the external storage may be unavailable—such as when the user has mounted the storage to a PC or has removed the SD card that provides the external storage—you should always verify that the volume is available before accessing it. You can query the external storage state by calling getExternalStorageState() . If the returned state is equal to MEDIA_MOUNTED , then you can read and write your files. For example, the following methods are useful to determine the storage availability:
Although the external storage is modifiable by the user and other apps, there are two categories of files you might save here:
Public files Files that should be freely available to other apps and to the user. When the user uninstalls your app, these files should remain available to the user.
For example, photos captured by your app or other downloaded files.
Private files Files that rightfully belong to your app and should be deleted when the user uninstalls your app. Although these files are technically accessible by the user and other apps because they are on the external storage, they are files that realistically don’t provide value to the user outside your app. When the user uninstalls your app, the system deletes all files in your app’s external private directory.
For example, additional resources downloaded by your app or temporary media files.
If you want to save public files on the external storage, use the getExternalStoragePublicDirectory() method to get a File representing the appropriate directory on the external storage. The method takes an argument specifying the type of file you want to save so that they can be logically organized with other public files, such as DIRECTORY_MUSIC or DIRECTORY_PICTURES . For example:
If you want to save files that are private to your app, you can acquire the appropriate directory by calling getExternalFilesDir() and passing it a name indicating the type of directory you’d like. Each directory created this way is added to a parent directory that encapsulates all your app’s external storage files, which the system deletes when the user uninstalls your app.
For example, here’s a method you can use to create a directory for an individual photo album:
If none of the pre-defined sub-directory names suit your files, you can instead call getExternalFilesDir() and pass null . This returns the root directory for your app’s private directory on the external storage.
Remember that getExternalFilesDir() creates a directory inside a directory that is deleted when the user uninstalls your app. If the files you’re saving should remain available after the user uninstalls your app—such as when your app is a camera and the user will want to keep the photos—you should instead use getExternalStoragePublicDirectory() .
Regardless of whether you use getExternalStoragePublicDirectory() for files that are shared or getExternalFilesDir() for files that are private to your app, it’s important that you use directory names provided by API constants like DIRECTORY_PICTURES . These directory names ensure that the files are treated properly by the system. For instance, files saved in DIRECTORY_RINGTONES are categorized by the system media scanner as ringtones instead of music.
Query Free Space
If you know ahead of time how much data you’re saving, you can find out whether sufficient space is available without causing an IOException by calling getFreeSpace() or getTotalSpace() . These methods provide the current available space and the total space in the storage volume, respectively. This information is also useful to avoid filling the storage volume above a certain threshold.
However, the system does not guarantee that you can write as many bytes as are indicated by getFreeSpace() . If the number returned is a few MB more than the size of the data you want to save, or if the file system is less than 90% full, then it’s probably safe to proceed. Otherwise, you probably shouldn’t write to storage.
Note: You aren’t required to check the amount of available space before you save your file. You can instead try writing the file right away, then catch an IOException if one occurs. You may need to do this if you don’t know exactly how much space you need. For example, if you change the file’s encoding before you save it by converting a PNG image to JPEG, you won’t know the file’s size beforehand.
Delete a File
You should always delete files that you no longer need. The most straightforward way to delete a file is to have the opened file reference call delete() on itself.
If the file is saved on internal storage, you can also ask the Context to locate and delete a file by calling deleteFile() :
Note: When the user uninstalls your app, the Android system deletes the following:
- All files you saved on internal storage
- All files you saved on external storage using getExternalFilesDir() .
However, you should manually delete all cached files created with getCacheDir() on a regular basis and also regularly delete other files you no longer need.
Источник


