- Анимация Floating Action Button в Android
- Floating Action Button
- Меню из FAB’ов
- Auto-Hide or Auto-Extend Floating Action Button for NestedScrollView in Android
- Steps to Implement auto-hide or auto-extend Floating Action Button
- How to hide Floating Action Button when scrolling in Recycler View
- Published by Gurleen Sethi on March 14, 2017 March 14, 2017
- Gurleen Sethi
- FloatingActionButton/Menu hide on ListView scroll #299
- Comments
- tieuphu9x commented Aug 16, 2016
- ifarshgar commented Aug 18, 2016 •
- shihabmi7 commented Aug 20, 2016 •
- eric-taix commented Jan 24, 2017
- fmrsabino commented Aug 9, 2017
- AvatarQing commented Sep 18, 2017
- Animating an Android Floating Action Button
- Floating Action Button
- Making a menu of Floating Action Buttons
- Caution!
- Display Floating Action Button menu
- Hide Floating Action Button menu
- A new circular animation
- Create a new Activity
- Build the Reveal UI
- Setup the RevealActivity
- The ViewAnimationUtils.createCircularReveal() method
- What’s next?
Анимация Floating Action Button в Android

С момента возникновения концепции Material design одним из самых простых в реализации элементов стала плавающая кнопка действия — FAB, Floating Action Button. Этот элемент быстро обрёл широчайшую популярность среди разработчиков и дизайнеров. В этой публикации мы рассмотрим, как можно анимировать FAB и сделать её интерактивной. Но сначала разберём, как вообще добавить этот элемент в ваш проект.
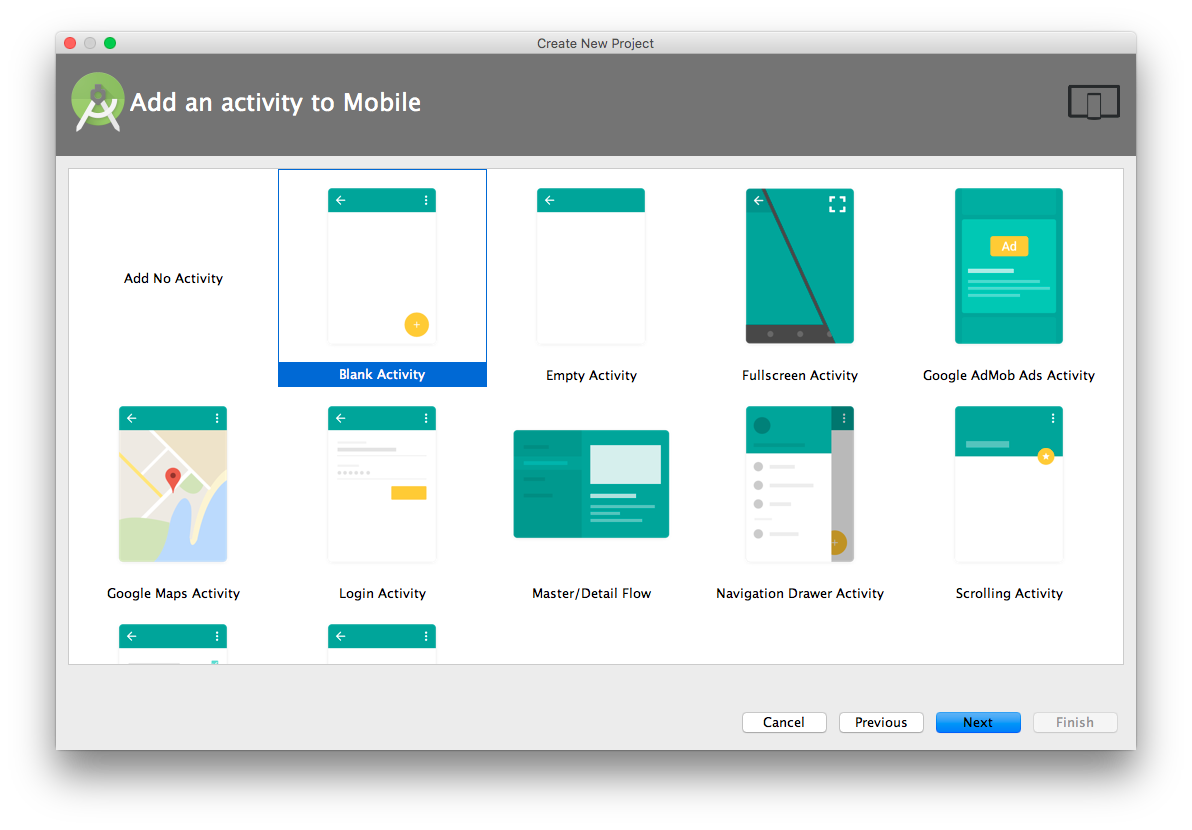
FAB выглядит как цветной круг в правом нижнем углу экрана. Если в Android Studio создать новый проект Blank Activity, то в нём автоматически будет сгенерирована плавающая кнопка действия.

Floating Action Button
FAB может быть одного из двух размеров: 56 dp (по умолчанию) или 40 dp. Если вы хотите подробнее изучить принципы использования FAB в дизайне приложения, то обратите внимание на официальные гайдлайны Google.
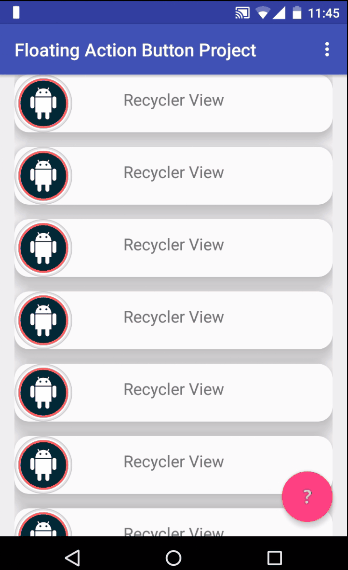
В самых свежих Android-приложениях FAB реагирует на прокручивание списка элементов. Было бы логичнее скрывать её во время прокручивания. Вот что имеется в виду:
Для отображения этой анимации создадим recyclerView , благодаря которому FAB реагирует на прокручивание. Сегодня доступно немало библиотек, позволяющих добиться этого с помощью пары строк кода. Например:
Здесь использован класс FloatingActionButton.Behavior() , чья основная задача, согласно официальной документации, заключается в перемещении видов FloatingActionButton , чтобы ни один из Snackbar их не перекрывал. Но в нашем случае этот класс является расширенным, так что мы можем его использовать для реализации нужного поведения кнопки.
Что же делает данный класс? При каждой инициализации прокрутки вниз метод onStartNestedScroll() возвращает значение true. После этого метод onNestedScroll() отображает или прячет кнопку, в зависимости от её текущей видимости. Конструктор класса FloatingActionButton.Behavior() является важной частью описанного поведения вида (view) и извлекается из XML-файла.
Добавим в FAB атрибут layout_behavior , содержащий название пакета, а в конце — имя класса. Иначе говоря, в атрибуте должно быть указано точное размещение класса в проекте. Например:
Анимация выглядит хорошо, но можно сделать ещё лучше. Например, чтобы кнопка уходила за пределы экрана во время прокрутки — это более реалистичное поведение:
Здесь используется та же логика, что и в предыдущем варианте, за исключением способа исчезновения FAB. Анимация довольно проста. Кнопка уходит вниз с помощью LinearInterpolator. Расстояние, которое ей нужно пройти, равно высоте кнопки плюс ширина нижнего поля.
Обратите внимание, что в выражениях if отсутствуют проверки View.VISIBLE и View.GONE , поскольку в данном случае вид не скрывается, а лишь уплывает за пределы экрана.
Меню из FAB’ов
Существует немало приложений, авторы которых создали красивые и хорошо работающие меню, состоящие из плавающих кнопок действия.
Давайте сделаем нечто подобное. Для начала создадим макет, содержащий три маленькие кнопки. Они невидимы и расположены в самом низу макета, под главной FAB. Содержимое fab_layout.xml:
Этот макет нужно включить в макет activity под главной FAB.
Теперь нужно добавить анимацию исчезновения и появления каждой из малых кнопок.
Примечание: здесь вы можете столкнуться с проблемой, связанной с отработкой нажатия на малые кнопки. Когда анимация завершается, реальное положение кнопки не меняется, перемещается только вид. Поэтому вы не сможете правильно обработать касание кнопки. Для решения этой проблемы можно настроить параметры макетов каждой кнопки с учётом их нового положения, и только потом выполнять анимацию перемещения вида.
Саму анимацию вы можете посмотреть в конце этой публикации. Порядок действий для всех кнопок один и тот же, различаются лишь координаты перемещения.
fab1 перемещается с помощью добавления в layoutParams полей справа и снизу, после чего инициируется анимация.
FrameLayout.LayoutParams layoutParams = (FrameLayout.LayoutParams) fab1.getLayoutParams();
layoutParams.rightMargin -= (int) (fab1.getWidth() * 1.7);
layoutParams.bottomMargin -= (int) (fab1.getHeight() * 0.25);
fab1.setLayoutParams(layoutParams);
fab1.startAnimation(hide_fab_1);
fab1.setClickable(false);
Процесс скрывания представляет собой обратное воспроизведение предыдущей анимации.
//Анимации одной из малых кнопок
Animation show_fab_1 = AnimationUtils.loadAnimation(getApplication(), R.anim.fab1_show);
Animation hide_fab_1 = AnimationUtils.loadAnimation(getApplication(), R.anim.fab1_hide);
Теперь создадим в папке res/anim/ файлы для каждой из анимаций. Делается это просто, но если у вас возникнут затруднения, то можете обратиться к документации.
Если вы посмотрите на тэг перевода (translate tag), отвечающий за движение вида, то увидите, что коэффициент перемещения (170% и 25%) соответствует коэффициентам, использованным при добавлении полей и извлечённым в Java-код.
Все вышеописанные шаги мы повторяем и для остальных малых кнопок. Различаются только коэффициенты перемещения: fab2 — 150% и 150%, fab3 — 25% и 170%.
Источник
Auto-Hide or Auto-Extend Floating Action Button for NestedScrollView in Android
In the previous article Extended Floating Action Button in Android with Example it’s been discussed how to implement the Extended Floating Action Button (FAB) in Android and more of its functionalities. In this article it’s been discussed it’s one of the features auto-hide or auto-extend the Floating Action Button in Android. Have a look at the following image on what things are discussed in this article. In this article, the nested scroll view is used.

Attention reader! Don’t stop learning now. Get hold of all the important Java Foundation and Collections concepts with the Fundamentals of Java and Java Collections Course at a student-friendly price and become industry ready. To complete your preparation from learning a language to DS Algo and many more, please refer Complete Interview Preparation Course.
Steps to Implement auto-hide or auto-extend Floating Action Button
Step 1: Create an empty activity project
- Create an empty activity Android studio. And select Java as a programming language.
- Refer to Android | How to Create/Start a New Project in Android Studio? to know how to create an empty activity Android Studio project.
Step 2: Invoking Dependencies in App-level gradle file
for Material design Extended Floating Action Button:
Источник
How to hide Floating Action Button when scrolling in Recycler View
Published by Gurleen Sethi on March 14, 2017 March 14, 2017
You might have seen many applications hiding the FAB on scrolling down and showing back when scrolling up. Hiding the FAB leaves nothing in the way of user and the content, making it an overall better UX.
It is very easy to achieve this kind of functionality. The prerequisites of this tutorial is that you have a basic understanding of Recycler View and FloatingActionButton.
First set up a basic Activity with a Coordinator Layout containing a Recycler View and FloatingActionButton, just as below.
Now reference the RecyclerView and FloatingActionButton in the Activity.
Now comes the main part. We will attach a scroll listener to the recycler view, so whenever the user scrolls the list we will get notified and will toggle the visibility of the FAB accordingly. The scroll listener looks like this.
Lets break down the above code and understand each line.
- hide() and show()are two methods provided by the FAB to hide/show the FAB button with a smooth animation.
- dyis a value that changes when you scroll vertically, when the user scrolls down the value is positive and when the user scrolls up the value is negative. So we check if the FAB is visible and the value is positive(i.e. user is scrolling down) we will hide it and if the FAB is hidden and the value is negative(i.e. user is scrolling up) we will show the FAB.
Once you run the app it will look something like this. Simple and slick!

Gurleen Sethi
Android Developer and enthusiast, believes in developing products and content to help people. Likes to do deep thinking.
Источник
FloatingActionButton/Menu hide on ListView scroll #299
Comments
tieuphu9x commented Aug 16, 2016
I want to hide/show FloatingActionButton/Menu on scroll of ListView. How to do this?
The text was updated successfully, but these errors were encountered:
ifarshgar commented Aug 18, 2016 •
i found the solution for this.
use this attribute:
app:layout_behavior=»com.example.FABBehavior»
shihabmi7 commented Aug 20, 2016 •
@RAHMAN-94 I am also stuck with the same issue. How to set Utils.getToolbarHeight(context) ; need this method badly.. and not works after set the had code value to this.
eric-taix commented Jan 24, 2017
I had the same issue as @shihabmi7 and was able to solve it. My FloatingActionMenu is inside a FrameLayout so I decided to add the behavior to the FrameLayout.
And the behavior code :
Adapt this to your desired behavior 😉
Hope it helps
fmrsabino commented Aug 9, 2017
I think this one might be an improvement on the solution provided by @eric-taix (you can apply it directly to your FloatingActionMenu and has a threshold (equal to half of the height of the FAB).
then add this behavior to the FloatingActionMenu in your XML file using app:layout_behavior
AvatarQing commented Sep 18, 2017
@fmrsabino Thanks for your improvement. I post it as java code here.
Источник
Animating an Android Floating Action Button

Since Material design was introduced, the Floating Action Button (FAB) has become one of the simplest components to implement, becoming a fast and essential favorite amongst designers and developers.
In this tutorial I will show you how to make your apps FAB interactive and how to make your own animations. But let’s start simple, adding the Floating Action Button to an Android project.
The Floating Action Button looks something like this in a layout file and will be auto generated if create an Android Studio project with a Blank Activity:
Floating Action Button
Floating action buttons can be one of two sizes. The default (56dp) and mini (40dp). For further discussion on the design principles of using a FAB, I recommend you read Google’s official guidelines.
In most recent Android apps, the FAB reacts to the scrolling of a list of elements and in my opinion, should be hidden whilst scrolling. Here is what I mean:
To show this animation I created a recyclerView so the FAB can react to scrolling.
There are a lot a libraries that can help achieve this in 1 or 2 lines of code, but for those who are curious, here is an example:
I’m using the FloatingActionButton.Behavior() class which according to the official documentation, its main function is to move FloatingActionButton views so that any displayed Snackbars do not cover them. But in our case this class is extended so that we can implement our own behavior.
Let’s get into more detail about this behavior class. Its intention is that whenever a scroll is initiated, the onStartNestedScroll() method will return true if the scroll is vertical and from there the onNestedScroll() method will hide or show the Floating Action Button, depending on its current visibility status.
The constructor of this class is an important part of this view’s behavior, making this inflatable from the XML file
To use this behavior, add the layout_behavior attribute to the Floating Action Button. The attribute contains the package name, plus the class name at the end or to put it differently differently, the exact location of this class in the project. In my case it looks like this:
This animation looks cool, but it could be better. I personally prefer floating the FAB out of the screen while I scroll through the apps content, it’s more realistic. Here’s what I mean:
The same logic as previously is applied, only the way the FAB hides changes.
The animation is simple. The FAB floats off the screen vertically using a LinearInterpolator. The FAB floats a distance down calculated by its height plus bottom margin to remove it completely of the screen and is floated back to its original position on scroll up.
If you take a closer look at the code, I removed the View.VISIBLE and the View.GONE checks in the if statements because the view doesn’t hide in this case, just floats off screen.
Making a menu of Floating Action Buttons
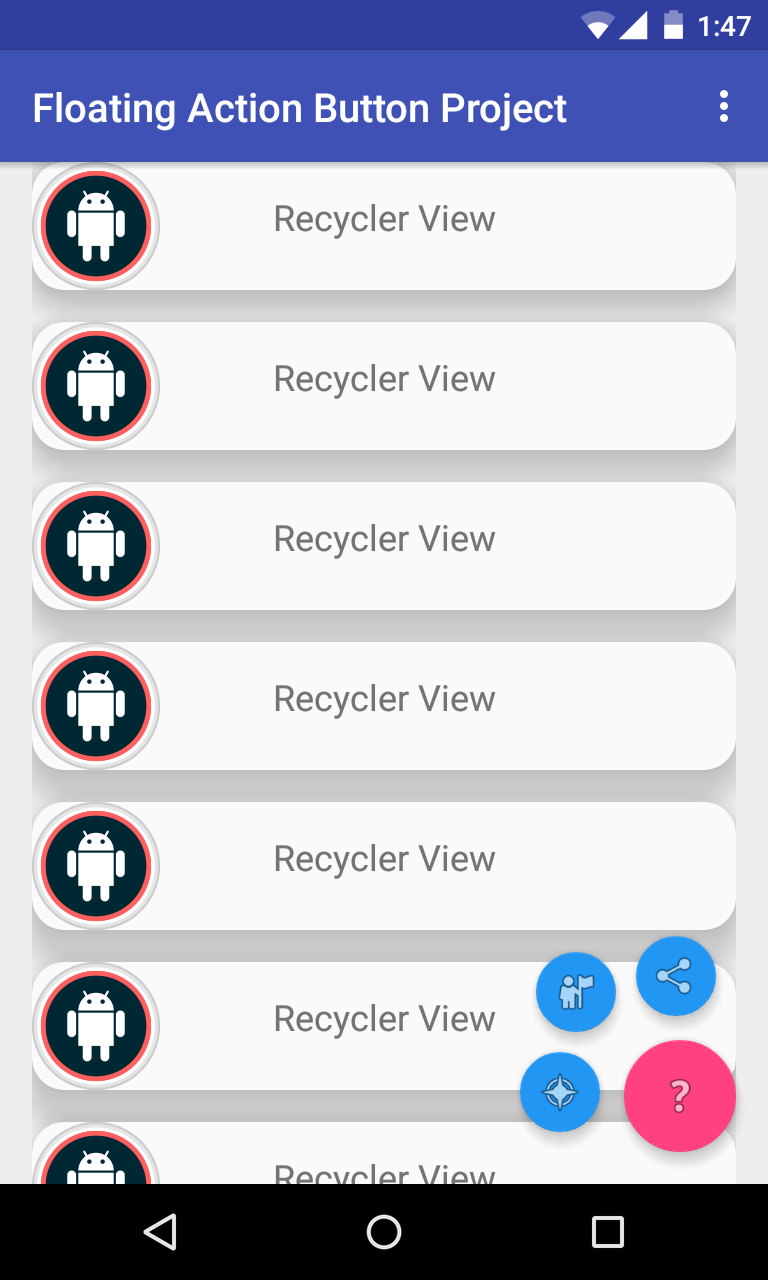
I’ve seen many Android apps making impressive Floating Action Button menus that look and work well. Here is an example:
Now you have an idea of what we’re making, let’s start building.
The first step into building this menu is the layout containing the 3 small buttons.
All the small buttons are invisible and are located at the bottom of the layout, under the primary FAB.
Include this layout in the activity’s layout, under the primary FAB.
Now that the layout is set, the next step is making the animations to show and hide each of the small FABs.
Caution!
While creating these animations I encountered the issue of touch events and small FABs. When the animation finishes the actual position of the small FABs does not change, only the view appears in the new position so you can’t actually perform touch events on the correct position. What I did to fix this issue was to set the layout parameters of each FAB to its new location and then perform the animation of pulling the view to the new position.
In the rest of this tutorial I will show the process of animating one of the small FABs. The process is the same for the others but with different relocation parameters.
Display Floating Action Button menu
Here I relocate fab1 by adding right and bottom margins to its layoutParams and starting the animation.
Hide Floating Action Button menu
The process of hiding is the reverse of the previous animation.
The animations used on this FAB are:
Now all that remains are the animations. Inside the res/anim/ folder I created files for all the animations. There’s not much to these, but if you need help understanding what each tag or attribute does, read the official documentation.
Finally, if you look at the translate tag, responsible for moving the view, the factor by which I have relocated the FAB (170% and 25%) correspond to the factors with the margins are added and subtracted in the java code.
The same process applies to both the other FABs, but with relocation factors of (150% and 150%) fab2 and (25% and 170%) fab3 .
The final project looks like this:
A new circular animation
If you are looking to make some special animation with FABs you can make use of the ViewAnimationUtils class to make reveal animations on views.
The rest of this article will be focused specifically on this class and how to build reveal animations with it. Unfortunately, this class is only available for API versions 21 (LOLLIPOP) and higher.
Create a new Activity
Since the rest of this article’s code sample is decoupled from the previous example I used a new Activity. If you decide to follow on, create a new Blank Activity named RevealActivity . Make sure this activity’s layout file has a Floating Action Button, as we will utilize it to fire up our animation. In my example, this FAB has the android:id=»@+id/fab» .
Build the Reveal UI
To make a reveal animation on a view you will need a layout to show after the animation is performed.
The layout depends on the view you like to show in the app, but to keep it simple I built an example layout to “animate-show”.
In the layouts folder create a new file, fab_reveal_layout.xml and insert the following code.
Actually, the container LinearLayout in this file has a visibility attribute visibility=»gone» so nothing will be visible when you insert this code in your file. To check out this layout, remove the visibility attribute from the LinearLayout or take a look at the following image.
After creating this file, include it in the activity’s layout file.
Setup the RevealActivity
After including the fab layout in the Activity’s layout we need to setup the CircularReveal animation.
In the RevealActivity class create the following global instances of the Floating Action Button, a boolean to keep track of the animation status and the fab_reveal_layout container layout.
Next, in the RevealActivity вЂs onCreate() method to find the FAB’s view references and add a click listener. I only initiated the Activity’s FAB because that is all needed to fire up the animation.
The toggleFabMenu() function is used create and fire up the reveal animation. Just add the following code in the RevealActivity class and I will describe in details what it does.
As I mentioned earlier, the createCircularReveal() method only works on LOLLIPOP and newer Android version, so this function has a TargetApi for build version LOLLIPOP. This means this function will not be called when fired up in a pre-LOLLIPOP device.
The first thing this function does is to checks whether the animation view is visible using the fabMenuOpen Boolean values.
In this function, I change the image of the fab using the setImageResource () method. If you add this function in your class make sure you add the missing images in the drawable folder, or just comment out this lines of code from the function.
If you run the project now it will work properly, as shown in the following GIF, but if you are interested in learning how the createCircularReveal() works check out the next section of this article.
The ViewAnimationUtils.createCircularReveal() method
The createCircularReveal() method is used to setup the animation. It takes five parameters based on which it creates an animation on the view.
The first parameter is a reference to the view that will be shown by the animating circle.
The next two parameters are the X and Y coordinates of the screen where the animation will start. These coordinates are related to the view that is reveal animated.
Since the animation is a circle reveal it needs the radius of the circle it is drawing, so the next two parameters are the starting and the end radius of the animation.
Relating to the example of this article, as shown by the GIF the animation will start at the center of the view with a start radius of “0” and the end radius is calculated by the Math.hypot() method. To reverse the animation just change the values of the start and end radius with each other.
The tricky part of the circular-reveal animation is finding the animation start coordinated related to the view that is reveal animated.
For example, I calculated as the X and Y coordinates of the animation, respectively the width/2 and the height/2 of the view in order to find the center of the view to start the animation.
Take a look at the following image to find out how to determine the coordinates of your own animations.
What’s next?
I hope I’ve given you an idea of how to animate Floating Action Buttons in your own project. From here you should read Android’s Animation Resources and create your own animations for your apps. You can find the final code for this project on GitHub and I welcome any questions or comments you may have.
Источник


