- Building an Android service that never stops running
- The problem
- It’s all about Foreground Services
- Show me the code
- Adding some dependencies
- Writing our service
- Time to deal with the Android Manifest
- Can you tell me how I start the service?
- Bonus: Start the service on Android boot
- Bonus 2: Restart the service when the task is removed
- Полный список
- IntentService
- Foreground
- Автозагрузка
- Android Foreground Service Example
- 1. Android Foreground Service Example.
- 2. Example Source Code.
- 2.1 Android Foreground Service Class.
- 2.2 Main Activity.
- 2.3 Layout XML File.
- 2.4 Android Manifest Xml File.
- 2.5 Assign FOREGROUND_SERVICE Permission.
Building an Android service that never stops running
I’ve been struggling these days trying to find a way to run an endless service in Android. This is just a guide for all of you who pursue the same goal. Hope it helps!
The problem
Due to Android battery optimizations introduced in Android 8.0 (API level 26), background services have now some important limitations. Essentially, they are killed once the app is in background for a while making them worthless for our purpose of running an always-running service.
According to Android recommendations, we should be using JobScheduler, which seems to work pretty well and will handle wakelocks for us, keeping the phone awake while the jobs are running.
Unfortunately, this won’t work either. JobScheduler will run jobs at Android’s discretion and, on top of that, once the phone enters in Doze Mode, the frequency of these jobs being run will constantly decrease. And even worst, if you ever want to access the network -say you need to send data to your server- you won’t be able to. Check out the list of restrictions Doze Mode imposes.
JobScheduler works well if you don’t mind about not having access to the network and you don’t care about not controlling the periodicity either. In our case, we want our service to run at a very specific frequency and never be stopped, so we’ll need something else.
It’s all about Foreground Services
If you’ve been looking over the internet for a solution to this problem it’s very likely that you’ve eventually arrived to this page from the Android’s documentation.
There, we are introduced to the different types of services that Android provides. Take a look at the Foreground Service description:
A foreground service performs some operation that is noticeable to the user. For example, an audio app would use a foreground service to play an audio track. Foreground services must display a Notification. Foreground services continue running even when the user isn’t interacting with the app.
It seems to be precisely what we’re looking for… an it is, indeed!
Show me the code
Creating a foreground service is really a straight-forward process so I will visit and explain all the steps needed to build a foreground service that never stops.
As usual, I’ve created a repository with all the code in case you want to take a look at it and skip the rest of the post.
Adding some dependencies
I’m using Kotlin for this example, so we will be leveraging coroutines and the Fuel library for HTTP requests.
In order to add these dependencies we must add them to our build.gradle file:
Writing our service
Foreground Services need a notification to be shown so the user is aware that the app is still running. That makes sense if you think about it.
Note that we will have to override some of the Service callback methods that handle key aspects of the service lifecycle.
It’s also very important that we use a partial wakelock so our service never gets affected by Doze Mode. Bear in mind that this will have an impact in the battery life of our phone so we must evaluate whether our use case can be handled by any of the other alternatives Android offers in order to run processes in the background.
There are some utility function calls ( log , setServiceState ) and some custom enums ( ServiceState.STARTED ) in the code, but don’t worry too much. If you want to see where they come from, just take a look at the example repository.
Time to deal with the Android Manifest
We will need some extra permissions for FOREGROUND_SERVICE , INTERNET and WAKE_LOCK . Be sure you don’t forget to include them because it won’t work otherwise.
Once we put them in place we will need to declare our service.
Can you tell me how I start the service?
Yes, you’re right. You see, depending on the Android version we must start the service with a particular method.
If the Android version is below API 26 we must use startService. In any other case, startForegroundService is what we must use instead.
Here you can see our MainActivity , just a screen with two buttons to start and stop the service. That’s all you need to start our endless service.
Remember that you can check out the complete code in this GitHub repository.
Bonus: Start the service on Android boot
Ok, we now have our endless service making network requests every minute as we wanted but then the user restarts the phone… and our service doesn’t start again…
Don’t worry, we can find a solution for this, too. We will create a BroadCastReceiver called StartReceiver .
Then, we’ll modify again our Android Manifest and add a new permission ( RECEIVE_BOOT_COMPLETED ) and our new BroadCastReceiver.
Take into account that the service won’t be rebooted unless it was already running. That’s how we programmed it, it’s not that it has to be like that.
Anyway, if you want to test this, just spin up one emulator with Google Services in it and be sure to be running adb in root mode.
Bonus 2: Restart the service when the task is removed
Michal Materowski wrote to me with this case and its solution, so kudos for him!
Theoretically, according to Android documentation, returning RETURN_STICKY from the service’s onStartCommand method should be enough for Android to keep the foreground service running.
Michal was testing all this with a Xiaomi Note 5 with Android Pie and every time he swiped an app from recent apps, it worked flawlessly. Unfortunately, whenever he pressed the Clear all recent apps button (MIUI specific), the service was stopped and the notification was gone. The Clear all recent apps button was probably doing some sort of battery life optimization by killing all processes and their associated services.
He found out that Android documentation states that onTaskRemoved “is called if the service is currently running and the user has removed a task that comes from the service’s application.”, so the plan was to leverage this to restart the service. Bear in mind, though, that onTaskRemoved is not called if the application is killed in any other way (e.g. stopped from the phone settings).
Add these lines to your service:
You can check out the original Michal Materowski’s PR with the whole code.
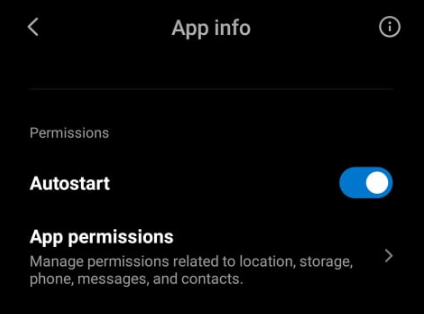
IMPORTANT: Michal had to manually set Autostart permission, otherwise the service was not started on boot.
According to Michal, some people mentioned that setting stopWithTask flag might help, but it didn’t make a difference for him:
Lots of kudos to Michal Materowski for his help on this case.
Источник
Полный список
— изучаем IntentService
— включаем режим Foreground для сервиса
— помещаем сервис в автозагрузку
Строили мы, строили, и, наконец, построили. Урок номер 100, с чем всех нас и поздравляю )
В этом уроке рассмотрим еще несколько полезных вещей про сервисы. Выносить каждую из них в отдельный урок я не стал, вполне можно в одном все рассмотреть. Проекты здесь тоже создавать не будем, чтобы урок не получился слишком громоздким. Я просто приведу некоторые куски кода и скрины для наглядности своих рассуждений. А если у вас будет желание, вы по этим наработкам сами можете создать проекты-примеры.
IntentService
Это подкласс обычного Service. Он используется, если вам в сервисе надо выполнять какие-то тяжелые задачи, и вы не хотите сами возиться с асинхронностью. Принцип работы этого вида сервиса прост. Он создает новый поток для своей работы. Затем берет все Intent пришедшие ему в onStartCommand и отправляет их на обработку в этот поток. Как именно обрабатываются Intent – зависит от нас, т.к. мы сами кодим это в методе onHandleIntent.
Т.е. приложение сыпет в сервис вызовами startService, в которых передает Intent-ы. IntentService принимает эти вызовы в onStartCommand, берет Intent-ы и отправляет их в очередь на обработку. И далее они поочередно обрабатываются в отдельном потоке методом onHandleIntent. Когда последний Intent из очереди обработан, сервис сам завершает свою работу.
В приложении делаем три вызова:
Где time – это время паузы, которую будем делать в сервисе, а label – просто метка, чтобы отличать вызовы.
Здесь необходим конструктор, в котором вызываем конструктор супер-класса и указываем какое-нить имя. Оно будет использовано для наименования потока.
В методе onHandleIntent кодим обработку Intent-ов. Достаем из них time и label, запускаем паузу на time секунд и выводим в лог label в начале и в конце.
В итоге, при запуске в логах видим:
11:07:37.880: D/myLogs(4137): onCreate
11:07:37.880: D/myLogs(4137): onHandleIntent start Call 1
11:07:40.880: D/myLogs(4137): onHandleIntent end Call 1
11:07:40.880: D/myLogs(4137): onHandleIntent start Call 2
11:07:41.880: D/myLogs(4137): onHandleIntent end Call 2
11:07:41.880: D/myLogs(4137): onHandleIntent start Call 3
11:07:45.890: D/myLogs(4137): onHandleIntent end Call 3
11:07:45.890: D/myLogs(4137): onDestroy
Сервис создался, вызовы выполнились по очереди и сервис завершил работу. От нас понадобилось только накодить обработку.
Foreground
Вы можете сказать системе, что ваш сервис очень важен для пользователя и его нельзя грохать при нехватке памяти. Это актуально, например, для музыкального плеера. В статус-бар при этом будет помещено уведомление.
На вход он принимает те же параметры, что и NotificationManager.notify – ID и Notification.
Т.е. вы создаете уведомление, назначаете ему ID и передаете это в startForeground. Сервис переходит в режим IDDQD :), а в статус-баре появилось уведомление.
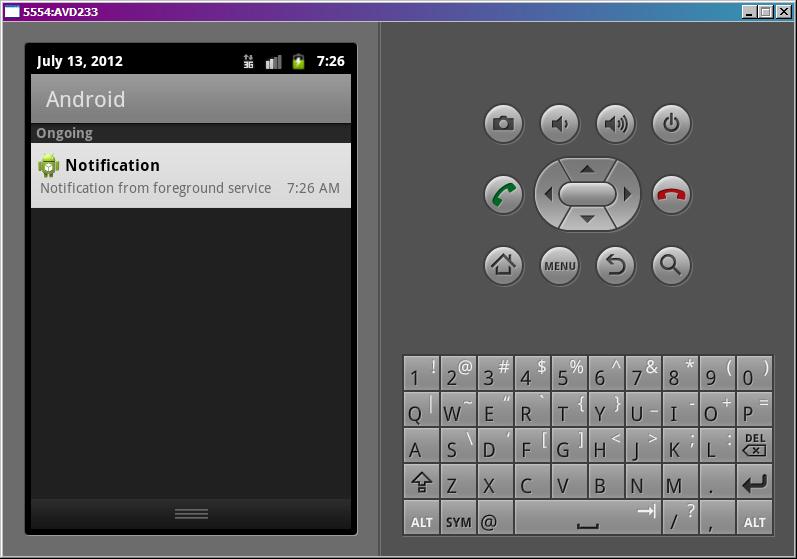
Оно появилось в разделе для постоянных уведомлений (Ongoing).
Метод stopForeground (boolean removeNotification) — возвращает сервису способность быть убитым системой в случае острой нехватки памяти. А на вход он принимает boolean-значение – удалять уведомление из статус-бара или нет.
Уведомление также пропадет, когда сервис будет остановлен.
Эти методы работают, начиная с Android 2.0. Пример реализации для более ранних версий есть в хелпе.
Напомню, что уведомления мы научились создавать на прошлом уроке.
Автозагрузка
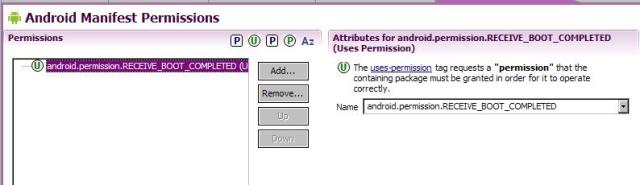
Сервисы для получения погоды или почты имеет смысл помещать в автозагрузку. Для этого нам надо создать BroadcastReceiver, настроить его IntentFilter на Action = android.intent.action.BOOT_COMPLETED, и добавить права android.permission.RECEIVE_BOOT_COMPLETED. Этот BroadcastReceiver будет вызван системой при старте системы и в нем мы кодим запуск сервиса.
Допустим, есть проект с сервисом MyService.
Создаем в проекте класс MyBroadReceiv
В манифесте добавляем его как Receiver и настраиваем фильтр
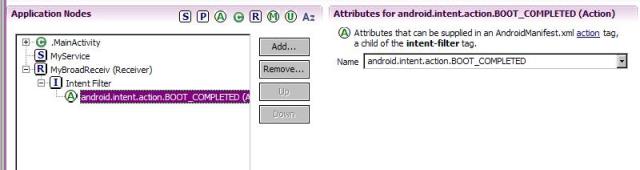
Добавляем права на получение сообщения о загрузке
Инсталлим проект на AVD. Закрываем AVD. Запускаем через меню в Eclipse: Window > AVD Manager. Находим там наш эмулятор и запускаем вручную.
Когда он запустился, смотрим логи
onReceive android.intent.action.BOOT_COMPLETED
MyService onCreate
MyService onStartCommand
Сработал BroadcastReceiver и запустил сервис.
Если после запуска AVD логи не отображаются, то откройте DDMS и во вкладке Devices явно выберите ваш AVD.
P.S. Я уже писал об этом, но напишу еще раз. Последующие уроки будут выходить по более свободному графику. Следите за обновлениями.
На следующем уроке:
— создаем свой ContentProvider
Присоединяйтесь к нам в Telegram:
— в канале StartAndroid публикуются ссылки на новые статьи с сайта startandroid.ru и интересные материалы с хабра, medium.com и т.п.
— в чатах решаем возникающие вопросы и проблемы по различным темам: Android, Kotlin, RxJava, Dagger, Тестирование
— ну и если просто хочется поговорить с коллегами по разработке, то есть чат Флудильня
— новый чат Performance для обсуждения проблем производительности и для ваших пожеланий по содержанию курса по этой теме
Источник
Android Foreground Service Example
Android foreground service is an android service object. It always runs in the foreground, this can avoid service objects being recycled by the android system when android os does not have enough resources. Android foreground service can interact with users through notification. It is usually used in a music player, file downloader, etc which user has few interactions with the player service but the service should not be stopped and recycled.
1. Android Foreground Service Example.
- There are 2 buttons in the Android app. When you click the START FOREGROUND SERVICE button, it will create and start a foreground service.
- The foreground service will show a head-up notification which will pop up at the screen top with max priority. The notification is also a text-style notification.
- There are two buttons in the notification, clicking each button will display a toast message at the screen bottom. When you click the STOP FOREGROUND SERVICE button, it will stop the service and remove the notification.
2. Example Source Code.
- The below source files are the example project files.
- There are two java files in this example MyForeGroundService.java & CreateForegroundServiceActivity.java.
- MyForeGroundService.java: This is the android foreground service class. It overrides the android.app.Service.onStartCommand(Intent intent, int flags, int startId) method. This method will be invoked when the activity invokes the startService(intent) method.
- In the onStartCommand method, it will check which button has been pressed by the intent.getAction() method returned value, and then invokes a related method such as startForegroundService().
- In the startForegroundService() method, to make the service object run in the foreground, it will create a Notification object, and then call the startForeground() method to make the service object run as foreground service.
- In the stopForegroundService() method, it will stop the MyForeGroundService service object from the foreground service by invoking the stopForeground(true) method, this will also remove the notification object. Then it will call the stopSelf() method to stop the service object.
- CreateForegroundServiceActivity.java: This is the activity class java file. It will be created when the android app starts. It will listen to the two buttons on-click event, and when one button is clicked, it will start the MyForeGroundService object by creating an Intent object, setting the intent object action, and then calling the startService(intent) method to start the service object. Then the MyForeGroundService object will be created, and its onStartCommand method will be invoked.
2.1 Android Foreground Service Class.
- MyForeGroundService.java
2.2 Main Activity.
- CreateForegroundServiceActivity.java
2.3 Layout XML File.
- activity_create_foreground_service.xml
2.4 Android Manifest Xml File.
- AndroidManifest.xml
2.5 Assign FOREGROUND_SERVICE Permission.
- If your android app os version is higher than or equal to level 26, you need to assign FOREGROUND_SERVICE permission in your android app to avoid crashes.
- To implement this, you should add the below XML snippet in the AndroidManifest.xml file.
Reference
This site uses Akismet to reduce spam. Learn how your comment data is processed.
This gives error for Android O & above versions.
I am facing error as : Developer warning for package “com.xxx.xxx”. Failed to post notification on channel “null”.
Android O Need Notification Channel like that
private fun startForegroundService() <
Log.d(TAG_FOREGROUND_SERVICE, “Start foreground service.”)
// Create notification default intent.
val intent = Intent()
val pendingIntent = PendingIntent.getActivity(this, 0, intent, 0)
val channelId = “NOTIFICATION_CHANNEL_NAME”
// Create notification builder.
val builder = NotificationCompat.Builder(this,channelId)
// Make notification show big text.
val bigTextStyle = NotificationCompat.BigTextStyle()
bigTextStyle.setBigContentTitle(“Music player implemented by foreground service.”)
bigTextStyle.bigText(“Android foreground service is a android service which can run in foreground always, it can be controlled by user via notification.”)
// Set big text style.
builder.setStyle(bigTextStyle)
builder.setWhen(System.currentTimeMillis())
builder.setSmallIcon(R.mipmap.ic_launcher)
val largeIconBitmap = BitmapFactory.decodeResource(resources, R.drawable.abc_ic_ab_back_material)
builder.setLargeIcon(largeIconBitmap)
// Make the notification max priority.
builder.priority = Notification.PRIORITY_MAX
// Make head-up notification.
builder.setFullScreenIntent(pendingIntent, true)
// Add Play button intent in notification.
val playIntent = Intent(this, MyForeGroundService::class.java)
playIntent.action = ACTION_PLAY
val pendingPlayIntent = PendingIntent.getService(this, 0, playIntent, 0)
val playAction = NotificationCompat.Action(android.R.drawable.ic_media_play, “Play”, pendingPlayIntent)
builder.addAction(playAction)
// Add Pause button intent in notification.
val pauseIntent = Intent(this, MyForeGroundService::class.java)
pauseIntent.action = ACTION_PAUSE
val pendingPrevIntent = PendingIntent.getService(this, 0, pauseIntent, 0)
val prevAction = NotificationCompat.Action(android.R.drawable.ic_media_pause, “Pause”, pendingPrevIntent)
builder.addAction(prevAction)
val notificationManager = getSystemService(Context.NOTIFICATION_SERVICE) as NotificationManager
if (Build.VERSION.SDK_INT >= Build.VERSION_CODES.O) <
val channel = NotificationChannel(
channelId, “NOTIFICATION_CHANNEL_NAME”,
NotificationManager.IMPORTANCE_HIGH
).apply <
enableLights(true)
lightColor = Color.DKGRAY
setShowBadge(true)
enableVibration(true)
vibrationPattern = longArrayOf(100, 200, 300, 400, 500, 400, 300, 200, 400)
>
notificationManager.createNotificationChannel(channel)
>
// Build the notification.
val notification = builder.build()
// Start foreground service.
startForeground(1, notification)
>
Источник


