- How to find the IMEI number on your Android phone
- How can I find my phone’s IMEI number?
- Our top equipment picks
- Google’s best
- Google Pixel 4
- Bigger and beautiful
- Samsung Galaxy Note 10+
- These are the best USB-C cables you can find for Android Auto
- Keep your Galaxy Z Fold 3 looking fantastic with these screen protectors
- These are the best rugged Android phones
- Harish Jonnalagadda
- Android get all imei
- Getting IMEI from an Android device using React Native
- react-native-imei
- Integrating react-native-imei to our project
- Testing the operation in an emulator
- Final words
- AlturaSoluciones/ReactNativeIMEI
- Contribute to ReactNativeIMEI development by creating an account on GitHub.
- Troubleshooting
How to find the IMEI number on your Android phone
 Source: Andrew Myrick / Android Central
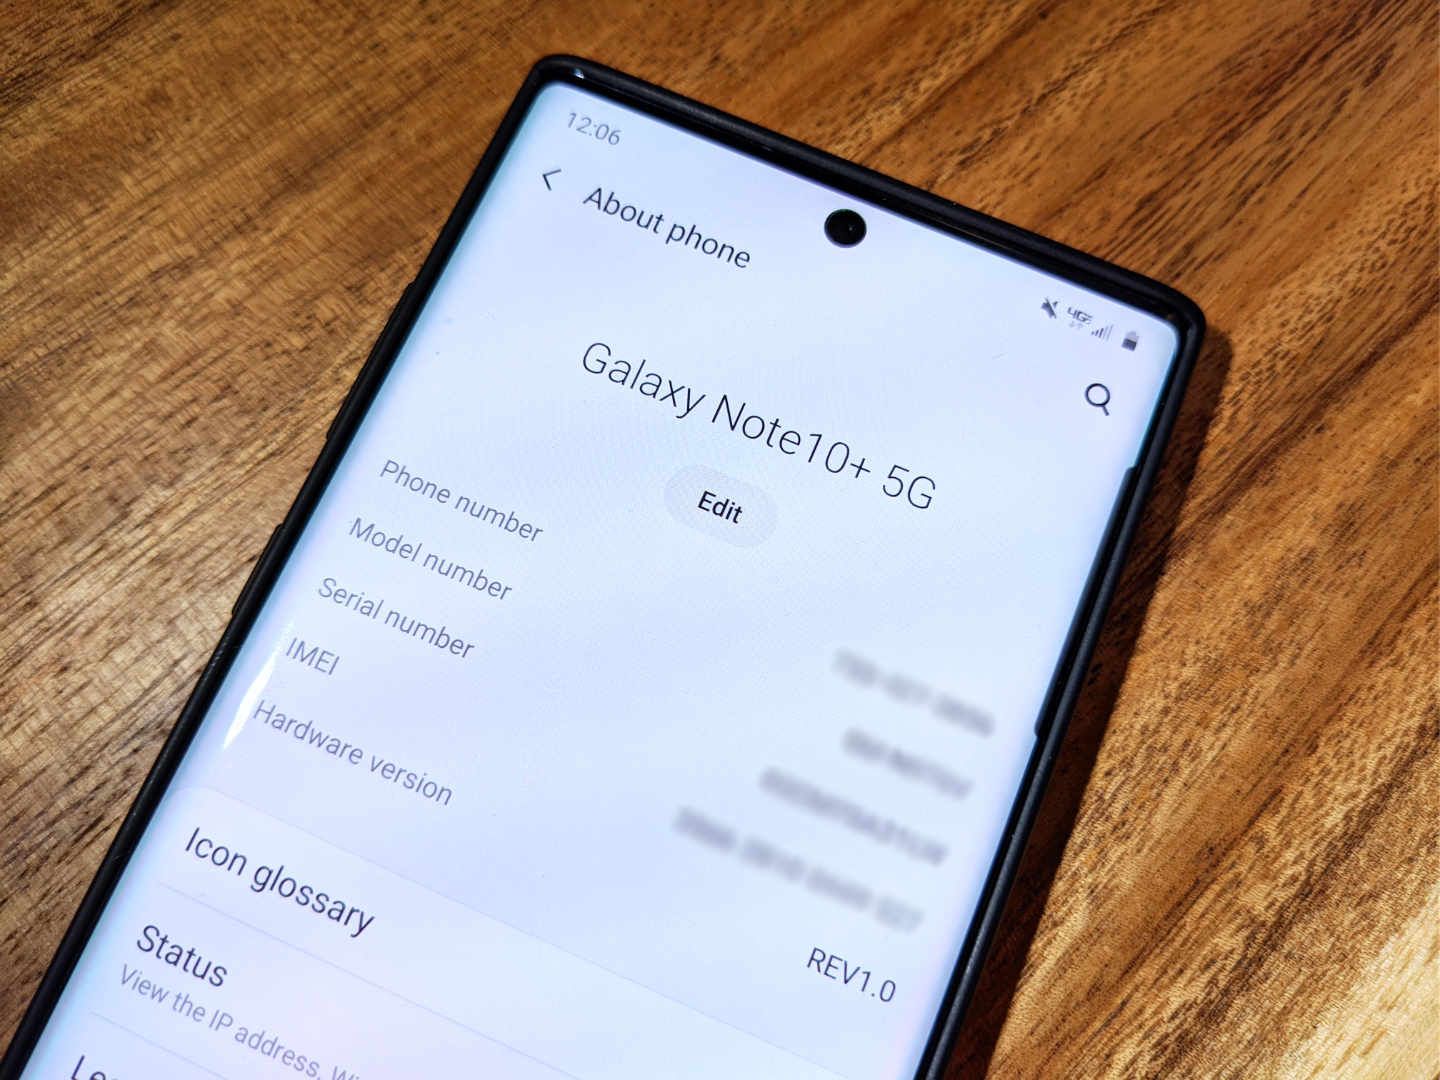
No matter what phone you’re using — whether it’s a budget Moto G7 or a $900 Galaxy Note 10+ — it will have an International Mobile Equipment Identity (IMEI) number. The IMEI number is a unique identifier that’s usually a string of 15 digits, and comes in handy if you’re trying to locate a lost or stolen phone.
How can I find my phone’s IMEI number?
Should you lose your phone or if it gets stolen, you’ll have to furnish law enforcement authorities with the IMEI number so they can locate your device. Carriers rely on IMEI numbers to identify devices registered on their network, and in the event of a lost or stolen phone, they’ll be able to blacklist the IMEI to prevent a particular device from being used on their network.
- Open the Settings app on your Android phone.
- Scroll down and tap on About Phone.
Scroll down and you will find the number under IMEI.
 Source: Android Central
Another way to find your IMEI, and that’s a bit easier, requires nothing more than the Phone app. Here’s another way to find your IMEI:
- Open the Phone app on your Android phone.
- From the Dialer, dial *#06# into the Dialer.
Wait for the dialog box to appear.
![]() Source: Android Central
Source: Android Central
Once you have entered this code, the MEID and any other IMEI numbers will appear on your device. This method is the easiest because it works regardless of what Android device you are using.
In the case of the first method, it’s important to note that the IMEI will not be in the same place. For example, with Samsung devices, the IMEI is at the top of the About Phone area, without needing to dive any deeper. But both methods work perfectly to get you the IMEI of your device, if you don’t happen to have the original box nearby.
Our top equipment picks
Google’s best

Google Pixel 4
Simply take a picture and see the stars
Google’s Pixel 4 is one of the more impressive handsets simply because of what the camera is capable of. You can just point your phone at the night sky and take pictures that you never thought you would be able to before. It’s truly amazing.
Bigger and beautiful

Samsung Galaxy Note 10+
Everything you could want in a phone and then some
From the big and beautiful display to the fantastic battery life and the three rear-facing camera module, this phone really does everything. And that’s not to mention the S Pen and those additional and useful features.
We may earn a commission for purchases using our links. Learn more.
![]()
These are the best USB-C cables you can find for Android Auto
Android Auto is an absolute necessity when driving, regardless of whether you’re headed out to the grocery store or for a long road trip. These cables will ensure your phone stays protected and charged, no matter what.
![]()
Keep your Galaxy Z Fold 3 looking fantastic with these screen protectors
The Galaxy Z Fold 3 is a beautiful phone with improved durability. But you might want to get some extra insurance by throwing on one of these screen protectors.
![]()
These are the best rugged Android phones
Living the rough and tumble life? Get yourself a smartphone that can handle everything you throw at it — or throw your phone at.

Harish Jonnalagadda
Harish Jonnalagadda is the Asia Editor at Android Central. A reformed hardware modder, he now spends his time writing about India’s technology revolution. Previously, he used to ponder the meaning of life at IBM. Contact him on Twitter at @chunkynerd.
Источник
Android get all imei
Краткое описание:
IMEI генератор, анализатор Blacklist Checker, MTK Engineering, Root Checker.
★ IMEI Tools is a VERY Powerful IMEI Tweaking Tool ★
App features:
1. IMEI Generator✅ (Can generate up to 500,000 IMEIs at a go)
2. MTK Engineering ⛓
3. Blacklist Checker📵
4. Root Checker 🔑
5. IMEI Analyzer 🔬
6. Android Settings ⚙️
7. Samsung Settings🔩
✔ CLEAN or BLACKLISTED? Check your IMEI
— Are you planning to buy a used phone?
— Are you selling second-hand phones and you want the best for your customers?
— You have already bought a phone but you can’t make calls and send messages?
— Your phone was lost or stolen?
If you answered «YES» to at least one question that means our BLACKLIST CHECKER is for you!
Blacklist Checker is used to check if the IMEI you supplied has been Reported Stolen, Lost or Blocked. This is a VERY USEFUL tool to avoid buying or using phones with reported IMEIs.
✔ Root Checker this Checks if your device is has been ROOTED
✔ MTK Engineering can only be used with Phones that employ the Use of MTK Chip ONLY. With MTK Engineering you can CHANGE YOUR IMEI (back up your previous IMEI before you do this) or do numerous device configurations, but be careful with this option to avoid damaging your Phone or voiding your warranty.
✔ Android Settings will open a hidden Settings Menu on your Phone Where you can get information such as
— Phone Information
— Battery Information (power plug, battery level, battery scale, battery temperature and so on)
— Usage Statistics
— Wi-Fi Information
✔ Samsung Settings can ONLY be used if you use a SAMSUNG Device. It will open a secret menu on your phone where you can further customize your phone.
✔ The ‘PHONE IMEI’ tab contains a list IMEIs for different phones (including latest phones). And guess what? You can generate up to 500 thousand IMEIs from a single tap without any No Duplicate. All generated IMEIs are Unique.
Generated IMEIs are also ordered for easy use.
I know you must be thinking «This is Super Cool, How do I use it?»
HOW TO USE
— Pick a phone of choice from the list
— Pick quantity to generate: 15, . or 500,000.
— Tap ‘Generate’ button
✔ The ‘GENERATOR’ tab is a supplement to PHONE IMEI tab. In this tab you can enter any Arbitrary IMEI (between 8 – 12 digits) and it will generate the complete IMEI. The list is guaranteed to contain zero duplicates.
HOW TO USE
— Input between 8 – 12 digits
— Pick quantity to generate : 15, . or 500,000.
— Tap ‘Generate’
✔ The ‘ANALYZER’ tab can be used to analyse IMEI pieces by piece, get your IMEI information & check if an IMEI is valid or Not.
✔ SHARE, COPY or SAVE your generated IMEIs.
This App is very easy to use coupled, locked and loaded with USEFUL features and has very friendly user interface.
This is simply the best IMEI Blacklist Checker, IMEI Generator, MTK Engineering, Root Checker, Samsung Settings, Android Setting, IMEI Analyzing tool out here!
Are you still Reading? stop and DOWNLOAD NOW! 😅
If you found this Tool Useful, don’t forget to
— Leave a review and say something Nice ❤️ everyone likes a Compliment 😜!
— Recommend it to Others. Be your brother’s keeper, sharing is caring!
1. Edge Dev Studio will not be responsible for any illegal actions that may be done with help of this software. This tool is intended to be used for finding information about IMEI and for testing/educational purposes. It is not intended for IMEI-spoofing, especially in countries that explicitly forbids this practice.
2. This App (IMEI Tools) can not track your lost phone!
Got any questions? Shoot a mail to -> [email protected]
Требуется Android: 4.1 и выше
Русский интерфейс: Да
Разработчик: Edge Dev Studio
Домашняя страница: http://imei-tools.edgedevstudio.com/
Market: 
Видео: 
premium IMEI Tools (Пост Alex0047)
premium IMEI Tools (Пост Alex0047 #75771106)
 Генератор IMEI [7.1].apk ( 4.18 МБ )
 Источник
Getting IMEI from an Android device using React Native

The International Mobile Equipment Identity (better known by its acronym IMEI) is a number, usually unique, which identifies mobile phones. It is usually printed inside the battery slot, however you can also print it on the screen by typing *#06#.
This number also can be obtained, having the respective permissions of the Android OS, from an application. This time we’ll do it from an React Native application.
Prior to the process, you must ensure that you have an updated version of npm:
Later, if you still do not have the create-react-native-app package installed, install it as follows:
Start by creating the react native project with the following statement:
Next, go to the project directory that you just created:
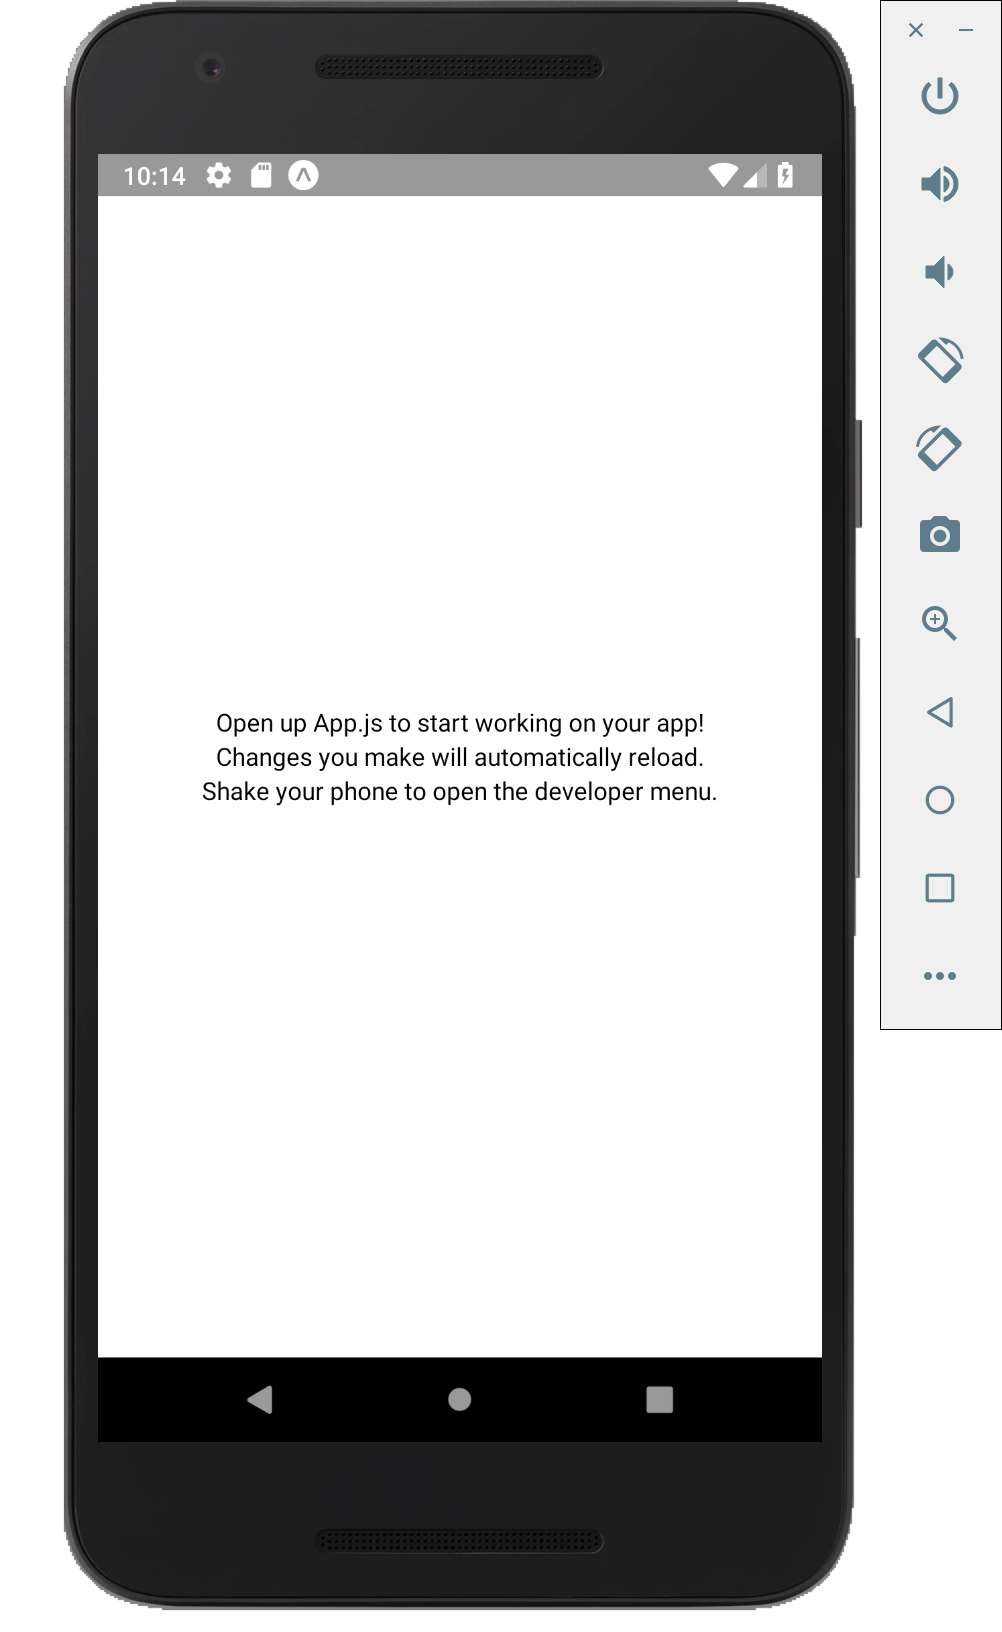
And prove that the application runs successfully:
Depending on where you are going to test our application, select the interactive CLI option that is shown after executing yarn start.
For this example we will use an Android emulator (Option a).

The device screen will present something like the following:
react-native-imei
It is a React Native library that allows us to easily obtain the IMEI, as long as the application is running on an Android device and has the READ_PHONE_STATE permission. This is the library that we’re going to use for our example.
Integrating react-native-imei to our project
To add the library for our example project, run the following command:
Since react-native-device-imei is a library that includes native code, you must link it to our application.
Prior to the link to the native library, you need to eject from the CRNA application (Create React Native App) to convert it into a React Native Regular application. The steps to follow are described in the CRNA official documentation. The output of the process will look similar to the following:
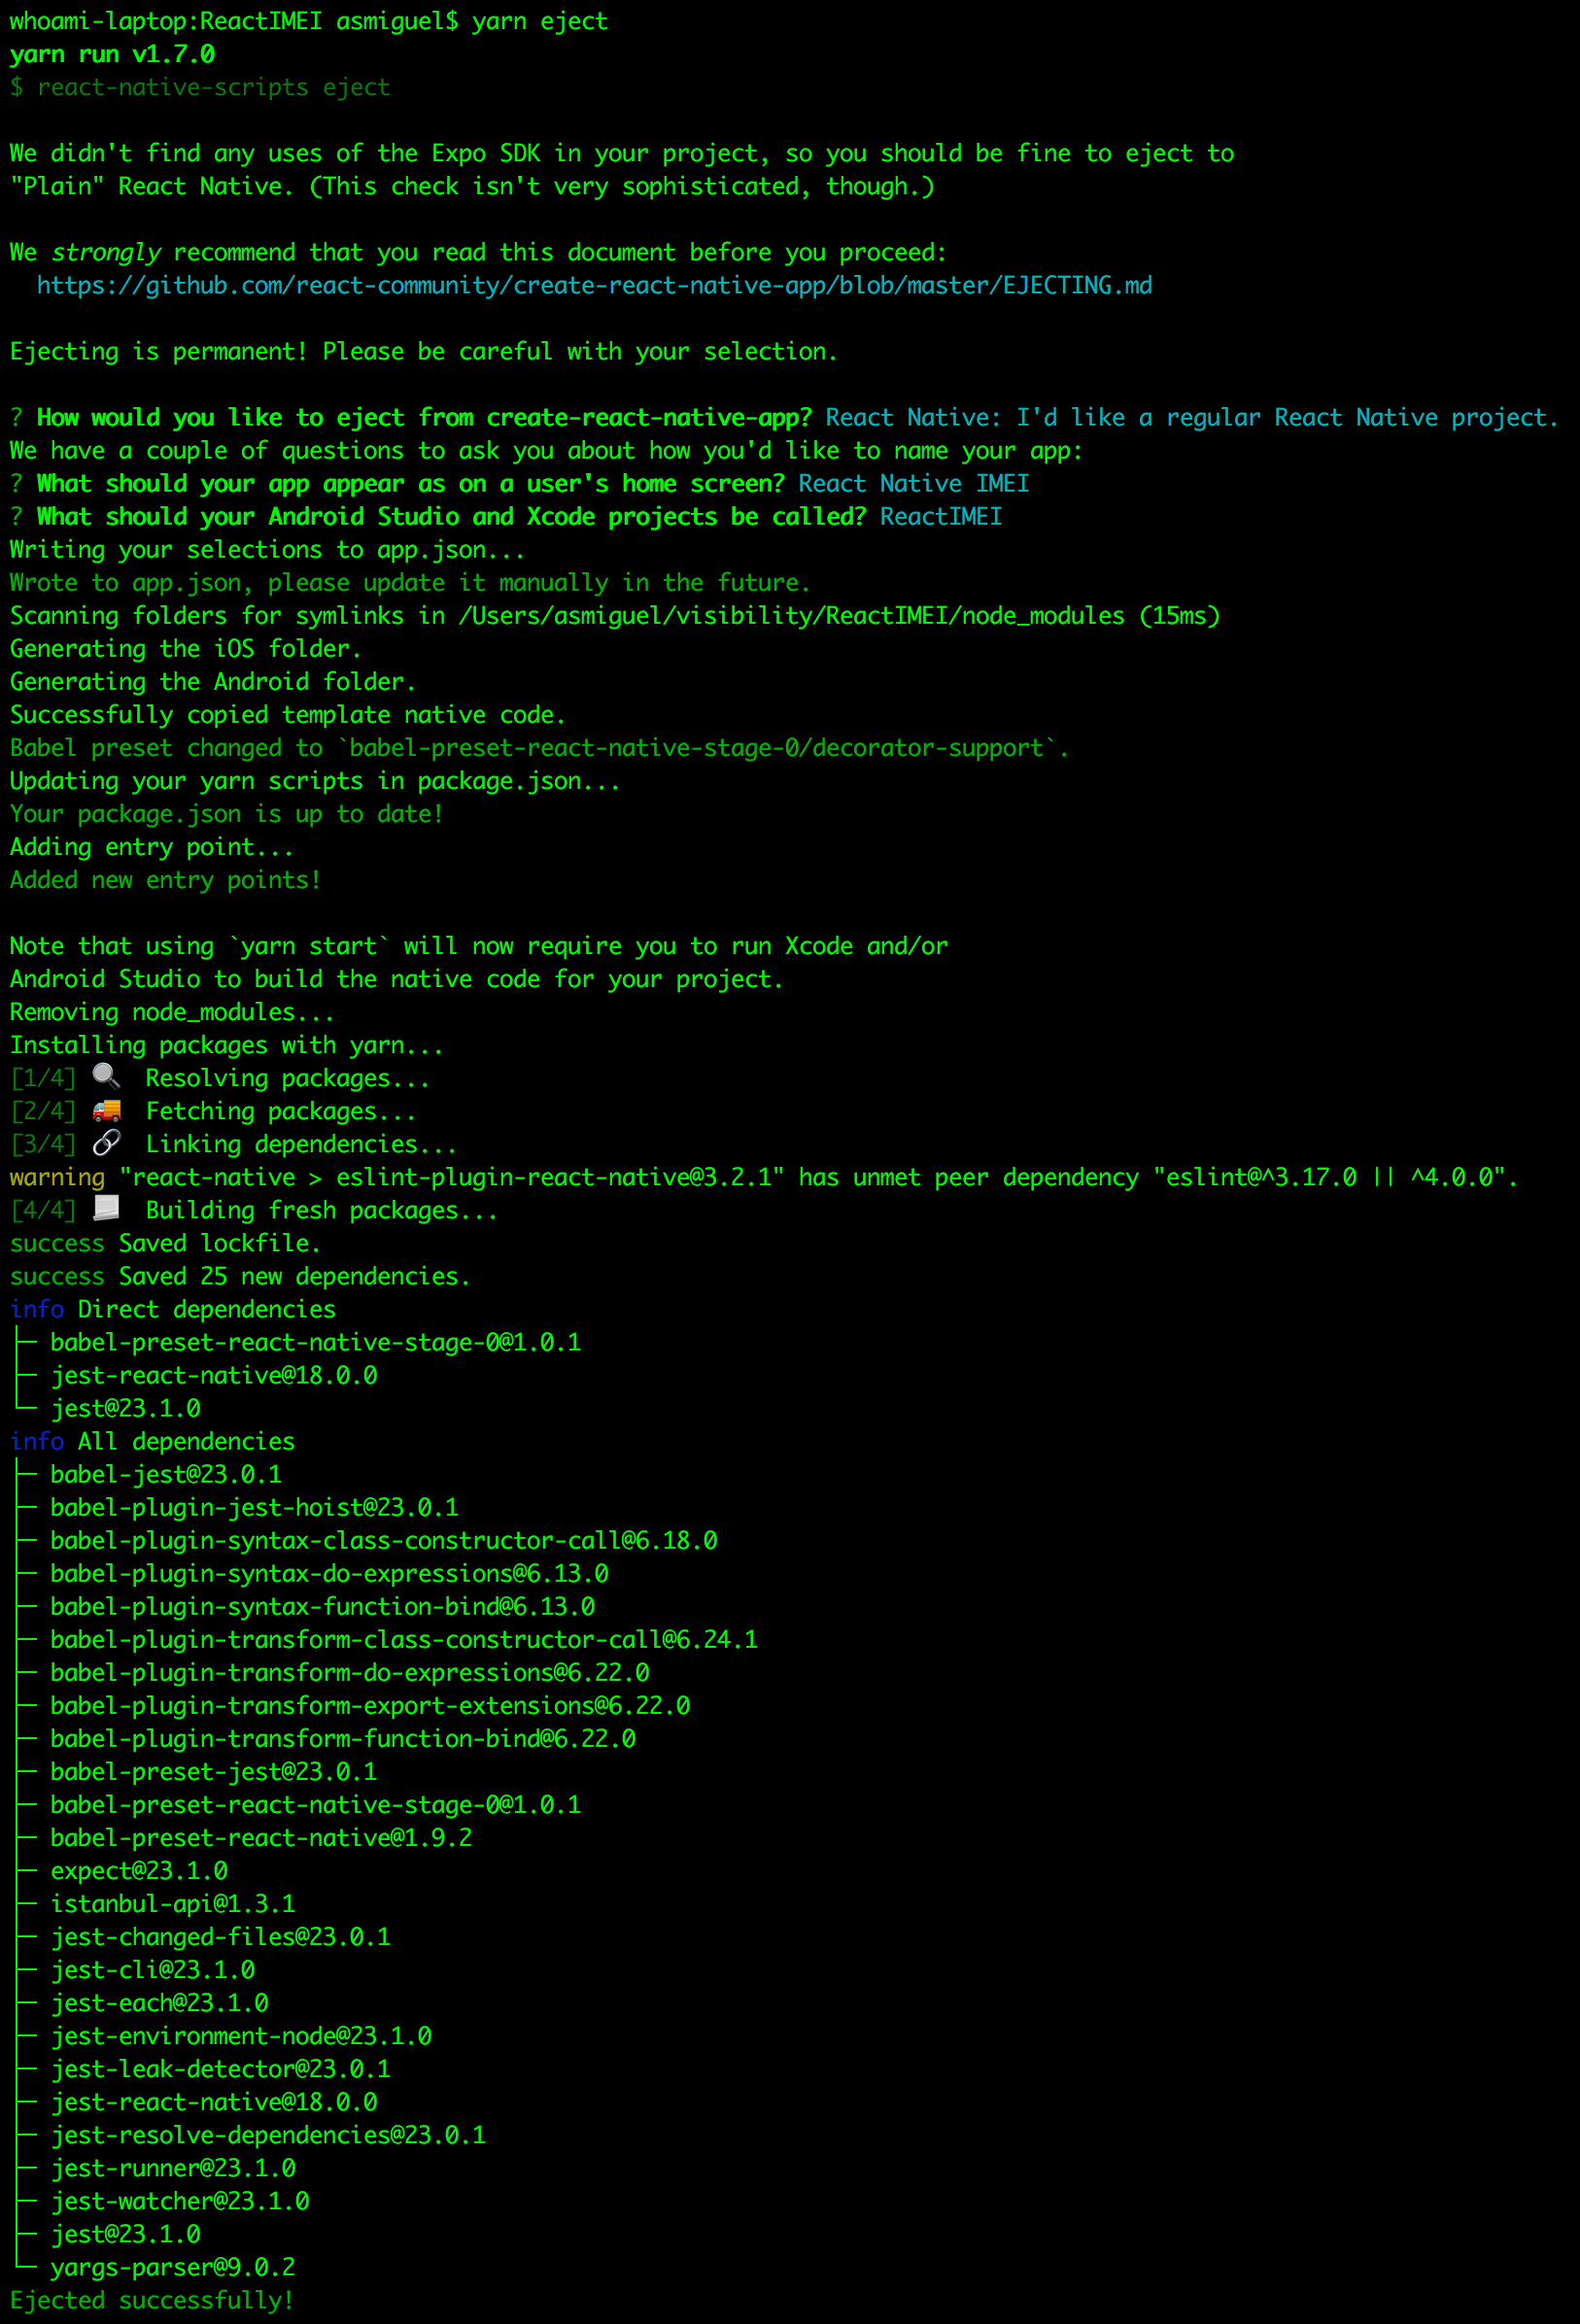
After performing the eject process, you can link the library:
The output will be similar to the following:

Once the library is linked, you can use it; for this, modify the App.js file that is in the project’s root directory.
First, modify the render function so that it shows a button ( TouchableOpacity) which, after clicking on it, will show the device IMEI in a text field.
In addition to this, initialize DeviceIMEI as part of the state in the App component’s constructor:
Finally, implement the function getDeviceIMEI which contains the logic to get the device IMEI:
After performing all the steps above, the complete file will look like this:
Testing the operation in an emulator
To test the operation of the app, open the android/ directory in Android Studio.
The next step is to start Metro Bundler by yarn start:

As a final step, run the app in an emulator from Android Studio, the directory will be recognized as an Android project:


When pressing the CLICK HERE TO GET DEVICE IMEI button, you’ll obtain the device IMEI:

Final words
Even though the integration of React Native with features and resources specific to the Android system is not as trivial as if it were a 100% native project, it is not impossible if we use the right third-party libraries which facilitate work and if we get advise from more experienced people in the React Native field.
For you to have a better guide, the code that has been worked on when writing this article is in the following repository:
AlturaSoluciones/ReactNativeIMEI
Contribute to ReactNativeIMEI development by creating an account on GitHub.
If you liked this article, please applaud as many times as you wish. You can also read this article in Spanish. To see similar stories about technology, look at our publications. Do not hesitate to leave us in the comments box any concerns or suggestions you may have.
If you need a great team that will advise you in expressing your ideas in React JS or React Native, do not hesitate to contact us. You can go to our website and fill out the form and we will contact you as soon as possible.
Troubleshooting
Problem: When creating the application using create-react-native-app, the following message appears at the end:
Cause: Usually it is because the create-react-app package uses (updated at the time of writing this publication) a discontinued version of Yarn. This message is found in the initial lines after executing the create-react-app command:
Solution: Update the Yarn version as suggested in the following lines:
And verify that the version of Yarn is updated:
If the Yarn version has not changed, you can force the update to a specific version, the most recent stable version (1.7.0 at the time of writing this article)
And verify the version again.
Next, delete the directory created that gave the error:
Finally, create the application again:
Cause: The react-native-cli module is not installed in your system.
Solution: Install the module using NPM:
Источник


