Secure your firebase’s google-services.json file in android


Nowadays firebase is commonly used in android projects as it provides a quick solution for logging crashes, providing a database for storing app’s data, and for many other things also. The most commonly used way for implementing the firebase in the android app includes downloading the google-services.json file from the firebase console and placing it in our project’s app directory. This file is responsible for auto initializing the firebase on app startup.
But do you know that this file contains some important keys and URLs that should not be leaked as it may tamper with the security of your app? Also, have you ever wondered that how easy is it to get those keys and URLs from your app with the help of reverse engineering?
If you decompile your apk using some reverse engineering tools like Apktool, then you will find that those keys are present in your app’s strings.xml file as you can see below —

And it can be extracted by anyone and may tamper with the security of your app.
How keys and URLs get stored in strings.xml?
So, what happens basically is, firebase will put these keys from the google-services.json file in the strings.xml file at compile time and use these at the time of auto initializing.
So, is it possible to stop this so that these keys and URLs cannot be retrieved from our app which can help in reducing the chances of tampering with the app?
And the answer is YES.

How can this be done?
The first step is to get the required keys from the google-services.json file as specified below and store them in your app. You can check out my previous article to know how to securely store secret keys in android.

After storing these keys in your app, you can delete the google-services.json file from your app. Also, if you have added the below line in your app-level build.gradle file, then you have to remove this.
Now you want to disable auto initialization of firebase by adding the below code to manifest file —
Now the final step is to manually initialize the firebase by placing the respective keys that you have previously get from the google-services.json file —
Note — If you have added firebase crashlytics in your project then you have to add the following code in your app-level build.gradle file to prevent the automatic uploading of mapping file to firebase crashlytics at release time:-
But after preventing the automatic upload of the mapping file, your info will not be preserved and you will no longer see a particular line number and the activity name where the crash occurs as you can see in the below screenshot —

But don’t worry, in order to preserve the info and get the proper crash reports, you have to add the following code to your app’s proguard-rules.pro file —
Also, for faster builds with proguard, you can exclude crashlytics by adding the following code to your app’s proguard-rules.pro file —
Thanks for reading the article. You can connect with me on LinkedIn and Facebook.
Источник
Android — How to get the Google Services Json
You can download the Firebase config file or Firebase config object for each of your project’s apps from the Project settings page. You need this config file or object to configure your app to use Firebase.
You may need to access your config file or object after the initial registering of the app with Firebase if you’re setting up a new environment or you’re not the member who originally registered the app.
Get config file for your Android app
To download the config file for a Firebase Android app:
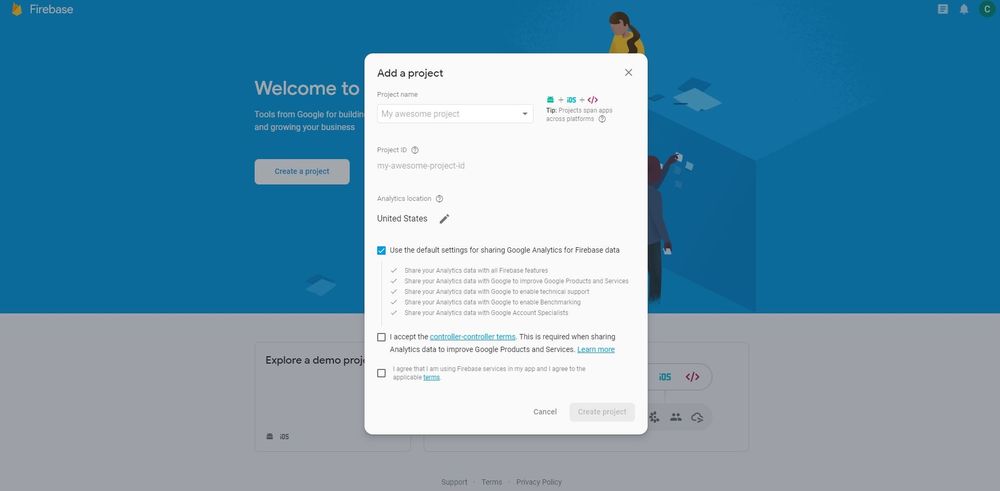
Click on Create a project and follow the steps.

Add a name for your project and select the appropriate settings, then click on Create project.
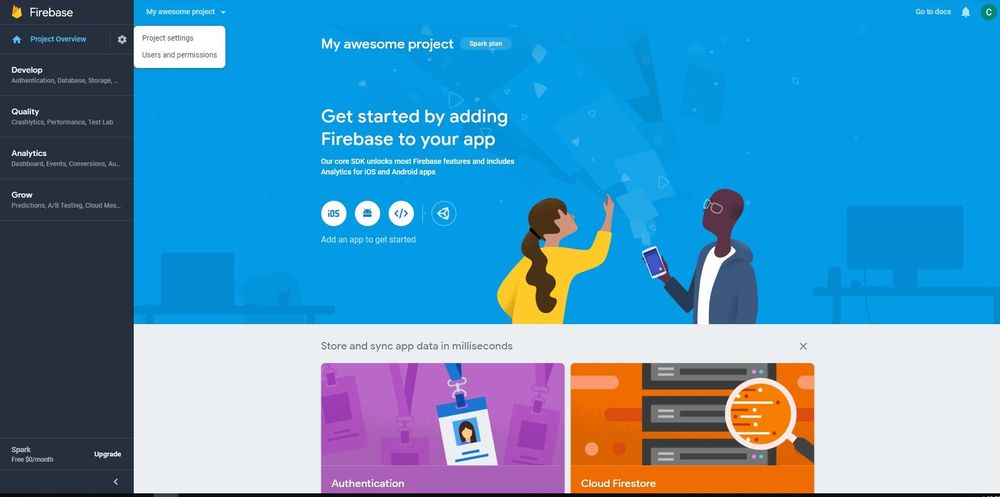
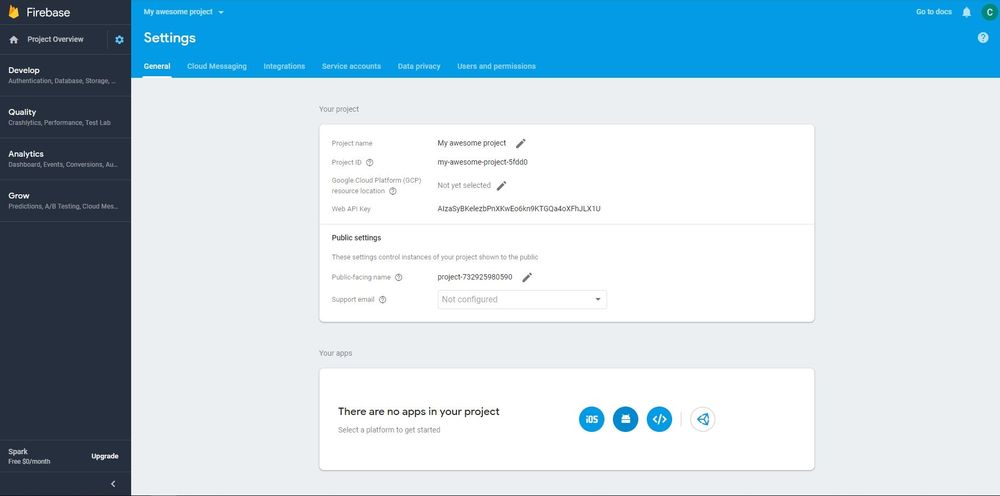
3. In the Your apps card, select the platform for the app you want created.
If you already have apps, select the package name of the app for which you need a config file.
Follow the required steps to add Firebase to your Android app. Here are the steps:
Источник
Как добавить Google-сервисы.в JSON в Android?
файл google-сервисов.json отсутствует в корневой папке модуля. Плагин Google Quickstart не может работать без него.
9 ответов
выше заданный вопрос был решен, как в соответствии с документацией на developer.google.com https://developers.google.com/cloud-messaging/android/client#get-config
файл google-services.json должен быть вставлен в приложение / каталог. После этого, когда я синхронизирую проект с файлом gradle, появляется неожиданная ошибка исключения верхнего уровня. Это происходит потому что:
файл Gradle уровня проекта, имеющий
и файл Gradle уровня приложения, имеющий:
верхняя строка создает конфликт между этим и classpath ‘com.google.gms:google-services:1.3.0-beta1’ поэтому я делаю комментарий, теперь он работает нормально и без ошибок Файл google-сервисов.json отсутствует в корневой папке модуля. Плагин Google Quickstart не может работать без него.
скопируйте файл в app/ папка вашего проекта Android Studio, или в app/src/
папка, если вы используете несколько сборок типы.
вместо того, чтобы помещать в корневую папку, как указано в документах firebase, просто скопируйте файл google-json в корневую папку projectname/app, и он отлично работает . Это просто !
WINDOWS
- открыть окно терминала в Android Studio (Alt+F12 or View->Tool Windows->Terminal). Затем введите
«переместить file_path / google-services.в JSON приложения/»
без двойных кавычек.
LINUX
- откройте терминал Android Studio и введите это
scp file_path / google-сервисы.формат JSON app/
стоит на Project -> app папку
пожалуйста, найдите скриншот с сайта Firebase

для использования Google входа в Android-приложение, вам нужно
который вы можете создать, используя указанную инструкцию здесь
нажмите прямо над приложением i.e android (выпадающий список) в Android studio.Выберите проект из выпадающего списка и вставьте файл json, щелкнув правой кнопкой мыши по приложение и затем синхронизировать его.
google-сервисы.файл json работает как API-ключи означает, что он хранит ваш project_id и api-ключ с форматом json для всех сервисов google (которые позволяют вам на консоли google), поэтому нет необходимости управлять всеми в разных местах.
важный процесс при использовании google-сервисов.в JSON
в приложении gradle вы должны добавить
на верхнем уровне gradle вы должны добавить ниже зависимость
Источник
korrio / gist:fe5d156e1d6c2c2ce19e3e508c3e5a96
This file contains bidirectional Unicode text that may be interpreted or compiled differently than what appears below. To review, open the file in an editor that reveals hidden Unicode characters. Learn more about bidirectional Unicode characters
| < |
| «project_info»: < |
| «project_id»: «wouchat24», |
| «project_number»: «1048295695605», |
| «name»: «WOUchat» |
| >, |
| «client»: [ |
| < |
| «client_info»: < |
| «mobilesdk_app_id»: «1:1048295695605:android:a7a78afc3416297e», |
| «client_id»: «android:info.androidhive.gcmtest», |
| «client_type»: 1, |
| «android_client_info»: < |
| «package_name»: «info.androidhive.gcmtest» |
| > |
| >, |
| «oauth_client»: [], |
| «api_key»: [], |
| «services»: < |
| «analytics_service»: < |
| «status»: 1 |
| >, |
| «cloud_messaging_service»: < |
| «status»: 2, |
| «apns_config»: [] |
| >, |
| «appinvite_service»: < |
| «status»: 1, |
| «other_platform_oauth_client»: [] |
| >, |
| «google_signin_service»: < |
| «status»: 1 |
| >, |
| «ads_service»: < |
| «status»: 1 |
| > |
| > |
| >, |
| < |
| «client_info»: < |
| «mobilesdk_app_id»: «1:1048295695605:android:dd45c547c2a4f385», |
| «client_id»: «android:com.module.candychat.net», |
| «client_type»: 1, |
| «android_client_info»: < |
| «package_name»: «com.module.candychat.net» |
| > |
| >, |
| «oauth_client»: [], |
| «api_key»: [], |
| «services»: < |
| «analytics_service»: < |
| «status»: 1 |
| >, |
| «cloud_messaging_service»: < |
| «status»: 2, |
| «apns_config»: [] |
| >, |
| «appinvite_service»: < |
| «status»: 1, |
| «other_platform_oauth_client»: [] |
| >, |
| «google_signin_service»: < |
| «status»: 1 |
| >, |
| «ads_service»: < |
| «status»: 1 |
| > |
| > |
| >, |
| < |
| «client_info»: < |
| «mobilesdk_app_id»: «1:1048295695605:android:6791e307174cc0f2», |
| «client_id»: «android:com.twentyfour.wouchat.modulechat», |
| «client_type»: 1, |
| «android_client_info»: < |
| «package_name»: «com.twentyfour.wouchat.modulechat» |
| > |
| >, |
| «oauth_client»: [], |
| «api_key»: [], |
| «services»: < |
| «analytics_service»: < |
| «status»: 1 |
| >, |
| «cloud_messaging_service»: < |
| «status»: 2, |
| «apns_config»: [] |
| >, |
| «appinvite_service»: < |
| «status»: 1, |
| «other_platform_oauth_client»: [] |
| >, |
| «google_signin_service»: < |
| «status»: 1 |
| >, |
| «ads_service»: < |
| «status»: 1 |
| > |
| > |
| >, |
| < |
| «client_info»: < |
| «mobilesdk_app_id»: «1:1048295695605:android:db97d5cad8425b81», |
| «client_id»: «android:com.wouchat.messenger», |
| «client_type»: 1, |
| «android_client_info»: < |
| «package_name»: «com.wouchat.messenger» |
| > |
| >, |
| «oauth_client»: [], |
| «api_key»: [], |
| «services»: < |
| «analytics_service»: < |
| «status»: 1 |
| >, |
| «cloud_messaging_service»: < |
| «status»: 2, |
| «apns_config»: [] |
| >, |
| «appinvite_service»: < |
| «status»: 1, |
| «other_platform_oauth_client»: [] |
| >, |
| «google_signin_service»: < |
| «status»: 1 |
| >, |
| «ads_service»: < |
| «status»: 1 |
| > |
| > |
| >, |
| < |
| «client_info»: < |
| «mobilesdk_app_id»: «1:343088663460:android:db97d5cad8425b81», |
| «android_client_info»: < |
| «package_name»: «com.wouchat.messenger» |
| > |
| >, |
| «oauth_client»: [ |
| < |
| «client_id»: «343088663460-jjle1ppoaogn8l2hd07dt85n9pm9p07f.apps.googleusercontent.com», |
| «client_type»: 1, |
| «android_info»: < |
| «package_name»: «com.wouchat.messenger», |
| «certificate_hash»: «32139A70BEC8642CAF0532172BC76E61E1DF5BA9» |
| > |
| >, |
| < |
| «client_id»: «343088663460-1gs7v46n629umoks3g87uqt07asp3ru7.apps.googleusercontent.com», |
| «client_type»: 3 |
| > |
| ], |
| «api_key»: [ |
| < |
| «current_key»: «AIzaSyCduH2_N0pWKn2N3jMr4MhlFR_b7WBWhFU» |
| > |
| ], |
| «services»: < |
| «analytics_service»: < |
| «status»: 1 |
| >, |
| «appinvite_service»: < |
| «status»: 2, |
| «other_platform_oauth_client»: [ |
| < |
| «client_id»: «343088663460-1gs7v46n629umoks3g87uqt07asp3ru7.apps.googleusercontent.com», |
| «client_type»: 3 |
| > |
| ] |
| >, |
| «ads_service»: < |
| «status»: 2 |
| > |
| > |
| > |
| ], |
| «client_info»: [], |
| «ARTIFACT_VERSION»: «1» |
| > |
You can’t perform that action at this time.
You signed in with another tab or window. Reload to refresh your session. You signed out in another tab or window. Reload to refresh your session.
Источник


