- How to Take a Screenshot on Your Android Phone or Tablet
- Save an image of your Android screen for troubleshooting or other purposes
- Press the Power and Volume Down Buttons Simultaneously
- Use Your Phone’s Built-in Shortcuts
- Install an App for Screenshots
- Use Android Studio
- Screenshot Uses
- How to take a screenshot on any Android phone
- No matter what phone you have, we’ll help you figure out the easiest way to snap the screen.
- Acer phones
- Asus phones
- Google phones
- HTC phones
- Huawei and Honor phones
- Lenovo
- LG phones
- Motorola phones
- OnePlus phones
- Samsung phones
- Sony phones
- ZTE phones
- Google Assistant
- Save and share
- Android Froyo phones and older
- Install the Software
- Get to the Root
- How to take a screenshot with your Android phone
- Shortcuts:
- How to take a screenshot on Android
- Take a screenshot on Samsung smartphones
- Take a screenshot on Google Pixel smartphone
- Take a screenshot on Xiaomi smartphones
- Take a screenshot on LG smartphones
- Take a screenshot on HTC smartphones
- Take a screenshot on Huawei / Honor smartphones
- Take a screenshot on OnePlus smartphones
- Take a screenshot on Nokia smartphones
- Take a screenshot on Sony smartphones
- How to take long screenshots
- How to record the screen in a video
- Where to find taken screenshots
How to Take a Screenshot on Your Android Phone or Tablet
Save an image of your Android screen for troubleshooting or other purposes
:max_bytes(150000):strip_icc()/WorkBadgePhoto-61c0b98ef5a74e4a85851a8f706dbd65.jpg)
All smartphones and computers offer ways to take screenshots. Here’s how to take them on a phone with Android 4.0 or later.
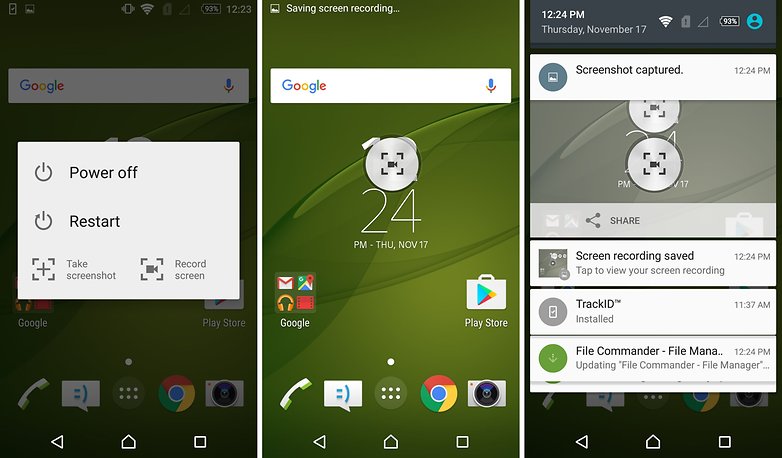
Press the Power and Volume Down Buttons Simultaneously
Google introduced the screenshot feature with Android 4.0 Ice Cream Sandwich. If you have Android 4.0 or later on your phone or tablet:
Navigate to the screen you want to record with a screenshot.
Press the Power and Volume Down buttons quickly at the same time. (Getting this right might take some practice.) The screen might flash or appear to shrink slightly to indicate the screenshot has been taken.
Look for the screenshot in your photo gallery or in a screenshots folder.
:max_bytes(150000):strip_icc()/screenshotsingallery-0d69728d7efb47c29139753cd3ba0b84.jpg)
Use Your Phone’s Built-in Shortcuts
Some phones come with built-in apps and gestures. For example, on some Samsung devices, swipe the edge of your palm across the screen from right to left.
:max_bytes(150000):strip_icc()/002_how-to-take-a-screenshot-on-android-phone-or-tablet-2377913-5c5a1b4946e0fb00013fc2a5.jpg)
Install an App for Screenshots
If you don’t have Android 4.0 or later on your phone, or if it doesn’t have a built-in screenshot feature, install an Android app. Here are a few to try:
- Screen Capture Shortcut Free takes screenshots after a delay or when you shake the phone.
- No Root Screenshot It offers a widget and allows you to annotate, crop, and share screenshots.
- Screencap Root Screenshots (requires rooting).
For more, search the Google Play Store for screenshot, screen grab, or screen capture.
Use Android Studio
You can take an Android screen capture on any compatible device by installing Android Studio from Google on your computer. This software development kit is used by developers to create and test Android apps, but it’s freely available to everyone.
You’ll also need the Java SE Development Kit and, in some cases, USB drivers for your device (check for these on the manufacturer’s website). Then, plug in the phone, run the Dalvik Debug Monitor (included in Studio), go to the Debug Monitor menu, and click Device > Screen Capture. This is a clunky way to take screenshots, but if nothing else works or you have Studio already set up, it’s easy to use.
Screenshot Uses
A few examples of how you might use screenshots include:
Источник
How to take a screenshot on any Android phone
No matter what phone you have, we’ll help you figure out the easiest way to snap the screen.


Top Deals On Great Products
Picked by Techconnect’s Editors
Update 7/2/18: Added the HTC U12+, LG G7, and OnePlus 6.
Every Android phone is different, and so is taking screenshots with them. Even though Android 4 introduced simple screenshots for all with the handy power-and-volume-down-key combo, nailing it can still be tricky. That’s why some phone makers have introduced new methods. We’re here to help: Just find your Android phone on the list below to learn the various ways to snap, share, and save a screenshot.
Acer phones
- Hold down the power and volume-down buttons for a couple of seconds.
- Pull down the notification panel to reach quick settings and tap the Screenshot icon.
Asus phones
- Hold down the power and volume-down buttons for a couple of seconds.
- Pull down the notification panel to reach quick settings and tap the Screenshot icon.
Google phones
- Nexus: Hold down the power and volume-down buttons for a couple of seconds.
- Pixels: Hold down the power and volume-down buttons for a couple of seconds.
HTC phones
- HTC U12+: Press and hold the power button until your phone vibrates, and then tap the virtual home button on the navigation bar while still pressing the power button
- HTC U series (up to U12+): Hold down the power and volume-down buttons for a couple of seconds.
- HTC 10: Hold down the home and power buttons OR hold down the power and volume-down buttons for a couple of seconds.
- All other HTC phones: Hold down power and volume-down buttons for a couple of seconds.
Huawei and Honor phones
- Hold down the power and volume-down buttons for a couple of seconds.
- Pull down the notification panel, switch to Shortcuts, and tap the Screenshot icon.
Lenovo
- Hold down the power and volume-down buttons for a couple of seconds.
- Pull down the notification panel and tap the Screen Shot icon.
LG phones
- LG G7: Press and hold the power and volume-down buttons for a couple of seconds.
- All other LG phones: Hold down the power (located on the back of the phone) and volume-down buttons for a couple of seconds.
- Pull down the notification panel and tap the Capture+ icon.
Motorola phones
- Hold down the power and volume-down buttons for a couple of seconds.
OnePlus phones
- All OnePlus phones: Press and hold the power and volume-down buttons for a couple of seconds.
- OnePlus 5, 5T, and 6: Swipe down with three fingers on the home screen.
Samsung phones
- Galaxy S8 and later: Hold down the power and volume-down buttons for a couple of seconds.
- Galaxy S7 and earlier: Hold down the home and power buttons for a couple of seconds.
Sony phones
- Hold down the power and volume-down buttons for a couple of seconds.
- Hold down the power key until a screen appears and tap Take screenshot.
ZTE phones
- Hold down the power and volume-down buttons for a couple of seconds.
Google Assistant
On supported phones, you can also ask Google Assistant to take a screenshot for you. When you’re on the screen you want to snap, just say, «OK Google, take a screenshot,» and it will oblige, saving a picture of the screen below the Assistant interface. So if you want to capture the Google Assistant screen itself, you’ll have to use the hardware buttons.
To back up your screenshots, you’ll need to head over to Google Photos.
Save and share
Once you’ve snapped your screenshot you can create a shortcut to it in the notification panel. Tap it and you’ll be able to edit or share it.
If you want to back up your screenshots to Google Photos, you might need to tell your phone to do so. Open the sidebar in Google Photos, then Device Folder. Tap Screenshots, and flip the Back up & sync toggle. From there on out, all of your screenshots will be backed up to your camera roll in Google Photos.
Android Froyo phones and older
If you happen to have a pre-Gingerbread Android 2.3 phone lying around, taking a screenshot is quite an arduous task. Froyo users will need a PC, a USB cable, some Android knowhow and third-party software.
Install the Software
Back in those days, Google thought only developers would be interested in capturing Android screenshots, so you’ll have to act like one. Download and install the free Android SDK (software development kit). Visit the site, and be sure to get the correct version for your OS.
The software also requires Java. Mac OS X has the right tools already built in. Windows users should download the Java Development Kit. Install the Android SDK and Java downloads.
Visit the Device Manager to fix any USB driver issues preventing your PC from recognizing your Android.
Launch the SDK Manager from the Android SDK download. (In Windows, if prompted, choose Extract All.) Accept the terms, and click Install. The SDK will download more packages and then update itself with the latest files. This process can take about 30 minutes.
Launch DDMS (Dalvik Debug Monitor) within the Android SDK Tools folder. The software will open a console for a moment and then launch a graphical interface in another window. Give it a moment, but if it quits and there seems to be an error initially—as happened to me on my test systems—try running DDMS again.
On the Android device, open Setting, Application settings, Development, and select USB debugging. Connect the Android device to your computer.
In Windows, if the Android doesn’t appear as a listing in the Dalvik Debug Monitor application, go to the Device Manager. Right-click the Android device, and select Update Driver Software. Choose Browse my computer for driver software, click Browse, and navigate to the USB driver folder within the Android SDK folder. Click Next. Approve the following prompt to install the driver. Return to the Dalvik Debug Monitor; your Droid should now be listed.
With either OS, if your Android device still failed to show up in the Dalvik Debug Monitor, verify that you set it for USB debugging mode. In addition, drag the menu down from the top of the Android screen, and pick USB connection. In most instances, you’ll want USB Mass Storage to be selected. (I had to perform this step on a Droid X because it set itself up in PC Mode first.) But try PC Mode if the software isn’t finding your Android; that might solve the problem.
On your computer, click the phone icon in the upper-left section to select your Android. On the Android, prepare the moment you want to capture. On the computer, choose Device, Screen capture. Click Save. Repeat the process for additional screenshots as needed.
Get to the Root
If you’re a savvy Android enthusiast, you can shoot screenshots without hooking up to a computer at all. First, however, you’ll have to root your phone.
Normally, the Android OS prevents screenshot apps from working, because they muck around with deeper permissions. The rooting process confers superuser abilities, however, granting you permission to do anything you want.
After rooting, search the Android Marketplace for screenshot to find various apps such as Screenshot, and Screenshot It. You’ll activate screenshots with a timer, by shaking the phone, or via another command, and the app will then capture your device.
Michael Simon covers all things iPhone, iPad, Mac, and Apple Watch, with a little Android thrown in. You can usually find him with his nose buried in a screen. The best way to yell at him is on Twitter.
Источник
How to take a screenshot with your Android phone
The process of taking a screenshot has been simplified and standardized over the years and, on most devices, just press the power button and low volume simultaneously. Some brands, however, use a different key combination or offer even more intuitive modes. So here’s how to do it on different Android smartphones.
Shortcuts:
How to take a screenshot on Android
Since the upgrade to Ice Cream Sandwich, the process of taking a screenshot has been standardized and consists, for most devices, in the following key combination:
You will need to press and hold the power button for a few seconds at the same time as the low volume button until you see the animation appear and you hear the sound of the shot. The shot you just took will be easily found in the gallery of your smartphone and in the internal storage in Pictures/Screenshots or DCIM/screenshots.
Low volume + Power button are the winning combination / © NextPit
Take a screenshot on Samsung smartphones
The latest Galaxy smartphones, like the S10 and Note 10 series, rely on the classic key combination described above due to the lack of a physical home key. As for the older models, Samsung stands out from the crowd with an alternative key combination:
Considering that Samsungs are among the most popular smartphones among Android users and among the best sellers in the world, perhaps it is the mass that wanted to distance itself from the South Korean brand, snubbing it. In any case, the latest generation smartphones of the brand also give the possibility to make screenshots with a move from karate:
- Go to Settings
- Click on Movements and controls
- Select Acquire with Palm Drag
Once activated, you can forget about any key combination and take pictures of the screen in front of your eyes by simply passing the palm profile of your hand on the screen, from right to left or vice versa.
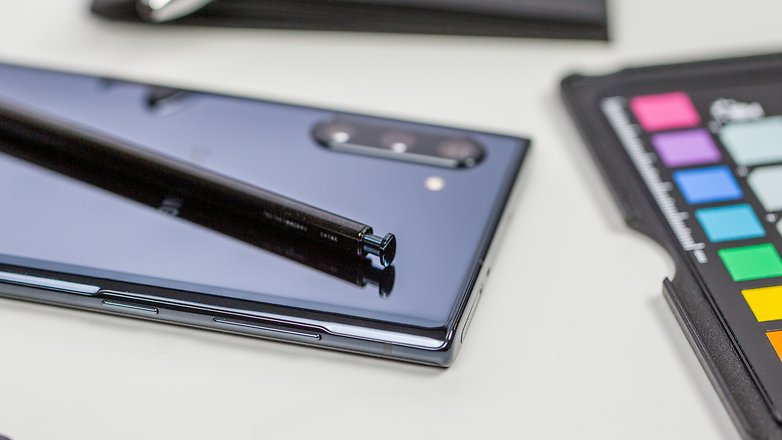 Have you tried using the S-Pen to make a screenshot? / © NextPit
If you own a Galaxy Note with an S-Pen, you will have three different ways to take a picture of your screen. Open the Air Command Menu and bring the digital pen closer to the display, now press the side button of the S-Pen to get the following options:
- Scrapbook: with the S-Pen you can select the portion of the screen to be saved. The saved image can then be used in your notes and will be saved in the dedicated folder.
- Screenshot notes: the entire surface of the screen can be captured and you can write over the image with different colors.
- S-Pen Button: With all Galaxys equipped with a pen, by holding down the S-Pen button at the same time and pressing the stylus on the display, you can take the screenshot of the screen.
Take a screenshot on Google Pixel smartphone
Google Pixels offer stock Android, the purest version of the operating system without the customizations offered by other brands. On these devices you can take a screenshot in this way:
- Pressing home key + power key together
- By holding down the power button and selecting the dedicated function shown on the screen
![]() On a Pixel, you can also take a screenshot from the power off screen / © NextPit
On a Pixel, you can also take a screenshot from the power off screen / © NextPit
Take a screenshot on Xiaomi smartphones
If you have a Xiaomi smartphone in your hands, you have three different ways to take a screenshot:
- Use the traditional key combination Low volume + Power key
- Use the Screenshot shortcut to access the notification bar
- Rely on gestures with a swipe down using three fingers simultaneously
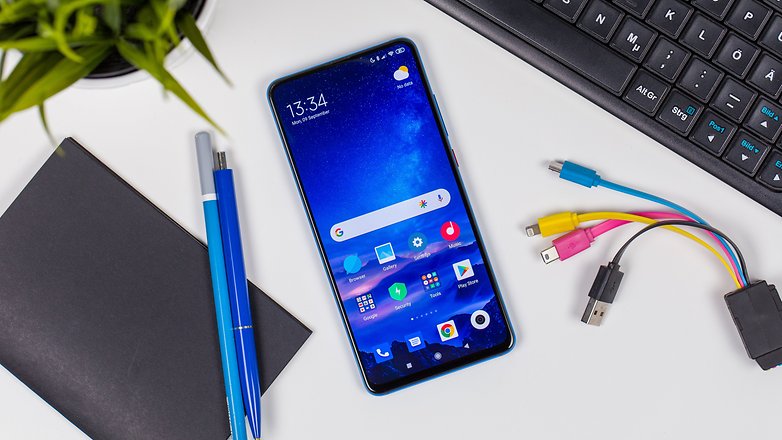 Physical keys, gestures or shortcuts from the notification bar / © NextPit
Take a screenshot on LG smartphones
LG uses the key combination Low volume + Power button but on older models makes the operation a bit complicated because of the positioning of the keys on the rear body, one underneath the other. A bit of practice is enough to get our hands on it but, alternatively, you can use QMemo+/Capture+ the LG note application from the notification area.
Fortunately, on newer devices, such as the LG G8, LG G7, LG V30, V30s and V40 ThinQ, the combination has become easier thanks to the return of the volume keys in the side frame.
 Making a screenshot on your new LG smartphone is easy / © NextPit
Take a screenshot on HTC smartphones
HTC doesn’t want to confuse ideas with anyone: the combination of low volume and power button remains valid, but you can also decide to use only one physical button and use the combination of power button and home button, in this case capacitive in models up to 2016.
Subsequent HTC models have on-screen navigation keys, so the only solution available is the classic combination of Low Volume + Power Key.
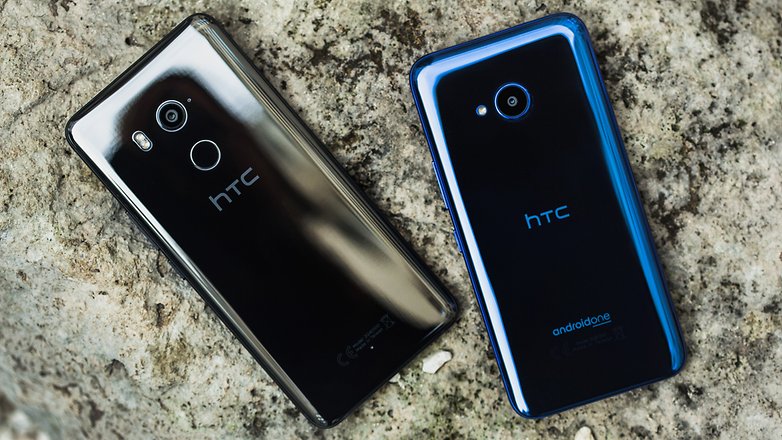 If you have one of the latest HTC go on safe with Low Volume + power button / © NextPit
Take a screenshot on Huawei / Honor smartphones
On Huawei and Honor smartphones you can take a screenshot using one of these modes:
- Use the traditional key combination Low volume + Power key
- Use the Screenshot shortcut to access the notification bar
- Activate the gestures from the settings menu and use the knuckle: two strokes on the display and you will have your screenshot
- EMUI and you: top tips for your Huawei or Honor phone
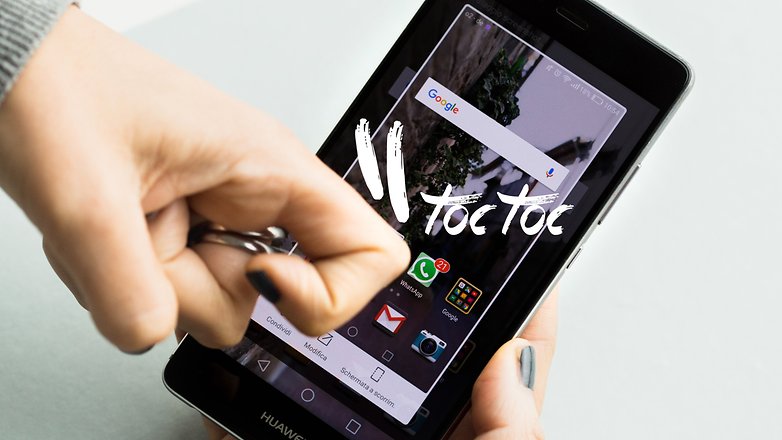 Use the knuckle to take a screenshot on your Huawei or Honor smartphone / © NextPit
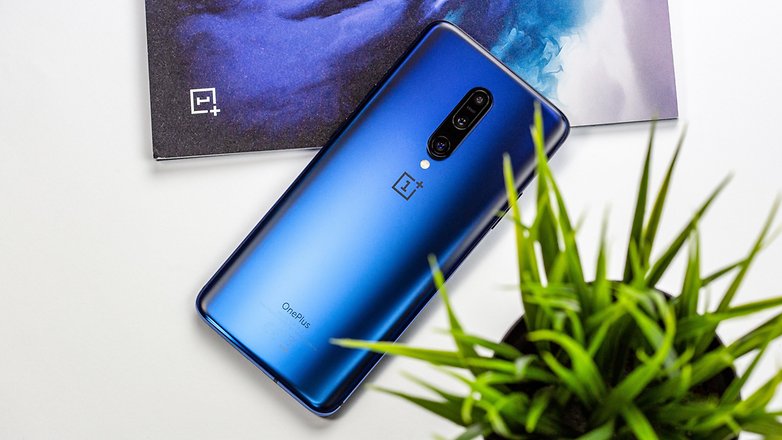
Take a screenshot on OnePlus smartphones
On OnePlus smartphones you can take a screenshot like this:
- Pressing Low Volume + Power Key
- On older models, selecting the appropriate option from the power-up menu after activating it in Settings> Keys>Power key menu>Screen capture
- Using gestures: swipe down with three fingers
 Low volume + Power button or gestures / © NextPit
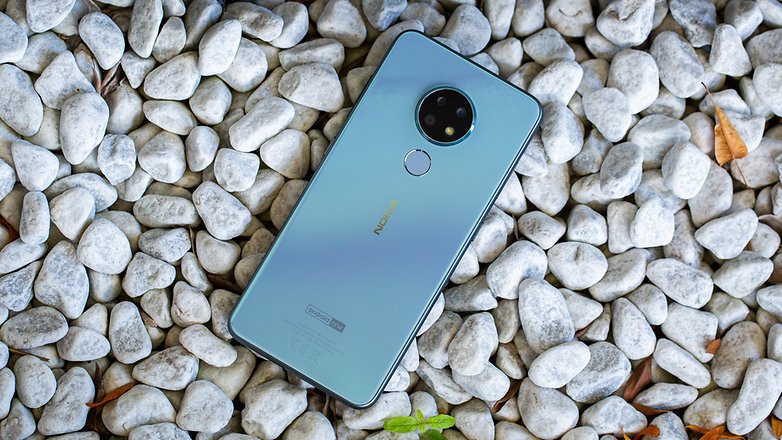
Take a screenshot on Nokia smartphones
In the case of Nokia, there are different possibilities depending on the device available. You can:
- Use the combination of Low Volume + Power Button
- Press and hold the Power key and select the dedicated function
- Select the option dedicated to screen capture from the notification menu (but not available on all devices)
 Low volume + Power button on Nokia 7.2! / © NextPit
Take a screenshot on Sony smartphones
The Japanese manufacturer goes straight to the point and allows you to take a screenshot on your devices simply by using the physical keys: Low Volume + Power Key.
How to take long screenshots
Some brand manufacturers allow you to take screenshots out of the lines called Scrollshots. This type of screenshot is particularly useful for capturing long texts or websites. But how do they work? The software takes the first screenshot then scrolling down takes the second and so on.
If your smartphone does not integrate this feature you can get it by downloading Stitch Long Screen. Thanks to this app you can still take several screenshots and combine them into one, provided they are well overlapped.
Stitch & Share for longer than normal screenshots / © NextPit
If your smartphone does not integrate this feature you can get it by downloading Stitch Long Screen. Thanks to this app you can still take several screenshots and combine them into one, provided they are well overlapped.
How to record the screen in a video
Some Sony devices have a feature that allows you to record the screen. To access it, simply press and hold the power button. The recordings are saved in MP4 format in /Movies/ScreenRecords.
 With Sony recording, the display is really a walk in the park / © NextPit
Huawei also allows you to create a screen video using knuckles. In the Mate 20 Pro you just have to knock twice on the display to record the video. In the Samsung Galaxy S9 you have to take advantage of the Game Launcher and the feature is limited to games.
 Record a video with audio included of what you have on the screen / © NextPit
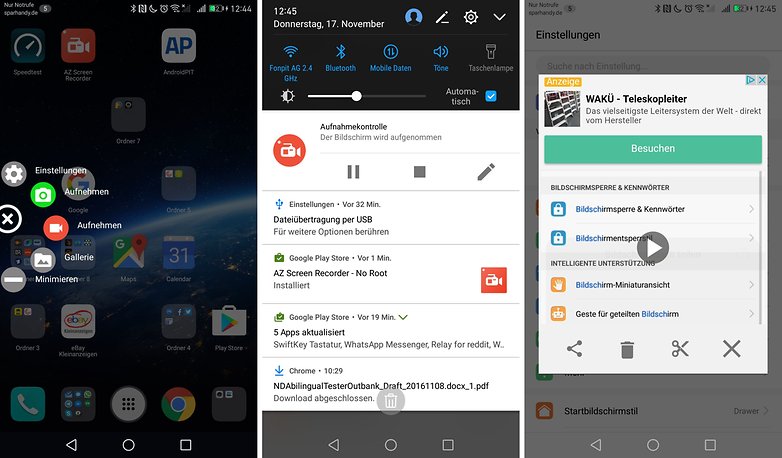
Also in this case for devices that do not integrate this feature comes to the rescue of the Play Store offering AZ Screen Recorder. Using your smartphone’s microphone, you can also integrate audio comments into the video.
Where to find taken screenshots
Once you have taken your screenshot, whatever the method and smartphone used, you will find it in your photo gallery. Then, by accessing your Gallery, you will find a dedicated folder called Screenshot/Shields.
What device do you have and how do you take screenshots on your Android? If you’re using a smartwatch, here’s how:
Источник


