Вторая жизнь HTC HD2
Установка Android на HTC HD2. Подробная инструкция по установке и приведению системы в пригодное для повседневного использования состояние.
Начать рассказ хочется издалека: с выбора телефона. Служившая мне два года верой и правдой 5800 окончательно надоела, софта под ней до сих пор с гулькин нос, скорость работы – посредственная, радовал только плеер и аккумулятор. А хотелось, как водится, большего. Прикинул бюджет и потребности: выбор был между Acer Liquid E, HD2, X10 и Desire. Первого и последнего нигде в тот день не было, да и внешне мне не нравился Desire, а Acer… ну как сказать. Он классный, и когда знакомые спрашивают, что стоит посмотреть на Android’е – советую сразу его, и многие берут, и довольны, но… не знаю, не лежит к нему душа моя. А Х10 мне в целом не понравился, сам не знаю, почему. Всегда SE нравились. В итоге я взял HTC HD2, зная, что на него прекрасно ставится Android, и проблем в использовании никаких нет. Да-да, вы все правильно поняли, после прочтения данной инструкции вы сможете поставить полностью рабочий Android, и все, начиная от Wi-Fi и GPS, заканчивая вспышкой и автофокусом камеры, будет работать.
прим: А камера так вообще лучше, чем в родной ОС снимает :-\
Краткий план действий:
- Узнаём версию SPL
- Зашиваем Hard SPL
- Прошиваем телефон прошивкой без регионлока с нужной нам версией радиомодуля и ядра
- Устанавливаем Android
- Делаем Android приятным для повседневной работы.
Сразу же объясню, зачем пункт 2: на самом деле, всё просто. Драйвера на некоторые «части» устройства у нас портированные / самописные, следовательно, нужна соответствующая им прошивка. Поэтому берём многоязычную прошивку для европейских HD2, которая разблокирована для установки на все устройства (из любой страны), обладает нужным сочетанием версии ядра и версии радиомодуля. Так же она даст нам один приятный бонус, но об этом – чуть позже.
Кстати, если же вы не так давно перепрошивались / обновлялись — можете попробовать сразу перейти к пункту «установка Android», ничего страшного не произойдет, если с первого раза он не запустится. В крайнем случае — передёрнете батарейку и пойдете по полному пути.
Приготовления
SPL – загрузчик, примененный впервые компанией HTC на платформе HTC Hermes, во времена WM5. Его основные задачи — банальная привязка телефона к региону и блокировка запуска кастомизированных прошивок.
К счастью, есть два способа обойти зловредный vendor-lock-in: SSPL и HSPL, одноразовая и универсальная версии снятия блокировки. Отличаются тем, что SSPL исчезает после перезагрузки, а HSPL остаётся до перепрошивки.
Узнать версию SPL легко – необходимо снять заднюю крышку с нашего HD2, зажать «громкость вниз» и ткнуть чем-нибудь в красную кнопочку перезагрузки aka soft reset. «Громкость вниз» мы отпускаем после того, как отпустим soft reset.
Откроется трехцветный «матрас», режим бутлоадера. В нём нас интересует вторая строка, а конкретно – версия SPL. Выглядит она примерно так: SPL-X.XX.XXXX, а версии, соответственно, могут быть 1.48.0000, 1.48.6666, 1.68.0000, 2.08.0000 и всякие другие.
Далее мы скачиваем простенькую утилитку, которую можно взять здесь, и, не отцепляя телефон, запускаем её от имени администратора. Выбираем пункт, в котором основные цифры совпадают с вашими, а вместо четырёх нулей стоят буквы HSPL. Ждем перезагрузки коммуникатора. Все, теперь мы получили полный доступ к загрузчику, и, как следствие, можем поставить кастомизированную версию прошивки.


Для прошивки нам понадобится:
- Собственно, сама прошивка, да еще и без регионлока
- Кастомный прошивальщик, которому плевать, чью прошивку шить
- Терпение
Перезагружаем телефон красной точечкой (до запуска Android’а заднюю крышку можно вообще не закрывать); ждем, пока загрузится Windows Mobile 6.5.(3), выбираем режим подключения по USB – синхронизация, ждем, пока телефон синхронизирует все, что нам надо. Крайне желательно, чтоб у вас уже стоял Outlook или любой другой софт, с которым телефон может синхронизировать контакты – в процессе перепрошивки вы их потеряете. Далее все очень просто:
Создаём в удобном для вас месте папку. Распаковываем кастомный прошивальщик, который можно взять здесь. Рядом с прошивальщиком кладём файл с разблокированной прошивкой. Одну из последних вы можете взять здесь, или пойти на соответствующий раздел 4pda и выбрать необходимую. Ахтунг! Юзерам HTC HD2 (!)TMobile(!) строго НЕОБХОДИМО пойти и выбрать прошивку самостоятельно, дабы не было brick’a.
Далее – запускаем прошивальщик от имени администратора, следуем простейшей инструкции, дожидаемся завершения прошивки.
В результате мы получим телефон, который способен работать на любом языке, вне зависимости от региона, в котором был приобретен, а так же, в качестве бонуса, 128 мегабайт скрытой ранее оперативки.
После перепрошивки – загружаемся в «матрасный» режим, убеждаемся, что у нас осталась HSPL (если нет – вновь ставим её, благо уже знаем как), и, после очередной перезагрузки, подключив USB-кабель, дожидаемся обратной синхронизации с Outlook.
На этом скучные и сложные действия закончены.
Устанавливаем Android
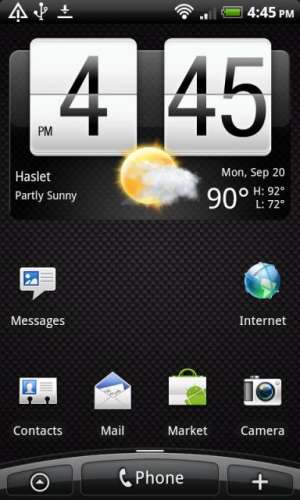
Ура! Начинается самое веселое. Собственно, чтобы веселое началось, нам понадобится выбрать ядро и обвязку системы. Облазив кучу тем по данному вопросу, я пришел к выводу, что одной из лучших для начала будет являться вот эта комбинация, все желающие самостоятельных экспериментов могут пойти на 4pda и изучить эту тему, хотя для первого запуска 100% подойдет и указанная мной версия. Верней, я даже рекомендую первый раз использовать именно её, т.к. в неё интегрировано всё, что надо, и она потрясающе стабильна. Основана данная версия на ядре Desire, HTC Sense прикручен, так что всё будет очень похоже на нативный для HTC Android.
Так же нам нужна карта памяти, объемом не менее 2ух гигабайт (а если более, то крайне желательно, чтобы на ней было свободно минимум 2 гигабайта). А ещё желательно отформатировать её, просто на всякий случай. Важные файлы, естественно, можно и нужно забэкапить.
Распаковываем в корень карты памяти скачанный архив, так, чтобы на карте, в корне появилась папка Android, а рядом с ней – файл *.img размером 1 гигабайт.
Далее, отцепившись от USB, открываем в телефоне «проводник», идём на карту памяти, в папку android, и запускаем в ней 2 exe-шника именно в таком порядке – CLRCAD.EXE (ничего не произойдет), а через пару секунд – HARET.EXE
Появятся строки загрузчика, спустя мгновение их должен сменить логотип HTC на чёрном фоне. Далее, что бы не происходило с телефоном (а происходить может что угодно – включения/отключения экрана, подсветки, появление «мусора» на экране и проч.) просто ждем. Однако, если загрузка остановилась на поле «jumping to kernel», ждать смысла нет; Android не запустится. Скорее всего проблема в том, что у вас старая версия прошивки радиомодуля (ради обновления оной мы зашивали HSPL и выполняли полную перепрошивку телефона).
Первый запуск Androidа занимает 5-10 минут, однако больше 20 минут ждать не имеет смысла. Все последующие запуски занимают 2-3 минуты.
Сразу после загрузки операционной системы и «прохождения квеста» (а это действительно квест, до перезагрузки Android будет работать достаточно медленно, просьба не пугаться) рекомендуется перезапустить телефон, вновь запустить Android, и перезапуститься еще раз.
Однако же, после первой же перезагрузки, не торопитесь запускать Android повторно, лучше скачать вот эту маленькую софтину под Windows Mobile, она сильно упростит запуск Android’а. Не рекомендую ставить галочку на «автозагрузка», ну или ставьте приличный запас времени (не менее 6 секунд, а лучше – не менее десятка секунд) для выбора операционки, просто на всякий случай.
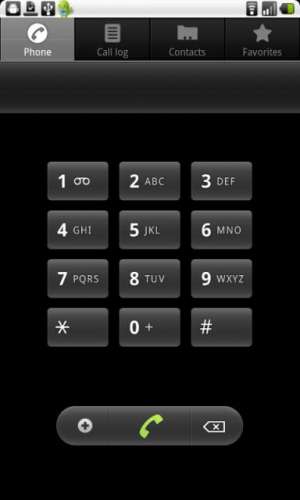
Так же запустить Android можно просто выбрав программку из меню «Пуск» и дважды щелкнув на интересующей нас иконке.
Приводим Android в порядок
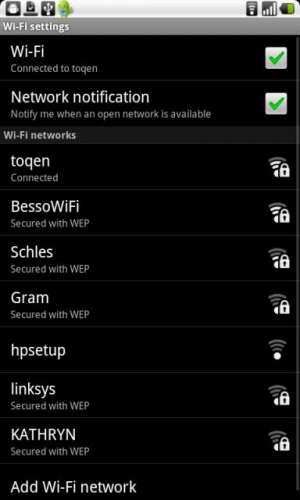
Подцепляем wi-fi, открываем меню-маркет, в поиск вбиваем следующие программки. Скачиваем и ставим бесплатные версии.
Продление жизни от одной зарядки:
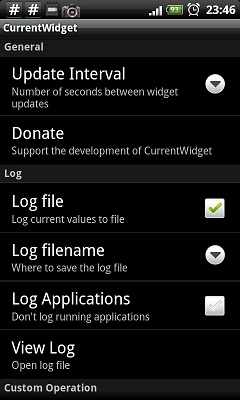
Current Widget — понадобится чтоб проконтролировать «уход» заряда с батареи.
Bat Stat — удобный и минималистичный виджет, показывающий актуальный заряд батареи, а так же её температуру.
Set CPU — понадобится для задания правил изменения тактовой частоты процессора.
TasKiller — простой и удобный менеджер процессов.
IM и социальные сети:
TweetDeck — HTC peep, конечно, хорош, но эта штука куда гибче.
Trillian IM — мультипротокольный IM с вполне нативным интерфейсом и приятной скоростью работы.
Так же рекомендую скачать swype, с уже встроенными Ru/En раскладками. Включается он в настройках, «языки и клавиатура». После нужно найти любое текстовое поле, сделать в нем длинный «тап», и в «способ ввода» выбрать тот самый Swype. Каждый, кто к нему привык, отказаться практически не в состоянии, уж больно классный способ ввода. А привыкают мгновенно. Если же вы никогда не слышали/не видели — можете перейти на официальный сайт, ну или посмотреть видео на том же YouTube.
В Current Widget надо поставить автообновление на 30 или 60 секунд, галочку на ведение логов, по желанию — вытащить его на десктоп.
Bat Stat, в принципе, не обязателен, но можно так же добавить на десктоп, благо у нас их семь. Я оставил его в самой жо^W дальней вкладке, дабы глаза не мозолил.
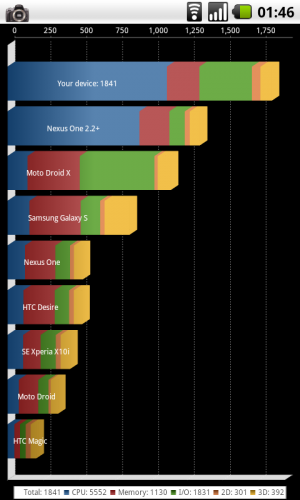
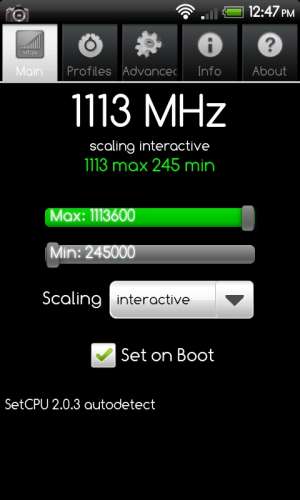
После проведения подготовлений, запускаем Set CPU, переходим во вторую вкладку, настраиваем профили в соответствии с данной картинкой (здесь и далее скриншоты ужаты вдвое):

Если честно, то хватает и 576 при повседневном юзе, у телефона есть 3d / 2d ускоритель, и GUI подтормаживать не будет, но субъективного прироста в жизни от батарейки я не обнаружил, а, если честно, даже показалось, что так оно разряжается чуть быстрее, чем с 768. Наверное с большей частотой некоторые задачи в фоне отрабатывают быстрее, и проц снова уходит на 254, в режим энергосбережения. Так что методом проб и ошибок были подобраны данные профили, с ними аппарат работает примерно столько же, сколько и под WinMo.
Теперь, когда мы имеем настроенные профили энергосбережения, отцепляемся от USB, вываливаемся на рабочий стол (надо нажать кнопку с «домиком» которая под экраном), пролистываем его до Current Widget, смотрим на цифры и ужасаемся смело жмем один раз на «повесть трубку». Экран потемнел, телефон перешел в режим ожидания. Дадим ему полежать так минуты 2-3, после чего снимем блокировку, пару-тройку раз тыкнем в виджет с «расходометром», откроется окно его настроек, где мы и кликнем «посмотреть логи».
Редактор выбирайте любой, проматывайте в самый низ лога и смотрите. В идеале, энергопотребление должно быть 3-6 мА/ч, но «нормальным» можно считать всё, что меньше или равно 5-7 мА/ч. Редкие скачки до 20-40 мА/ч — вполне допустимы.
Ну и чтоб добить уж до конца — откроем TasKiller, подождем секунд пять, по всем приложениям, не получившим собственной иконки — делаем длинный «клик» и «игнор», это системное барахло, оно нас не интересует. Так же игнорим те приложения, что нам нужны, например — IM и Музыкальный проигрыватель. После открываем параметры приложения (жмем windows-кнопку, появляется панелька, в ней — настройки); ставим галочки напротив hide ignored applications и autokill when screen off.
На этом — всё, можно наслаждаться работой Anroid’а, скачать Angry Birds, похвастаться перед родными… ну в общем всё, что будет угодно, т.к. система полностью работоспособна и более чем стабильна. Спасибо за внимание 🙂
UPD: По просьбам трудящихся добавил файлы на яндекс, в качестве зеркала.
UPD2: Скорость работы так же зависит от класса SD-карты, рекомендуется использовать 4 / 6 и выше.
UPD3: Всем, кто пишет «фу, эмуль»: скоро завершится создание прошивки в NAND, которая полностью заменит WM на данном аппарате.
UPD4: Последние вести с фронта: лучше всего работает на карточках 4 класса приличных производителей, объемом 4/8/16 гигабайт.
UPD5: Не забывайте убрать HSPL, если вам он не нужен или вы решили не использовать Android. Идём вот сюда, открываем первый спойлер (Дополнительный инструментарий для перепрошивки) в нём — открываем второй. А там подробная информация.
Источник
Android htc hd2 ics
Ядро MDJ S6 от 17.11
MDJ S5 от 17.11
MDJ S4 FINAL
hastarin r8.2 от 11.11
MDJ_S3
MDJ_R3
MDJ_S2 fixed
MDJ_R2 fixed
hastarin r8.1 (Overclocked, Undervolted, AXI enabled, CIFS/NFS support) от 07.11
hastarin r8.0 (Overclocked, Undervolted, AXI enabled, CIFS/NFS support, extended battery support) от 30.10
hastarin r7.7 (Overclocked, Undervolted, AXI enabled, CIFS/NFS support, extended battery support) от 27.10
Учитывая, что ядра, в отличии от сборок, очень сильно влияют на стабильность работы системы, имеет смысл устанавливать только новые ядра.
Поэтому здесь приведены описания и ссылки только на последние ядра. Названия старых даны для общего развития 🙂
Сообщение отредактировал GarryBig — 29.11.10, 18:49
HtcClay’s SuperHD2 V1.3 [michyprima RC10] noSense от 19.09.2010
Сообщение отредактировал GarryBig — 21.11.10, 19:29
Bangsters V1.4 [michyprima R11] RMNET + PPP + (AXI/NOAXI) + EVO noSense от 20.09.2010
Сообщение отредактировал GarryBig — 21.11.10, 19:34
Easier to list whats NOT working:
— Camera (app closes itself)
— Ebook reader (E-Books do not open)
— Ringtones (Unable to select a ringtone, get a force close error)
— Video playback from SD card is slow, needs rectifying
— LED Notifications are bizzare, sometimes they work and sometimes they don’t
// Creates a 1gb data.img (takes a long time to make on first boot, be patient. No, the HD2 has not crashed despite what the screen looks like! Wait 10 minutes or so.)
// Don’t worry about FB console not showing, that’s normal
// This shouldn’t really be considered as a build for daily usage, still experimental
// Copy the Android folder to SD card, run CLRCAD.EXE and haret.exe on your HD2
Git diff patches included, Thanks to gauner1986 for sharing his patch (and also correcting my mistake with PPPD )!
Thanks to mattc for support!
Thanks to football for the dump!
Thanks to the usual suspects at #htc-linux and #htc-linux-chat!
Kernel Tree: http://www.gitorious.com/linux-on-wi. x_on_wince_htc (Kernel compiled on 19/09/2010 by darkstone)
Diff patches used in the kernel provided are included in the build, found in the /Android/diff/ folder.
Сообщение отредактировал GarryBig — 21.11.10, 19:44
mattc Leo + Froyo w/Sense 1.8 [KiNgxKernel #5] withSense от 21.09.2010
Сообщение отредактировал GarryBig — 22.11.10, 12:06
mattc EvoLeo v1.0 [KiNgxKernel #5] withSense Внимание! Без русификации! от 21.09.2010
This is a brand new build. I have based it on the official HTC EVO rom and tweaked it for the HD2. The rootfs will create a 1GB data image.
The EVO base is friendlier to the non-trackball phones.
Important note: after booting Haret you will notice strange lines on the screen. This is normal, be patient and it will boot.
What is working:
Louder sound over speakerphone and headset
Very stable and fast internet over PPP. Hard freezes are completely eliminated
Light sensor
Touchscreen/Gsensor Freezes Eliminated
Bluetooth Streaming Media/Phone
Wifi
Wifi/USB tethering
USB transfers
EDGE/3G/HSDPA Internet
Camera (flash is buggy)
Standard Definition Camcorder w/flash
LED Keypad Lights and Charging Indicator
No more green line in HQ YouTube
All other items working on other builds, too many to list
What’s Added that you won’t get in my other build:
EVO keyboard with directional buttons
Proper HTC camera interface with working previews
Additional downloadable sense Widgets are working
Ringtones, notifications, etc. work without additional media folder (no more ringtones with your music!!)
Known Issues:
The camera flash is premature causing dark photos in low light
You may need to enter a manual DNS address when using WIFI tethering
There are menu items for 4G. The hardware doesn’t support 4G, they will fail.
Notification led is flaky, works at times, not at others. Don’t rely on it.
Tips:
Use SetCPU for better battery life.
Turn off live wallpaper for better performance and battery life.
I have included a Task Manager. Learn to use it religiously to improve battery life.
Other Notes:
CPU scaling is enable by default without SetCPU. This kernel cannot be overclocked.
I have included Astro File Manager as well as a Task Killer.
Installation Instructions:
Unzip the contents to your SD card. All of the files should extract into a folder named «Android».
Use an autoloader or, in Windows Mobile, browse to the Android folder on your SD card and run CLRCAD.exe, then Haret.exe.
Let Android boot. The first boot is always the longest and larger data sizes require longer times.
Enjoy Android.

Сообщение отредактировал GarryBig — 21.11.10, 20:19
JDMS 1.3 FRF91 Latest Stable Nightly [michyprima RC11] WITH AXIS noSense от 21.09.2010
Сообщение отредактировал GarryBig — 21.11.10, 20:25
HyperDroidV1.6 CM6 [michyprima R11] +AXI Fast,Stable,Latest noSense от 26.09.2010
Bleeding Edge Stuff (Newer code than the Current FRG33)
V1.6:
-Updated Base to Latest Stable September 20 Nightly
-Updated Twitter
-Updated Gmail
-Updated Adobe Flash
-Tightened Up the Elements of the ROM
-Small Tweaks & Fixes
-gauners’ fixed liblights
-newest haret
-and lots more.
V1.5:
-All Settings work (WiFi Proxy, etc.)
-Even Better Battery Life
-Media Playback Tweaks
-Smoother Graphics (thanks to darkstone)
-Support for Extended Battery
-Latest Haret by NetRipper
-New DSP Manager. (more control over the EQ)
-Long Press Back to Kill Foreground App
-Quiet Hours
-Swipe Latest Notifications to Clear (Doesn’t work for Ongoing Notifs)
-New Dialer (More updates through Patches to be released soon)
-Updated Maps (remove Brut.all since you can install this yourself, Install Street from market separately)
-Updated Theme to include MattedBlues+MattedGray Stuff 🙂
-and lots more «under the hood». What’s Tested & Working:
— Wifi
— GPS
— 3G
— LED Lights & Keypad Lights
— Camera with flash properly exposed
— Bluetooth
— 2D/3D Games (Gameloft, Com2Us, EA, CamelGames, etc.)
— Everything thats working on other builds
What Probably Doesn’t Work (or works but is unreliable) :
— WiFi Tethering is not reliable (new feature in development)
— USB Tethering is not reliable (works well with Easy Tether!)
Known Issues:
— If you get «unable to mount sdcard» simply replace «set cmdline «rel_path=YourBuildFolderName»» with «set cmdline «rel_path=YourBuildFolderName loop_partition=mmcblk0″» in the startup.txt
— Dropped Mobile Data Connections due to buggy PPP (will be fixed in the future, just like most things)
— Touch Screen Freezes when G-Sensor is overloaded (games like Abduction and other Accelerometer dependent Games). workaround is to use Portrait mode only.
Сообщение отредактировал GarryBig — 22.11.10, 03:17
NexusHD2-FRG83_V1_(Froyo 2.2.1) [michyprima R11] noSense от 29.09.2010
* «Stock» build except banning ads (hosts file is replaced)
* Use michyprima’s R11 Kernel with AXI scaling (support for extended batteries)
* Creates 512 MB data.img (You can specify the different data image size in startup.txt)
* Superuser privileges (su and busybox) included
* Some apps included (Delete any apk files in the AndroidApps folder before first boot if you don’t like any of them.)
* Disable «auto-rotate screen» in «Display settings» if encountering the touchscreen freeze.
What is working:
* WiFi
* GPS
* 3G/HSDPA
* 5MP Camera with flash
* Camcorder
* Bluetooth
* LED status notification
* Keypad LED control
* WiFi Tethering/Hotspot
* USB Mass Storage (Only copying files from SD card to PC is working correctly.)
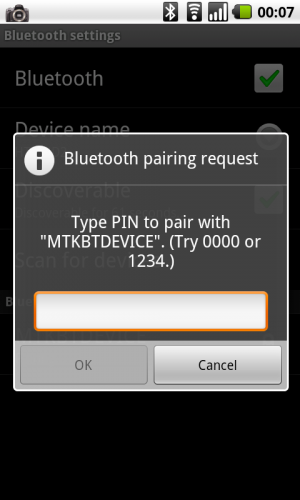
* Bluetooth calling (Someone has to test since I have no BT headset to test with.)
* Compass is inaccurate, this is known.
* Use SetCPU to overclock. The max default is set to 998MHz.
* Turn off live wallpaper for better performance and battery life.
* I have included the following apps in the AndroidApps folder, they will be installed at first boot:
o Battery Indicator 3.0.1.apk
o ES File Explorer 1.4.6.apk
o Superuser 2.3.6.1.apk
o TasKiller 3.3.3 Free.apk
o TeslaLED Flashlight 2.0.3 Droi.apk
1. Extract the Android folder (with all files in in) to root of your SD Card. THIS IS IMPORTANT.
2. If you already have an Android folder on your SD Card DELETE IT OR RENAME IT, because this version MAY BE INCOMPATIBILE with older releases .
3. After copyng everything to your SD Card ensure you have at least 600 Mb free space for data store
4. After you have done all steps go into Android folder and tap CLRCAD (for working sound), and after that just tap HaRET.
5. On first run when there is «Creating a new datastore» just give it time to complete, and on first boot be patient and give it time to load everything.
6. If you get some strange errors, or Android does not work, try to reformat SD card and try everything from the start.
Сообщение отредактировал GarryBig — 22.11.10, 03:22
Core Droid V0.4R Froyo / EVO Sense [michyprima #R11] withSense от 29.09.2010
Сообщение отредактировал GarryBig — 22.11.10, 03:26
FroyoStone Sense — V3.1 withSense от 29.09.2010
Сообщение отредактировал GarryBig — 22.11.10, 04:48
HyperDroidSenseV1.1 [hastarin r4.1] withSense от 29.09.2010


Сообщение отредактировал GarryBig — 22.11.10, 04:57
phireMOD SkinnyEVO v1.2b [hastarinl r4.1 or r7] | Stock Theme | Sprint-Free | FAST SENSE withSense от 30.09.2010
Features:
— Sprint-free! Removed all stock Sprint apps
— Removed other bloatware
— Changed boot animation
— Working G-sensor (do not calibrate!)
— Working light sensor
— Bluetooth, Wifi, Data
— Speaker is nice and loud
— 3MP Evo camera and 5MP Nexus camera included
— As per the developers request, SetCPU IS NOT included in this ROM. To get speeds similar to the included screenshot, please download the latest version of SetCPU
— Hastarin Kernel 4.1 or R7
— 1GB Data.img included
Check the changelog below for updates!
Installation:
— Place «Android» folder on the root of your SD card
— With keypad lights on, run «CLRCAD.exe» then «haret.exe»
— First boot will take up to 15 minutes
— Wait to unlock screen until it says to (with blinking arrows)
— After setup, let Google finish syncing before doing anything else
— Wifi may need read «error» after turning on. Try again and it will work.
— Enter APN information manually to get Data working properly.
To get data working:
1. Go to Settings > Wireless & Networks > Mobile Networks > Access Point Names
2. Press the menu button and choose «New APN»
3. Enter your provider-specific information (Google is your friend
4. Press menu and select «Save»
5. Press the radius button next to your new APN and you’re good to go!
What doesn’t work:
— Camera Flash is still premature
— 011 dialing issue for non-US users (temporary solution found in this thread)
— G-sensor doesn’t respond well to being calibrated. Some have said that calibrating the phone facedown works, but this needs to be confirmed.
Сообщение отредактировал GarryBig — 22.11.10, 05:05
NexusHD2-FRG83 V1.2 [michyprima’s R11] noSense от 01.10.2010
* «Stock» build except banning ads (hosts file is replaced)
* Use michyprima’s R11 Kernel with AXI scaling (support for extended batteries)
* Create 512 MB data.img (You can specify the different data image size in startup.txt)
* Superuser privileges (su and busybox) included
* Some apps included (Delete any apk files in the AndroidApps folder before first boot if you don’t like any of them.)
What is working:
* WiFi
* GPS
* 3G/HSDPA
* 5MP Camera with flash
* Camcorder with flash
* Bluetooth
* LED status notification
* Keypad LED control
* WiFi Tethering/Hotspot
* USB Mass Storage (Only copying files from SD card to PC is working correctly.)
* Bluetooth calling (Someone has to test since I have no BT headset to test with.)
* Compass is inaccurate, this is known.
* Disable «auto-rotate screen» in «Display settings» if encountering the touchscreen freeze.
* Use SetCPU to undervolt and overclock. The max default is set to 998MHz.
* Turn off live wallpaper for better performance and battery life.
* I have included the following apps in the AndroidApps folder, they will be installed at first boot:
o Battery Indicator 3.0.1.apk
o ES File Explorer 1.4.6.apk
o Fancy Widget 1.3.0.apk (Time & Weather)
o Superuser 2.3.6.1.apk
o TasKiller 3.3.3 Free.apk
o TeslaLED Flashlight 2.0.3 Droi.apk
* About 3G/HSDPA:
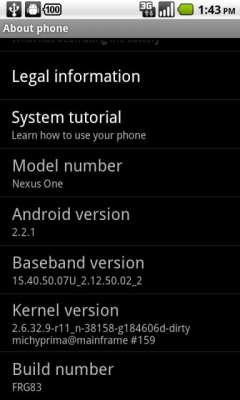
o The stock Nexus One ROM only shows 3G icon in the status bar no matter if you are in HSDPA or not.
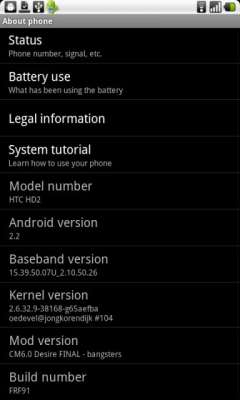
o You can check under «Settings > About phone > Status > Mobile network type». If it says HSDPA, you are on the 3.5G network («H» Network).
* Please install MoreLocale 2 from Android Market to enable more languages if needed.
1. Extract the Android folder (with all files in in) to root of your SD Card. THIS IS IMPORTANT.
2. If you already have an Android folder on your SD Card DELETE IT OR RENAME IT, because this version MAY BE INCOMPATIBILE with older releases .
3. After copyng everything to your SD Card ensure you have at least 600 Mb free space for data store
4. After you have done all steps go into Android folder and tap CLRCAD (for working sound), and after that just tap HaRET.
5. On first run when there is «Creating a new datastore» just give it time to complete, and on first boot be patient and give it time to load everything.
6. If you get some strange errors, or Android does not work, try to reformat SD card and try everything from the start.
>>>> All apps will now function and install correctly. If you have an issue installing an app from the Android Market or another source, then go through the following steps:
>>>> — Go to Settings > SD & phone storage > Unmount SD card
>>>> — Now install your app, it will now install correctly and function fine
>>>> — Go to Settings > SD & phone storage > Mount SD card
My HD2 WinMo Info (on this version rom was tested)
ROM: Stock 1.48.709.2 CHT
Radio: 2.12.50.02_2
Сообщение отредактировал GarryBig — 22.11.10, 05:18
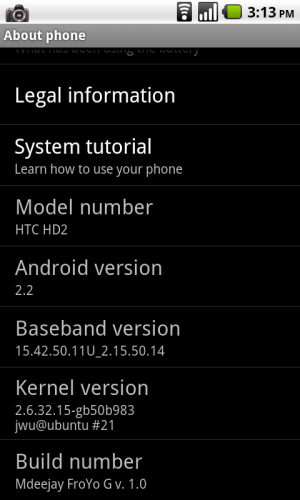
Mdeejay FroYo G v.1.0|1.19.531.1 [huanyu#21] от 08.10.10
Features:
Kernel from huanyu #21
Without Sense
Only English & Spanish languages
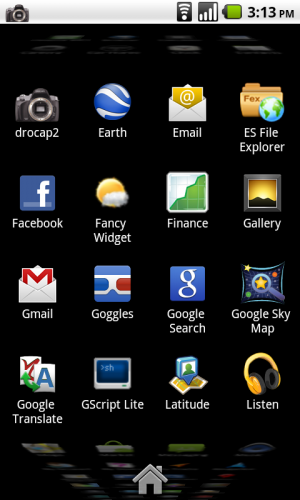
Apps:
ES File Explorer
Task Killer
G-Script Lite
Fancy Widget 1.30
Google Sky Maps
Finance
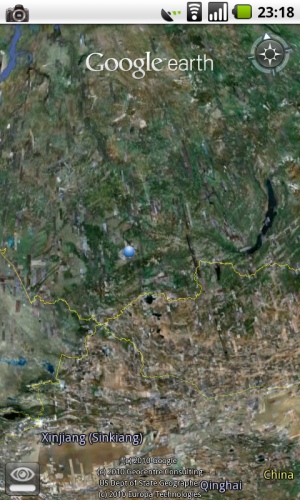
Earth
Maps
My Tracks
Navigation
Listen
Photobucket
Speed Test
Superuser
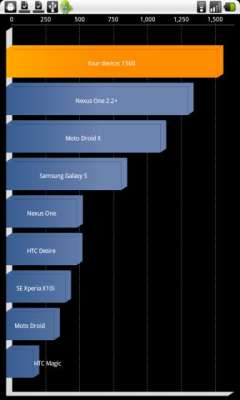
Quadrant
What’s Working:
Lightsensor
Compass
G-Sensor
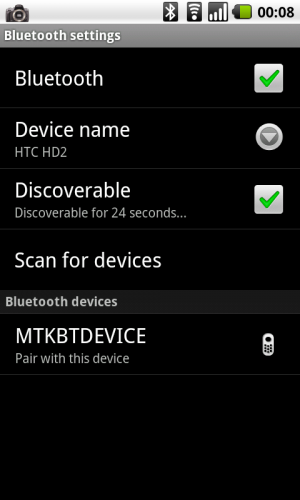
Bluetooth
GPS
Wi-Fi
USB Data Storage
3G/HSDPA Internet (PPP only)
LEDs
All other items working on other builds
What’s Not Working:
Camera
NEED ONLY NEW INSTALL
Installation:
— Place «Android» folder on the root of your SD card
— With keypad lights on, run «CLRCAD.exe» then «haret.exe»
— First boot will take up to 10-15 minutes
— Wait to unlock screen until it says to (with blinking arrows)
Instructions on APN settings:
1. Settings > Wireless & Networks > Mobile Networks > Access Point Names
2. Push ‘Windows’ button, choose ‘New APN’
3. Enter all relevant information for your specific provider, you can likely google it.
4. When everything is entered, push ‘Windows’ key again, then ‘Save’.
5. Push on the radius button next to the new APN you created, it should turn green.


Сообщение отредактировал GarryBig — 22.11.10, 05:41
MCCM SE 2.5 withSense от 09.10.2010
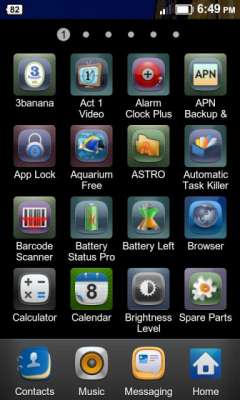
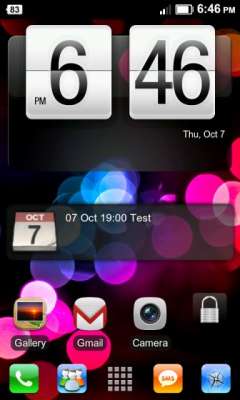
Три версии UI
Fede.launcher-1 (Iphone iOS style)
LauncherPro (HTC Sense style)
Twlauncher-1 (Samsung Galaxy S style)
См.Скриншоты
1 GB memory
Full Ram
No freeze untill now
Camera 5mp (with flash), Video camcorder, market. all works
In Call loud (same time u had to lower the volume)
G-Sensor
Wi-Fi
Wi-Fi Hotspot
USB Tethering
USB Modem
USB Data Storage
LEDs
GPS
BT
Youtube
All other items working on other builds
Not Working:
FM Radio (can replace by internet Radio widget)
Going to settings/SD card and phone storage causes
сли есть проблемы с установкой программ
1-install Terminal Emulator
2-u should have Superuser to get to root
3-open Terminal Emulator
4-Press window button/Preferences/initial command
5-write
#su (enter)
fix_permissions (enter)
reboot
all application force close will vanished


Сообщение отредактировал GarryBig — 22.11.10, 11:52


Сообщение отредактировал GarryBig — 22.11.10, 11:58
NexusHD2-FRG83 V1.3 [michyprima R11] noSense от 12.10.2010
Release Notes:
V1.3
Add DSPManager app and related lib
Add some tweaks for Bluetooth headsets and replace some Bluetooth related libs
Bluetooth headset is fully supported in calls, music streaming/A2DP, and files transfer now. (But some BT headsets may not be compatible with this build.)
«Stock» build except blocking ads (hosts file is replaced) and adding «H» (HSDPA) icon and battery % icon
Use michyprima’s R11 Kernel with AXI scaling (support for «extended batteries»)
Create 512 MB data.img (You can specify the different data image size in startup.txt)
Rooted: superuser privileges (su and busybox) included
Some apps included (Delete any apk files in the AndroidApps folder before first boot if you don’t like any of them.)
(Что работает:)
WiFi
GPS (works great. I got a location within 15 seconds.)
3G/HSDPA
5MP Camera with flash
Camcorder with flash
Bluetooth (BT headset is fully supported in calls, music streaming/A2DP, and files transfer.)
LED status notification
Keypad LED control
WiFi Tethering/Hotspot
USB Mass Storage (Only copying files from SD card to PC is working correctly.)
Compass is inaccurate, this is known.
(Дополнениe)
Disable «auto-rotate screen» in «Display settings» if encountering the touchscreen freeze.
Install SetCPU to overclock. The default is set to 245MHz
998MHz.
Battery power consumption is about 1.5
2% per hour with the following SetCPU settings:
Main Tab: 1152max/245min, «conservative» Scaling, and check «Set on Boot»
Profiles Tab: check «Enable», and add «Screen Off» with 245max/245min powersave (Priority 50)
Turn off live wallpaper for better performance and battery life.
Install LauncherPro for a smoother home screen.
About 3G/HSDPA:
The stock Nexus One ROM only shows 3G icon in the status bar no matter if you are in HSDPA or not.
You can check under «Settings > About phone > Status > Mobile network type». If it says HSDPA, you are on the 3.5G network («H» Network).
With v1.3, I have included FRG83_stockbar_add-on_H_icon_and_battery%_icon.zip in the «Android/root» folder.
If you don’t like this add-on, please delete the folder named «root» located in the «Android» folder.
Please install MoreLocale 2 from Android Market to enable more languages if needed.
(Установленные приложения)
Battery Indicator 3.0.1.apk
DSPManager 1.0.apk
ES File Explorer 1.4.6.apk
Fancy Widget 1.3.0.apk (Time & Weather)
Superuser 2.3.6.1.apk
TasKiller 3.3.3 Free.apk
TeslaLED Flashlight 2.0.3 Droi.apk


Сообщение отредактировал GarryBig — 22.11.10, 13:18
Mdeejay FroYo Lex v.1.1|1.33.605.1 [hastarin R7.2] от 14.10.10
What’s Working:
Louder sound
Lightsensor
Compass
G-Sensor
Bluetooth
GPS
Wi-Fi
Wi-Fi Hotspot (3G Mobile Hotspot)
USB Tethering
USB Modem
USB Data Storage
HTC Sync / Media Sync
3G/HSDPA Internet (PPP only)
LEDs
All other items working on other builds
What’s Not Working:
Camera
Applications:
— Terminal Emulator
— GScript Lite
— Quadrant
— SpeedTest
— Maps
— EA Tetris (Demo)
— TaskKiller
— droCap 2
— ES Explorer
DO NOT CALIBRATE G-SENSOR!
Do not set Global Mode
Installation:
— Place «Android» folder on the root of your SD card
— Run «CLRCAD.exe» then «haret.exe»
— First boot will take up to 3-5 minutes (with data.img)
— Wait to unlock screen until it says to (with blinking arrows)
v. 1.1:
— Based on RUU v. 1.33.605.1 (13.10.2010)
— Back to stock fonts
v. 1.0.1:
— Added Auto APN
— Fix G-Sensor
— Other minor fixes
v. 1.0:
— First Release


Сообщение отредактировал GarryBig — 22.11.10, 13:47
FroyoStone Sense — V3.2 [linux_on_wince_htc 2.6.32.15] withSense от 17.10.2010
ARNING:
If you post in this thread knowing fine well that this is a HTC Sense build and you complain about sense anyway, then I will ignore your post completely.
If you want to update the kernel, I would recommend kernel builds by hastarin which has tweaks. http://forum.xda-developers.com/showthread.php?t=787588
If you have music stuttering, use this fix: http://forum.xda-developers.com/showthread.php?t=811248
If you have issues with data/PPP, look here for support: http://forum.xda-developers.com/showthread.php?t=794309
The problem is due to the combination of the EVO kernel and stagefright.
HTC Desire Sense build (FroyoSense V3.2) (Based on stock, no modification apart from camera app and superusers app) for HTC HD2 by darkstone:
My goal is to make a build that is close to stock as possible, but also has everything working. I’m getting there
Everything should be working, should be fast. Very fast.
Changelog for V3.2:
Fixed PPP disconnects (updated lib_htcril_wrapper)
Added more APN’s (T-Mobile users, I’m looking at you for cluttering up my thread )
Updated kernel to latest EVO commit as of 17-Oct-2010 00:44 from here: http://oe.netripper.com/files/htcleo. uild_evo_tree/
Re-enabled Stagefright for videos.
Some performance tweaks.
Camera flash now work correctly, this is fixed in the kernel.
If you are already using FroyoStone v3.1, you can upgrade to v3.2 easily, all you need to do is overwrite the system.ext2 and the zImage files on your SD card with the ones in this update. DO NOT REPLACE THE DATA.IMG IF YOU ARE AN EXISTING USER AND WANT TO KEEP YOUR FILES.
Included 1GB data.img by default, saves time waiting for your phone to create a 1GB data.img. Delete the included one if you want, the phone will create a new one.
If this is your first time running FroyoStone, you will need to reboot after completing setup for the first time. Users upgrading to v3.2 do not need to do this.
Notes:
A popup may show after taking a picture with the camera, this is normal. If you want to avoid seeing this, change the camera settings for Review Duration from 5seconds to off.
Cam is limited to 3mpx, partly due to the kernel and also the camera apk. I need to speak to AdamG and see how he fixed this when he ported Sense camera to Nexus One. IIRC he modified the HTCCamera.apk file.
720p video recording does not work, seems like H264 encoding is fudged. H263 seems fine, record fine at 800×480 resolution.
Wifi hotspot app is working fine
Make sure to reboot after first boot, apps needing root access won’t work. Phone calls will have no audio. Make sure you reboot!
// Creates a 1GB data.img if there is no data.img present. I have included a clean 1GB data.img for a quick first boot.
// Don’t worry about FB console not showing, that’s normal
// Copy the Android folder and the media folder to the root of your SD card so that you have two folders on your SD card, run CLRCAD.EXE and haret.exe on your HD2
Just want to point out that the HTC Desire is closest in terms of hardware to our HD2, that’s why I prefer cooking a Desire build and that’s why I will always choose Desire based builds over EVO and Desire HD builds.
Changelog for V3.1:
Fixes youtube green line/video quality issue
Ringtones/alarm sounds included by default, no need to download media.zip
Theme removed, using stock rom with no customizations
GScript removed, no need for it now, no touchscreen freeze
Switched to EVO kernel tree
Dropped FroyoStone Clean, there is no need for it anymore. Just use LauncherPro if you want stock-like home screen
Speed increase
Removed powersave on screen off feature
PPP only, no RMNET for data
Changelog for V2:
— Theme changed, more transparency
— Now creates 1 GB data.img
— PPP is now being used.
— Fixed APN/Sim card changed error.
— Using interactive cpu governor
— Capped CPU scale between 768mhz at the maximum and 245mhz and the minimum by default, use SETCPU to uncap this speed if you wish to benchmark.
— Powersave governor @ 245mhz used by default when screen is turned off.
— Bluetooth Headset now fully supported in calls.
— GPU performance tweaked, games and HTC Sense now run at a higher FPS. Check in NeoCore for difference in FPS between builds.
— Added a Stop G-Sensor and Start G-Sensor to GScriptLite program. Stop G-Sensor to avoid touchscreen freeze when not using the G-Sensor. Start G-Sensor when it is needed.
Сообщение отредактировал GarryBig — 22.11.10, 14:17
Источник


