Android hyper v image
Устанавливаем Android на ваш компьютер/ноутбук через виртуальную машину Oracle VM VirtualBox или VMWare Workstation.
Самая последняя и стабильная версия на данный момент: Android 8.1 Oreo с патчем безопасности 5 января 2019 (сборка образа: 17 января 2019)
Android 9.0 в виртуальных машинах работает очень плохо и в большинстве случаев не запускается, если есть информация о том, как заставить его стабильно запускать, пишите в ЛС, добавлю в шапку.
1. Сама виртуальная машина Oracle VM VirtualBox 5.22 (версия 6.0 на данный момент плохо дружит с Android-x86, пока пользуемся стабильной 5.2)
2. Образ Android. Его скачиваем с сайта Android-x86.org
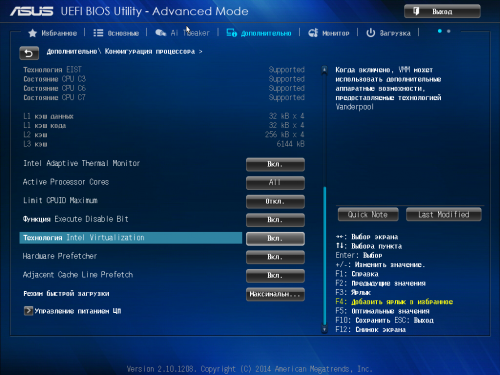
3. Включение функции виртуализации у вашего процессора в биосе вашего хоста (у разных материнских плат и процессоров этот параметр в меню называется по разному, нужно искать, пример на моей материнской плате на картинке)
|
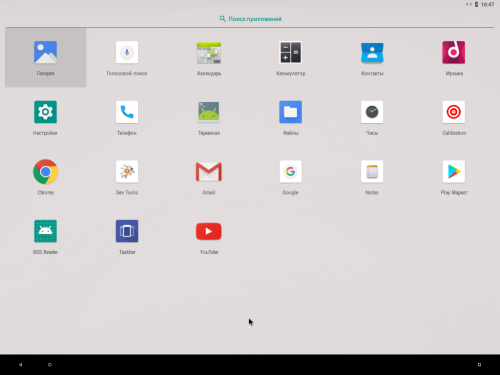
0.1. Скачиваем и устанавливаем программу. 1.1. Создаём виртуальную машину с любым названием, тип системы: Linux, версия: Ubuntu (разрядность не важна). 2.1. Запускаем машину. Теперь у вас есть уже рутированный Android с прошивкой для разработчиков.
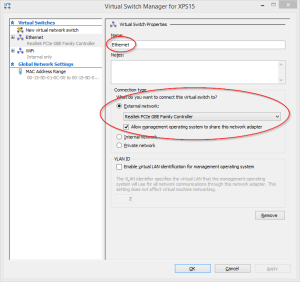
Как изменить разрешение экрана? Она определяет разрешение и количество памяти для цвета. VirtualBox 6.0 не хочет запускать Android Как включить полную поддержку программ, написанных для ARM в Android-x86? Что работает и что не работает в последней версии (Android 8.1)? Сообщение отредактировал Smit7564 — 28.04.20, 22:47 Спасибо, все понятно расписал, +++++++ тебе! Добавлено 31.01.2014, 18:38: Правда можно вместо Virtual box можно использовать ЛЮБОЙ эмулятор. Я лично пробовал через MS virtual pc Источник Using Android-X86 as an Emulator in Hyper-V for WindowsEveryone knows how S-L-O-W and painful the Android emulator can be when developing. The Intel x86 system images are better, but still a bit slow, so most of us test and debug on actual devices. Still, emulators come in handy. In the past, I came across the Android x86 project and thought it would be a good option, but found the project to not be ready for prime time. With their 4.4 release earlier this month, that has changed. It still isn’t straight forward to install, so I am going to document the steps and some of the problems I ran into. InstallationFirst, download the ISO for the 4.4 or newer release Android x86 from the downloads page. Next fire up Hyper-V Manager. I assume you have some experience creating virtual machines using Hyper-V, so I am just going to outline the setup. If you need more info, Google it or check out this quick-start. First, we need to make sure that a Virtual Switch is setup to enable networking. If you haven’t already done it for another virtual machine, click Virtual Switch Manager on the right and create a new External Virtual Switch. Name it something like Ethernet and make sure it is linked to your Ethernet card, not your WiFi.
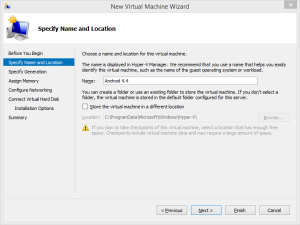
Back in Hyper-V Manager, at the top right, click New, Virtual Machine and name it Android 4.4.
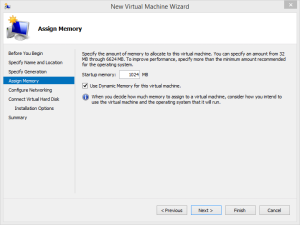
Specify Generation 1 on the next screen, then select the startup memory. You probably want to increase it to 1024 or 2048 MB. Also, select Use Dynamic Memory.
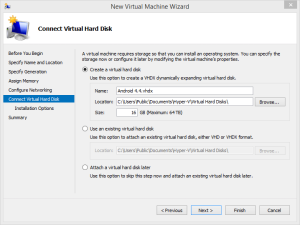
In Configure Networking, select the Ethernet switch we setup previously. On the Connect Virtual Hard Disk page, you can use the defaults, but you will want to decrease the size of the disk to something like 16 GB.
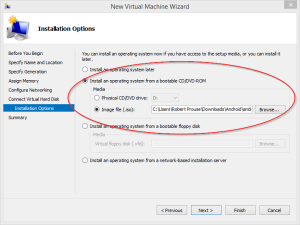
On the Installation Options page, select Install an operating system from a bootable CD/DVD-ROM and select the ISO you downloaded from Android-x86.
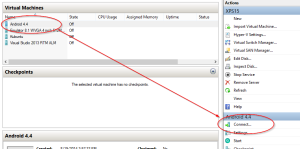
You can now click Next, check out the summary and click Finish to create your new virtual machine. In Hyper-V Manager, click on your new Android virtual machine and click Connect in the lower right.
This will open the virtual machine in a powered off state. Press the Start button in the toolbar to power up and boot the machine. It will boot to the Live and Installation CD screen. Use the keyboard to scroll down and select Installation — Install Android-x86 to harddisk.
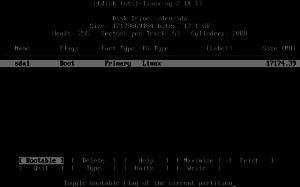
Select Create/Modify partitions,
Use the keyboard to highlight New and press Enter.
Select Primary, then accept the size of the partition, then click on Bootable.
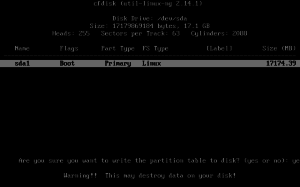
Now, highlight Write, press Enter and type in yes to create the partition. You can now Quit.
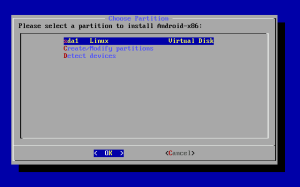
You can now choose sda1 Linux Virtual Disk.
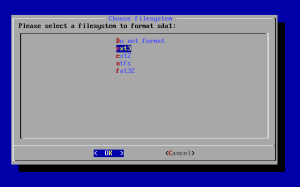
Format as ext3. confirm your selection, then wait while the partition is created. It will sit at 0% for awhile, don’t worry, it will go.
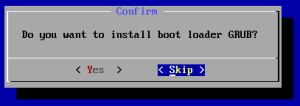
Next you will be asked if you want to install GRUB. Say yes.
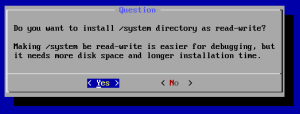
Also say yes to making /system read-write.
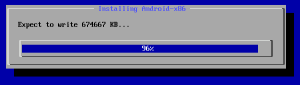
It will now install Android on your virtual disk.
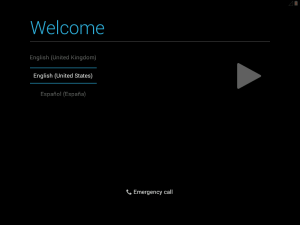
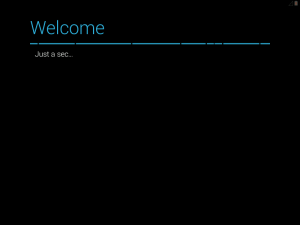
After a successful installation, you will be asked if you want to run Android or reboot. Don’t do either, click on the Turn Off button to shutdown the machine, then go to Media | DVD Drive and Eject the Android X86 ISO. Now press Start to boot the machine. You will see the GRUB boot screen, then it will start booting Android and go to the initial setup. Step through as you would any Android device with a few small points. On the Just a sec progress screen, click the screen with the mouse a couple of times so that it doesn’t time out and lock the device.
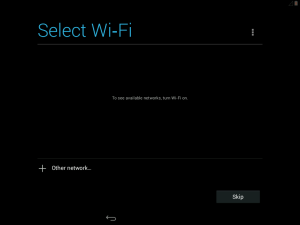
Skip Wi-Fi setup. Your Ethernet card will act like cell data.
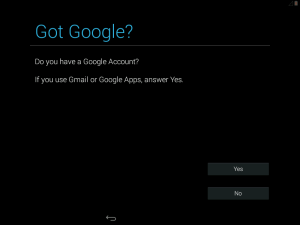
If you have a Google account and want to use it, click Yes, otherwise No.
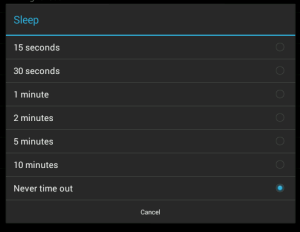
Once you are done the setup, immediately go to Settings | Display | Sleep and set it to never. When Android x86 locks the screen, you cannot get it to wake up in Hyper-V. If anyone figures out how to do it, please post the solution in the comments.
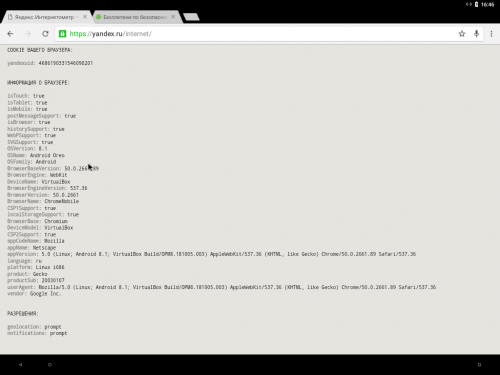
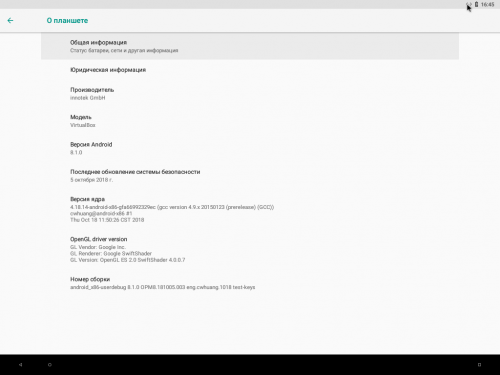
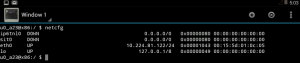
Debugging in Android StudioNow for the fun stuff. Setup the Emulator for DebuggingFirst, we need to enable debugging on the device. Go to Settings | About tablet and click on the Build number 7 times to enable the Developer Options. Go back to settings and open Developer Options and turn on USB debugging. I also find it useful to enable Show Touches in the Input section so that you can see the mouse clicks. Next, go back to settings and into Security and enable Unknown Sources. Connect ADBIn Android, run the Terminal Emulator. The font is probably way too small to see, so go into Preferences and increase the font size. Back in the emulator window, type netcfg and take note of the IP address of eth0.
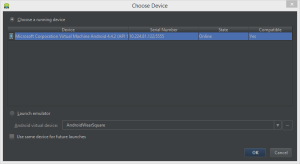
Now, back on Windows open a command prompt (with a path to your Android tools) and type adb connect [ipaddress] with the IP address from the device. Now when you do an adb devices, you should see your emulator listed. Debug Your App from Android StudioLaunch Android Studio and load your project. In the configuration dropdown in the toolbar, select Edit Configurations. In the dialog, click on your app configuration and in the Target Device section, make sure it says Show chooser dialog. Close the configuration dialog. You can now Run or Debug your app and a Choose Device dialog will come up with your emulator listed.
So far, I haven’t been able to adjust the emulator resolution to portrait mode and you can’t rotate the device. From what I can tell, Hyper-V limits the available resolutions to common desktop resolutions. There is also no sound in the emulator and I haven’t been able to get it working with my WiFi card yet, but it is a great option for quick debugging and testing. That’s all there is to it. If you have any solutions, questions or problems, post them in the comments. Источник  Когда к мобильному устройству присоединены наушники  ОС Google Android развивается, и по всему видимому |