- Implementing the Perfect Splash Screen in Android
- Splash Screen is the first screen visible to the user when the application’s launched. It’s a vital screen that will allow the users to have first impressions of the application.
- There are 2 common methods of implementing splash screens and will find the right way:
- Step 1
- Step 2
- Step 3
- Step 4
- Step 5
- Now that our splash is working, what size of the image should I put into a drawable folder?
- Splash screen best practices
- Meet the Jetpack Splashscreen API: a definitive guide for splash screens in Android
- Simple things first
- Showing a splash screen (Old way)
- Fading out the logo
- Showing the splash screen using Core SplashScreen API
- Core SplashScreen API + Animations
- Showing the splash screen using Core SplashScreen API with Jetpack Compose
- Final thoughts
- Exploring Android 12: Splash Screen
- Displaying a Splash Screen
- Setting the Background Color
- Setting the Splash Icon
- Setting the Icon Background Color
- Setting a Branding Image
- Customising the Splash Screen time
- Accessing the Splash Screen
- Wrapping Up
Implementing the Perfect Splash Screen in Android
Splash Screen is the first screen visible to the user when the application’s launched. It’s a vital screen that will allow the users to have first impressions of the application.

A Splash Screen is a screen that appears when you open an app on your mobile device. Sometimes it’s referred to as a launch screen or startup screen and shows up when your app is loading after you’ve just opened it.
When the loading is finished, you’ll be taken to a more functional screen where you can complete actions.
Splash screens appear on your screen for a fleeting moment — look away and you might miss them. The splash screen is one of the most vital screens in the application since it’s the user’s first experience with the application.
There are 2 common methods of implementing splash screens and will find the right way:
- Using Timers (the bad)
- Using a Launcher Theme (The Right way)
Using timer (Our 1st Method) into your activity to display splash, we create a splash activity and create a thread in onCreate() for shows up for 2/3 seconds, then go to our desired activity. Here, see the implementation of this easy method:
The above approach isn’t the correct approach. It’ll give rise to cold starts.
The purpose of a Splash Screen is to quickly display a beautiful screen while the application fetches the relevant content if any (from network calls/database). With the above approach, there’s an additional overhead that the SplashActivity uses to create its layout.
It’ll give rise to slow starts to the application which is bad for the user experience (wherein a blank black/white screen appears).
The cold start appears since the application takes time to load the layout file of the Splash Activity. So instead of creating the layout, we’ll use the power of the application theme to create our initial layout (Our 2nd Method).
Application theme is instantiated before the layout is created. We’ll set a drawable inside the theme that’ll comprise the Activity’s background and an icon using layer-list as shown below.
Do you know when an activity is called Android OS first see in the manifest is there any theme for that activity and load the theme from manifest?
So, we will set a custom theme in Manifest for our splash activity. To create the theme for the splash screen, follow the below process.
Step 1
Create Background for Splash Screen in drawable/splash_background.xml, the bitmap is the image we want to show.
Step 2
Create the gradient onto which your app logo will be placed in drawable/bg_gradient.xml, background can be a gradient or any colour depending on your app.
Step 3
Create Style for Splash Screen in res/values/themes.xml
Step 4
Create an empty Activity named SplashScreenActivity and set the style as the theme for it in AndroidManifest.xml
Step 5
Setting the Intent to your MainActivity.java from SplashScreenActivity.java
As we are loading the splash screen them from manifest, there is no need to setContentView() with any xml layout. If you want to show your splash screen for some amount of time (like five secs) you can create a Handler , also using a timer can help you fetch data from the cloud on your MainActivity which could be a better approach than to show a dialog on home screen.
Using the theme and removing the layout from the SplashScreenActivity is the correct way to create a splash screen 🙌.
Now that our splash is working, what size of the image should I put into a drawable folder?
Always put your app_logo.png into drawable-xxhdpi folder so that your logo automatically scales for all types of phone screens in most cases.
Also, make sure that image resolution is not more than 1000×1000 pixels . It can have less resolution depending on how you want it. Now there are diverse types of splash screen which has multiple logos on various parts of the screen. How that could be done?

From the above example, we implemented our method to create a splash like Twitter, and now to create one like Facebook we just make a slight change to our drawable/splash_background.xml.
Just add as many item to your layer-list you want to place in your splash screen.
Splash screen best practices
Splash screens are simple. They’re used to enhance a brand and give users something nice to look at as they wait. In this regard, here are some best practices for when you design your own splash screen:
- Keep it free from unnecessary distraction
- Don’t use multiple colours or logos
- Use animation sparingly
Hope it helped. Happy Coding 😀
BTW, I solve real-world problems by building useful apps. Have a look at my portfolio .
Источник
Meet the Jetpack Splashscreen API: a definitive guide for splash screens in Android
Splash screens, also called launch screens, are the screens shown by the app as it loads, during the app’s startup. They exist to provide a momentary brand exposure or improve the user experience by showing a preview of the app as it starts, which can reduce the user’s perceived load time.

Branded and preview splash screens as in Material Design docs
On many projects I’ve worked on, in addition to showing the splash screen, we had to animate the transition between splash and first app screen. Depending on the animation type and how we’re showing the first app views, we can have jank or a perceivable delay between the animations. So, we have to choose the right approach accordingly to the use case.
In this article you’ll see how animated splash screens are created in Android and how this should be done now that we have Jetpack’s Core SplashScreen, which backports Android 12 SplashScreen API back to Android Marshmallow (API 23).
Suppose we have to implement the following branded splash screen for an Android app:
Note that we start with a brand image, fade it out and then begin a slide down transition in the start screen. This use case will let us exercise multiple techniques in splash screen display, despite having simple transitions in the design. The animations must run sequentially and a long delay or jank between them is not acceptable.
Simple things first
Let’s start simple: showing what happens in Android when you don’t set up a splash screen. After creating an ‘Empty Activity Project’ in Android Studio, the main activity layout was adjusted to have the same design as the start screen reference. Nothing was made regarding the splash screen.
This is how it’s displayed up to API level 30:
As we didn’t add nothing to set up a splash screen yet, a black screen is shown while the main activity is loading.
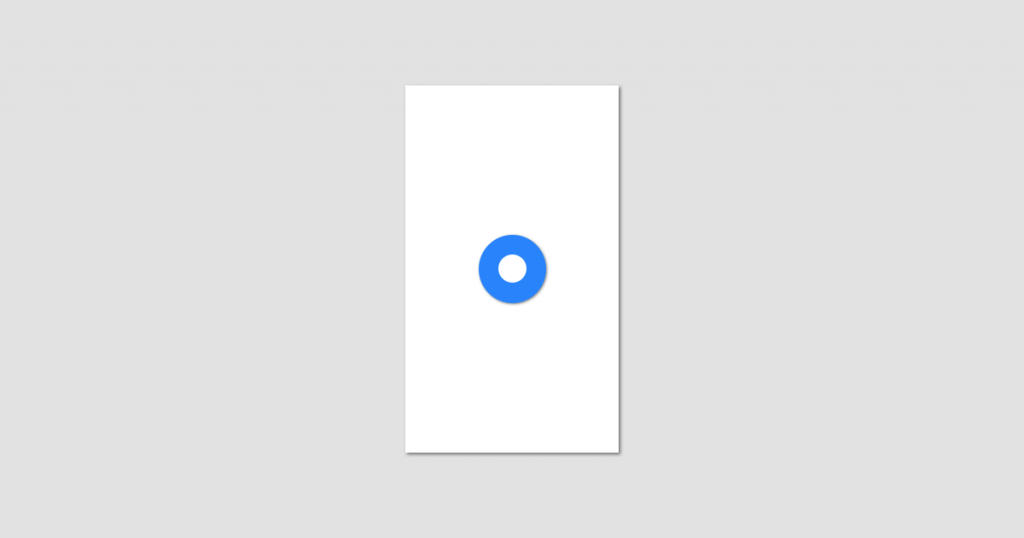
Important: On an Android 12, a static branded splash screen was automatically displayed, using a centered app icon without any effort at all. Nice improvement!
 Automatic static splash screen on Android 12
To repeat this step, clone the following branch in Github’s repo: github.com/tgloureiro/animated_splashscreen_android/tree/step1_no_splash
Showing a splash screen (Old way)
The traditional way of defining a splash screen in Android, is setting a window background to the the activity being launched. As the content is not attached to it yet, the window background is fully visible while the activity is loading. After it loads, content view is set inside the onCreate() method and it’s views starts being rendered.
Therefore, to show the splash screen we have to set up the window background in the theme being used by the activity:
Exit fullscreen mode
If we need the splash screen to have a logo centered over some background drawable, we can use a LayerDrawable , that allows us to specify a list of drawables that is drawn in the order they’re declared. In this example, we have a flat colored background with the logo centered in the screen. The use of android:gravity informs the platform to center the second drawable in the middle of the screen.
Exit fullscreen mode
For the splash background, we can use any type of drawable. For this example, we’ll use a solid color. The color can be specified directly in the layer list, instead of pointing to another Drawable as we did here
Exit fullscreen mode
This is the old way of doing a splash screen and it’s recommended up to API Level 22, the ones not covered by the new Core Splash Screen API.
Fading out the logo
There’s an easy way of implementing the splash screen’s fade out after activity loading: we can have the illusion of a logo fade out making a cross-fade between the splash screen and the screen background without the logo. We can do it using a TransitionDrawable . A transition drawable allows us to define two drawable layers and easily cross-fade between them using the startTransition(int) method.
Exit fullscreen mode
We have to perform the following tasks:
- Check if the splash screen was not displayed, otherwise we just set content view
- Get a reference to the window background and start the crossfade transition
- Launch a coroutine and after waiting for the animation duration, set the content view
Exit fullscreen mode
Check how it is rendered in a phone:
To repeat this step, clone the following branch in Github’s repo: github.com/tgloureiro/animated_splashscreen_android/tree/step2_fade_out_splash
Showing the splash screen using Core SplashScreen API
The Core Splash Screen API provides a way of defining the elements we have in the Splash Screen. To setup a splash screen, you have to do the following steps:
1- Setup a style with Theme.SplashScreen as a parent, in themes.xml
Exit fullscreen mode
2- Setup windowSplashScreenBackground, windowSplashScreenAnimatedIcon as the background and the centered logo in the screen
Exit fullscreen mode
3- Setup the theme to be displayed in activity after the splash screen
Exit fullscreen mode
4- In build.gradle, change your compileSdkVersion to «android-S» (to be changed to apiLevel 31 with the release of Android 12) and include the library in dependencies.
Exit fullscreen mode
5- Finally, in the MainActivity (or the entry point for your app) you just have to call installSplashScreen() before setContentView()
Exit fullscreen mode
Very straightforward, huh? With these simple steps you’ll be showing your splash screen from API23 to Android12.
Core SplashScreen API + Animations
In Android 12, the logo itself can be animated using AnimationDrawable or AnimatedVector . The AnimationDrawable works similar to a classical animation which you have to represent
frame by frame and duration for each one. AnimatedVectorDrawable let’s you describe your animation that will be interpolated by the framework.
The backported version of the Core Splash Screen API doesn’t support animations on the logo yet. But we can implement a fadeout animation after splash’s exhibition and I’ll show how to implement it using this API.
We have to perform the following tasks:
- Check if the splash screen was not displayed, otherwise we manually set the theme and the content view
- Install the splash screen and listen for the ExitAnimation event
- Get a reference to the the logo, fade it out, remove the splash and set content view after it finishes
Exit fullscreen mode
Check how it is rendered in a phone:
To repeat this step, clone the following branch in Github’s repo: github.com/tgloureiro/animated_splashscreen_android/tree/step3_core_splash_api_fade_out
Showing the splash screen using Core SplashScreen API with Jetpack Compose
The splash steps are pretty much the same, except we use Compose’s setContent<> instead of setContentView(int) . That’s it.
The challenge here is to replace the start screen animation, originally made using MotionLayout, with one made using Compose. We can use an initially invisible AnimatedVisibility Composable and make it visible in the first pass using a LaunchedEffect. Making it visible will start the animation as described in the widget.
Exit fullscreen mode
Check how it is rendered in a phone:
To repeat this step, clone the following branch in Github’s repo: github.com/tgloureiro/animated_splashscreen_android/tree/step4_core_splash_jetpack
Final thoughts
The new Jetpack Core Splashscreen API provides a default way to create splash screens back to API23, with useful mechanisms we can use to know whether the loading ended and a way to continue showing the splash if we want to do additional work after starting the activity. The results are similar to what we had before, with the benefit of reduced boilerplate and compatibility with new Android versions.
Источник
Exploring Android 12: Splash Screen
With the Android 12 beta now available, we’re starting to learn more about the new features that the latest version of Android gives to us. One of the things that caught my eye here is the introduction of a Splash Screen API – not only providing a standardised way for apps to present splash screens within their apps, but also improve the user experience when it comes to launching apps. I’m in the process of getting the Compose Academy app ready for launch, whilst also ensuring things are working properly against the Android 12 APIs – so this was a great chance to learn about the the Splash Screen APIs.

You may be thinking, I see many splash screens for apps that look great! While that is true, a lot of the time this requires developers to create their own Splash Screen classes. These sometimes only serve the purpose of displaying some form of branding on screen, or even handle more complex scenarios such as performing app initialisation and fetching data before the user is taken into the app. There are also the cases to take into account where apps do not even setup some form of splash screen – because the user may be coming from a cold or warm start when launching an app, this doesn’t always result in a smooth experience. For examples sake, let’s look at what an app will currently look like if you do not setup some kind of splash screen.
Personally, this feels a little janky! I get shown a blank screen which doesn’t display any kind of branding while I wait for my app to launch – this isn’t the best experience when it comes to taking the user into our app.
What a lot of apps started doing here was utilising the android:windowBackground attribute inside of a theme, allowing you to essentially set the content that was going to be shown in this blank space while the app loaded. Now, this isn’t exactly official support for “splash screen” content, but is more of a way to avoid that blank space from being shown on screen.

Now while this doesn’t provide a smooth transition into our app, this definitely looks better than before! The only thing to note here is that because this is just applying some theming to the background of the window, the launch time is going to remain the same – so if we were doing some kind of application setup, we would still need to add some additional changes to have support for these requirements.
In API level 26, we saw the introduction of the android:windowSplashScreenContent attribute. This can be used to show some content as a splash screen while your app is being launched. While this again doesn’t handle the scenario where we might need to handle initilization of our app during this time, it provided a smoother splash screen display and entrance into our app.
Now come Android 12, we have the new Splash Screen APIs. Without using any of the further customisation that these APIs provide, we can see that we still have a very similar smooth experience that we saw from the attribute added in API 26 except this time out-of-the-box:
While this doesn’t look too different from the attribute we saw introduced in API 26, in the Android 12 we get access to more attributes that allow for further customisation of our Splash screen. These attributes allow us to customise our splash screen in ways that was not previously achievable without providing a custom splash screen activity.
Over the following sections, let’s take a look at how we can utilise these to provide a customised experience for the launch of our app.
Displaying a Splash Screen
While in previous API versions we needed to provide some form of resource as a theme attribute to be used for the content of our window or splash screen content, this is no longer a requirement when it comes to Android 12. So it’s important to know that your launcher activity will display this new Splash Screen by default – so if you are currently presenting a custom splash screen in your application, you will need to adapt to these changes coming in Android 12.
While the Splash Screen APIs offer a collection of attributes which can be used to fine tune your Splash Screen appearance, if you do not provide values for these then default values and resources from your application will be used. For examples sake, here is the default splash screen displayed when launching my app on a device running Android 12:
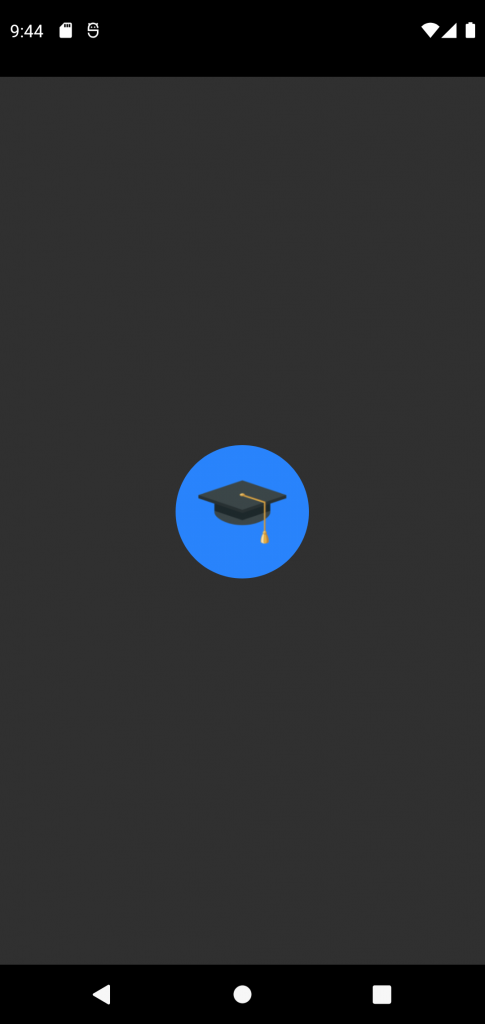
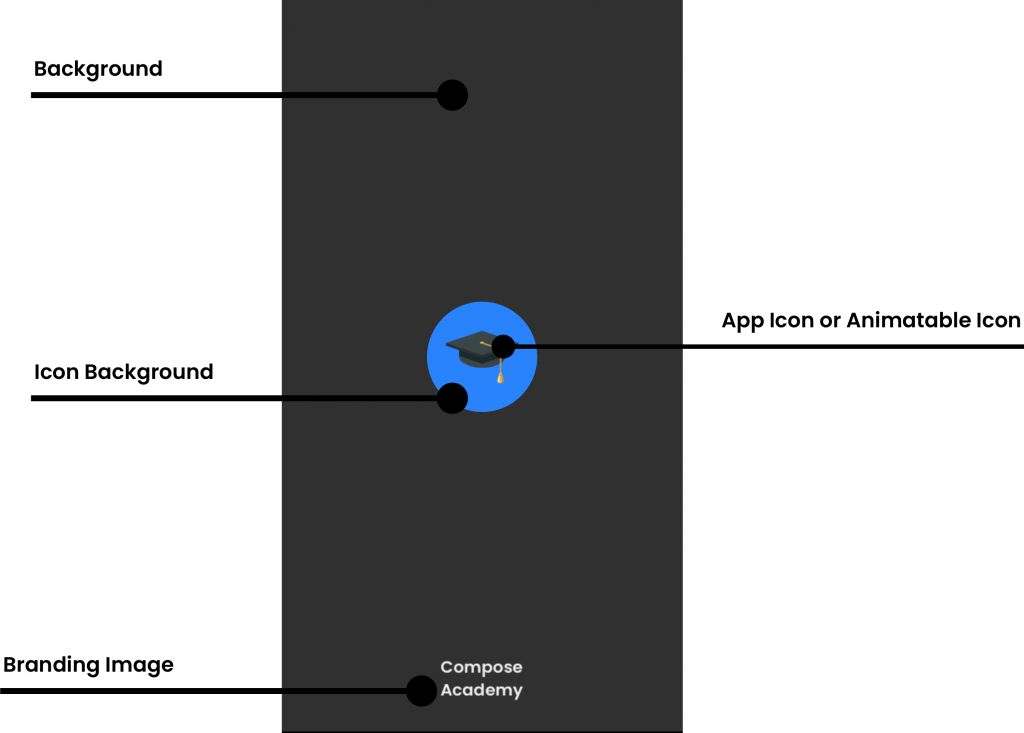
We can see a couple of things here when it comes to the display of the splash screen – the icon for my application is displayed on top of a background color. In my application I am using an adaptive icon and it appears as though the Splash Screen is directly using that adaptive-icon xml reference to display the icon within the screen. I know this because when I changed the color of the background layer for my launch icon, this was reflected in my splash screen.
Setting the Background Color
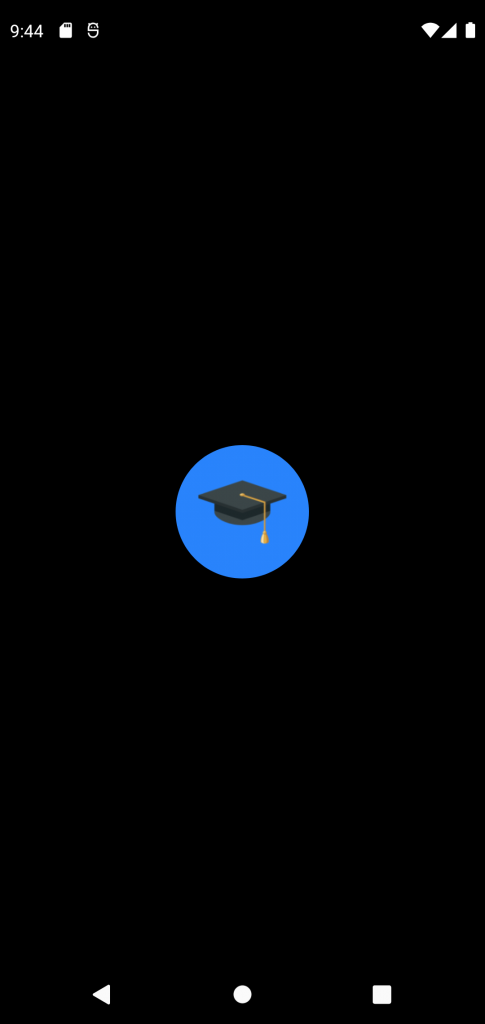
As we can see above, the Splash Screen will use a default background color*. In some cases we may want to override this – maybe it needs to match branding colors, or maybe the app icon doesn’t look quite right when displayed on top of the default background color. In either scenario you can utilise the windowSplashScreenBackground attribute to override this default color.
*I’m not entirely sure what color is being used for this background color yet, I will update this post once I have clarity here!
Setting the Splash Icon
In some cases, you might not want to use your application icon for the icon displayed in the splash screen. If you want to display something else in place of this then you can use the android:windowSplashScreenAnimedIcon attribute to do so. I find this name a bit misleading as this icon can actually be a reference to one of two things:
- A static vector drawable reference – used to display a static asset in place of the default application icon
- An animated vector drawable – used to display an animated graphic in place of the default application icon
This enables you to replace the default icon (your application icon) that is being displayed in the splash screen with an asset of your choice. If using an animated asset then it’s important to be sure that this does not extend the lifetime of the splash screen (1,000 milliseconds). While the approach here will depend on the kind of animation you are using, there are some general guidelines that come to mind here:
- If using an animation that animates a single time from a start to end state, ensure that the animations ends shortly before the 1,000 millisecond time limit.
- If using an infinitely looping animation, be sure that the animation does not appear to be cut-off once the 1,000 millisecond time limit is hit. For example, an infinitely spinning item being cut-off at the time limit will not appear “janky”, but cutting off the morphing between two shapes could make the transition between the splash screen and your app feel not so smooth.
Once we have an asset that we wish to use for the icon of our splash screen, we can apply it:
As displayed above, our icon asset will displayed in the center of the splash screen. Using this will completely remove any of the default properties and styling from what was previously being shown in our splash screen.
Setting the Icon Background Color
As we saw above, providing a custom icon allows us to change the default icon that is displayed within our splash screen. However, we can also see above that this might not always render in the best results. The icon I used there does not have a background layer, so it’s a bit tricky to see the icon against the background color being used for the splash screen. While we can customise the background color of the splash screen, we might not want to or be in a position to change this here. In these cases we can utilise the android:windowSplashScreenIconBackgroundColor attribute to provide a color to be used for the background of our icon.
When this is applied, we’ll see a shaped background applied to our icon, using the color that we defined in the attribute above. It’s been difficult to test this, but in the case of my device this matches the app icon shape that I have set in my system settings. Currently this is not something that you can override for the splash screen. If you need customisation here, the best approach would be to create a drawable that already has a background layer as a part of the asset.
Setting a Branding Image
The branding image is an optional static asset which can be used to display an image at the base of the Splash Screen. This branding image will be displayed for the entire time that the splash screen is presented on screen.
![]()
While the design guidelines state that it is not recommended not to use a branding image within the Splash Screen, this functionality has been provided should you need to present this visual component. Personally I think this adds a nice touch to the splash screen, but realistically in most cases the splash screen will not be displayed long enough for the user to take in all of the content within the screen. If you are not doing any customisation to override the exit time of the splash screen, the splash screen is going to be displayed for about 1 second. When the splash screen is launched, the user is naturally going to be drawn to the icon that is displayed in the center of the screen – any additional content on the screen is likely going to overwhelm the user and in most cases, probably not going to be seen. With that said, it’s important to think about whether your app really needs to utilise this branding asset within its splash screen.
Customising the Splash Screen time
By default, the Splash Screen will display for
1,000 milliseconds – until the first frame of our application is drawn. However, a lot of applications use their splash screen to initialise default application data or perform asynchronous tasks to configure the app. In these cases, we can prevent the first frame of our app being drawn so that our splash screen remains in view. We can achieve this by using the ViewTreeObserver OnPreDrawListener – returning false until we are ready to proceed past the splash screen. Returning false here will prevent our
Accessing the Splash Screen
The Activity class has a new getSplashScreen function that can be used to access the splash screen for your activity. As mentioned previously, the splash screen will only be shown for the launcher activity of your application – so accessing this elsewhere does not have any effect.
You can view a full example of this in the official documentation, but currently the splashScreen only provides programatic access for applying a listener to the exist animation of the splash screen. This means you can listen for when the splash screen is animating to the content of your app, allowing you to customise this transition.
Wrapping Up
After learning about the Splash Screen APIs, I can now ensure that the Compose Academy app will be handling things properly. In most cases you may not even need to change anything, with your users enjoying a smooth launch flow of your app out-of-the-box.
In future there may be further additions to what applications can customise for the splash screen – having these APIs now means that there is a platform for opening up these things to developers. However, it’s impossible to create a one-size-fits-all implementation and I feel like Google will still want to enforce some kind of standard for splash screens (and not give developers free rein). Regardless, I’m looking forward to seeing how developers utilise these new APIs 😃
Источник


