- Android — Phone Calls
- Intent Object — Action to make Phone Call
- Intent Object — Data/Type to make Phone Call
- Example
- Android Hidden Codes: All the custom Dialer Codes and What they do!
- Structure of the Android hidden codes
- Generic hidden codes
- Special hidden codes for popular Android brands
- Motorola
- Nokia
- OnePlus
- Realme
- Samsung
- Xiaomi
- Top 9 Ways to Fix Unable to Answer Calls on Android Phone
- Mehvish
- 1. Restart Phone
- 2. Answer Correctly
- 3. Remove SIM Card
- 4. Turn Airplane Mode on and Off
- 5. Clear Data and Cache for Phone App
- 6. Update Phone App
- 7. Check Third-Party Calling Apps
- 8. Check Theme
- 9. Reset App Preferences
- Alternate Way to Answer Calls
- Back to the Basics
- Read Next
- Top 17 Xiaomi Mi Band 3 or Band 4 FAQs Answered for Beginners
- How to Troubleshoot Your Pixel 2 Using Google Assistant
- 9 Best Fixes for Zoom Microphone Not Working on Windows 10
- A Guide to Presenting PowerPoint Presentation (PPT) in Google Meet on Phone and Laptop
- Top 7 Ways to Fix Camera App Not Working on Android
- Top 8 Ways to fix Unfortunately File Manager Has Stopped on Android
- Top 8 Ways to Fix WhatsApp Notification Sound Not Working
- Top 7 Ways to Fix Android Keyboard (AOSP) Has Stopped
- Did You Know
Android — Phone Calls
Android provides Built-in applications for phone calls, in some occasions we may need to make a phone call through our application. This could easily be done by using implicit Intent with appropriate actions. Also, we can use PhoneStateListener and TelephonyManager classes, in order to monitor the changes in some telephony states on the device.
This chapter lists down all the simple steps to create an application which can be used to make a Phone Call. You can use Android Intent to make phone call by calling built-in Phone Call functionality of the Android. Following section explains different parts of our Intent object required to make a call.
Intent Object — Action to make Phone Call
You will use ACTION_CALL action to trigger built-in phone call functionality available in Android device. Following is simple syntax to create an intent with ACTION_CALL action
You can use ACTION_DIAL action instead of ACTION_CALL, in that case you will have option to modify hardcoded phone number before making a call instead of making a direct call.
Intent Object — Data/Type to make Phone Call
To make a phone call at a given number 91-000-000-0000, you need to specify tel: as URI using setData() method as follows −
The interesting point is that, to make a phone call, you do not need to specify any extra data or data type.
Example
Following example shows you in practical how to use Android Intent to make phone call to the given mobile number.
To experiment with this example, you will need actual Mobile device equipped with latest Android OS, otherwise you will have to struggle with emulator which may not work.
| Step | Description |
|---|---|
| 1 | You will use Android studio IDE to create an Android application and name it as My Application under a package com.example.saira_000.myapplication. |
| 2 | Modify src/MainActivity.java file and add required code to take care of making a call. |
| 3 | Modify layout XML file res/layout/activity_main.xml add any GUI component if required. I’m adding a simple button to Call 91-000-000-0000 number |
| 4 | No need to define default string constants.Android studio takes care of default constants. |
| 5 | Modify AndroidManifest.xml as shown below |
| 6 | Run the application to launch Android emulator and verify the result of the changes done in the application. |
Following is the content of the modified main activity file src/MainActivity.java.
Following will be the content of res/layout/activity_main.xml file −
Following will be the content of res/values/strings.xml to define two new constants −
Following is the default content of AndroidManifest.xml −
Let’s try to run your My Application application. I assume you have connected your actual Android Mobile device with your computer. To run the app from Android studio, open one of your project’s activity files and click Run  icon from the toolbar.Select your mobile device as an option and then check your mobile device which will display following screen −
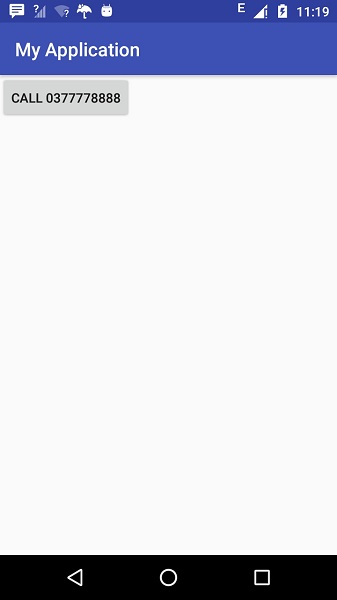
Now use Call button to make phone call as shown below −
Источник
Android Hidden Codes: All the custom Dialer Codes and What they do!
The Android operating system is well known for its hidden features and easter eggs. One such area is using custom dialer codes to access various hidden apps and settings. Some of these codes are universal, which means you’ll get the desired output on any Android device, irrespective of them being a great flagship or a cheap budget phone. However, custom OEM skins (e.g. One UI by Samsung and MIUI by Xiaomi) and carrier-customized models often come with their own set of hidden codes.
Below you can find a bunch of generic as well as device-specific Android hidden codes. Give them a try and discover some of the handiest secret functionalities of your phone. If you don’t see your device listed or you want to submit a new code, send a message to Skanda Hazarika (SkandaH on the forums) with all the relevant details.
Table of Contents:
Structure of the Android hidden codes
The so-called hidden codes are basically part of the Man Machine Interface (MMI) schema. These are a bit different from the Unstructured Supplementary Service Data (USSD) codes, although both of them start with an asterisk (*) followed by digits that comprise of commands or data. Groups of digits may be separated by additional asterisks. The message is terminated with a hash symbol (#), but custom MMI codes may end with an asterisk as well.
While USSD codes are used to communicate with the mobile network operator’s servers for menu-based information services, mobile-money services, and location-based content services, the MMI Supplementary Service codes work completely offline.
Just like USSD, you have to dial the “hidden” codes on the stock dialer app to invoke the corresponding action.
Generic hidden codes

- *#07#
Displays the Specific Absorption Rate (SAR) value of the device.

- *#*#225#*#*
Displays calendar storage information.

- *#*#426#*#*
Displays the Firebase Cloud Messaging (FCM) diagnostics page or information related to Google Play Services.

- *#*#759#*#*
Displays the RLZ Debug UI with Unique Device ID and other data related to application installation. It’s also possible to turn on (and off) OEM mode through this interface.

- *#*#4636#*#*
Displays information about the phone, battery, and various network statistics.

Special hidden codes for popular Android brands
The generic codes should work on every Android device out there. In case you’re looking for OEM-specific codes, take a look at the following index.
- *#07#
Displays the regulatory labels. - .12345+= (must be entered in the stock calculator app)
Opens the engineering mode.
Google Pixel devices run an enhanced version of vanilla Android, which means you’re limited to the generic codes mentioned above.
Motorola
- *#*#2486#*#*
Opens up the engineering mode. You may need to boot through the “BP Tools” section in the fastboot interface at least once before trying this code. - *#07#
Displays the regulatory information.
Nokia
- *#*#372733#*#*
Opens up the service mode (also known as the FQC menu).

OnePlus
- 1+= (must be entered in the stock calculator app)
Displays the company’s motto – “Never Settle” – on the calculator app.

- *#66#
Displays the IMEI and MEID in an encrypted format
![]()
- *#888#
Displays the PCB version of the motherboard of the phone.
![]()
- *#1234#
Displays the software version.
![]()
- *#*#2947322243#*#*
Wipes out the internal memory (use with caution!).
Realme
- *#800#
Opens up the factory mode/feedback menu.
![]()
- *#888#
Displays the PCB version of the motherboard of the phone.
![]()
- *#6776#
Displays the software version and additional details.
![]()
Samsung
- *#0*#
Opens up the hardware diagnostic menu.

- *#011#
Displays network connection and serving cell related information. - *#0228#
Displays battery status.

- *#0283#
Opens up the packet loopback settings.


- *#1234#
Displays the software version and additional details.

- *#2663#
Displays advanced firmware version menu.

- *#7353#
Displays the quick test menu. - *#9090#
Displays advanced debugging tools.

- *#9900#
Opens up system dump mode.

- *#2683662#
Displays advanced service mode.

- *#34971539#
Displays advanced camera firmware information.

- *#*#73788423#*#*
Displays the service menu. - *#07#
Displays certifications details.
Xiaomi
- *#*#64663#*#*
Displays the hardware diagnostic menu (also known as the QC test menu).

We hope this guide will get you in and out of hidden menus within Android. We’ll be updating this guide with more such codes for specific phones, so check back again in the future.
XDA В» Tutorials В» Android Hidden Codes: All the custom Dialer Codes and What they do!
Источник
Top 9 Ways to Fix Unable to Answer Calls on Android Phone
Mehvish
01 Mar 2020
Typically, when you receive a call on your phone, you swipe the screen to answer it. But, sometimes, that doesn’t happen. Even though the user can see who is calling, answering, or rejecting the call doesn’t take place after repeated attempts. That can be frustrating. Don’t worry, though. In this post, we will tell you how to fix cannot answer incoming calls issue on your Android phone.

The inability to not being able to answer calls can be quite frustrating. While for some users, the phone hangs and freezes while receiving calls, others can make the action of answering calls, but it doesn’t answer the call.
Spooky but not a major issue. You can easily fix it with the solutions mentioned below.
1. Restart Phone
If it’s a new issue and it happened for the first time, begin by restarting your phone. Sometimes, that is enough to fix any issue on your phone, including the one related to unable to answer calls.
2. Answer Correctly
Android phones let you answer calls in different ways. On some devices, you have to swipe up on the answer (or green) button, while others make you swipe right. Try both methods.
If you have a Samsung phone, things are a bit different now. Earlier, one could tap on the answer (or green) button to accept the call. But the functionality has been removed now. So if you are trying to answer the call in the same way, it’s incorrect. You will have to swipe up on the green button.

In case you want the Tap to answer feature back, you can do that by going to Settings on your Samsung phone. Then, go to Accessibility > Interaction & Dexterity>Assistant Menu. Turn on the toggle next to off on the next screen. Then, you will find the Single tap to swipe option. Enable it. Now, you can answer calls with a single tap.


Even though you get the feature, enabling the Assistant Menu has a drawback as it adds a floating menu icon. To hide that, increase the Transparency of the menu in the settings. Alternatively, long-tap the floating icon and drag it towards the Hide button that appears. It will then stay in your notification panel.

Tip: Bought a Samsung phone recently? Try our useful compilation of Samsung phone calling tips and tricks.
Also on Guiding Tech

How to Fix Missed Call Notification Not Showing in Android
3. Remove SIM Card
Even though this kind of issue is usually related to your Android phone, you should try removing the SIM card from your phone to fix any network issue. Once you remove it, clean the SIM tray and your SIM card with a cloth and then insert it again.
4. Turn Airplane Mode on and Off
Another way to fix it is by enabling the Airplane mode. Doing that will restrict the network connectivity on your phone and solve the network-related issue. To enable the airplane mode, open quick settings, and tap on Airplane mode to enable. Once enabled, wait for a minute and then disable it.

5. Clear Data and Cache for Phone App
Clearing cache and data for the Phone app has proved beneficial for many Android users who were going through the same trouble. Don’t worry, clearing cache or data of the Phone app will not delete any of your personal data. Your files, contacts, and even call history will remain untouched.
To clear cache and data for the Phone app, follow these steps:
Step 1: Open Settings on your Android phone and go to Apps & notifications or App.

Step 2: Tap on the Phone app that came preinstalled on your phone under All apps.

Step 3: Tap on Storage. Then, tap on Clear cache first. Restart your phone. If the issue persists, tap on Clear data or Clear storage depending on the option available on your phone.


On phones running Android 7.1 Nougat and above, you can long-tap on the Phone app icon on the home screen or in the app drawer to reveal app shortcuts. Then, tap on the ‘i’ or App info icon. You will directly be taken to step 3 mentioned above. Tap on Storage followed by Clear cache.

6. Update Phone App
At times, the issue is with the app itself. The developers are quick to release an update that fixes the calling problem. You should open the Play Store and update the Phone app. For future use, learn how to know if an app needs an update on Android and iPhone.
Also on Guiding Tech
# troubleshooting
7. Check Third-Party Calling Apps
Do you use a third-party calling or dialer app on your phone? That might be interfering with the calling functionality on your phone. Either disable it for a while or make the pre-installed dialer app as your default phone calling app.
For that, open Settings on your phone and go to Apps. Tap on Default apps. If the option isn’t visible, tap on the three-dot icon at the top and select Default apps.
Tip: Use the search box in Settings to find default apps settings.


Tap on the Phone app and select the system default phone app. You should also take a look at the Caller ID & spam app setting. Either select the system app or choose None.

8. Check Theme
If you use themes on your Android phone, switch to the default theme to test the incoming call. Sometimes, the answer and reject buttons are reversed in a theme, or they do not work at all. To fix it, you will need to disable the custom theme and use the system default theme.
9. Reset App Preferences
If the issue persists, reset app preferences on your phone. Doing so will not delete any data but will reset the settings to their default values, thus fixing any issue that might be interfering with the incoming calls. If you are worried about what settings might be changed, check our guide on what happens when you reset app preferences.
To reset app preferences, open Settings on your phone and go to Apps. Tap on the three-dot icon at the top and select Reset app preferences.


Tip: If you can’t find the Reset app preferences option, go to Settings > System > Reset options > Reset app preferences.
Alternate Way to Answer Calls
If the touch buttons do not let you answer calls, you can use the hardware buttons to answer calls. While the Power key lets you end the call, the volume up key can be used to answer calls. The latter feature is limited to some phones only.
To enable physical buttons, go to Settings > Accessibility. You will find the required options. Alternatively, open the Settings for the Phone app. Then, go to Answering and ending calls. Enable the required buttons.

Also on Guiding Tech

How to Fix Incoming Call Not Showing on Screen (Android)
Back to the Basics
We hope one of the above methods would have helped you in answering the incoming calls. If you are still unable to answer the incoming calls, check the block list and do not disturb mode. You should also check the screen where the answer and reject buttons are located. It could be a display issue if other apps also don’t work at the required place.
Next up: Make the best use of the Google’s Phone app with the tips and tricks mentioned in our post. Check the next post.
Last updated on 13 Mar, 2020
The above article may contain affiliate links which help support Guiding Tech. However, it does not affect our editorial integrity. The content remains unbiased and authentic.
Read Next

Top 17 Xiaomi Mi Band 3 or Band 4 FAQs Answered for Beginners
Did you just receive your Mi Band 3 or 4? Check out these FAQs that will help you in setting up and knowing the Mi Band in a better way.

How to Troubleshoot Your Pixel 2 Using Google Assistant
Want to troubleshoot issues on your Pixel 2 and Pixel 2 XL? # Google Assistant will now help you do that over a few voice commands.

9 Best Fixes for Zoom Microphone Not Working on Windows 10
Are you facing issues with # audio on the # Zoom app on # Windows 10? Find out how to fix the # Zoom microphone not working on your # Windows 10 PC.

A Guide to Presenting PowerPoint Presentation (PPT) in Google Meet on Phone and Laptop
Are you wondering how to share your presentation with every one over a # Google Meet call? Here’s a guide for sharing # PowerPoint presentation in # Google Meet on Android, iPhone, iPad, Mac, and Windows.

Top 7 Ways to Fix Camera App Not Working on Android
Are you facing issues accessing the # Camera app on # Android? Here’s how you can fix the issue and use the # camera again.

Top 8 Ways to fix Unfortunately File Manager Has Stopped on Android
# Android file manager stopping right in the middle of work may spoil the mood for you. Here’s how you can fix the issue.

Top 8 Ways to Fix WhatsApp Notification Sound Not Working
Are you getting # WhatsApp notifications without any # sound? Here’s how you can fix # WhatsApp notification sound not working on # iPhone and # Android.

Top 7 Ways to Fix Android Keyboard (AOSP) Has Stopped
Are you facing Android keyboard has stopped error on your phone? Here’s how you can troubleshoot Android keyboard (AOSP) has stopped.
Did You Know
Twitter’s logo is named Larry after Larry Bird, the iconic basketball player.
Источник


