- Implement In-app Update In Android
- Make sure every user of your app is on the new version.
- What is In-App Update:
- Flexible Update:
- Benefits:
- How to Manually Install OTA Updates on Android (2 Methods)
- Method 1: Install OTA Update from SD Card (Apply update from SD card)
- Method 2: Install OTA Update using ADB Sideload (Apply update from ADB)
- Как обновить версию Android на телефоне/смартфоне?
- Надо ли делать бекап перед обновление системы?
- How To Install Android 10 on your Android [Download Links]
- Android 10 Features
- Pre-Requirements to Android 10 ROMS
- Download Android 10 for Your Android
- Android 10 For Xaiomi phones
- Android 10 For OnePlus phones
- Android 10 For MotoRola phones
- Android 10 For Asus phones
- Android 10 for Samsung Phones
- How to Install the Androdi 10 On Your Android
Implement In-app Update In Android
Make sure every user of your app is on the new version.

Apr 6, 2020 · 8 min read

In this article, we will learn about the In-app update feature in Android what is all about In-app update, what are the benefits of using the In-app update in your android application. Recently I’ve been working on a product in which I need to Implement an In-app update Why we need to Implement this?.
As a Developer we always want our users to have the updated version of their application but there are a lot of people who actually turned off their auto update from google play store and he/she doesn’t know about any update available or not.
To overcome the problem Google Introduced this feature called In-app update from this feature you can easily prompt the user to update the application and with the user permission you can update the application also while updating the app user can be able to interact with the application. Now the user doesn’t need to go to google play store to check there is any update available or not.
What is In-App Update:
An In-app update was Introduced as a part of the Play Core Library, which actually allows you to prompts the user to update the application when there is any update available on the Google Play Store.
There are two modes of an In-app update.
- Flexible Update
- Immediate Update
Flexible Update:
In Flexible update, the dialog will appear and after the update, the user can interact with the application.
This mode is recommended to use when there is no major change In your application like some features that don’t affect the core functionality of your application.
The update of the application is downloading in the background in the flexible update and after the completion of the downloading, the user will see the dialog in which the user needs to restart the application. The dialog will not automatically show, we need to check and show to the user and we will learn how later.
Benefits:
The major benefit of the flexible update is the user can interact with the application.
Источник
How to Manually Install OTA Updates on Android (2 Methods)
Sideloading OTA updates can help you update your Android phone to the latest software instantly. In this post, we will show you how to manually install OTA updates on Android devices using 2 different options in the stock recovery.
Latest and regular software updates are an integral part of every Android device, irrespective of its manufacturer. On Android, updating to the latest software version could be easily done Over-the-Air, which is more commonly referred to as “OTA Updates“. The whole process is completely automated and requires the least amount of effort on the user’s end to get through it. Especially when it comes to phones that support seamless updates. With the new A/B partition, users don’t even need to reboot their phone, as the update is installed to the alternate partition in the background.
However, an OTA update isn’t always available for all the devices at once. There are several factors like the device region, mobile carrier, etc that impact the rollout and thus, a delay can be expected. Also, it is often that a manufacturer may perform a staged rollout, which means the update will reach a small percentage of devices initially and then slowly be available for the rest.
But we, as users, can be impatient when it comes to trying out the new software that would fix the existing bugs or bring in some exciting new features. It’s likely that users who have already received the update, tend to capture the OTA update zip and share it with others on forums and social groups. In such a case, if you have the OTA package (update.zip), then you can instantly upgrade your phone to the latest software. The instructions below will help you manually install Android OTA Updates using stock recovery.
Sideloading OTA updates do not require an unlocked bootloader. And unlike Factory Image/Firmware, sideloading or manually installing OTA updates via stock recovery doesn’t wipe the data stored on your device. Your data stays intact.
Despite that, we strongly recommend that you take a full backup of all your data stored on your phone including the internal storage to safeguard from any data loss situation.
Take a note that you will first need the OTA update zip package for your device before you follow the steps. You can find these zips either on forums like XDA or request a fellow mate to capture the OTA update package. Also, these methods require your phone’s software to be completely unmodified/stock. It will fail if your phone is rooted via Magisk/SuperSU, has TWRP recovery installed, or any other modifications of this kind.
Once you have the OTA package, you can proceed to the instructions below and use one of the listed methods to manually install the OTA update on your Android device.
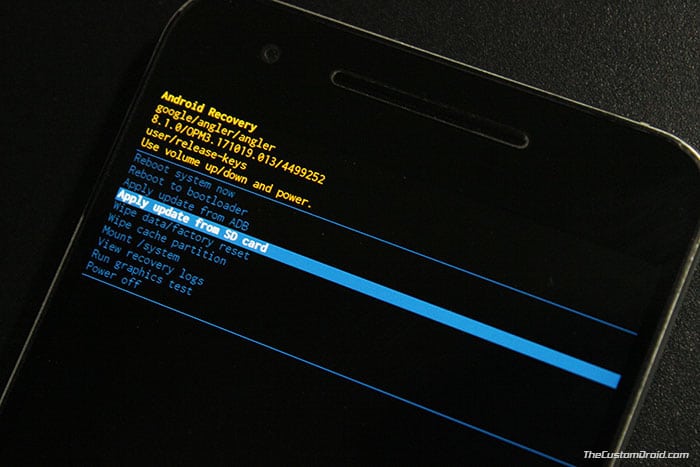
Method 1: Install OTA Update from SD Card (Apply update from SD card)
The first method works by storing the OTA zip package on your phone’s internal/external storage. And then using the ‘Apply update from SD card’ option in stock recovery to install the OTA update. This method is best for users who do not have access to a PC.
- Download the OTA zip package for your Android phone.
- Connect your phone to the PC using the USB cable.
- Next, transfer the OTA zip package to the root directory of your phone’s internal/external storage.
- Once copied, disconnect the phone.
- Boot your phone into the recovery mode using the physical buttons combination or by entering the following ADB command:
- In the stock recovery menu, use the Volume buttons of your phone to select the ‘Apply update from SD card‘ option.

- Press the Power button to confirm the selection.
- Now, use the Volume keys to highlight the OTA update package.
- Finally, press the Power button to confirm and install the OTA update package on your Android device.
- After the update is installed, select ‘Reboot system now’.
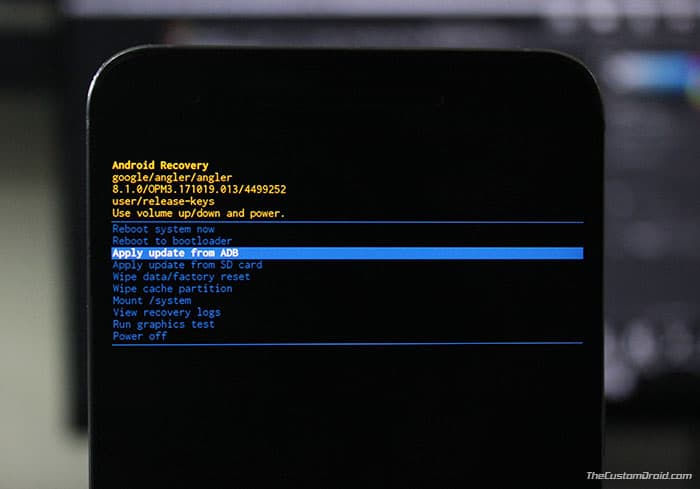
Method 2: Install OTA Update using ADB Sideload (Apply update from ADB)
Sometimes, the phone might not detect the storage or the OTA package itself. In such cases, you can use the ‘Apply update from ADB’ option in the stock recovery and the ADB Sideload command to manually install OTA update on your Android device. Before you proceed with the instructions below, you must first setup ADB and Fastboot tools on your PC.
- Download OTA zip package for your Android device.
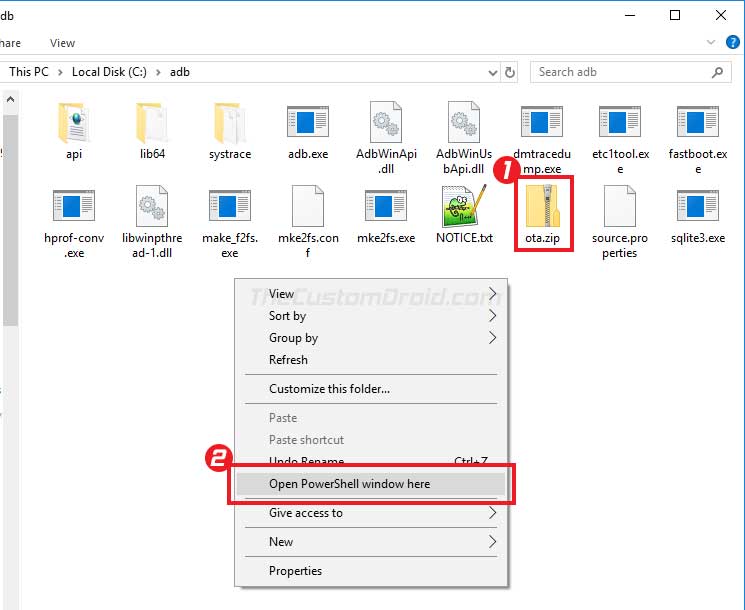
- Copy the downloaded package to the folder where the ADB and Fastboot binaries are present.
- Hold the SHIFT key on the keyboard and right-click on an empty space inside the same folder.
- Select the ‘Open PowerShell window here’ option.
- Connect your phone to the PC using the USB cable.
- Now enter the following command to boot your Android device into stock recovery:
- In the stock recovery, use the Volume buttons to select the ‘Apply update from ADB‘ option.
- Press the Power button to confirm the selection.
- Now, enter the following command to install the OTA update package on your Android device:
- Make sure to replace “ota.zip” with the actual filename of the OTA update package.
- Once the installation is complete, select the ‘Reboot system now‘ option.
Your device will now boot into the updated firmware. You can use this method on almost every Android device. Required that you have the correct OTA update zip for your phone and stock recovery installed on it.
So this was our guide on how to manually install OTA updates on Android using Stock Recovery. If you face any errors while updating your phone using these methods, let us know by commenting below.
Источник
Как обновить версию Android на телефоне/смартфоне?

Многие пользователи задают такой интересный вопрос — мол, есть у меня смартфон, хочу обновить версию Андроид. Это особенно актуально в тех случаях, когда на устройстве установлена версия Android 4.4, а некоторые гаджеты используют версию 7.0.
Стремление к обновлению понятно, однако для начала мы должны объяснить вам следующее: несмотря на то, что Google может выпустить новую версию Android, это не значит, что для вашего устройства есть прошивка с обновленной операционной системой. Более того, многие производители не поддерживают обновление прошивок для старых моделей смартфонов. Понять их можно — это экономия, а кроме того, некий стимул для того, чтобы пользователь сменил свое устройство на более современное.
Бывают и другие ситуации. Например, на смартфоне используется прошивка 4.4, хотя Google выпустил версию 6.0. Некоторые производители совершенствуют прошивки в пределах одной версии Android, то есть они могут обновлять прошивку, но версия операционной системы не изменяется — все та же 4.4. Поэтому гарантировать, что вы сможете обновить версию ОС на смартфоне, мы не можем. Однако если вы точно знаете, что для вашего гаджета вышла прошивка с новой версией Android, мы покажем, что вам необходимо сделать для обновления.
В качестве примера мы возьмем смартфон Samsung Galaxy. Модель устройства роли не играет, поэтому суть не меняется.
Итак, первое, что вы должны сделать, это зарядить устройство хотя бы до 80% — не меньше, а лучше — до 100%.
Следующий пункт — подключение интернета. Настоятельно рекомендуем использовать Wi-Fi. Почему? Да потому, что размер прошивки может измеряться гигабайтами. Если вы будете скачивать ее с помощью мобильного интернета, не удивляйтесь огромному счету потом. Впрочем, если у вас подключен безлимитный пакет мобильного интернета, проблем быть не должно.
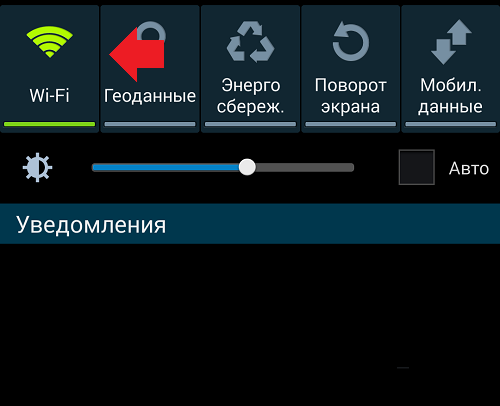
Теперь ищем приложение с настройками. Вот оно в нашем случае:

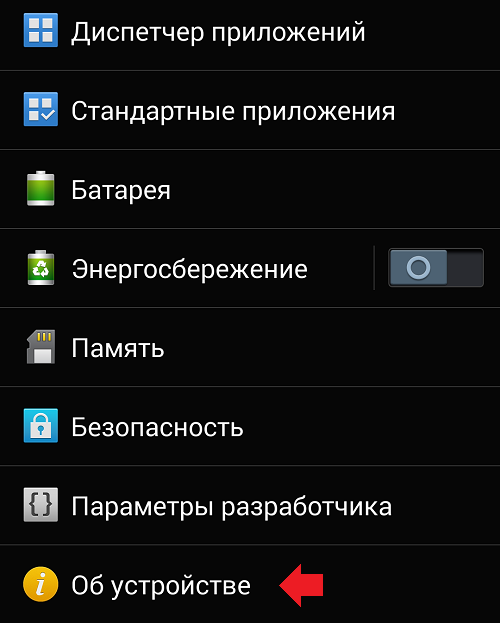
Заходим в настройки и видим множество разделов. Нас интересует тот из них, который называется «О смартфоне» или «Об устройстве». Обычно это самый последний раздел меню.
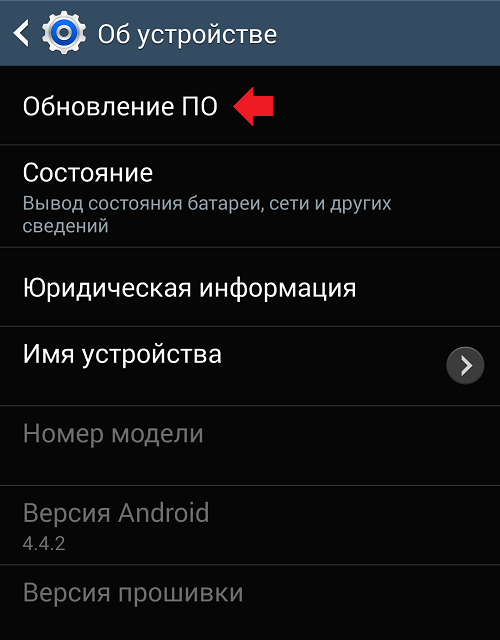
В новом окне вы увидите различные пункты меню, включая версию Android, номер модели, версию прошивки и т.д. В верхней части окна есть пункт «Обновление системы» или «Обновление ПО». Нажмите на него.
Далее нажмите «Обновить» или «Проверить обновление».
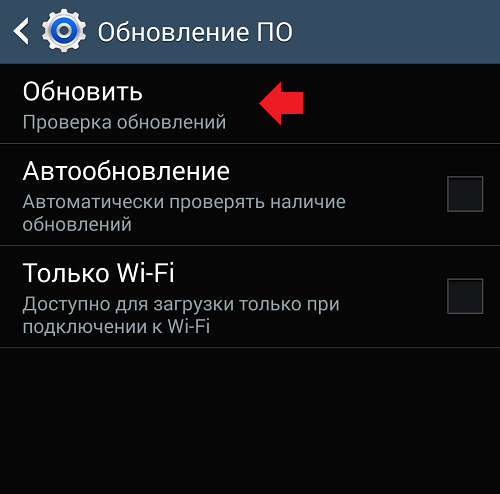
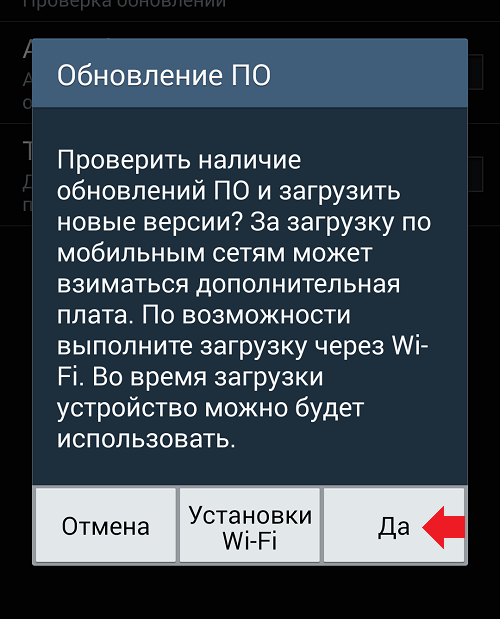
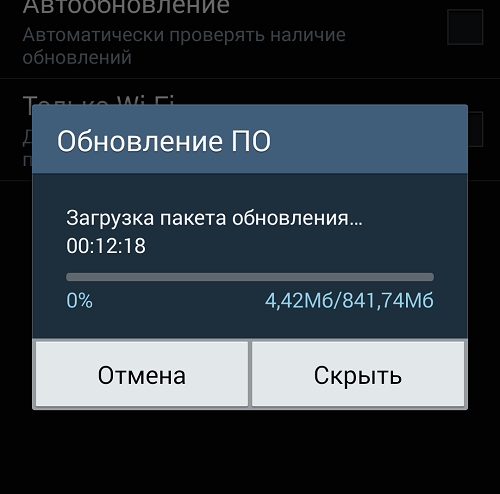
Поскольку есть обновление для вашей операционной системы, сразу же начнется загрузка ПО.
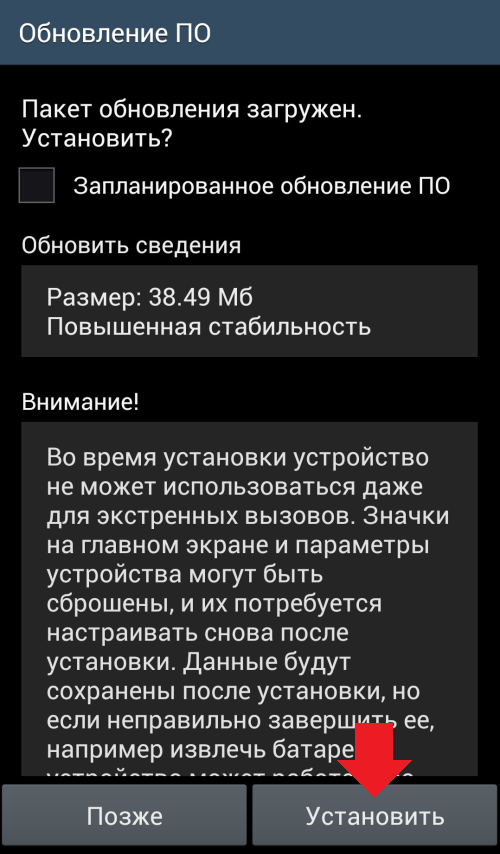
Обновление скачано, нажмите на кнопку «Установить», после чего устройство будет выключено. В некоторых случаях ничего не нужно нажимать, устройство выключится само после скачивания ПО.
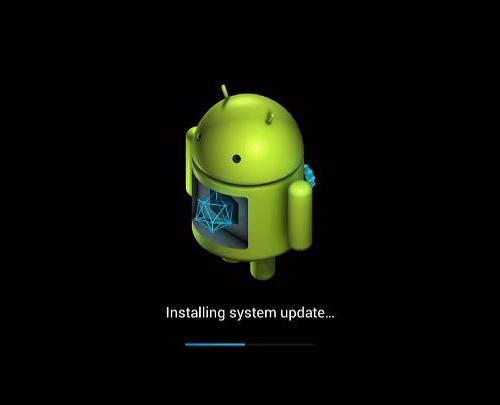
После выключения смартфон снова включится и вы увидите зеленого робота, а также надпись «Установка обновления системы» или Installing system update или вообще ничего, кроме робота и загрузочной полосы, которая отражает прогресс обновления. Обновление может занимать некоторое время, ни в коем случае не перезагружайте устройство, не отключайте его, не вынимайте батарею.
После обновления смартфон включится. Ваша прошивка было обновлена.
Вот такой порядок действий. Есть и другой вариант — обновление прошивки в ручном режиме. Однако вам придется самостоятельно скачивать прошивку и устанавливать ее, а сделать это уже не так просто, как обновляться по воздуху. Описание процесса обновления прошивки для своего смартфона в ручном режиме ищите на форуме 4pda.ru (для разных смартфонов он различается).
Надо ли делать бекап перед обновление системы?
Вообще, обычно все данные при обновлении сохраняются. Однако если возникнет ошибка при обновлении, наверняка придется сбросить настройки, а в этом случае происходит удаление всех данных. Поэтому перед прошивкой мы все же настоятельно советуем сделать бекап важных данных, например, фотографий. Номера телефонов можно сохранить с помощью синхронизации с Google-аккаунтом.
Друзья! Если наш сайт помог вам или просто понравился, вы можете помочь нам развиваться и двигаться дальше. Для этого можно:
- Оставить комментарий к статье.
Источник
How To Install Android 10 on your Android [Download Links]
Here is the Guide to install Android 10 on your android phone. After the release of Android 10 by Google for the Pixel phones, most of the developers are working on Android 10 Custom ROMs and many of them released the stable version of Android 10. Some popular custom ROM like Lineage OS and Pixel experience are available for many smartphones. And all these custom rom are based on the latest build of Android 10.
Android 10 (aka Android Q) is now official and Pixel devices, Essential Phone, Redmi K20 Pro, OnePlus 7 Pro devices are receiving the latest Android version update. But most of the devices are missing this update, and if you are waiting for Android 10 for your phone, then here is the guide which helps you to update your devices with the latest Android 10 update.

Here in this post, we will share with you a List of Android 10 Custom ROM Supported devices and the ROMS download link too. Which you can install on your phone with the help of Custom TWRP recovery and enjoy all the features of Android 10. But before that first, take a look at the Android 10 features and overview.
Table of Contents
Android 10 Features
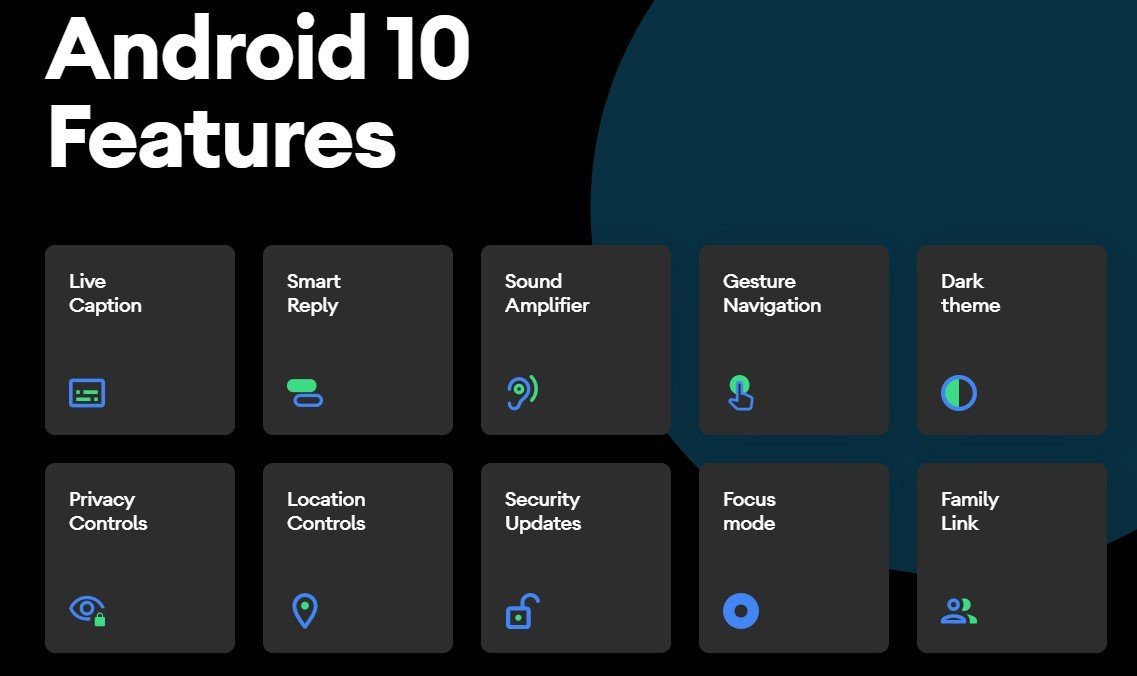
Dark theme – Android’s new Dark theme uses true black to keep your battery alive longer. Plus, it also changes how your Google apps look, like Calendar and Photos.1
Gesture Navigation – In Android 10 you will see the new Gesture Navigation. That’s totally different from the last android versions. In the new update, the back button is now ditched and you can easily go backward or forward via swiping left or right. Gestures are now quicker and more intuitive than ever.
Sound Amplifier – With Sound Amplifier, your phone can boost sound, filter background noise, and fine-tune to how you hear best. Yes, this also the new feature in Android 10. And many users are waiting for this feature from long time.
Smart Reply – Smart Reply is one of handy feature in Android 10 update. With this new feature, you can quickly reply to the message that you receive in your notification panel.
Live Caption – With a single tap, Live Caption automatically captions videos, podcasts, and audio messages. This feature will be available on Google Pixel smartphones very soon.
Focus Mode – The focus mode is the improved version of Digital Wellbeing which allows users to select and control app usage. Digital Wellbeing was introduced in Android 9.0 Pie version.
Family Link – Now with this new features you can manage your phone for your family or kids that what content they see. You can set screen time limits, view app activity, manage apps and content restrictions, and see where they are.
Pre-Requirements to Android 10 ROMS
- Make sure that the bootloader of your smartphone is unlocked.
- You should have a custom TWRP recovery installed on your phone.
- Take a full backup of your device data. In case anything goes wrong, you can restore the backup.
- Charge your device battery up to 60% at least for a smoother process.
Download Android 10 for Your Android
Here is a list of Android 10 Custom ROM Supported devices that you can easily download from here. Just download the ROM zip file and follow the below mention installtion instruction on your device to update your phone with Android 10 update.
Android 10 For Xaiomi phones
- Xiaomi Mi 8 (dipper) Android 10: Click Here
- Xiaomi Mi A1 (tissot): Click Here
- Xiaomi Mi A2 (jasmine_sprout): Click Here
- Xiaomi Mi Mix (lithium): Click Here
- Xiaomi Poco F1 (beryllium): Click Here
- Xiaomi Redmi 3S/3X (land): Click Here
- Xiaomi Redmi 6 Pro (sakura): Click Here
- Xiaomi Redmi K20 Pro/Mi 9T Pro (raphael): Click Here
- Xiaomi Redmi Note 5 Global/Pro (whyred): Click Here
- Xiaomi Redmi Note 5/Plus (vince): Click Here
- Xiaomi Redmi Note 7 (lavender): Click Here
- Xiaomi Redmi Note 7 Pro (violet): Click Here
Android 10 For OnePlus phones
- OnePlus 5 (cheeseburger) Android 10: Click Here
- OnePlus 5T (dumpling): Click Here
- OnePlus 6 (enchilada): Click Here
- OnePlus 7: Click Here
- OnePlus 7 Pro: Click Here
Android 10 For MotoRola phones
- Motorola Moto G5S Plus (sanders): Click Here
Android 10 For Asus phones
- Asus Zenfone Max Pro M1 (X00TD): Click Here
- Asus Zenfone Max Pro M2 (X01BD): Click Here
Android 10 for Samsung Phones
- Samsung Galaxy Grand Prime: Click Here
- Samsung Galaxy Tab E 9.6: Click Here
- Sprint Galaxy Tab E 8.0: Click Here
- Samsung Galaxy J5: Click Here
- Samsung Galaxy Alpha: Click Here
- Samsung Galaxy S2: Click Here
- Samsung Galaxy S4: Click Here
- Samsung Galaxy S4 Mini: Click Here
- Samsung Galaxy Mega 6.3: Click Here
- Samsung Galaxy J: Click Here
- Samsung Galaxy Tab A 9.7: Click Here
- Samsung Galaxy S6: Click Here
- Samsung Galaxy S7: Click Here
- Samsung Galaxy S7 Edge: Click Here
- Samsung Galaxy Note 3: Click Here
- Samsung Galaxy S5 [klte]: Click Here
- Samsung Galaxy S5 Plus: Click Here
- Galaxy S5 Active: Click Here
- Samsung Galaxy Tab S3: Click Here
- Samsung Galaxy J7 Prime: Click Here
- Samsung Galaxy Note 4: Click Here
- Samsung Galaxy A3 2017: Click Here
- Samsung Galaxy A7 2017: Click Here
- Samsung Galaxy A5 2017: Click Here
- Samsung Galaxy Ace 2: Click Here
- Samsung Galaxy A8 2018: Click Here
- Galaxy S6 edge: Click Here
- Samsung Galaxy J2 Core: Click Here
- Galaxy A7 2018: Click Here
- Samsung Galaxy Jean: Click Here
- Samsung Galaxy Tab S4: Click Here
- Samsung Galaxy Tab A Series: Click Here
So, guys, that was the list of Android devices that are supported with Android 10 [Custom ROM development]. Now, just in case, if you can’t didn’t find your device on the list, then don’t worry at all. We would be updating the list from time-to-time. So check after some time, we will update the Androdi 10 Download List soon.
How to Install the Androdi 10 On Your Android
No matter which Android smartphone you own, the custom ROM installation will always the same. Follow the process and install the Android 10 Update on your device.
1. First, install the custom TWRP recovery on your phone, Without this you can’t flash the Androdi 10 Custom ROM on your phone.
2. Now boot your phone in custom TWRP recovery. Once your phone in the TWRP custom recovery mode. Go to Wipe button, then select “Advanced Wipe” from the following screen. From here, tick the boxes next to the Dalvik Cache, System, Data, and Cache options, then swipe the slider at the bottom of the screen.

3. Go back to TWRP main menu, tap on “Install” and select the Android 10 ROM zip file and flash it. And after that Flash the Google Apps zip file ( If needed for Your ROM ).

4. Once your ROM is successfully flashed you’ll see “Wipe cache/dalvik” option Tap on it and after that Reboot System.

So this way you can install the Androdi Q update on your phone with the help of custom recovery. If you have any question about the guide or facing some problem during the process then leave the comments below, and we will help you to fix it up.
Источник


