- ListView в Android: Простое использование
- ListActivity
- Адаптер
- Пример: Простой ListActivity
- Android ListView Example
- 1. How To Get A ListView Object.
- 2. ListView Properties And Methods.
- 3. ListView ArrayAdapter Example.
- 4. ListView SimpleAdapter Example.
- 5. ListView Custom SimpleAdapter Example.
- 6. ListView Custom BaseAdapter Example.
- Using lists in Android wth ListView — Tutorial
- 1. Using lists in Android
- 2. Android and the ListView widget
- 2.1. Views for handling lists
- 2.2. Possible input types for lists
- 2.3. Adapters
- 2.4. Filtering and sorting
- 2.5. Data updates in the adapter
- 2.6. Listener
- 3. Default adapter
- 3.1. Default platform adapter
- 3.2. Using ArrayAdapter
- 3.3. ListView example with ArrayAdapter
- 4. Custom adapter implementations
- 4.1. Developing a custom adapter
- 4.2. Preparing a row for the list
- 4.3. Example for a custom adapter
- 4.4. Updating the data model from the adapter
- 5. ListActivity and ListFragment
- 5.1. Default container for using ListView
- 5.2. ListActivity and custom layout
- 5.3. Placeholder for an empty list
- 6. Exercise: Using ListView and ListActivity
- 7. Exercise: ListActivity with custom layout
- 8. Tutorial: Implementing your customer adapter
- 9. ListViews and performance
- 9.1. Motivation
- 9.2. Time consuming operations
- 9.3. Avoiding layout inflation and object creation
- 9.4. View holder pattern
- 9.5. Example
- 10. Storing the selection of a view
ListView в Android: Простое использование
Блуждал в Интернете в поисках достойного мануала. Нашел, по моему мнению, достойный, но, как водится в кругах программирования под Android он, конечно же, на английском. Вот и решил привнести свой вклад в распространение мануалов в этой среде на русском. Буду его изучать и, попутно, переводить сюда.
Напомню, что статья является переводом этой статьи с разрешения ее автора.
Продолжение статьи находится здесь. В нем рассматривается кастомизация списков и советы по их оптимизации.
Мануал написан под Android 4, Eclipse 3.7, Java 1.6. Источник можно найти здесь.
Списки — это вещь обычная в современных мобильных устройствах. Мы можем перемещаться по списку и выбирать нужный нам элемент, чтобы открыть что-то. Так и у Андроида он имеется.
ListActivity
Вы можете напрямую использовать ListView в своем проекте, как и любой другой компонент интерфейса пользователя. Если основная цель вашей Деятельности это отображение списка, то вы можете расширить класс Activity классом ListActivity, что значительно упростит использование ListView.
ListActivity расширяет Activity, чтобы упростить использование списков. Например, у вас уже будет предопределенный метод, обрабатывающий нажатие на элемент списка.
ListActivity содержит ListAdapter, ответственный за управление содержимым. Адаптер должен быть установлен в методе onCreate() вашей деятельности через метод setListAdapter().
При нажатии на элемент списка вызывается метод onListItemClick(). Этот метод позволяет получить доступ к выбранному элементу.
В Андроиде уже есть некоторые предопределенные шаблоны для использования в Адаптере, например «android.R.layout.simple_list_item1». Если же вы не хотите использовать предопределенный шаблон, ваш шаблон должен иметь идентификатор «@android:id/list», который будет называться ListView. Например:
Так же вы можете использовать вид с id «@android:id/empty». Этот вид отображается, когда список пуст.
Адаптер
Что такое Адаптер?
ListView берет содержимое для отображения через адаптер. Адаптер расширяется классом BaseAdapter и отвечает за модель данных для списка и за расположение этих данных в его элементах.
В Андроиде есть два стандартных адаптера: ArrayAdapter и CursorAdapter. ArrayAdapter управляет данными, основанными на массивах или списках, в то время, как SimpleCursorAdapter управляет содержимым из базы данных. Так же вы можете разработать свой Адаптер, расширяющий эти два класса или же класс BaseAdapter.
Самый важный метод Адаптера — getView(). Он вызывается для каждого элемента списка, чтобы определить как и какие данные должны в нем отображаться. getVew() так же содержит параметр convertView, который позволяет использовать заново уже существующий элемент списка, который уже не отображается, т.к. пользователь пролистнул его с видимой части дисплея. Если convertView не пустой, он может быть использован заново, чтобы не грузить шаблон, что приводит к значительному приросту производительности, т.к. подгрузка XML файла достаточно ресурсоемка.
ListViews и производительность
Отображение большого количества данных на мобильном устройстве должно быть реализовано максимально эффективно. Поэтому ListView создает виды (виджеты) по необходимости и подкрепляет их к иерархии видов. Стандартный Адаптер ListView удаляет виды, например, если элемент больше не отображается, он будет стерт и только его содержимое поменяется. Если вы используете свой адаптер, то вы должны так же предусмотреть это, чтобы избежать проблем с производительностью.
Пример: Простой ListActivity
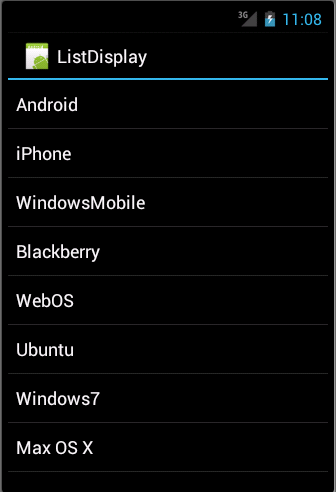
Сейчас мы создадим максимально простой список. Мы используем стандартный класс Adapter — ArrayAdapter и вид, предопределенный Андроидом.
Создайте новый проект «de.vogella.android.listactivity» с Деятельностью «MyListActivity». Не изменяйте шаблон main.xml. Создайте следующую Деятельность:
Заметьте, что мы не используем setContentView(). ListActivity использует шаблон ListView по-умолчанию, если другой шаблон не задан явно.
 По нажатию одного из элементов списка будет выводиться стандартный «Тост» с информацией какой из элементов был выбран.
Прошу прощения за репост. Изначально не отметил как перевод. Большое спасибо jeston за наводку, принял и научился на ошибках.
Источник
Android ListView Example
android.widget.ListView is widely used in android mobile app. It displays all the list items in the form of a vertical list. This article will show you examples about how to create ListView and how to add item data in it.
1. How To Get A ListView Object.
There are two ways to create a ListView.
- Use android.widget.ListView widget directly.
- Make your activity class extends android.app.ListActivity. Then you can call it’s setAdapter() method to set item data, and it’s onListItemClick() method is used to response list item click action.
After you get the ListView object, you need to add item data in it through Adapter. There are following Adapters that you can use.
You can even use other adapters, but these three adapters are most used. We will show you above adapter examples later.
2. ListView Properties And Methods.
- android:choiceMode : The value can be singleChoice (can only select one item ), multipleChoice( can select multiple item ) or none.
- android:divider : It is a color or drawable object id, used to set divider color.
- android:dividerHeight : Set the divider height.
- android:entries : The value is a array resource id defined in android studio. The array data will be shown in the ListView.
- android:headerDividersEnabled : Boolean value, true means draw divider after header view.
- android:footerDividersEnabled : Boolean value, true means draw divider before footer view.
- setOnItemClickListener() : Set OnItemClickListener object which will response to ListView item click event.
3. ListView ArrayAdapter Example.
If you can not watch the above video, you can see it on the youtube URL https://youtu.be/c5Fv78xCI6M
activity_list_view.xml
ListViewActivity.java
Please note the second parameter for ArrayAdapter constructor can have below values.
- simple_list_item_1 : Each list item is a TextView object.
- simple_list_item_2 : Each list item is a TextView object, text size is bigger.
- simple_list_item_checked : Each list item is a checked checkbox.
- simple_list_item_single_choice : Display a radio button in the right of each list item. Even it is a radio button, it can be multiple checked if ListView’s android:choiceMode value is multipleChoice.
- simple_list_item_multiple_choice : Display a checkbox in the right of each list item. Even it is a checkbox, it can be single checked if ListView’s android:choiceMode value is singleChoice.
4. ListView SimpleAdapter Example.
If you can not watch the above video, you can see it on the youtube URL https://youtu.be/9BYH4Ftclv0
activity_list_view.xml
ListViewActivity.java
Please note the SimpleAdapter creation code. There are 5 parameters in the SimpleAdapter constructor.
- First parameter : This is the context object that this SimpleAdapter will be used with.
- Second parameter : This is a List > object, each map object in the list represent a ListView item data.
- Third parameter : This is the ListView’s item UI component layout xml. It decides which UI components will be shown in each ListView item.
- Fourth parameter : This String array contains map object’s keys. Each key related map value will be shown in the ListView item.
- Fifth parameter : This int array contains the view object’s resource id in item layout xml file(second parameter specified). Each view object will display related value extracted from map object use keys( fourth parameter specified) by order.
5. ListView Custom SimpleAdapter Example.
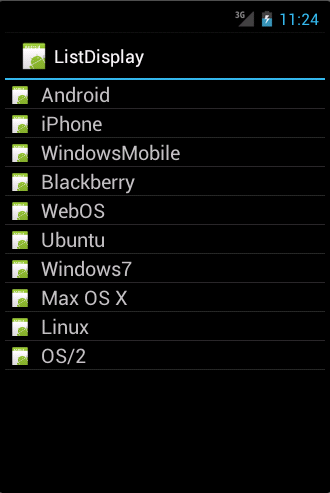
This example will customize a SimpleAdapter object which use self defined ListView item layout to add a picture at the beginning of each ListView item.
If you can not watch the above video, you can see it on the youtube URL https://youtu.be/XJOX6qtZuxk
activity_list_view.xml
ListViewActivity.java
6. ListView Custom BaseAdapter Example.
If you still need more customization for ListView item. You can use android.widget.BaseAdapter. Override it’s getCount() and getView() method.
This example set different item row background color and add a button for each item row.
Источник
Using lists in Android wth ListView — Tutorial
This tutorial describes how to use ListView together with activities and fragments in Android.
1. Using lists in Android
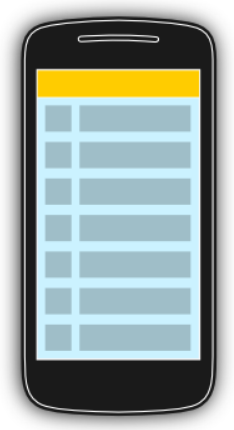
The display of elements in a list is a very common pattern in mobile applications. The user sees a list of items and can scroll through them. Such an activity is depicted in the following picture.
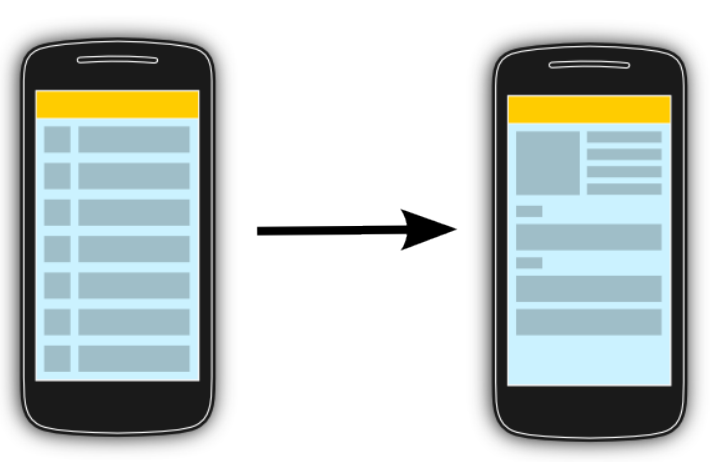
Typically the user interacts with the list via the toolbar, for example, via a button which refreshes the list. Individual list items can be selected. This selection can update the toolbar or can trigger a detailed screen for the selection. The following graphic sketches that. On the selection of a list item another activity is started.
2. Android and the ListView widget
2.1. Views for handling lists
Android provides the ListView and the ExpandableListView classes which are capable of displaying a scrollable list of items. The ExpandableListView class supports a grouping of items.
2.2. Possible input types for lists
The input of a list (items in the list) can be arbitrary Java objects. The adapter extracts the correct data from the data object and assigns this data to the views in the row of the ListView .
These items are typically called the data model of the list. An adapter can receive data as input.
2.3. Adapters
An adapter manages the data model and adapts it to the individual entries in the widget. An adapter extends the BaseAdapter class.
Every line in the widget displaying the data consists of a layout which can be as complex as you want. A typical line in a list has an image on the left side and two text lines in the middle as depicted in the following graphic.

A layout file for such a line might look like the following.
The adapter would inflate the layout for each row in its getView() method and assign the data to the individual views in the row.
The adapter is assigned to the ListView via the setAdapter method on the ListView object.
| Adapters are not only used by ListView , but also by other views which extend AdapterView as, for example, Spinner , GridView , Gallery and StackView . |
2.4. Filtering and sorting
The filtering and sorting of the data is handled by the adapter. You need to implement the logic in your custom adapter implementation.
2.5. Data updates in the adapter
The notifyDataSetChanged() method on the adapter is called if the data has changed or if new data is available.
The notifyDataSetInvalidated() method is called if the data is not available anymore.
2.6. Listener
To react to selections in the list, set an OnItemClickListener to your ListView .
3. Default adapter
3.1. Default platform adapter
Android provides default adapter implementations; the most important are ArrayAdapter and CursorAdapter . ArrayAdapter can handle data based on Arrays or java.util.List . SimpleCursorAdapter can handle database related data.
3.2. Using ArrayAdapter
The ArrayAdapter class can handle a list or arrays of Java objects as input. Every Java object is mapped to one row. By default, it maps the toString() method of the object to a view in the row layout.
You can define the ID of the view in the constructor of the ArrayAdapter otherwise the android.R.id.text1 ID is used as default.
The ArrayAdapter class allows to remove all elements in its underlying data structure with the clear() method call. You can then add new elements via the add() method or a Collection via the addAll() method.
You can also directly modify the underlying data structure and call the notifyDataSetChanged() method on the adapter to notify it about the changes in data.
| If you want to change the data in your adapter, the underlying data structure must support this operation. This is, for example, the case for the ArrayList class, but not for arrays. |
3.3. ListView example with ArrayAdapter
The following listing shows a layout file called activity_listviewexampleactivity.xml which includes a ListView .
The following example shows the usage of the ListView view in an activity. It uses a default layout from the Android platform for the row layout. It also demonstrates the removal of list items and uses animations for the removal.
4. Custom adapter implementations
4.1. Developing a custom adapter
The ArrayAdapter is limited as it supports only the mapping of toString() to one view in the row layout. To control the data assignment and to support several views, you have to create your custom adapter implementation.
For this you would extend an existing adapter implementation or subclass the BaseAdapter class directly.
| Frequently you extend ArrayAdapter to write a custom adapter, as this is simpler than extending BaseAdapter directly. |
4.2. Preparing a row for the list
The adapter needs to create a layout for each row of the list. The ListView instance calls the getView() method on the adapter for each data element. In this method the adapter creates the row layout and maps the data to the views in the layout.
This root of the layout is typically a ViewGroup (layout manager) and contains several other views, e.g., an ImageView and a TextView . The following graphic shows a list with different layouts for odd and even rows.

Within the getView() method you would inflate an XML based layout and then set the content of the individual views based on the Java object for this row. To inflate the XML layout file, you can use the LayoutInflator system service.
| This layout inflator service can get accessed via the getLayoutInflator() method of the activity or via the context.getSystemService(Context.LAYOUT_INFLATER_SERVICE) method call. |
After the adapter inflated the layout, it searches for the relevant views in the layout and fills them with the data. The individual elements in the layout can be found via the findViewById() method call on the top level view.
4.3. Example for a custom adapter
The following code shows an implementation of a custom adapter. This adapter assumes that you have two png files (no.png and ok.png) in one of your directory]]res/drawable folders. The coding inflates an XML layout file, finds the relevant views in the layout and sets their content based on the input data.
4.4. Updating the data model from the adapter
The row can also contain views which interact with the underlying data model via the adapter. For example, you can have a Checkbox in your row layout and if the Checkbox is selected, the underlying data is changed.
5. ListActivity and ListFragment
5.1. Default container for using ListView
Android provides specialized fragment and activity classes to simplify list handling.
The classes are the ListActivity class, if you want to use lists in activities, and the ListFragment class, if you want to use lists in fragments.
You do not have to assign a layout to these elements. If you do not define a layout, the activity or fragment contains a single ListView by default. ListActivity and ListFragment also allow you to override a onListItemClick() method for handling selection of list items.
Both classes allow you to set the adapter to the default ListView via the setListAdapter() method.
The following example code shows a simple ListFragment implementation.
The next example code demonstrates the usage of a ListActivity .
5.2. ListActivity and custom layout
You can use a custom layout with ListActivity or ListFragment . In this case the fragment or activity searches in the provided layout for a ListView with the predefined android:id attribute set to @android:id/list . This usage is demonstrated by the following code snippet.
| If you do not use this ID or do not include a ListView into your layout, the application crashes once you try to display the activity or the fragment. |
5.3. Placeholder for an empty list
You can also use a view with the @android:id/empty ID in your layout. The corresponding activity and fragment shows this view automatically if the ListView is empty and hides it otherwise. For example, you could display an error message in such a view.
6. Exercise: Using ListView and ListActivity
The following exercise demonstrates how to use a ListView in an ListActivity . You use the predefined ArrayAdapter class and an existing Android layout for the rows.
Create a new Android project called de.vogella.android.listactivity with the activity called MyListActivity .
Change MyListActivity class based on the following code example. Note that the setContentView() method is not used.
7. Exercise: ListActivity with custom layout
In our example your will define your layout for the rows and use it in your adapter.
Create the rowlayout.xml layout file in the directory]]res/layout folder of the de.vogella.android.listactivity project.
Change your activity so that it uses the new layout.
8. Tutorial: Implementing your customer adapter
The following uses two images «no.png» and «ok.png». I placed them in the «res/drawable-mdpi» folder. You must create your own icons. In case you do not find any icons just copy «icon.png» and use a drawing program to change it a little bit and create a second one.
Create the class MySimpleArrayAdapter which will serve as our adapter.
To use this adapter, change the activity to the following.
If you run this example you should get a list with different icons for the certain elements.

9. ListViews and performance
9.1. Motivation
Performance is especially important on Android as users expect fast reaction times. Compared to desktop computers an Android device is relatively slow from the hardware perspective.
This part describes how to reduce these operations to implement your custom list adapter efficiently. The default Android adapters like ArrayAdapter are already performance optimized.
9.2. Time consuming operations
Every view which gets inflated from an XML layout file will result in a Java object. Inflating layouts and creating Java objects are expensive with regards to time and memory consumption.
In addition using the findViewById() method is relatively time consuming, even though it is not as bad as XML inflating.
9.3. Avoiding layout inflation and object creation
A ListView typically contains more data than the number of displayed rows. If the user scrolls the list, then the rows and their associated views will be scrolled out of the visible area. The Java objects which represent the rows can be reused for newly visible rows.
If Android determines that a row is not visible anymore, it allows the getView() of the adapter method to reuse the associated view via the convertView parameter.
The adapter can assign new data to the views contained in the view hierarchy of the convertView . This avoids inflating an XML file and creating new Java objects.
In case Android cannot reuse a row, the Android system passes null to the convertView parameter. Therefore the adapter implementation needs to check for this.
9.4. View holder pattern
A ViewHolder implementation allows to avoid the findViewById() method in an adapter.
A ViewHolder class is typically a static inner class in your adapter which holds references to the relevant views in your layout. This reference is assigned to the row view as a tag via the setTag() method.
If we receive a convertView object, we can get the instance of the ViewHolder via the getTag() method and assign the new attributes to the views via the ViewHolder reference.
While this sounds complex this is approximately 15 % faster than using the findViewById() method.
9.5. Example
The following code shows a performance optimized adapter implementation which reuses existing views and implements the holder pattern.
10. Storing the selection of a view
By default a ListView has no selection mode active. You can activate it via the setChoiceMode() method call. Pass ListView.CHOICE_MODE_MULTIPLE for multiple selections or ListView.CHOICE_MODE_SINGLE for single selections to this method.
To get the selected items of a ListView , use the getCheckedItemPosition() for a single selection method or listView.getCheckedItemPositions() for multiple selections. If you have stable ID, you could also use the getCheckedItemIds() method to get the selected IDs.
Android already provides a default layout for this: the android.R.layout.simple_list_item_multiple_choice layout which contains a configured CheckedTextView view.
The following activities demonstrate how to use these selection modes. If you use these modes, the ListView stores the selected values. It is not persisted in your data model.
Источник


