- Android — Drag and Drop
- The Drag/Drop Process
- The DragEvent Class
- Constants
- Methods
- Listening for Drag Event
- Starting a Drag Event
- Example
- Находки программиста
- воскресенье, 15 июля 2012 г.
- Реализация Drag and Drop в Android
- The Android Drag-and-Drop Framework in Practice
- API Overview
- States
- Listener and Callback Method
- Drag-and-Drop Shadow
- The Example
- Conclusion
Android — Drag and Drop
Android drag/drop framework allows your users to move data from one View to another View in the current layout using a graphical drag and drop gesture. As of API 11 drag and drop of view onto other views or view groups is supported.The framework includes following three important components to support drag & drop functionality −
Drag event class.
Helper methods and classes.
The Drag/Drop Process
There are basically four steps or states in the drag and drop process −
Started − This event occurs when you start dragging an item in a layout, your application calls startDrag() method to tell the system to start a drag. The arguments inside startDrag() method provide the data to be dragged, metadata for this data, and a callback for drawing the drag shadow.
The system first responds by calling back to your application to get a drag shadow. It then displays the drag shadow on the device.
Next, the system sends a drag event with action type ACTION_DRAG_STARTED to the registered drag event listeners for all the View objects in the current layout.
To continue to receive drag events, including a possible drop event, a drag event listener must return true, If the drag event listener returns false, then it will not receive drag events for the current operation until the system sends a drag event with action type ACTION_DRAG_ENDED.
Continuing − The user continues the drag. System sends ACTION_DRAG_ENTERED action followed by ACTION_DRAG_LOCATION action to the registered drag event listener for the View where dragging point enters. The listener may choose to alter its View object’s appearance in response to the event or can react by highlighting its View.
The drag event listener receives a ACTION_DRAG_EXITED action after the user has moved the drag shadow outside the bounding box of the View.
Dropped − The user releases the dragged item within the bounding box of a View. The system sends the View object’s listener a drag event with action type ACTION_DROP.
Ended − Just after the action type ACTION_DROP, the system sends out a drag event with action type ACTION_DRAG_ENDED to indicate that the drag operation is over.
The DragEvent Class
The DragEvent represents an event that is sent out by the system at various times during a drag and drop operation. This class provides few Constants and important methods which we use during Drag/Drop process.
Constants
Following are all constants integers available as a part of DragEvent class.
| Sr.No. | Constants & Description | ||||||||||||||
|---|---|---|---|---|---|---|---|---|---|---|---|---|---|---|---|
| 1 |
| Sr.No. | Constants & Description | |||||||||||
|---|---|---|---|---|---|---|---|---|---|---|---|---|
| 1 |
| Step | Description |
|---|---|
| 1 | You will use Android studio IDE to create an Android application and name it as My Application under a package com.example.saira_000.myapplication. |
| 2 | Modify src/MainActivity.java file and add the code to define event listeners as well as a call back methods for the logo image used in the example. |
| 3 | Copy image abc.png in res/drawable-* folders. You can use images with different resolution in case you want to provide them for different devices. |
| 4 | Modify layout XML file res/layout/activity_main.xml to define default view of the logo images. |
| 5 | Run the application to launch Android emulator and verify the result of the changes done in the application. |
Following is the content of the modified main activity file src/MainActivity.java. This file can include each of the fundamental lifecycle methods.
Following will be the content of res/layout/activity_main.xml file −
In the following code abc indicates the logo of tutorialspoint.com
Following will be the content of res/values/strings.xml to define two new constants −
Following is the default content of AndroidManifest.xml −
Let’s try to run your My Application application. I assume you had created your AVD while doing environment setup. To run the app from Android Studio, open one of your project’s activity files and click Run  icon from the toolbar. Android studio installs the app on your AVD and starts it and if everything is fine with your setup and application, it will display following Emulator window −
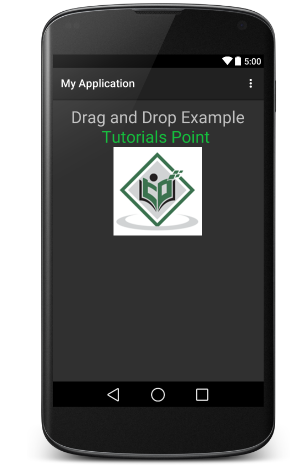
Now do long click on the displayed TutorialsPoint logo and you will see that logo image moves a little after 1 seconds long click from its place, its the time when you should start dragging the image. You can drag it around the screen and drop it at a new location.
Источник
Находки программиста
Решения конкретных задач программирования. Java, Android, JavaScript, Flex и прочее. Настройка софта под Linux, методики разработки и просто размышления.
воскресенье, 15 июля 2012 г.
Реализация Drag and Drop в Android

Touch-интерфейсы дают нам удивительную возможность «прикоснуться к приложению», манипулировать с элементами на экране самым естественным для человека способом. И нам, разработчикам, грех не использовать такую возможность. Давайте разберёмся, как максимально просто реализовать Drag&Drop в нашем приложении.
В двух словах уточним, какое поведение элемента интерфейса мы хотим получить. Есть пара белых ImageView и один синий прямоугольник. Та из белых картинок, которой мы коснулись будет следовать за пальцем, пока мы её не отпустим. Если мы отпустим её над синим прямоугольником, прямоугольник станет красным, и картинка останется на месте. Если за пределами — картинка вернётся на исходную позицию.
Основная наша цель — сделать всё максимально просто. Кроме Layout-a, описывающего начальное состояние интерфейса, мы напишем всего один класс в сотню строк кода. Итак приступим.
Становимся в исходное положение
Как я и описывал в условии задачи: тут синий прямоугольник и две картинки в RelativeLayout-е. Ничего особенного.
Вот и наши 100 строк кода:
Посмотрим на наш код внимательнее. Вся логика реализована тут с помощью двух listener-ов. Первый OnTouchListener, метод onTouch которого реализует непосредственно наше Activity мы навешиваем на «подвижные» картинки. Задача, которую мы тут решаем — определить какая из картинок под пальцем, сохранить её начальные параметры расположения на случай, если нужно будет вернуться и установить флаг начала перемещения.
Второй OnTouchListener вешаем на самый верхний элемент иерархии View нашего Activity. Он определяет координаты «цели», перемещает картинку и проверяет, не попали ли мы уже в цель.
Источник
The Android Drag-and-Drop Framework in Practice
The Android drag-and-drop framework provides you with the tools necessary to create components that allow your users to move data around an app using drag-and-drop gestures. The framework contains an API for handling the drag-and-drop logic, such as drag events, listeners, etc. In this article, we’ll show how it all works and share an example that showcases how to make the API work with the UI.
API Overview
We’ll quickly go through the APIs and the components that we’ll need to create the example app. See the Drag and Drop section of the Android developers guide for the full documentation and more in-depth explanations.
States
A drag-and-drop action begins when a user performs a movement that the framework recognizes as a signal that data is being dragged. There are four steps (states) in the drag-and-drop process:
Started — Once your application’s logic decides that the user should perform a drag (for example, on a long press), you call startDrag() , which tells the system that the drag has started. After that, the system sends the ACTION_DRAG_STARTED event down to the drag event listeners for all the View objects in the current layout.
Continuing — The user continues the drag, and the system now sends ACTION_DRAG_ENTERED or ACTION_DRAG_EXITED , depending on if the drag gesture entered or exited the bounds of the view to which the event is propagated.
Dropped — The user drops the dragged object/data, and the system sends the ACTION_DROP event to the listener of the view if the location of the drop event is inside that view’s bounding box.
End — The drag-and-drop operation has ended. All of the views that were listening for the drag-and-drop events now get the ACTION_DRAG_ENDED event.
These four states provide everything you need when it comes to updating the UI to match the drag-and-drop process and its result.
Listener and Callback Method
To receive the drag-and-drop events, the view needs to register a View.OnDragListener on the View via View#setOnDragListener() . The View.OnDragListener contains only one method, boolean onDrag(View v, DragEvent event) .
The first parameter you get in the onDrag() call is the view that received the event. The second parameter is the DragEvent object, which contains all the information about the particular drag-and-drop event, including the location of the event, the drag action (state), and the data it carries. See the full documentation for all the methods. We will see how to use this in the example at the end.
Drag-and-Drop Shadow
During the drag-and-drop action, the framework provides you with the API that enables you to draw on top of the dragged point, thus creating the visual representation of the dragged data. For that, you have to extend the View.DragShadowBuilder and pass it in the View#startDrag() method. When creating the View.DragShadowBuilder , you can pass a view that will be used as the basis of the drag gesture shadow.
To get and alter the coordinates of the drag-and-drop gesture, you need to override the onProvideShadowMetrics(Point outShadowSize, Point outShadowTouchPoint) method that gets you the size and the touch point, which you can then alter. They will then get propagated back to the system afterward. We’ll cover this more in the implementation.
The onDrawShadow(canvas: Canvas) method gives you a canvas that you can now use to draw the shadow.
The Example
There’s no point in going too deep with the documentation of components, so we’ll jump right into the action and create an example that will try to cover most of this API and showcase the real power of this framework. You can always go back and check the full documentation to see if there’s anything that you might need that’s not covered here.
We will create a sample app where you can pick colors from a palette of five colors.
For the sake of simplicity, the entire app will only have one view/activity, and that’s MainActivity . First we need to define a layout for it in the XML, namely activity_main.xml :
As you can see, we have two areas that we can paint: area1 and area2 . Then we have the floating action buttons, which we’ve used as color palette elements, so you can drag them into the areas to paint them in the same color as the dragged button. Of course, you can and probably should use custom views if you implement the color picker in your own app.
Now, let’s go to our MainActivity , where we will implement all of the drag-and-drop logic. In this particular example, we want to activate a drag action when one of the floating action buttons has been long pressed. Once the dragging has started, we will increase the shadow of the areas that can be painted, and once you hover over one of those areas, the shadow will grow even larger, in order to provide feedback that the area below will be painted if you drop the color.
First we define these elevation values in our MainActivity :
Since we will activate the drag action once one of the floating action buttons has been pressed, we need to create a long-press listener. A description for each line is in the comments:
Now, let’s create an OnDragListener that we will set on our areas:
In order to have some UI feedback, we’ll create a shadow for a drag gesture that will follow the finger. For that purpose, we extend View.DragShadowBuilder :
Lastly, we need to set the long-press listener on the floating action buttons and a drag listener on the areas that we can drop the color on:
And there we have it: We’ve implemented an example similar to what was shown earlier in this post. We hope this helps you better understand the process and see how you can implement the Android drag-and-drop framework for your own use case.
Conclusion
The Android drag-and-drop framework provides you with a flexible yet powerful API for dragging data across your app. It allows you to handle all of the stages in the drag-and-drop process in a very convenient way — both in terms of data and the UI.
Your app might need a custom solution, but in most of the drag-and-drop implementations, this API will be sufficient; you might just have to figure out the best way to set it up for your needs.
Источник


