- Android Practice
- Установка OnClickListener и обработка нажатий
- Анонимный класс
- Поле типа OnClickListener
- Вложенный класс
- Activity с реализацией OnClickListener
- Использование одного обработчика
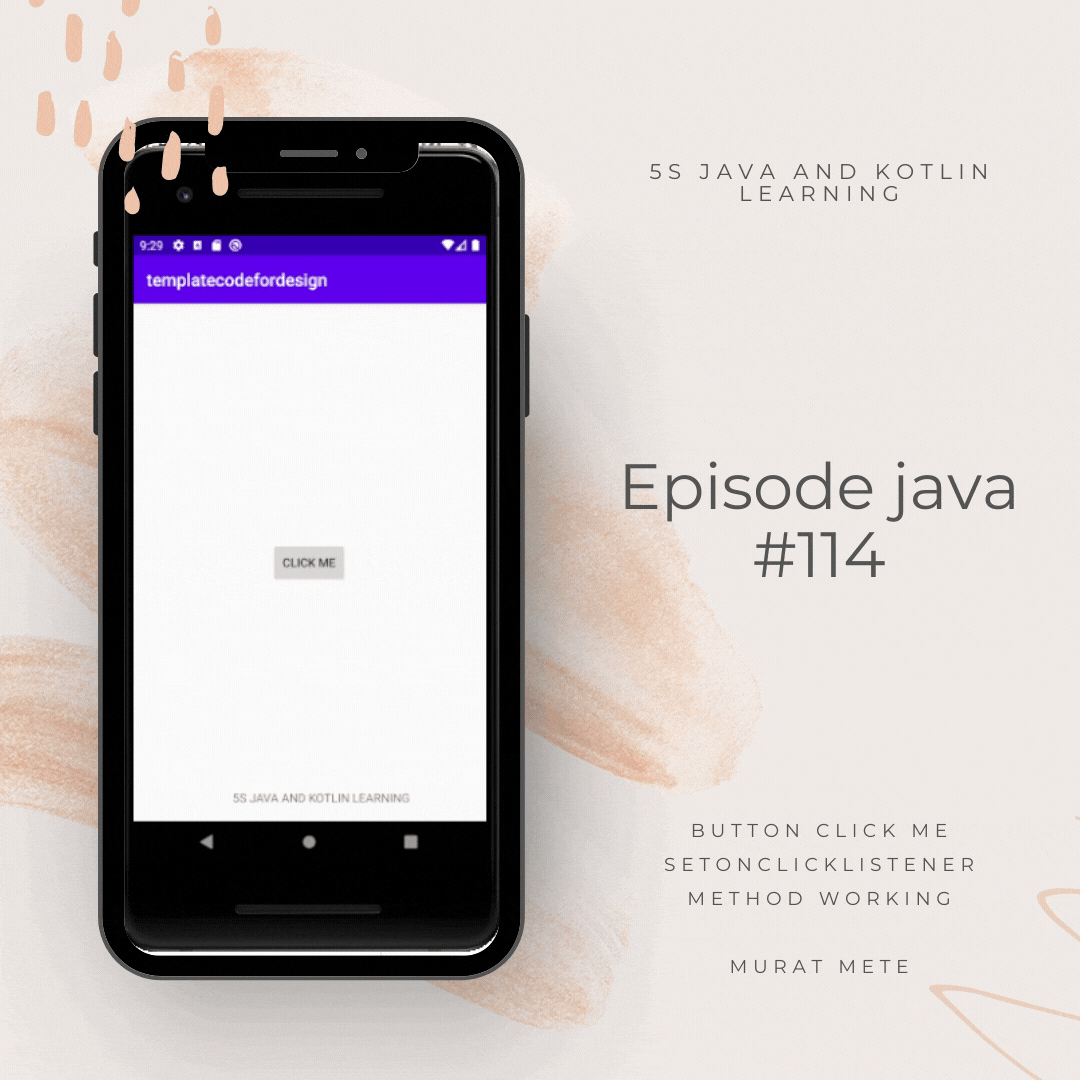
- Button Click Me setOnClickListener Method Working — Java Android
- Android — setOnClickListener vs OnClickListener vs View.OnClickListener
- 5 Answers 5
- Best way to implement View.OnClickListener in android
- 14 Answers 14
Android Practice
Статьи о разработке Android приложений
Установка OnClickListener и обработка нажатий

Когда мы имеет дело с множеством кнопок в приложении, то нужно позаботиться об обработке событий. В данной статье мы рассмотрим работу с OnClickListener , варианты создания разных обработчиков событий и возможные пути идентификации конкретной кнопки. Так же мы рассмотрим преимущества и недостатки этих подходов , в некоторых случая они очень существенны, а в некоторых нет.
Для установки обработчика для кнопки, используется setOnClickListener метод. В параметре передается класс реализующий OnClickListener интерфейс, который имеет единственный метод onClick(View v) . Установку обработчика для кнопок следует выполнять в onCreate() методе Activity.
Анонимный класс
Самый простой способ создания обработчика это использование анонимного класса.
Преимуществом такого подхода является простота и не требует создания дополнительных переменных. Очень хорошо подходит, если у вас только одна кнопка. Недостатками является внутренняя реализация, обработчик нельзя задать в другом месте и при наличии нескольких кнопок, такой подход становиться массивным. Так же недостатком является то, что обработчик будет использоваться только данной кнопкой.
Поле типа OnClickListener
Вместо анонимного класса мы может определить поле с типа OnClickListener и сразу же его инициализировать:
Здесь мы получает одновременное определение и реализацию. Далее созданное поле можно передать кнопке в качестве обработчика:
По сравнению с анонимными классом, использовать поле типа OnClickListener более удобнее. Преимуществом является легкая установка обработчика сразу нескольким кнопкам и одновременное определение с реализацией. Реализация может располагаться в любом месте. Недостатком является создание поля, а именно экземпляра класса и при этом, он может иметь другие методы, но они будут не видны из вне.
Вложенный класс
При таком подходе создается вложенный класс реализующий OnClickListener интерфейс:
После создание класса обработчика, его можно установить для каждой кнопки следующим образом:
Преимуществом является простая установка в setOnClickListener методе и то, что класс может иметь другие методы, к которым можно обращается. Недостатком является обязательное определение класса и отведение отдельного поля для хранения созданного экземпляра.
Activity с реализацией OnClickListener
Activity может сама реализовывать интерфейс OnClickListener , тогда при установки обработчика передается this . Сначала нужно сообщить, что Activity будет реализовывать интерфейс:
Чтобы установить обработчик, нужно передать this нашей Activity в качестве параметра:
Если с кнопкой в дальнейшем не производиться никаких действий, то можно не создавать ее экземпляр и установка обработчика будет следующей:
Если нужно установить обработчик во внутреннем классе, то нужно передать в качестве параметра MainActivity.this .
Такой подход обработки нажатий более простой, удобный и наиболее предпочтительный, а так же не создает дополнительных полей или классов.
Использование одного обработчика
Было бы не разумно создавать для каждой кнопки свой обработчик, а постараться использовать уже созданный. Для определения конкретной нажатой кнопки, можно использовать getId() метод. Этот метод будет возвращать идентификатор нажатой кнопки, а мы сможем выполнить дальнейшею логику соответственно кнопки:
Вы можете использовать фигурные скобки для лучшего разделения кода:
Рассмотренные подходы обработки нажатий можно применять не только для кнопок, но и для других элементов, например таких как ListView и GridView.
Источник
Button Click Me setOnClickListener Method Working — Java Android
Button will respond to OnClickListener after this course.
This example demonstrates the implement button onclicklistener android java Code Example
In this article, we will discuss about how to trigger click events on android Views (Buttons, Text views etc) ?
Android Button in JAVA ANDROID
Action listeners are probably the easiest — and most common — event handlers to implement. You implement an action listener to define what should be done when an user performs certain operation.
Step 1 − Create a new project in Android Studio, go to File ⇒ New Project and fill all required details to create a new project.

Create Empty Project
How to implement on Android Button OnClick in android programmatically.
S tep 2 — “Add the following code to res/layout/activity_main.xml.“

I worked in simple relative layout method for only give basic example.
- In the below code, we have declared Button as ”@+id/button”.
- You can add a spinner to your layout with the Button object. You should usually do so in your XML layout with a element. For example:
Источник
Android — setOnClickListener vs OnClickListener vs View.OnClickListener
My understanding is that when I’m creating a button object that listens for a click, I have to:
- Create the button object
- Use OnClickListner to make it listen to the user’s click
- Use onClick to execute actions after the user clicks the button
- Where does setOnClickListener fit into the above logic?
- Which one actually listens to the button click?
- setOnClickListener ?
- OnClickListener ?
- View.OnClickListener ?
- What are the differences between those three?
Here is what I found in Android Dev:
You may also find it more convenient to implement OnClickListener as a part of your Activity . This will avoid the extra class load and object allocations. For example:


5 Answers 5
Imagine that we have 3 buttons for example
So what we will do?
Or we can do this:
Or we can implement View.OnClickListener and i think it’s the best way:
Finally there is no real differences here Just «Way better than the other»

The logic is simple. setOnClickListener belongs to step 2.
- You create the button
- You create an instance of OnClickListener * like it’s done in that example and override the onClick -method.
- You assign that OnClickListener to that button using btn.setOnClickListener(myOnClickListener); in your fragments/activities onCreate -method.
- When the user clicks the button, the onClick function of the assigned OnClickListener is called.
*If you import android.view.View; you use View.OnClickListener . If you import android.view.View.*; or import android.view.View.OnClickListener; you use OnClickListener as far as I get it.
Another way is to let you activity/fragment inherit from OnClickListener . This way you assign your fragment/activity as the listener for your button and implement onClick as a member-function.
Please note that for the sake of simplicity I have made reference to only the first code snippet i.e.,
setOnClickListener(View.OnClickListener l) is a public method of View class. Button class extends the View class and can therefore call setOnClickListener(View.OnClickListener l) method.
setOnClickListener registers a callback to be invoked when the view (button in your case) is clicked. This answers should answer your first two questions:
1. Where does setOnClickListener fit in the above logic?
Ans. It registers a callback when the button is clicked. (Explained in detail in the next paragraph).
2. Which one actually listens to the button click?
Ans. setOnClickListener method is the one that actually listens to the button click.
When I say it registers a callback to be invoked, what I mean is it will run the View.OnClickListener l that is the input parameter for the method. In your case, it will be mCorkyListener mentioned in button.setOnClickListener(mCorkyListener); which will then execute the method onClick(View v) mentioned within
Moving on further, OnClickListener is an Interface definition for a callback to be invoked when a view (button in your case) is clicked. Simply saying, when you click that button, the methods within mCorkyListener (because it is an implementation of OnClickListener ) are executed. But, OnClickListener has just one method which is OnClick(View v) . Therefore, whatever action that needs to be performed on clicking the button must be coded within this method.
Источник
Best way to implement View.OnClickListener in android
Suppose we have an Activity with a lot of views on which OnClickListener is to be registered.
The most common way to implement this is to let the Activity-Subclass implement the OnClickListener, something like this:
The way i like to implement it is to create a private class inside the Activity-Subclass and let that inner class implement the OnClickListener:
This way the code seems more organized and easy to maintain.
Moreover, talking about «Is-a», «Has-a» relationships, the latter seems to be a good practice because now the Activity-Subclass would have a «Has-a» relationship with the ClickListener. While in the former method we would be saying that Our Activity-Subclass «Is-a» ClickListener, which ain’t completely true.
Note that, i am not concerned with the memory overhead the latter would cause.
Also, adding onClick tag in xml is completely out of question.
So, what really is the best way to implement a ClickListener?
Please don’t suggest any libraries like RoboGuice or ButterKnife etc.
UPDATE:
I would like to share the approach I finally adopted.
I directly implement the listener in Activity/Fragment.
As far as OOP design is concerned. The «HAS-A» approach doesn’t offers any practical benefits and even takes up more memory. Considering the amount of nested classes(and the memory overhead) we will be creating for every similar listener we implement, this approach should clearly be avoided.

14 Answers 14
First, there is no best practice defined by Android regarding registering click listeners. It totally depends on your use case.
Implementing the View.OnClickListener interface to Activity is the way to go. As Android strongly recommends interface implementation over and over again whether it is an Activity or Fragment.
Now as you described :
This is your approach. Now it is your way of implementation and there is nothing wrong with this if you are not concerned with memory overhead. But what’s the benefit of creating the inner class and implementing the View.OnClickListener if you can simply implement that in the main class which can also lead to the code clarity and simplicity that you need.
So it just a discussion rather getting the best possible solution of implementing the View.OnClickListener because if you go with the practical point of everyone, you will go for a solution which is simple and memory efficient.
So I would prefer the conventional way. It keeps things simple and efficient. Check the code below:
P.S : Your approach will definitely increase lines of code 😛 😉


First of all lets get the basics clear here..
By implementing an Interface, your class doesn’t become that.. like you said:
«Our Activity-Subclass «Is-a» ClickListener, which ain’t completely true.»
Your class can only have «Is-a» relationship if it extends, in this case an Activity . Implementing an interface means that it can behave like what interface has set its contract.
class Peter extends Human .. means Peter is a Human..
class Peter can also implement programmer, musician, husband etc means Peter can behave as the above.
As for best practice, you could make an entirely separate class which implements OnClickListener like this:
And in your main Activity you could instantiate MyListener and call onClick() and pass your view in it:

I use button.setOnClickListener(this); where my Activity implements View.OnClickListener , and then get the ID of the Button in a separate method. See below for an example:

Here you can create a btnClickListner object and after that you will call that btnCLickLisner object when ever you want to perform the onCLieck actions for buttons..
Let us assume, in my activity i have a 5 to 10 buttons and writing each button separate onclick listner is bad idea. So to over come this,we can use like below..
register your buttons
Here i am setting the onclick listner to my buttons after click
Here is the btnClick Listner implementation

I have found using Butterknife makes for clean code. And because it uses code generation (not reflections) it has little performance overhead.
Your ClickListener is an inner non-static class the coupling of this ‘has-a’ is no different than if your class Activity implemented View.OnClickListener . This is because your inner ClickListener requires an instance of ActivityMain and really can’t be reused. I would argue that you’re over engineering and aren’t actually gaining anything.
EDIT: To answer your question I like to have anonymous View.OnClickListener for each widget. I think this creates the best separation of logic. I also have methods like setupHelloWorldTextView(TextView helloWorldTextView); where I put all my logic related to that widget.

First approach is better than the other because thats why View.OnClickListener is an Interface instead of an abstract class . besides the later might leak in various situations since you are using a non-static inner class.
A small remark to this, and maybe a little bit of topic.
What, if we not just implement OnClickListener and we have a bunch of other Listeners / Callback to implement. In my Opinion it will get messy to implement all of these in the class instead of using anonymous classes / lambda. It is hard to remember wich method belongs to which interface.
So if we have to implement an interface (in this case OnClickListener) multiple times it my be a good solution to implement on class base and use the switch/case.
But if we have to implement multiple interfaces it may be a good solution to use anonymous classes / lambda
For this particular case I’d say that maintain a single instance of a OnClickListener is the best approach for you. You will have a «Has-a» relationship and won’t need to create several instances since you are handling the behavior using the view id in the onClick(View view) callback.

simply you using like not implements subclass or not handle a click event just do like this way .
and handle click event into button ya any type of click event like
its work very simply Thanks


It really depends on what you want to achieve. If you have e.g. a complex functionality with threading, dependencies, etc., I personally like to decouple it completely from the Activity into a separate class XyzAction , that does the heavy stuff, knows about certain Invoker s and returns them results, if needed. My Invoker s are basically objects, that implement OnClick / OnTouch /etc. Listener s and bind themselves to needed actions. E.g. there could be a LoginInvoker implementing OnClickListener for a Button and an ImageView and also a generic ActionListener that gets invoked when a MenuItem is clicked. The Invoker has update methods for showing progress to the user and the result of the bound action. The action posts updates to its Invoker s and can be garbage collected, if all of them die, because it has no connection to the UI.
For less complex actions, I couple them directly to the Android component (i.e. Activity / Feagment / View ) and also call them Actions , with the big difference of them implementing the UI callbacks directly.
In both cases I declare the actions as members, so I can see on a quick glance what specific actions the Android component supports.
If there’s something trivial like «show a Toast if button is pressed», I use anonymous inner classes for the UI callbacks, because you normally don’t care that much about them with regards to maintainability.
Источник


