- Managing AVDs with AVD Manager
- In this document
- Creating an AVD
- Creating a device definition
- Hardware options
- Creating Emulator Skins
- Какая команда выводит список доступных имен avd
- Managing Virtual Devices with the Android Device Manager
- Android Device Manager on Windows
- Requirements
- Launching the Device Manager
- Main Screen
- New Device
- Edit Device
- Additional Options
- Android Device Manager on macOS
- Requirements
- Launching the Device Manager
- Main Screen
- New Device
- Edit Device
- Additional Options
- Troubleshooting
- Android SDK in Non-Standard Location
- Wrong Version of Android SDK Tools
- Snapshot disables WiFi on Android Oreo
- Wrong Version of Android SDK Tools
- Snapshot disables WiFi on Android Oreo
- Generating a Bug Report
- Summary
- Related Links
- Related Video
Managing AVDs with AVD Manager
In this document
The AVD Manager is a tool you can use to create and manage Android virtual devices (AVDs), which define device configurations for the Android Emulator.
To launch the AVD Manager:
- In Android Studio, select Tools > Android > AVD Manager, or click the AVD Manager icon
 in the toolbar.
 - Or, use the command line to navigate to your SDK’s tools/ directory and execute:
 in the toolbar.
The AVD Manager main screen shows your current virtual devices, as shown in figure 1.

Figure 1. The AVD Manager main screen shows your current virtual devices.
Note: If you launch the AVD Manager from the command line, the UI is different than how it appears in Android Studio, as documented here. Most of the same functionality is available, but the command-line version of the AVD Manager is currently not documented.
Creating an AVD
You can create as many AVDs as you would like to use with the Android Emulator. To effectively test your app, you should create an AVD that models each device type for which you have designed your app to support. For instance, you should create an AVD for each API level equal to and higher than the minimum version you’ve specified in your manifest tag.
To create an AVD based on an existing device definition:
- From the main screen (figure 1), click Create Virtual Device.
In the Select Hardware window, select a device configuration, such as Nexus 6, then click Next.

Figure 2. The Select Hardware window.
If necessary, click Show Advanced Settings to select a custom skin for the hardware profile and adjust other hardware settings.
To launch the AVD in the Android Emulator, click the launch button  in the list of AVDs.
Creating a device definition
In case the available device definitions do not match the device type you’d like to emulate, you can create a custom device definition for your AVD:
- From the main screen (figure 1), click Create Virtual Device.
- To begin you custom device by using an existing device profile as a template, select a device profile then click Clone Device.
Or, to start from scratch, click New Hardware Profile.
The following Configure Hardware Profile window (figure 3) allows you to specify various configurations such as the screen size, memory options, input type, and sensors.
When you’re done configuring the device, click Finish.

Figure 3. The Configure Hardware window when creating a custom device configuration.
Hardware options
If you are creating a new AVD, you can specify the following hardware options for the AVD to emulate:
| Characteristic | Description | Property |
|---|---|---|
| Device ram size | The amount of physical RAM on the device, in megabytes. Default value is «96». | hw.ramSize |
| Touch-screen support | Whether there is a touch screen or not on the device. Default value is «yes». | hw.touchScreen |
| Trackball support | Whether there is a trackball on the device. Default value is «yes». | hw.trackBall |
| Keyboard support | Whether the device has a QWERTY keyboard. Default value is «yes». | hw.keyboard |
| DPad support | Whether the device has DPad keys. Default value is «yes». | hw.dPad |
| GSM modem support | Whether there is a GSM modem in the device. Default value is «yes». | hw.gsmModem |
| Camera support | Whether the device has a camera. Default value is «no». | hw.camera |
| Maximum horizontal camera pixels | Default value is «640». | hw.camera.maxHorizontalPixels |
| Maximum vertical camera pixels | Default value is «480». | hw.camera.maxVerticalPixels |
| GPS support | Whether there is a GPS in the device. Default value is «yes». | hw.gps |
| Battery support | Whether the device can run on a battery. Default value is «yes». | hw.battery |
| Accelerometer | Whether there is an accelerometer in the device. Default value is «yes». | hw.accelerometer |
| Audio recording support | Whether the device can record audio. Default value is «yes». | hw.audioInput |
| Audio playback support | Whether the device can play audio. Default value is «yes». | hw.audioOutput |
| SD Card support | Whether the device supports insertion/removal of virtual SD Cards. Default value is «yes». | hw.sdCard |
| Cache partition support | Whether we use a /cache partition on the device. Default value is «yes». | disk.cachePartition |
| Cache partition size | Default value is «66MB». | disk.cachePartition.size |
| Abstracted LCD density | Sets the generalized density characteristic used by the AVD’s screen. Default value is «160». | hw.lcd.density |
Creating Emulator Skins
An Android emulator skin is a collection of files that define the visual and control elements of an emulator display. If the skin definitions available in the AVD settings don’t meet your needs, you can create your own custom skin definition, then apply it to your AVD from the advanced settings on the Verify Configuration screen.
Each emulator skin contains:
- A hardware.ini file
- Layout files for supported orientations (landscape, portrait) and physical configuration
- Image files for display elements, such as background, keys and buttons
To create and use a custom skin:
- Create a new directory where you will save your skin configuration files.
- Define the visual appearance of the skin in a text file named layout . This file defines many characteristics of the skin, such as the size and image assets for specific buttons. For example:
- Add the bitmap files of the device images in the same directory.
- Specify additional hardware-specific device configurations an hardware.ini file for the device settings, such as hw.keyboard and hw.lcd.density .
- Archive the files in the skin folder and select the archive file as a custom skin.
For more detailed information about creating emulator skins, see the Android Emulator Skin File Specification in the tools source code.
Источник
Какая команда выводит список доступных имен avd
Я знаю, что могу запустить эмулятор avd, набрав
Но есть ли команда для вывода списка доступных имен avd? Где хранится эта конфигурация avd?
AFAIK — это то, что вам нужно. android list avd avdmanager list avd
Использование sdk / tools / emulator
Это будет список всех доступных AVDS
Перечислите все свои эмуляторы:
Запустите один из перечисленных эмуляторов:
где эмулятор находится под:
войдите в Android / sdk / tools и выполните следующую команду
который вернет что-то вроде
Я пробую несколько комбинаций, и это сработало :), это было довольно очевидно
вывод будет примерно таким
Я могу запустить эмулятор с консоли
Это старый пост, но в настоящее время я использую этот скрипт для отображения имен avd и запуска его.
Вот пример запуска и вывода:
У меня есть простой способ (только для окон):
Прежде всего установите постоянный путь к adb в вашей системе (очень похоже на java). Найдите свой, в большинстве случаев — C:\Program Files\android\android-sdk\platform-tools и скопируйте. Теперь просмотрите свойства вашей системы и найдите Advanced System Setting. Теперь найдите переменную среды, на вкладке системных переменных найдите путь. Если пути нет, создайте новую переменную, назовите ее Путь и вставьте скопированное значение в следующее поле. Но если путь уже существует, откройте его, поставьте ; точку с запятой в конце поля значения и вставьте скопированное значение.
Теперь вы почти закончили.! Проверьте это, набрав adb cmd
а теперь введите adb devices , это то, что вы хотели. Ура.!
Для пользователей Mac, прибывающих сюда, вы можете найти ранее упомянутый каталог android / sdk / tools в / Users / YOURUSERNAME / Library / Android / sdk / tools /
Источник
Managing Virtual Devices with the Android Device Manager
This article explains how to use the Android Device Manager to create and configure Android Virtual Devices (AVDs) that emulate physical Android devices. You can use these virtual devices to run and test your app without having to rely on a physical device.
After you have verified that hardware acceleration is enabled (as described in Hardware Acceleration for Emulator Performance), the next step is to use the Android Device Manager (also referred to as the Xamarin Android Device Manager) to create virtual devices that you can use to test and debug your app.
Android Device Manager on Windows
This article explains how to use the Android Device Manager to create, duplicate, customize, and launch Android virtual devices.
You use the Android Device Manager to create and configure Android Virtual Devices (AVDs) that run in the Android Emulator. Each AVD is an emulator configuration that simulates a physical Android device. This makes it possible to run and test your app in a variety of configurations that simulate different physical Android devices.
Requirements
To use the Android Device Manager, you will need the following items:
Visual Studio 2019 Community, Professional, or Enterprise.
OR Visual Studio 2017 version 15.8 or later is required. Visual Studio Community, Professional, and Enterprise editions are supported.
Visual Studio Tools for Xamarin version 4.9 or later.
The Android SDK must be installed (see Setting up the Android SDK for Xamarin.Android). Be sure to install the Android SDK at its default location if it is not already installed: C:\Program Files (x86)\Android\android-sdk.
The following packages must be installed (via the Android SDK Manager):
- Android SDK Tools version 26.1.1 or later
- Android SDK Platform-Tools 27.0.1 or later
- Android SDK Build-Tools 27.0.3 or later
- Android Emulator 27.2.7 or later.
These packages should be displayed with Installed status as seen in the following screenshot:

Launching the Device Manager
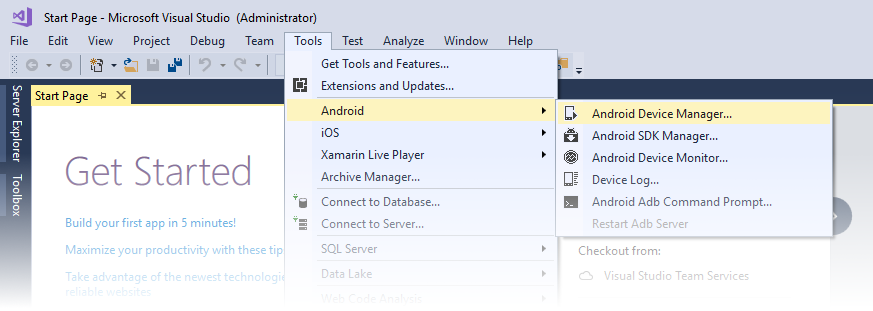
Launch the Android Device Manager from the Tools menu by clicking Tools > Android > Android Device Manager:
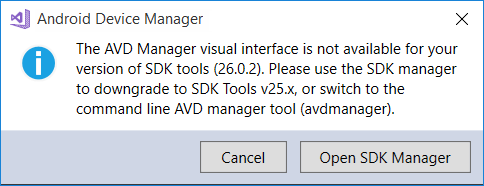
If the following error dialog is presented on launch, see the Troubleshooting section for workaround instructions:
Main Screen
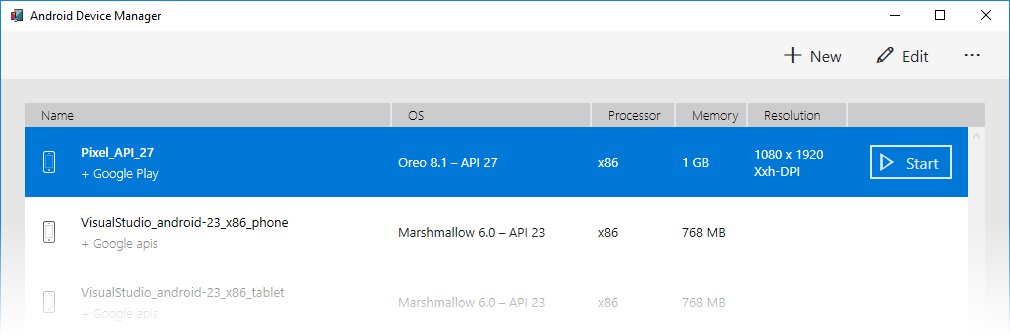
When you first launch the Android Device Manager, it presents a screen that displays all currently-configured virtual devices. For each virtual device, the Name, OS (Android Version), Processor, Memory size, and screen Resolution are displayed:
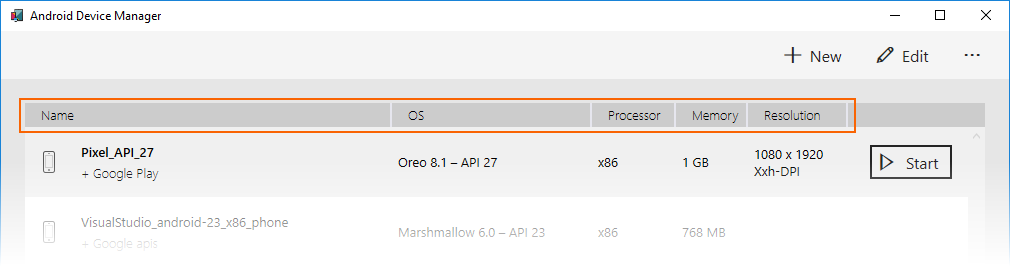
When you select a device in the list, the Start button appears on the right. You can click the Start button to launch the emulator with this virtual device:
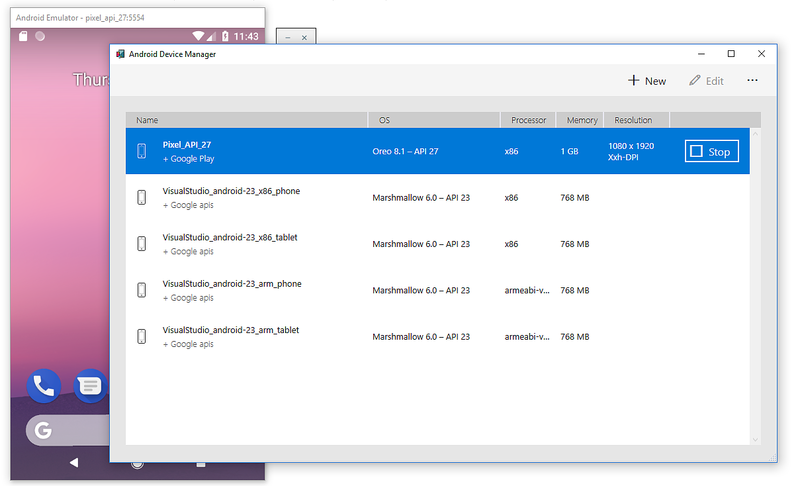
After the emulator starts with the selected virtual device, the Start button changes to a Stop button that you can use to halt the emulator:
New Device
To create a new device, click the New button (located in the upper right-hand area of the screen):
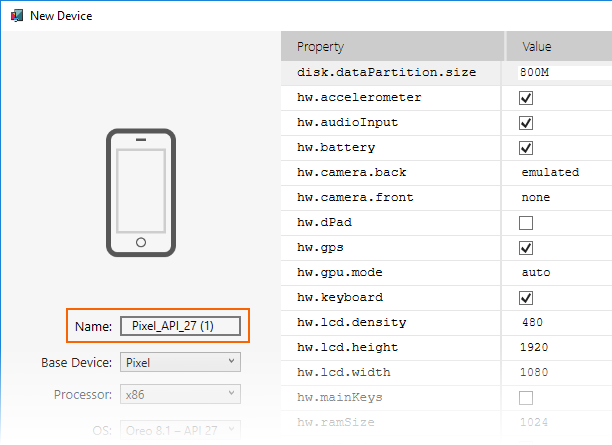
Clicking New launches the New Device screen:
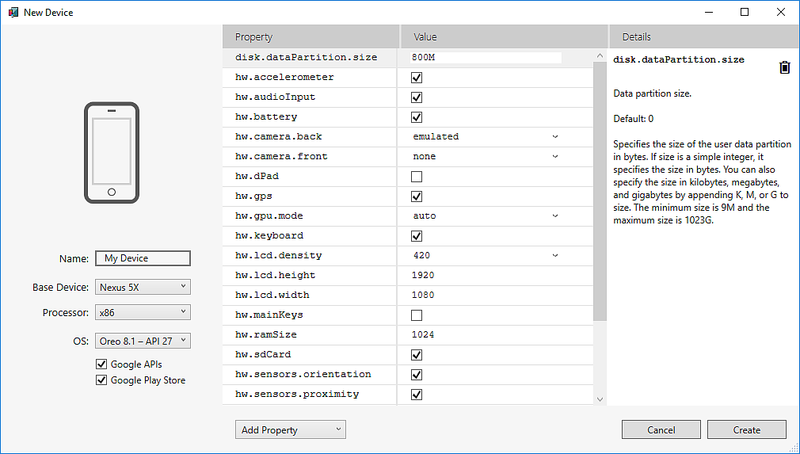
To configure a new device in the New Device screen, use the following steps:
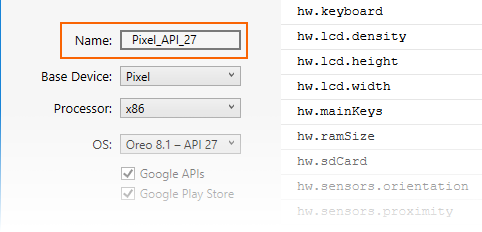
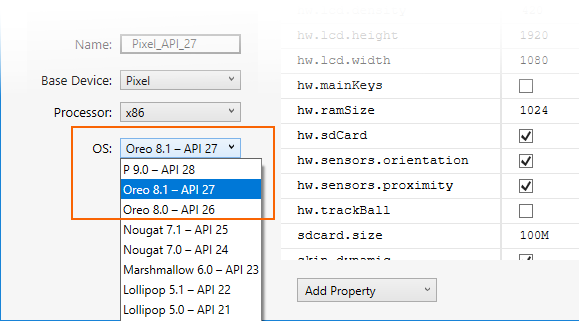
Give the device a new name. In the following example, the new device is named Pixel_API_27:
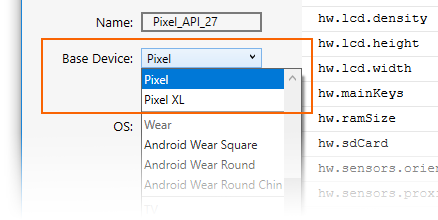
Select a physical device to emulate by clicking the Base Device pull-down menu:
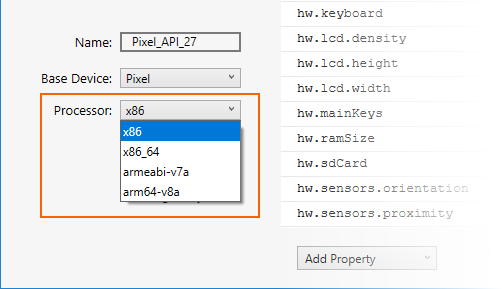
Select a processor type for this virtual device by clicking the Processor pull-down menu. Selecting x86 will provide the best performance because it enables the emulator to take advantage of hardware acceleration. The x86_64 option will also make use of hardware acceleration, but it runs slightly slower than x86 (x86_64 is normally used for testing 64-bit apps):
Select the Android version (API level) by clicking the OS pull-down menu. For example, select Oreo 8.1 — API 27 to create a virtual device for API level 27:
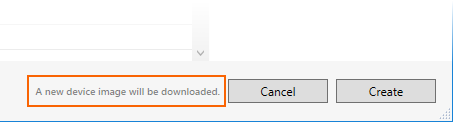
If you select an Android API level that has not yet been installed, the Device Manager will display A new device will be downloaded message at the bottom of the screen – it will download and install the necessary files as it creates the new virtual device:
If you want to include Google Play Services APIs in your virtual device, enable the Google APIs option. To include the Google Play Store app, enable the Google Play Store option:
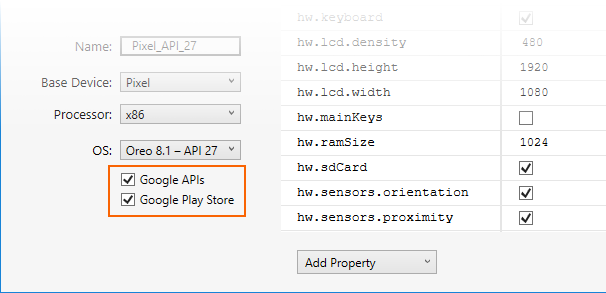
Note that Google Play Store images are available only for some base device types such as Pixel, Pixel 2, Nexus 5, and Nexus 5X.
Edit any properties that you need to modify. To make changes to properties, see Editing Android Virtual Device Properties.
Add any additional properties that you need to explicitly set. The New Device screen lists only the most commonly-modified properties, but you can click the Add Property pull-down menu (at the bottom) to add additional properties:
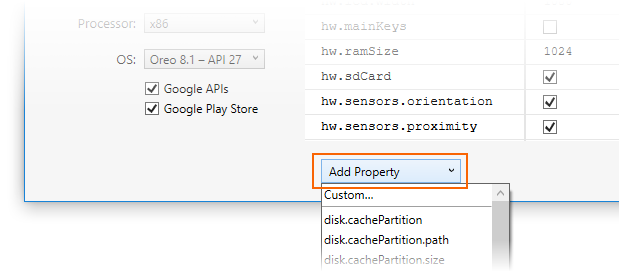
You can also define a custom property by selecting Custom. at the top of the property list.
Click the Create button (lower right-hand corner) to create the new device:
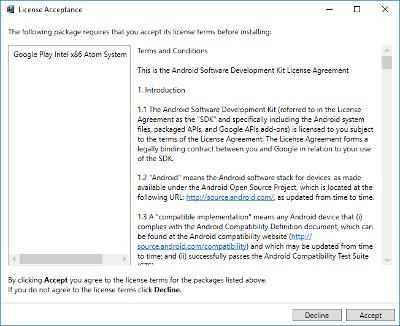
You might get a License Acceptance screen. Click Accept if you agree to the license terms:
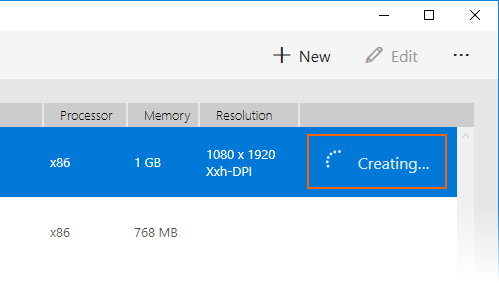
The Android Device Manager adds the new device to the list of installed virtual devices while displaying a Creating progress indicator during device creation:
When the creation process is complete, the new device is shown in the list of installed virtual devices with a Start button, ready to launch:
Edit Device
To edit an existing virtual device, select the device and click the Edit button (located in the upper right-hand corner of the screen):
Clicking Edit launches the Device Editor for the selected virtual device:
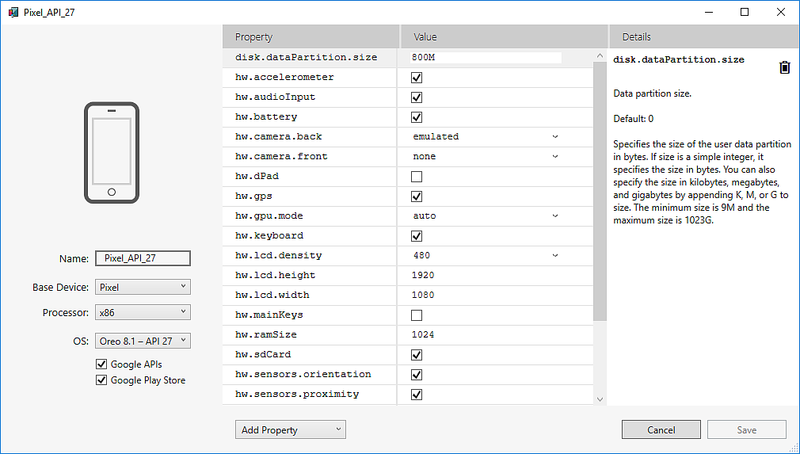
The Device Editor screen lists the properties of the virtual device under the Property column, with the corresponding values of each property in the Value column. When you select a property, a detailed description of that property is displayed on the right.
To change a property, edit its value in the Value column. For example, in the following screenshot the hw.lcd.density property is being changed from 480 to 240:
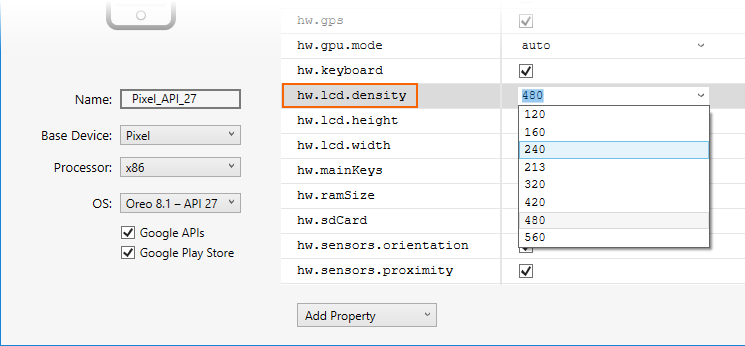
After you have made the necessary configuration changes, click the Save button. For more information about changing virtual device properties, see Editing Android Virtual Device Properties.
Additional Options
Additional options for working with devices are available from the Additional Options (…) pull-down menu in the upper right-hand corner:

The additional options menu contains the following items:
Duplicate and Edit – Duplicates the currently-selected device and opens it in the New Device screen with a different unique name. For example, selecting Pixel_API_27 and clicking Duplicate and Edit appends a counter to the name:
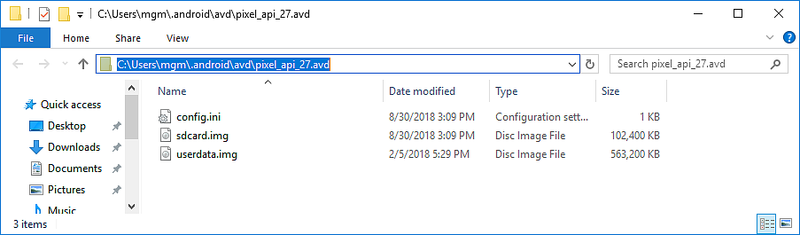
Reveal in Explorer – Opens a Windows Explorer window in the folder that holds the files for the virtual device. For example, selecting Pixel_API_27 and clicking Reveal in Explorer opens a window like the following example:
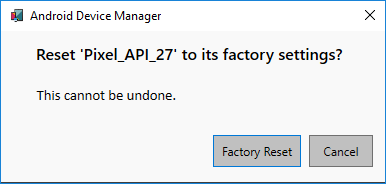
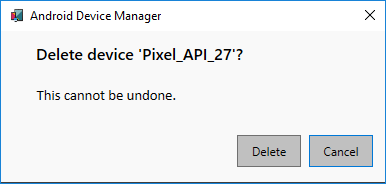
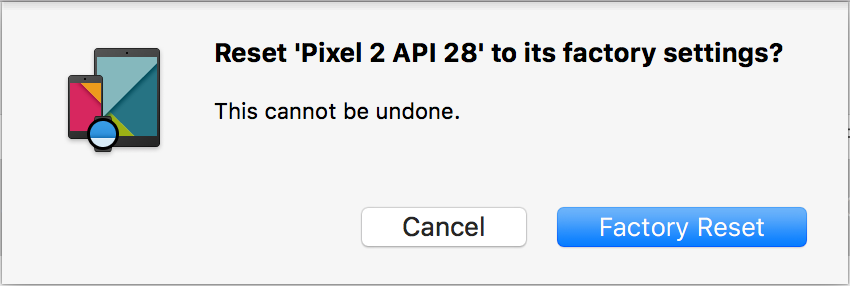
Factory Reset – Resets the selected device to its default settings, erasing any user changes made to the internal state of the device while it was running (this also erases the current Quick Boot snapshot, if any). This change does not alter modifications that you make to the virtual device during creation and editing. A dialog box will appear with the reminder that this reset cannot be undone. Click Factory Reset to confirm the reset:
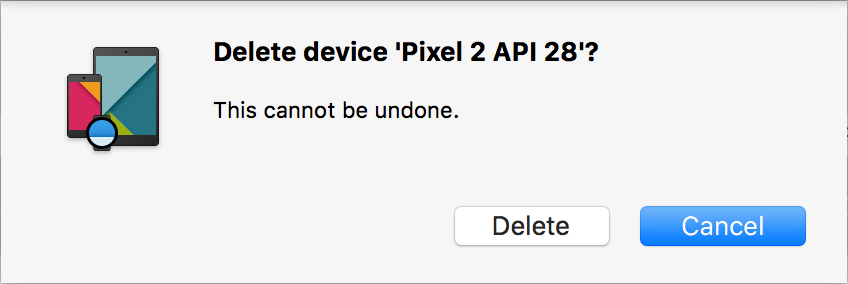
Delete – Permanently deletes the selected virtual device. A dialog box will appear with the reminder that deleting a device cannot be undone. Click Delete if you are certain that you want to delete the device.
If you are using a Mac with an Apple chip, such as the M1, you will need to install the Android Emulator for M1 preview from GitHub.
Android Device Manager on macOS
This article explains how to use the Android Device Manager to create, duplicate, customize, and launch Android virtual devices.

You use the Android Device Manager to create and configure Android Virtual Devices (AVDs) that run in the Android Emulator. Each AVD is an emulator configuration that simulates a physical Android device. This makes it possible to run and test your app in a variety of configurations that simulate different physical Android devices.
Requirements
To use the Android Device Manager, you will need the following items:
Visual Studio for Mac 7.6 or later.
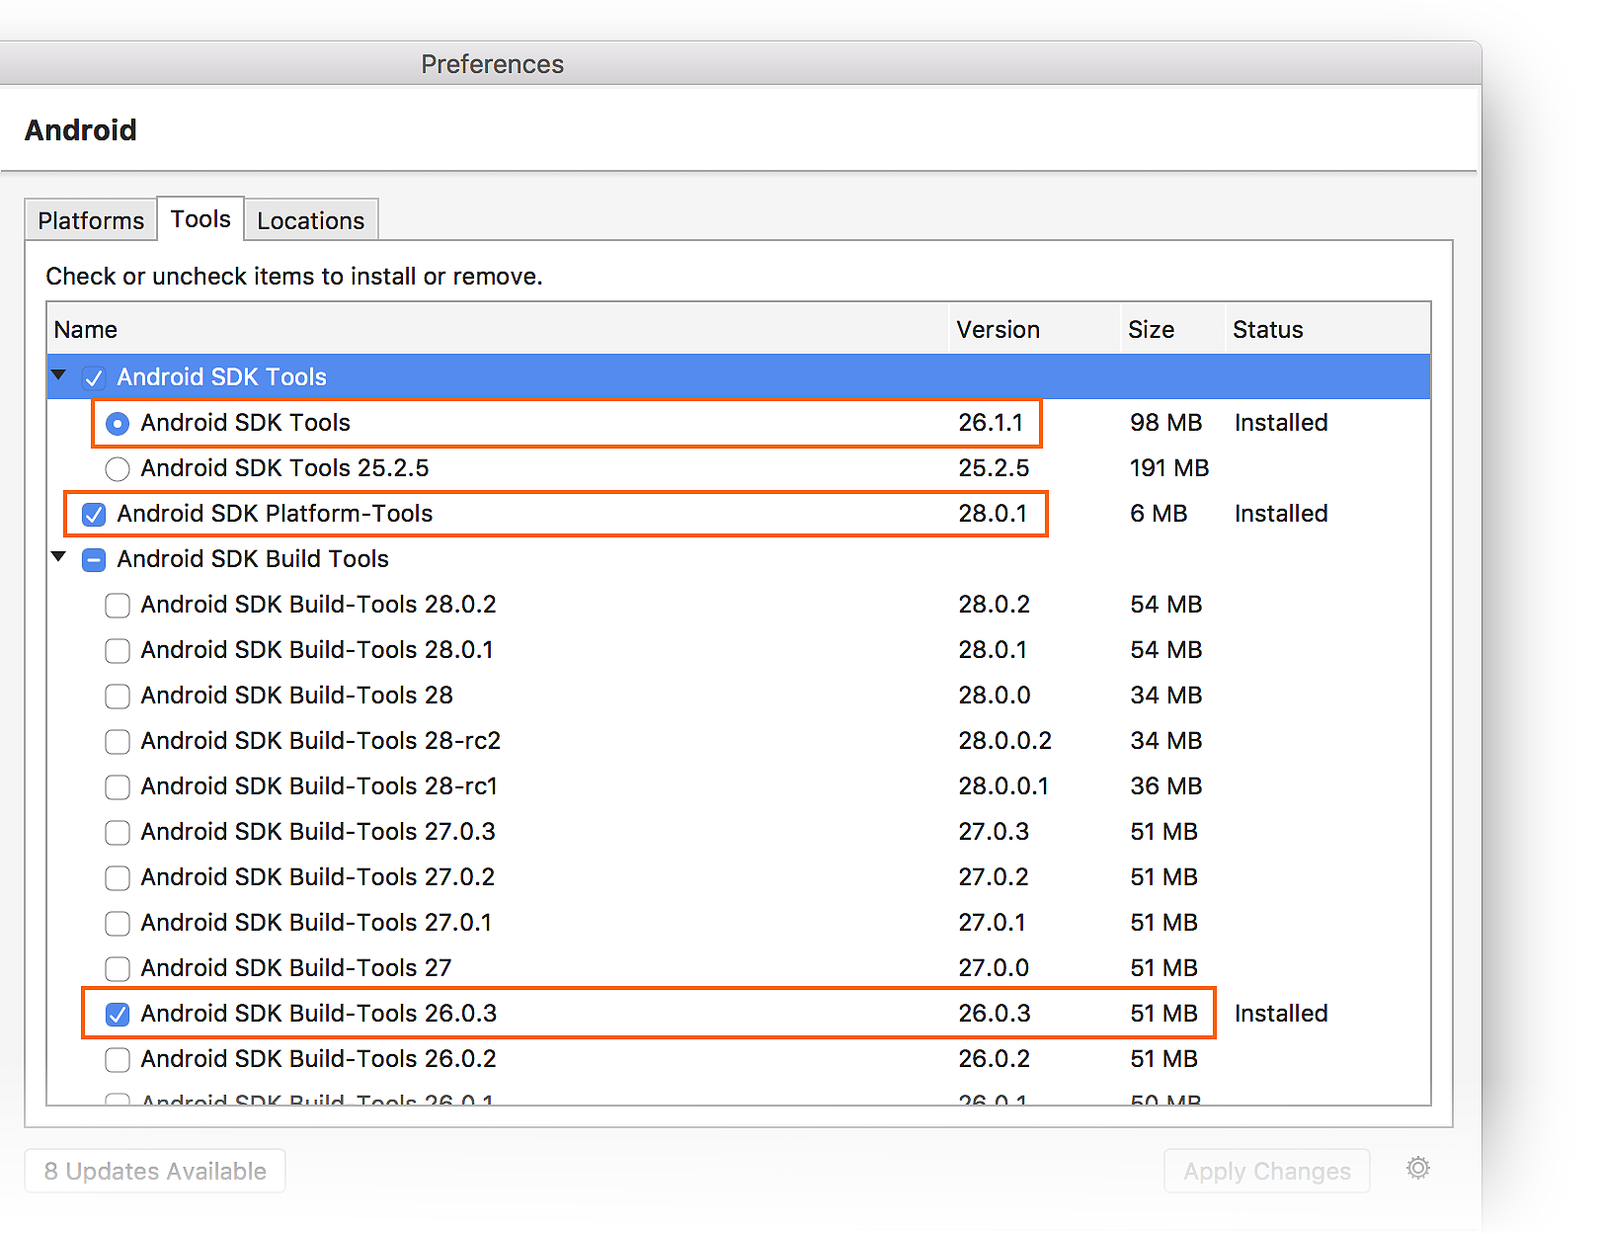
The following packages must be installed (via the Android SDK Manager):
- SDK tools version 26.1.1 or later
- Android SDK Platform-Tools 28.0.1 or later
- Android SDK Build-Tools 26.0.3 or later
These packages should be displayed with Installed status as seen in the following screenshot:
Launching the Device Manager
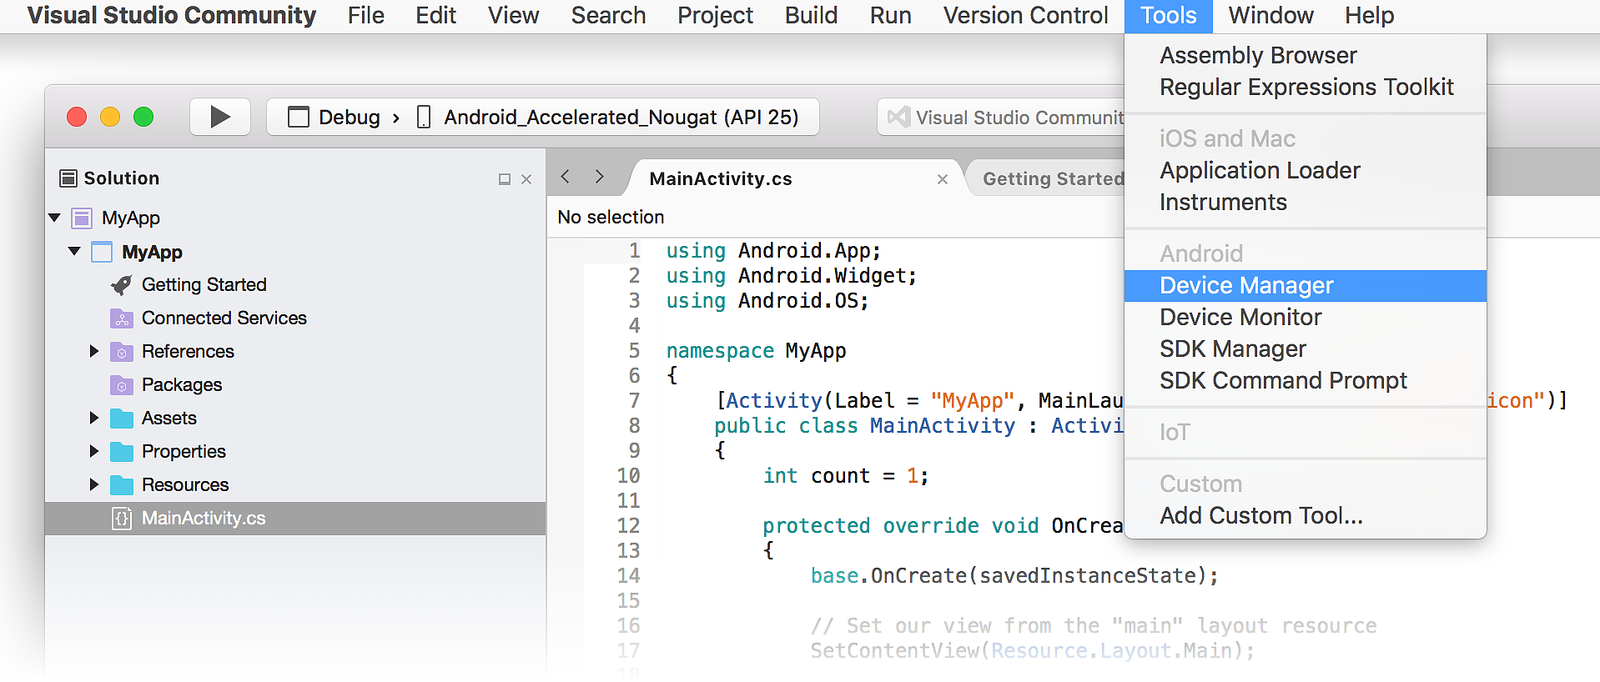
Launch the Android Device Manager by clicking Tools > Device Manager:
If the following error dialog is presented on launch, see the Troubleshooting section for workaround instructions:
Main Screen
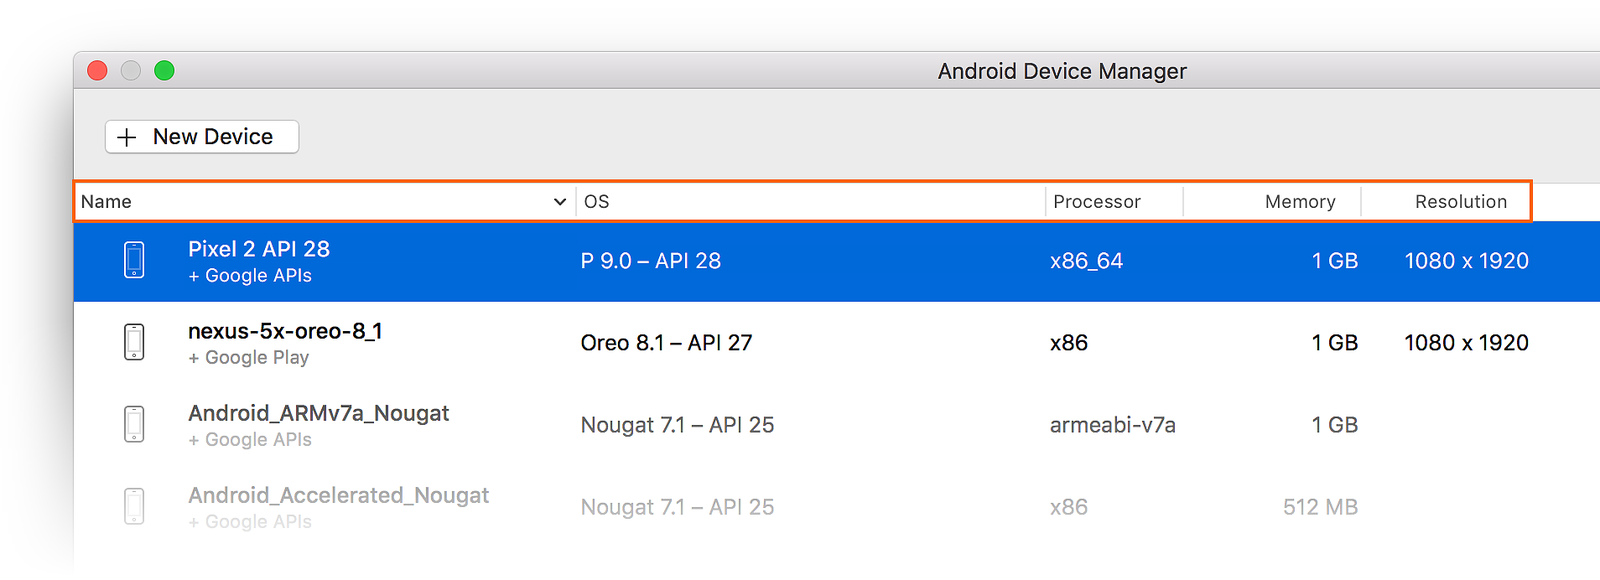
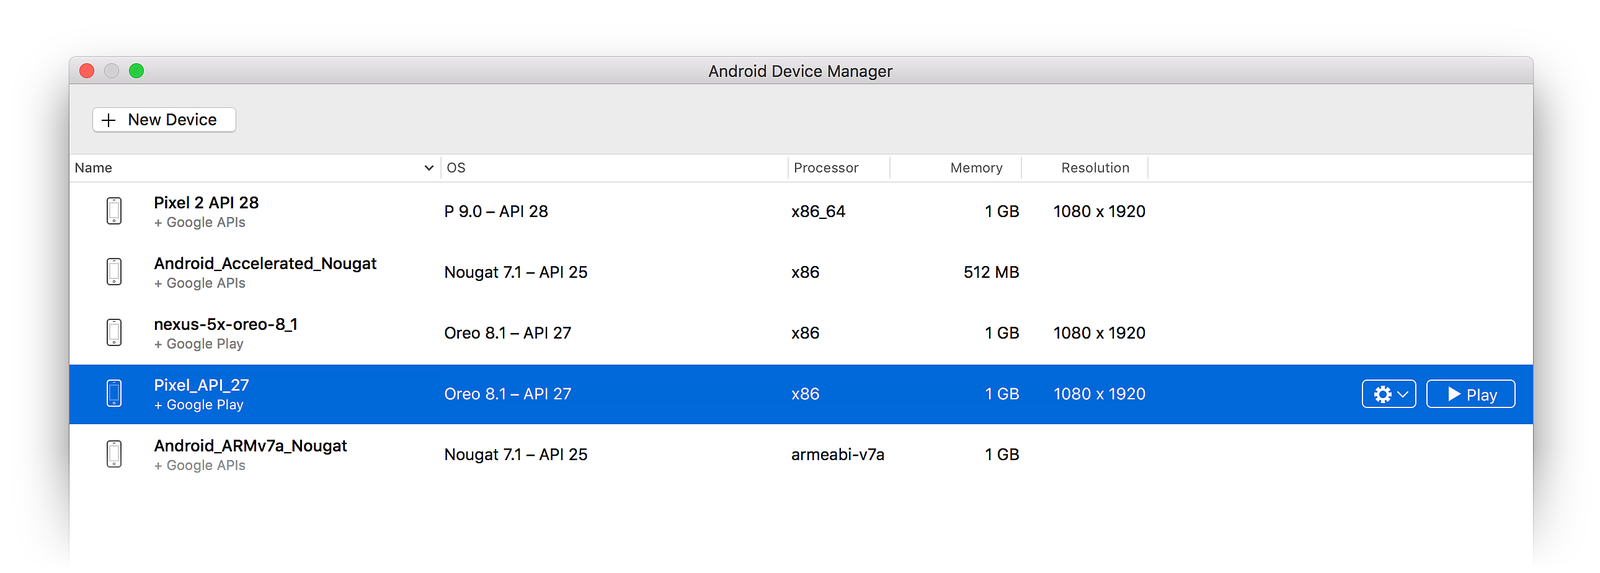
When you first launch the Android Device Manager, it presents a screen that displays all currently-configured virtual devices. For each virtual device, the Name, OS (Android Version), Processor, Memory size, and screen Resolution are displayed:
When you select a device in the list, the Play button appears on the right. You can click the Play button to launch the emulator with this virtual device:
After the emulator starts with the selected virtual device, the Play button changes to a Stop button that you can use to halt the emulator:
When you stop the emulator, you may get a prompt asking if you want to save the current state for the next quick boot:
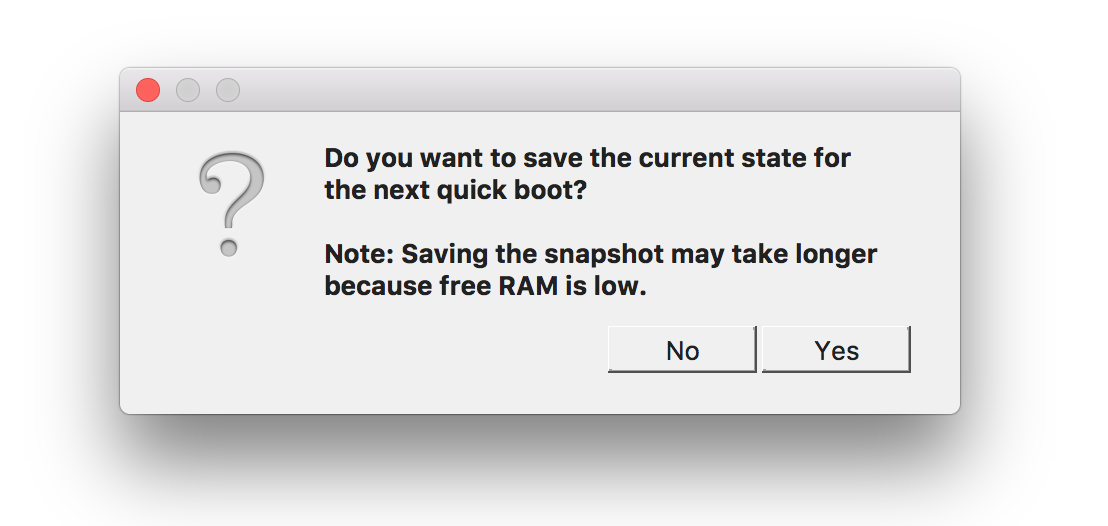
Saving the current state will make the emulator boot faster when this virtual device is launched again. For more information about Quick Boot, see Quick Boot.
New Device
To create a new device, click the New Device button (located in the upper left-hand area of the screen):
Clicking New Device launches the New Device screen:
Use the following steps to configure a new device in the New Device screen:
Give the device a new name. In the following example, the new device is named Pixel_API_27:
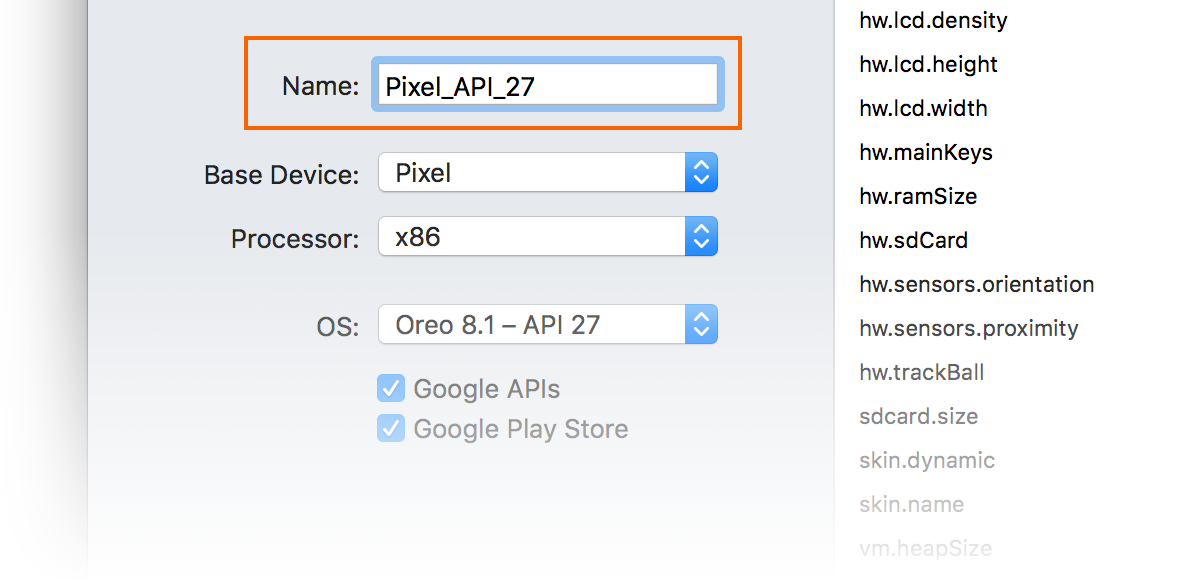
Select a physical device to emulate by clicking the Base Device pull-down menu:

Select a processor type for this virtual device by clicking the Processor pull-down menu. Selecting x86 will provide the best performance because it enables the emulator to take advantage of hardware acceleration. The x86_64 option will also make use of hardware acceleration, but it runs slightly slower than x86 (x86_64 is normally used for testing 64-bit apps):

Select the Android version (API level) by clicking the OS pull-down menu. For example, select Oreo 8.1 — API 27 to create a virtual device for API level 27:
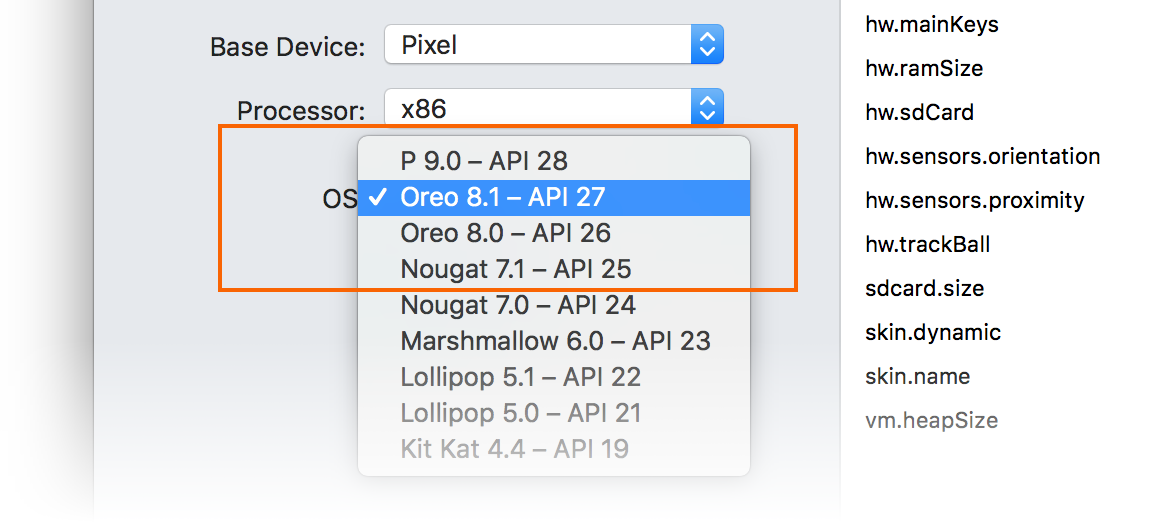
If you select an Android API level that has not yet been installed, the Device Manager will display A new device will be downloaded message at the bottom of the screen – it will download and install the necessary files as it creates the new virtual device:

If you want to include Google Play Services APIs in your virtual device, enable the Google APIs option. To include the Google Play Store app, enable the Google Play Store option:
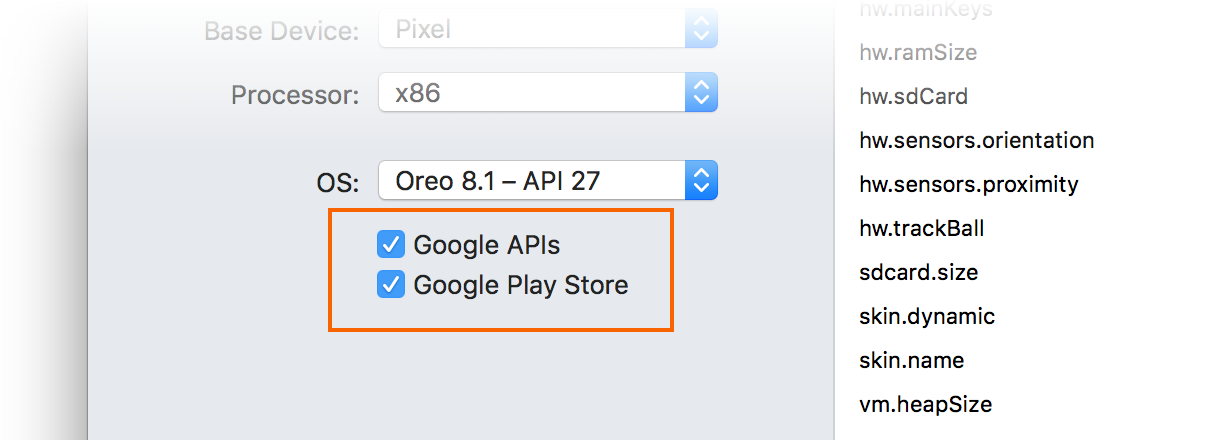
Note that Google Play Store images are available only for some base device types such as Pixel, Pixel 2, Nexus 5, and Nexus 5X.
Edit any properties that you need to modify. To make changes to properties, see Editing Android Virtual Device Properties.
Add any additional properties that you need to explicitly set. The New Device screen lists only the most commonly-modified properties, but you can click the Add Property pull-down menu (at the bottom) to add additional properties:
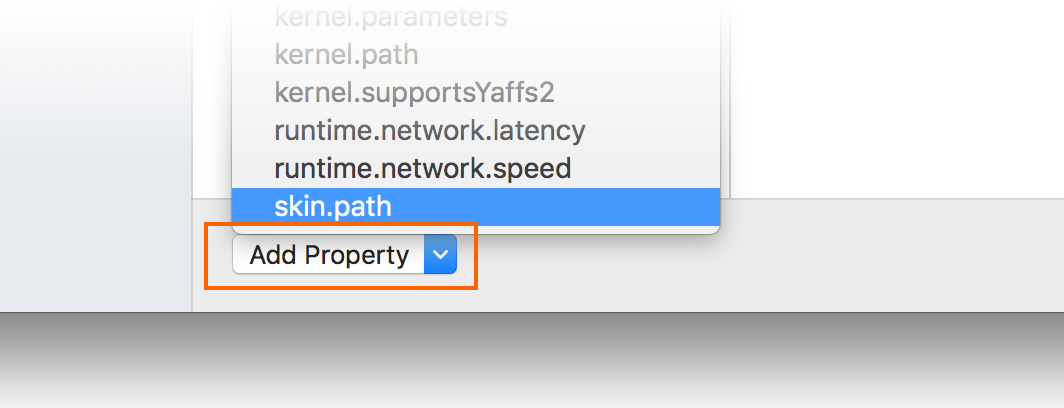
You can also define a custom property by clicking Custom. at the top of this property list.
Click the Create button (lower right-hand corner) to create the new device:
The Android Device Manager adds the new device to the list of installed virtual devices while displaying a Creating progress indicator during device creation:

When the creation process is complete, the new device is shown in the list of installed virtual devices with a Start button, ready to launch:
Edit Device
To edit an existing virtual device, select the Additional Options pull-down menu (gear icon) and select Edit:
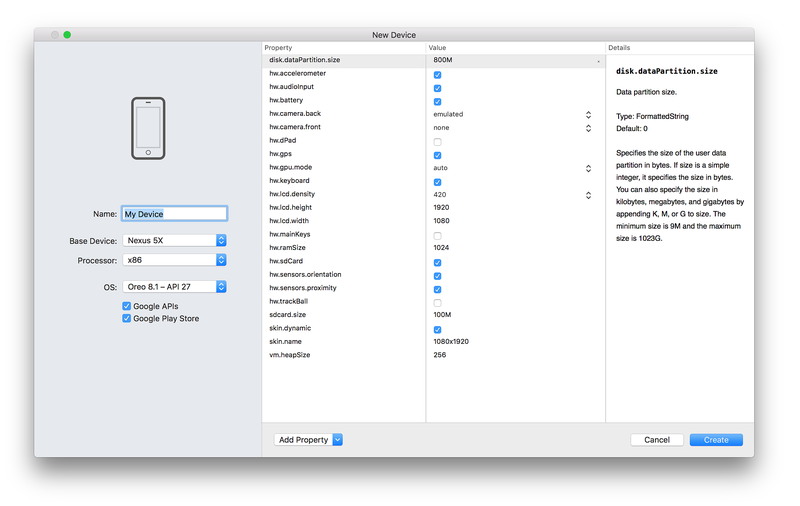
Clicking Edit launches the Device Editor for the selected virtual device:
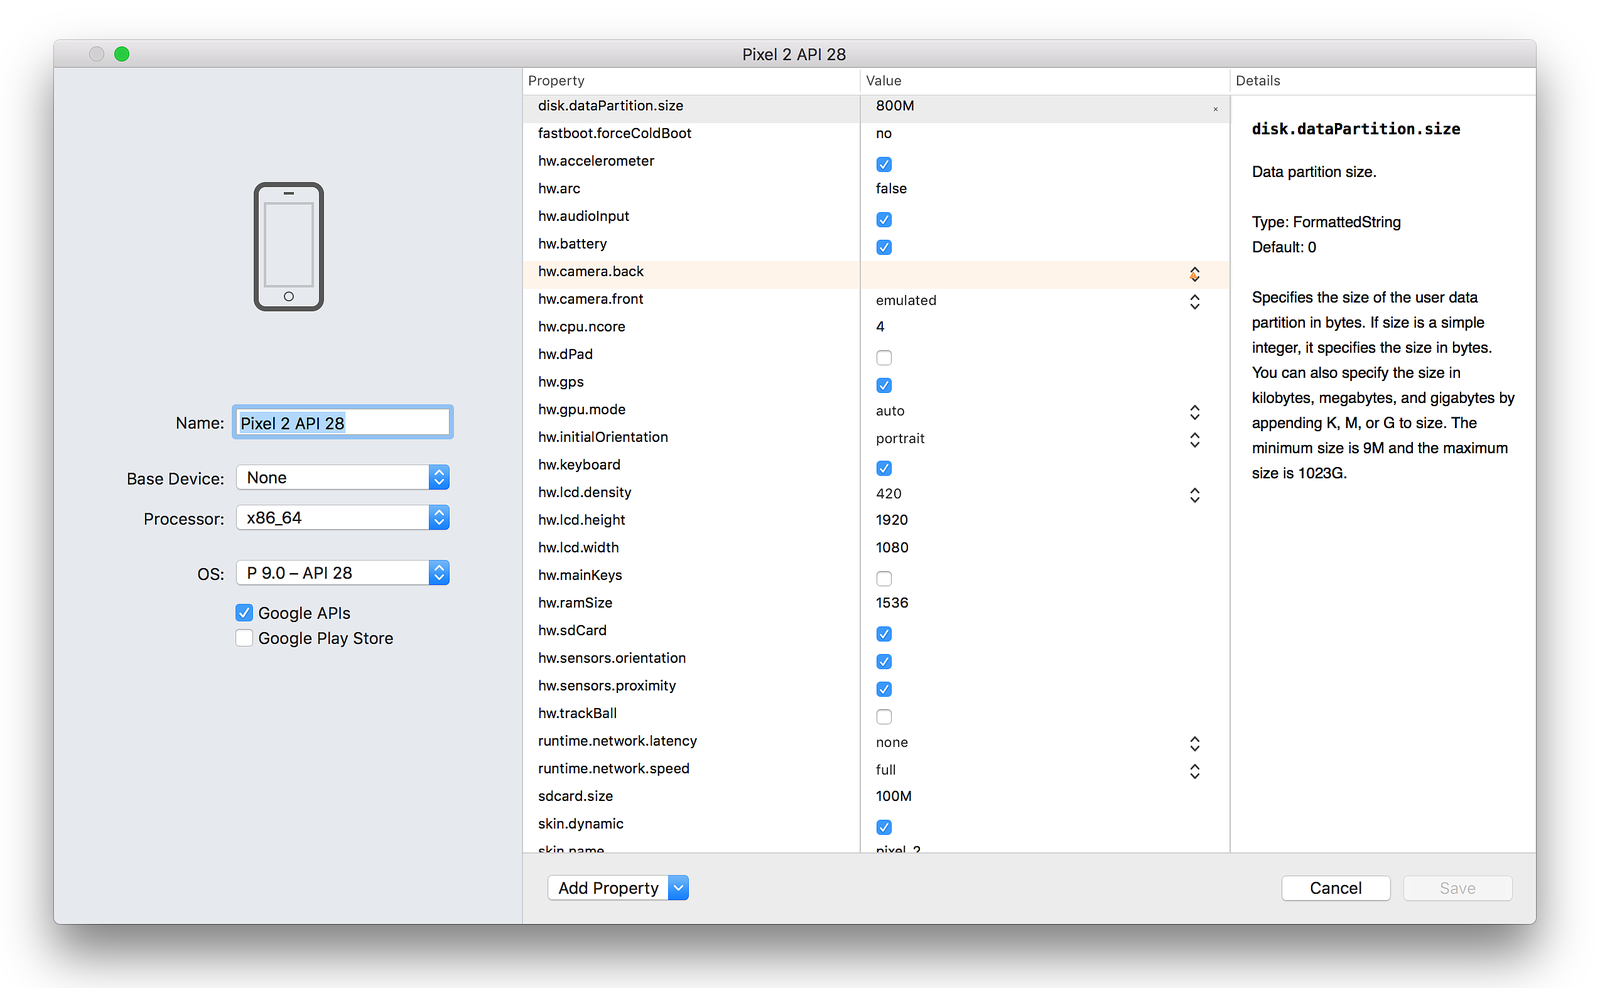
The Device Editor screen lists the properties of the virtual device under the Property column, with the corresponding values of each property in the Value column. When you select a property, a detailed description of that property is displayed on the right.
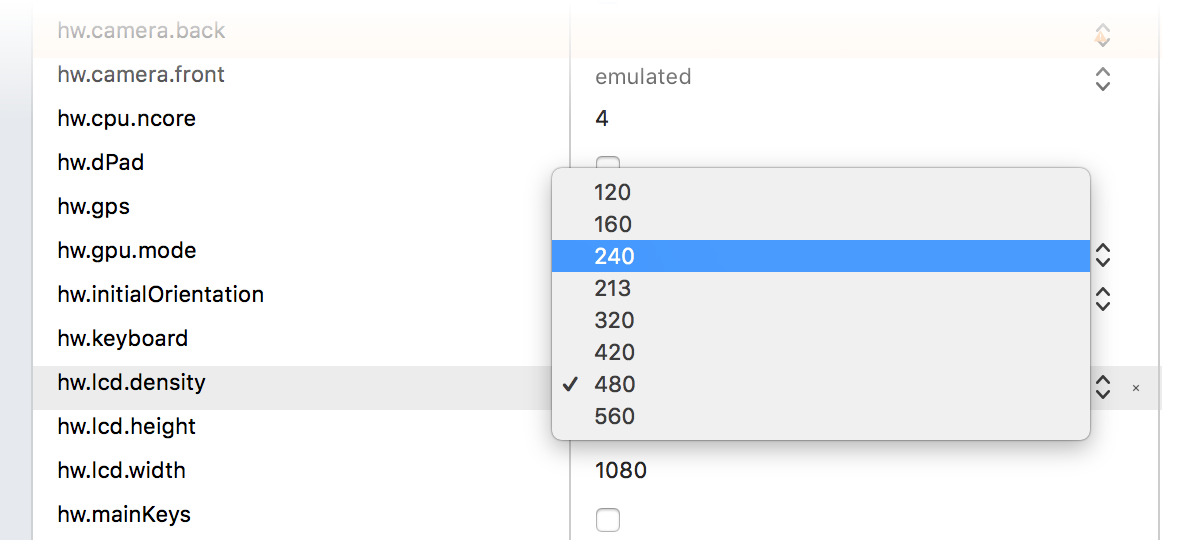
To change a property, edit its value in the Value column. For example, in the following screenshot the hw.lcd.density property is being changed from 480 to 240:
After you have made the necessary configuration changes, click the Save button. For more information about changing virtual device properties, see Editing Android Virtual Device Properties.
Additional Options
Additional options for working with a device are available from the pull-down menu located to the left of the Play button:
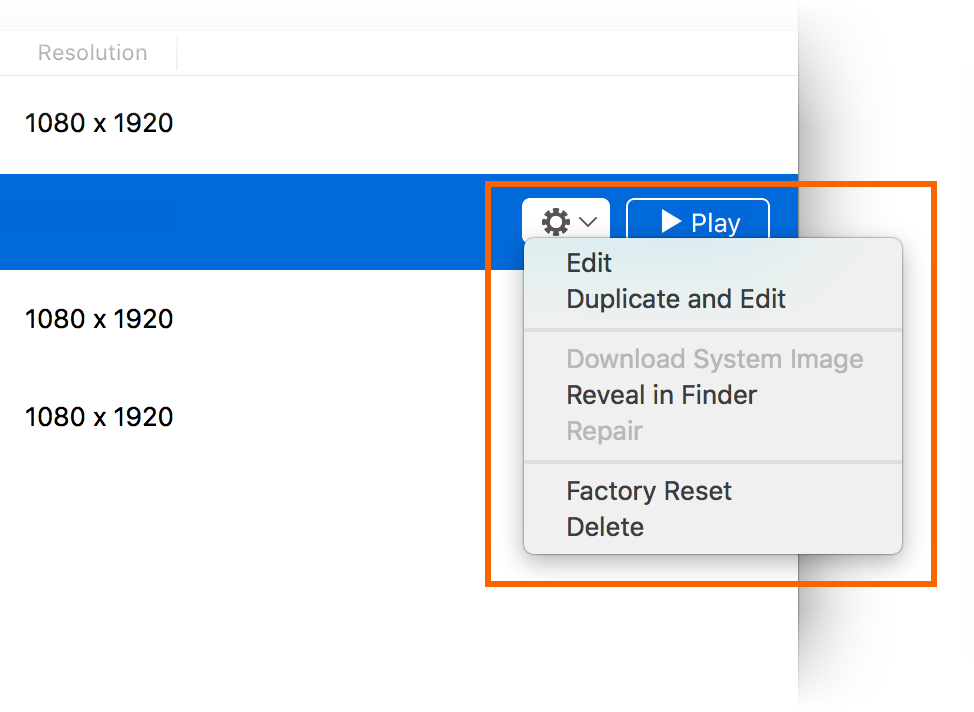
The additional options menu contains the following items:
Edit – Opens the currently-selected device in the device editor as described earlier.
Duplicate and Edit – Duplicates the currently-selected device and opens it in the New Device screen with a different unique name. For example, selecting Pixel 2 API 28 and clicking Duplicate and Edit appends a counter to the name:

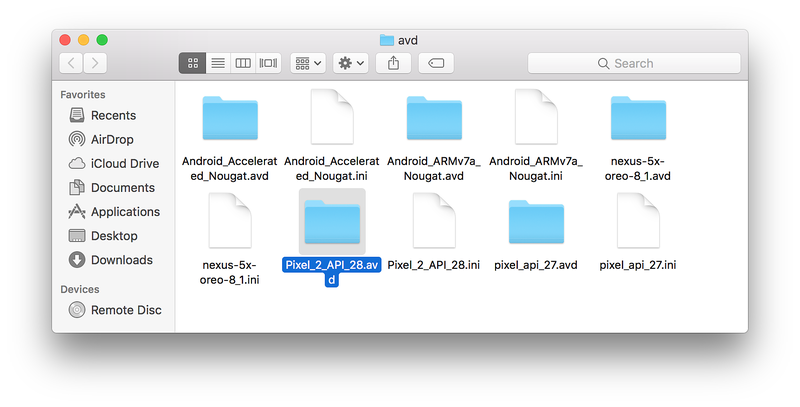
Reveal in Finder – Opens a macOS Finder window in the folder that holds the files for the virtual device. For example, selecting Pixel 2 API 28 and clicking Reveal in Finder opens a window like the following example:
Factory Reset – Resets the selected device to its default settings, erasing any user changes made to the internal state of the device while it was running (this also erases the current Quick Boot snapshot, if any). This change does not alter modifications that you make to the virtual device during creation and editing. A dialog box will appear with the reminder that this reset cannot be undone. Click Factory Reset to confirm the reset.
Delete – Permanently deletes the selected virtual device. A dialog box will appear with the reminder that deleting a device cannot be undone. Click Delete if you are certain that you want to delete the device.
Troubleshooting
The following sections explain how to diagnose and work around problems that may occur when using the Android Device Manager to configure virtual devices.
Android SDK in Non-Standard Location
Typically, the Android SDK is installed at the following location:
C:\Program Files (x86)\Android\android-sdk
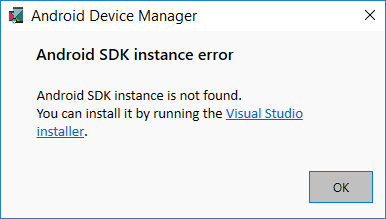
If the SDK is not installed at this location, you may get this error when you launch the Android Device Manager:
To work around this problem, use the following steps:
From the Windows desktop, navigate to C:\Users\username\AppData\Roaming\XamarinDeviceManager:

Double-click to open one of the log files and locate the Config file path. For example:

Navigate to this location and double-click user.config to open it.
In user.config, locate the element and add an AndroidSdkPath attribute to it. Set this attribute to the path where the Android SDK is installed on your computer and save the file. For example, would look like the following if the Android SDK was installed at C:\Programs\Android\SDK:
After making this change to user.config, you should be able to launch the Android Device Manager.
Wrong Version of Android SDK Tools
If Android SDK tools 26.1.1 or later is not installed, you may see this error dialog on launch:

If you see this error dialog, click Open SDK Manager to open the Android SDK Manager. In the Android SDK Manager, click the Tools tab and install the following packages:
- Android SDK Tools 26.1.1 or later
- Android SDK Platform-Tools 27.0.1 or later
- Android SDK Build-Tools 27.0.3 or later
Snapshot disables WiFi on Android Oreo
If you have an AVD configured for Android Oreo with simulated Wi-Fi access, restarting the AVD after a snapshot may cause Wi-Fi access to become disabled.
To work around this problem,
Select the AVD in the Android Device Manager.
From the additional options menu, click Reveal in Explorer.
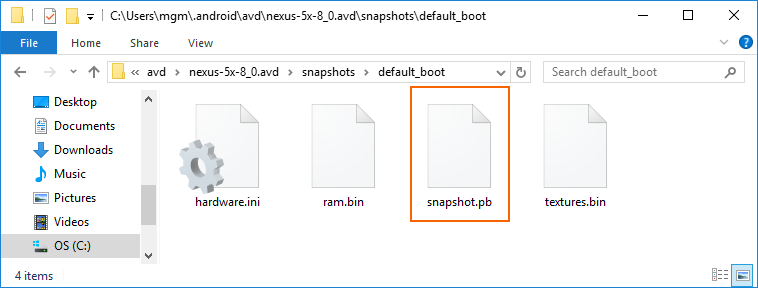
Navigate to snapshots > default_boot.
Delete the snapshot.pb file:
Restart the AVD.
After these changes are made, the AVD will restart in a state that allows Wi-Fi to work again.
Wrong Version of Android SDK Tools
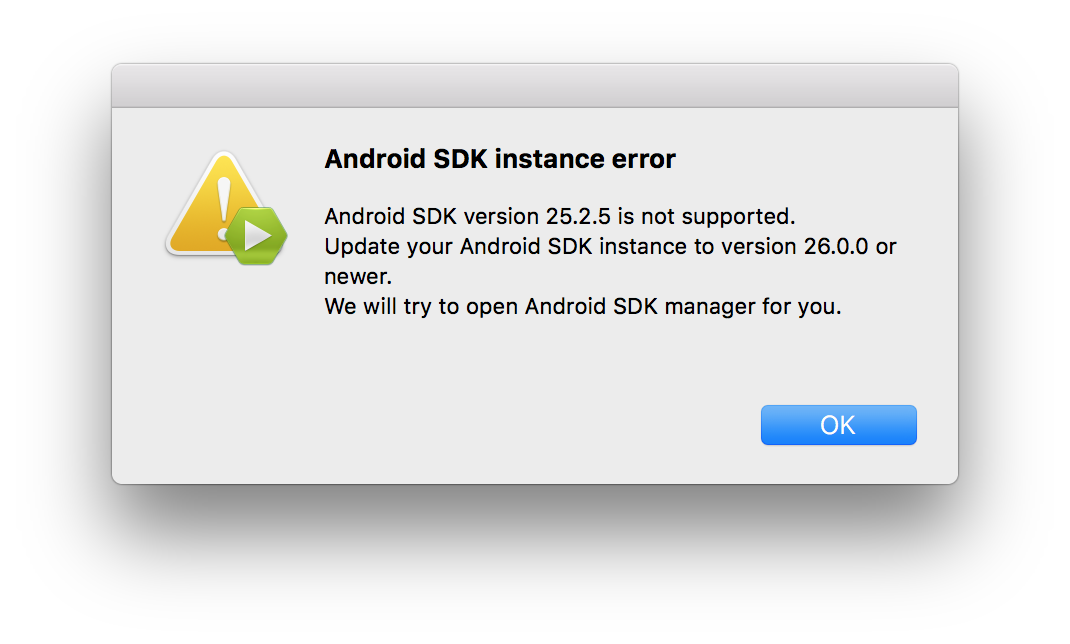
If Android SDK tools 26.1.1 or later is not installed, you may see this error dialog on launch:

If you see this error dialog, click OK to open the Android SDK Manager. In the Android SDK Manager, click the Tools tab and install the following packages:
- Android SDK Tools 26.1.1 or later
- Android SDK Platform-Tools 28.0.1 or later
- Android SDK Build-Tools 26.0.3 or later
Snapshot disables WiFi on Android Oreo
If you have an AVD configured for Android Oreo with simulated Wi-Fi access, restarting the AVD after a snapshot may cause Wi-Fi access to become disabled.
To work around this problem,
Select the AVD in the Android Device Manager.
From the additional options menu, click Reveal in Finder.
Navigate to snapshots > default_boot.
Delete the snapshot.pb file:
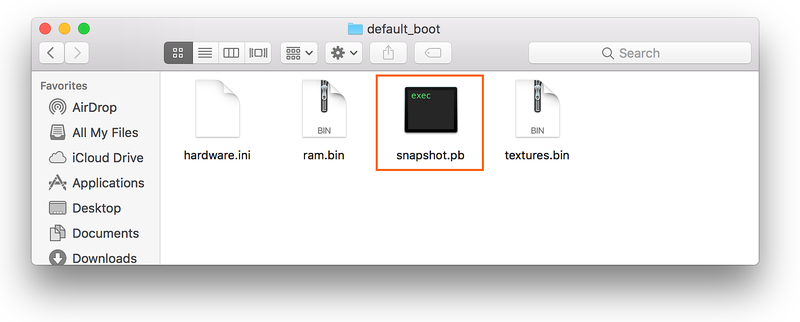
Restart the AVD.
After these changes are made, the AVD will restart in a state that allows Wi-Fi to work again.
Generating a Bug Report
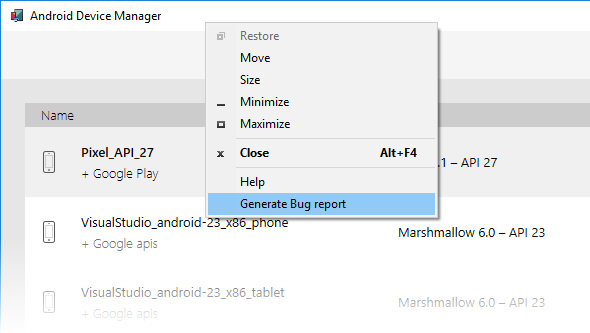
If you find a problem with the Android Device Manager that cannot be resolved using the above troubleshooting tips, please file a bug report by right-clicking the title bar and selecting Generate Bug Report:
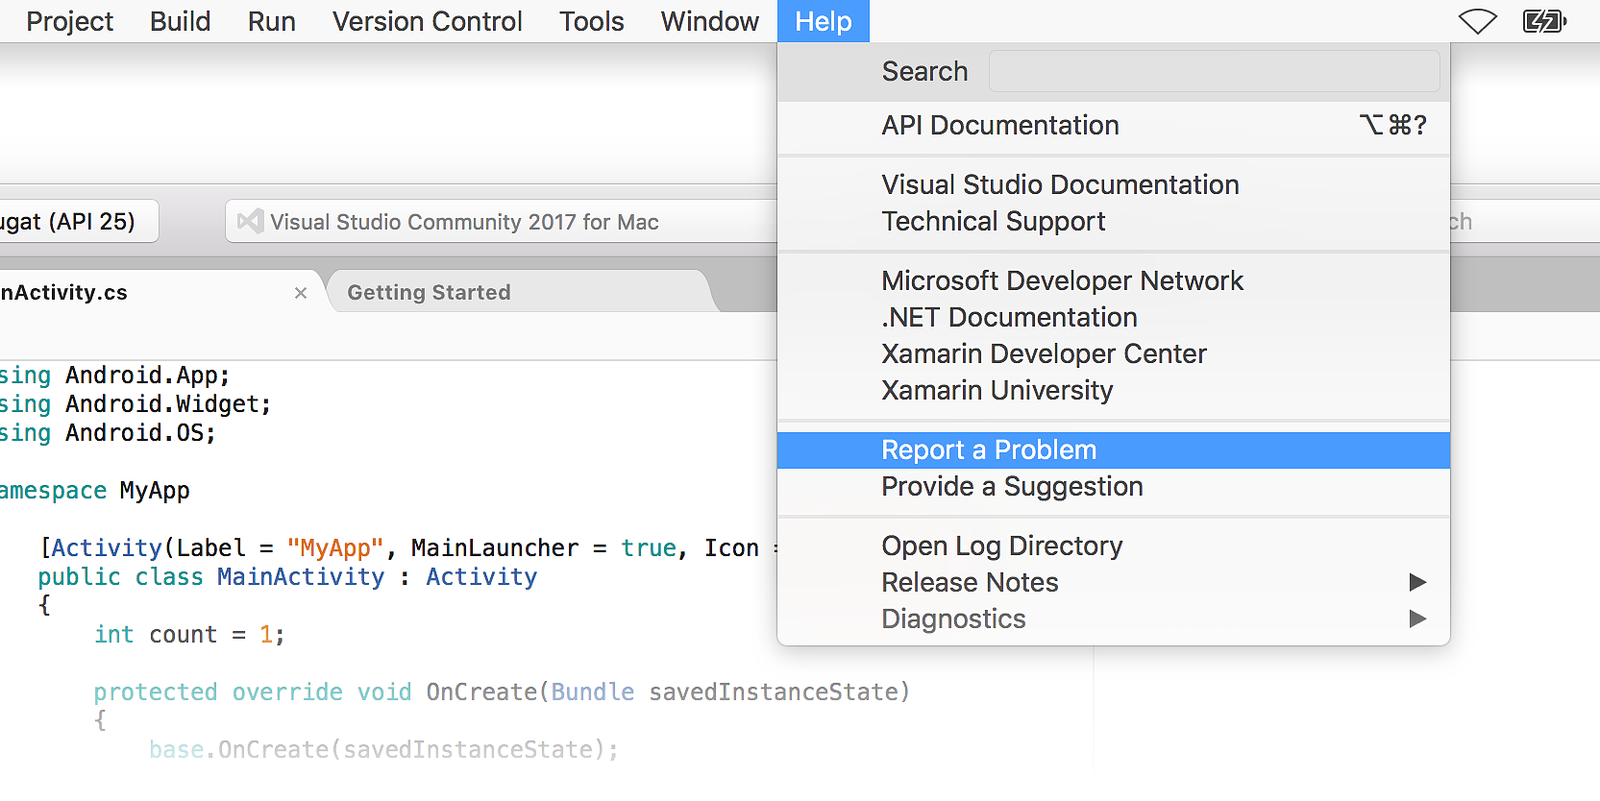
If you find a problem with the Android Device Manager that cannot be resolved using the above troubleshooting tips, please file a bug report by clicking Help > Report a Problem:
Summary
This guide introduced the Android Device Manager available in Visual Studio Tools for Xamarin and Visual Studio for Mac. It explained essential features such as starting and stopping the Android emulator, selecting an Android virtual device (AVD) to run, creating new virtual devices, and how to edit a virtual device. It explained how to edit profile hardware properties for further customization, and it provided troubleshooting tips for common problems.
Related Links
Related Video
Find more Xamarin videos on Channel 9 and YouTube.
Источник


