- Полный список
- Реализация списка с заголовком, футером и пагинацией в Андроид
- RecyclerView
- Настройка Gradle
- Добавление RecyclerView в XML представление
- Привязка XML с классом JAVA
- RecyclerView ItemDecoration
- RecyclerView Adapter
- Пагинация
- Android ListView With Header | Pinned header, Sticky, Section
- 1. Android ListView With Fixed Header And Footer Example
- Look Header And Footer
- Step 1. Separate Views
- Step 3. XML file For ListView
- Step 5. List Adapter
- Starring at adapter
- Step 6. Final Updates
- Noticing the above
- 2. Android ListView Sticky Header Like iphone | Pinned header listview
- Last Views For Header
- Step 1. Adding Colors
- Step 2. Adding Image
- Step 3. Preparing HeaderListView And Section Adapter Class
- Step 4. Ios Adapter
- Looking Deeply
- getRowView()
- Handling Click Events
- Step 5. Main Updates
- 3. Android Multi Column ListView With Sticky Header Example
- See Our MultiColumn ListView
- Step 1. Making a List Item File
- Step 2. Food Model
- Step 3. Food Adapter Class
- Diving Step by Step
- Step 4. Making Final Changes
- What does above code means ?
- 4. Android ListView Section Header Example Group By Header
- Last Views
- What is Section Header ?
- Step 1. Layout Resources
- Step 2. Separate Classes
- Step 3. Custom Adapter
- Step 4. Final Codes
- Diving Deep In Main Activity
- Understanding Adapter
Полный список
— используем Header и Footer в списках
— разбираемся, как и где используется HeaderViewListAdapter
Header и Footer (далее по тексту HF) – это View, которые могут быть добавлены к списку сверху и снизу. За создание соответствующих View для пунктов списка отвечает уже не адаптер, а программист. Он должен сам создать View и предоставить его списку в методы addHeader или addFooter.
У этих методов есть две реализации. Рассмотрим на примере Header.
v – View, которое отобразится, как пункт списка
data – объект, связанный с этим пунктом списка
isSelectable – можно ли будет кликать на пункт или выделять его
Тут просто идет вызов первого метода с параметрами: addHeaderView(v, null, true);
При использовании HF и адаптера есть нюанс. При присвоении списку адаптера (метод setAdapter), список проверяет, были ли уже добавлены Header или Footer.
Если нет, то список использует данный ему адаптер и запрещает в дальнейшем добавлять себе HF. Это же написано в хелпе методов addHeader и addFooter – «Call this before calling setAdapter». Т.е. вы должны добавить HF до того, как присвоите адаптер списку.
Если да, то список оборачивает полученный адаптер в HeaderViewListAdapter, используя конструктор: , java.util.ArrayList, android.widget.ListAdapter)» target=»_blank»>HeaderViewListAdapter (ArrayList
Посмотрим на практике.
Project name: P0551_HeaderFooter
Build Target: Android 2.3.3
Application name: HeaderFooter
Package name: ru.startandroid.develop.p0551headerfooter
Create Activity: MainActivity
В файл strings.xml добавим строки:
Кнопка и список.
Создадим Layout-файлы для Header и Footer.
В onCreate подготавливаем адаптер и HF-элементы.
В fillList будем заполнять список.
onclick – обработка нажатия кнопки
createHeader и createFooter – создание View для HF и заполнение их данными.
Попробуем проверить, что Header реально нельзя добавить после установки адаптера. Реализуем метод fillList так:
Сохраним и запустим.
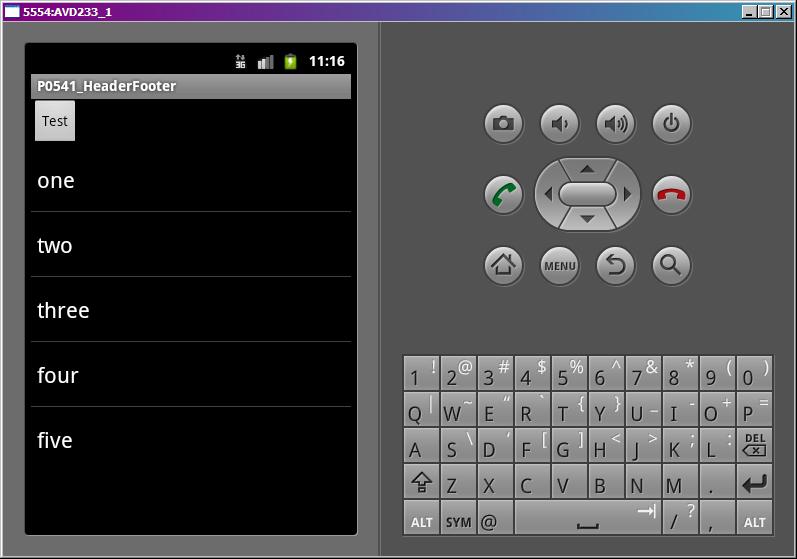
Пункты списка есть. Header-а нет.
Смотрим лог, видим там ошибку: «Cannot add header view to list — setAdapter has already been called». По русски: нельзя добавить Header, адаптер уже установлен.
Давайте сначала добавим HF, а потом присвоим адаптер. Поменяем код fillList:
Обратите внимание на то, с какими параметрами добавляем header2 и footer2. Мы связываем с ними String объекты и с помощью false указываем, что выделение на этих пунктах не будет работать.
Все сохраним, запустим приложение.

HF появились. Убедитесь, что клик на header2 и footer2 ни к чему не приводит. И если покрутить колесо мыши, то выделение на этих пунктах не останавливается.
Кстати, если вы делаете свой адаптер, то этого эффекта можно добиться, выполнив свою реализацию метода isEnabled.
Попробуем удалить HF. Метод onclick перепишем так:
Запустим, нажмем кнопку Test и видим, что исчезли те HF, которые мы удалили — header2 и footer2.
Теперь посмотрим, как работает HeaderViewListAdapter, разберемся, что там за вложенный адаптер у него и как до него добраться.
Перепишем метод onclick:
Сначала мы с помощью метода getAdapter получаем адаптер, который использует ListView. Т.к. мы добавляли HF к списку, то он использует адаптер HeaderViewListAdapter. Попробуем получить данные по второму и пятому пункту этого адаптера, вызвав getItem и выведем значение в лог.
Далее мы от HeaderViewListAdapter получаем его вложенный адаптер. Это тот адаптер, который мы давали на вход списку в методе setAdapter. Но т.к. были использованы HF, то список создал HeaderViewListAdapter в качестве основного адаптера и отдал ему наш в качестве вложенного и теперь мы его получаем методом getWrappedAdapter. Попробуем от нашего адаптера получить данные также по второму и пятому пункту и вывести в лог.
Тут важно понимать, что если бы мы не добавляли HF к списку, то список не стал бы заморачиваться с созданием HeaderViewListAdapter и метод lvMain.getAdapter сразу вернул бы ArrayAdapter.
Сохраняем, запускаем, жмем кнопку Test и смотрим лог.
hvlAdapter.getItem(1) = some text for header 2
hvlAdapter.getItem(4) = three
alAdapter.getItem(1) = two
alAdapter.getItem(4) = five
Адаптеры показали разные данные. Это произошло потому, что hvlAdapter объединяет HF с данными из alAdapter и работает с ними, как с одним набором данных. А alAdapter учитывает только свои данные, которые мы ему давали (массив строк data[]).
Для hvlAdapter второй пункт – это header2. При добавлении Header-а мы присвоили ему объект String, его он сейчас и вывел в лог. Пятый пункт – three.
Для alAdapter второй пункт – two, а пятый — five. Он вообще не в курсе ни про какие HF, он работает только со своими данными.
Вот как-то так организована работа с Header и Footer элементами. А про HeaderViewListAdapter в хелпе написано, что разрабам скорее всего не придется использовать этот класс напрямую в своем коде. Наверно так оно и есть. Этот класс используется списком, чтобы работать с данными адаптера и добавленными Header и Footer, как с одним набором данных.
Для тех, кто расстроился, что нельзя добавлять HF после присвоения адаптера списку, внесу сразу важную поправку. В хелпе действительно так написано. Но на деле это относится только к Header. А Footer добавляется без проблем. И я не знаю, баг это или фича )
На следующем уроке:
Присоединяйтесь к нам в Telegram:
— в канале StartAndroid публикуются ссылки на новые статьи с сайта startandroid.ru и интересные материалы с хабра, medium.com и т.п.
— в чатах решаем возникающие вопросы и проблемы по различным темам: Android, Kotlin, RxJava, Dagger, Тестирование
— ну и если просто хочется поговорить с коллегами по разработке, то есть чат Флудильня
— новый чат Performance для обсуждения проблем производительности и для ваших пожеланий по содержанию курса по этой теме
Источник
Реализация списка с заголовком, футером и пагинацией в Андроид

RecyclerView
RecyclerView — это расширенная версия ListView с некоторыми улучшениями в производительности и с новыми функциями. Как следует из названия, RecyclerView перерабатывает или повторно использует представления элементов при прокрутке. В RecyclerView гораздо проще добавлять анимации по сравнению с ListView. В этом уроке мы разберем, как создать RecyclerView с заголовком, футером, разбиением на страницы и анимацией.
Настройка Gradle
Добавьте следующую зависимость в файл build.gradle:
Добавление RecyclerView в XML представление
После того, как проект будет синхронизирован, добавьте компонент RecyclerView в ваш макет:
Привязка XML с классом JAVA
Теперь в методе onCreate вашей активности добавьте следующий код:
Прежде чем идти дальше, давайте подробно рассмотрим приведенный выше код
- Layout Manager — Простыми словами, Layout Manager помогает нам определить структуру нашего RecyclerView. Есть три встроенных Layout Managers. Помимо этого, мы можем создать собственный пользовательский Layout Manager, чтобы удовлетворить наши требования.
- LinearLayoutManager показывает элементы в списке с вертикальной или горизонтальной прокруткой.
- GridLayoutManager показывает элементы в сетке.
- StaggeredGridLayoutManager показывает элементы в шахматной сетке.
RecyclerView ItemDecoration
ItemDecoration позволяет приложению добавлять специальный полосы и смещения к определенным представлениям элементов из набора данных адаптера. Это может быть полезно для рисования разделителей между элементами, выделениями, границами визуальной группировки и т. д. – developer.android.com
В этом примере мы будем использовать ItemDecoration для добавления отступов к каждому элементу.
В вышеприведенном классе мы устанавливаем отступы к нулевому элементу.
RecyclerView Adapter
Теперь давайте настроим адаптер ReeyclerView с заголовком и футером.
Пагинация
Теперь, когда адаптер готов, давайте посмотрим, как добавить пагинацию в список RecyclerView. Это довольно легко сделать и должно быть добавлено в onCreate после установки Adapter to Recycler-View.
Всякий раз, когда данные изменяются в mList, вызывайте функцию ниже, чтобы обновить адаптер RecyclerView и показать новые данные.
Надеюсь, что этот пост поможет вам получить общее представление о настройке RecyclerView с заголовком, подвалом и пагинацией.
Источник
Android ListView With Header | Pinned header, Sticky, Section

The article of today is about Android ListView With Header And Footer Example.
1. Android ListView With Fixed Header And Footer Example
We can add fixed header and footer to listview which are always visible.
Android have built in methods like addheaderview and addfooterview for ListView class.
We can use these methods to make custom header and footer for listview.
Header and Footer will always stick and visible at the start (Header) and end (Footer) of the listview.
Example of this tutorial can be the checkout or bill summary screen of any restaurant.
This checkout screen need the header and footer of the listview.
Here, different food items with their name,quantity and price are set in the listview because every order have different number of food items so it is not fix.
And, in the header of the listview, you need to fix the name and logo of the restaurant while in footer, you can show the total amount payable.
Having built in methods is great advantage and simplifies the whole process.
Look Header And Footer
Step 1. Separate Views
We need to create separate views for header and footer in this example.
Separate views gives us better options for customization.
First of all create a new XML resource file named header_view.xml
Add the following coding lines in header_view.xml
I have taken only one textview in the header file.
You can add imageview to add image, button, videoview or any other UI widget as you like.
Customize this file with different colors and styles and images to make it more attractive or as per your client’s requirements.
Make another XML layout resource file in res->layout directory.
Name of this file should be footer_view.xml
Copy the below source code in footer_view.xml
This file will create the view for footer.
I have make it same as the header view with just one textview.
You can also customize this file with various UI widgets and styles.
Step 3. XML file For ListView
Now we will make a listview.
- For this, we need to make one layout file which will represent the each row layout of the listview.
Prepare a new XML file named listview_item.xml and add the following lines
Again, only one textview with some properties like, textcolor, textsize, textstyle, background color etc.
All the rows of the listview will get the view like above file.
Step 5. List Adapter
Every listview require adapter class for data management.
Make a new JAVA class and set the name ListAdapter.java
Code structure for ListAdapter.java is as the following
Starring at adapter
Read the below lines
Compiler will first make context and integer array.
Then there is constructor which has two parameters.
We will initialize our objects for context and integer array using these parameters.
Now consider the following method
Using this method, compiler will first inflate the layout file listview_item.xml
Now every children of listview will get the user interface developed by the listview_item.xml file.
After this, compiler will set the value of the textview.
Compiler will use integer array to populate the values in the textview.
Step 6. Final Updates
At last, we need to write some code in activity_main.xml and MainActivity.java files.
Source code for activity_main.xml looks like the below
Just one listview and nothing else in this file.
Code block for MainActivity.java is as the below
Noticing the above
Consider the below source code
First line is giving us the object of the Listview.
Second is defining one integer array. This integer holds the values from 1 to 18.
Third line is making an object of the ListAdapter class.
Now see the following coding lines
First, compiler will create an object of the LayoutInflater class.
Using this inflater, compiler has inflate the header_view.xml file in the second line.
Third line is important. We are setting up the header file in this line using addheaderView() method.
Attend the following code block
First line will inflate the footer_view to initialize the object (footerView) of the View class.
Then compiler will stick the footer to the listview using addFooterView() method.
Finally, above code will set the adapter into listview and our listview is ready with sticky header and footer.
2. Android ListView Sticky Header Like iphone | Pinned header listview
We will develop Android ListView Sticky Header Like iphone example in this tutorial.
Sometimes you want to make pinned header listview in android app.
This example will guide you to make sticky or pinned header for listview in android studio.
Pinned header means that a header which have certain number of child rows and this header sticks at the top of the ListView.
Then, again there will be another sticky header which will have certain number of children and it replaces old header.
You may have notice this type of listview in iphone or ios.
Android does not have any built in method or class to achieve this type of user interface for listview.
We need to customize out traditional listview and adapter class for this purpose.
Last Views For Header
Step 1. Adding Colors
I will separate the headers and children with different colors.
Also, different headers may have different colors.
So let us add some colors in res->values->colors.xml file.
Write the following lines in res->values->colors.xml file.
I have added blue, green, red and orange colors.
You can add many more colors as per your requirements.
Step 2. Adding Image
In this example we need to add one image in the drawable folder.
Download this image by clicking the below link
[sociallocker]Download scrollbarlight Image[/sociallocker]
After downloading the image, add it into res->drawable directory.
We need this image in HeaderListView class which we will create in the next step.
Step 3. Preparing HeaderListView And Section Adapter Class
Create a new JAVA class and give it a name HeaderListView.java
Copy the below code block in HeaderListView.java class
This class helps us to make a special listview which can support the sticky header.
Above class is the transformation from traditional listview to our desired listview.
Now make another new JAVA class named SectionAdapter.java
Write down the following Coding lines in SectionAdapter.java
For special listview, we also need to have special adapter with it.
Above class is making that special adapter for our special listview.
We will extend this adapter while creating the actual adapter for our listview.
Step 4. Ios Adapter
Let us create an adapter what will populate out listview with pinned header.
Make a new class and give it a name IosAdapter.java
Following is the code structure for IosAdapter.java class
Looking Deeply
Let us look what the above class IosAdapter will do actually.
Consider below code
- This method will return the total number of sticky or pinned headers.
Look the following code
Above method is returning the total number of child for ant specific header.
Number of header is at the parameter (int section)
Above method will return 5 as the number of children for header at the position (int section)
getRowView()
code for above method
Above method will generate the view for the children items.
We will also set the text for children in this method.
Address of child can be like a child of the header at -> position section and a child position for that header is -> int row
Following method getSectionHeaderView() is making a layout for header
First parameter of getSectionHeaderView() method is the position (int section) for header.
We will set the name of the header in this method.
I have also set the background colors in this method using switch statement.
Handling Click Events
To handle the click events of the listview, review the below method
You can have both header and row position in this click event.
Step 5. Main Updates
Now last thing is to update activity_main.xml and MainActivity.java files.
Write the following coding lines in activity_main.xml
As you can see in the above code, I have used HeaderListView class to define listview.
It is referencing that HeaderListView which we have created in the step 3.
Here, in this line , you need to replace it with the package name of your android studio code.
You can find your package name in AndroidManifest.xml file.
Now make following source code in MainActivity.java
In this main class, we just need to set up the listview with proper adapter.
We will set the object of IosAdapter class to the listview.
3. Android Multi Column ListView With Sticky Header Example
Android Multi Column ListView With Sticky Header Example is today’s shining topic.
Multi column listview means that every row of the listview have more than one column and this listview is developing a table like structure.
You need to create a ListView with multiple columns in many applications to show multiple data.
Sometimes you want to have a static headers and just below that header, you want multi column listview.
For example, to show a order summary of any restaurant, you have two sticky headers like name of the restaurant and name of the customer.
Just after these two headers, your listview starts where every row includes columns like name of product, price of product, quantity of product etc.
We will develop just this kind of example in this article.
See Our MultiColumn ListView
Step 1. Making a List Item File
For creating a ListView, we need to make separate xml layout file.
This layout file represents the whole view structure of each listview row item.
So make a new file named list_item.xml in res->layout structure.
Add the below source code in list_item.xml file.
- In listview, we have two columns in every row item. One column is showing product name and another is showing the quantity of the product.
- In the above list_item.xml file, two textviews are representing these two columns.
- We will use this list_item.xml file in the adapter class where compiler will inflate it in every iteration while making each row for listview.
Step 2. Food Model
The proper way to make a reliable listview in every scenario is to make a listview with help of the model class.
Model class includes getter and setter methods for data maintenance.
For example, in our example we have data in the form of product name and it’s quantity.
We can store product name in String and quantity in integer format.
Create a new java class named FoodModel.java in your app.
Following is the coding lines for FoodModel.java class
- As I have said earlier, above model class includes get and set method for both product name and quantity.
Step 3. Food Adapter Class
Now let us create a food adapter class which will generate data set for the listview.
Prepare a new java class and set it’s name as FoodAdapter.java
Write down the following lines in FoodAdapter.java class
Diving Step by Step
Hang on, we will now understand above code one by one snippets.
Consider the below code snippet
- First line is creating object of context.
- Second is creating an ArrayList with the objects of the FoodModel class.
- This arraylist (foodModelArrayList) is our main data provider. We are filling this arraylist (foodModelArrayList) with data in Main Activity. We will see this in next step.
- Then I have created one Constructor. We will get context and arraylist (foodModelArrayList) via the parameters of this constructor.
Look at the below lines
- Above are necessary method to be overriden. Mainly I have used that arraylist (foodModelArrayList) in above methods.
Read the following code snippet
Above getView() creates every row of the listview.
This method is called for the number of times which is equal to the number of rows of the listview.
For example, if listview have five rows then getView() method is called for five times.
In this getView() method, compiler will first inflate the row layout (list_item.xml) which we have already created in step 1.
Then we will fill the values of two textviews. (One is for product name and another is for quantity.)
We are using arraylist (foodModelArrayList) to fill the values in textviews.
Step 4. Making Final Changes
Now let us create our app’s main layout structure.
For this, you need to replace your existing code of activity_main.xml with the following one
In the above file, I have added three sticky or static headers. It means that these headers can not be changed or modified.
First two TextViews and LinearLayout with horizontal orientation represents these three sticky headers.
Just below these headers, I have added our multi column listview.
After this, write down the below code snippet in MainActivity.java file.
What does above code means ?
See the below snippet
First line is creating one string array called Products. It includes the names of the various food products.
Similarly, second line is creating one integer array which holds the quantity of the food products.
Third and fourth lines are making objects ArrayList and Listview respectively.
Attend below lines
Second line is creating a new object of FoodAdapter class and third one is setting this adapter object with the ListView.
First line will insert the data in foodModelArrayList using populateList() method.
populateList() method holds the below code
- One for loop is there with six iterations.
- In every iteration, compiler will create the object of the FoodModel class.
Then it will set the product name and quantity to this object. After this, the compiler adds this object in the arraylist.
4. Android ListView Section Header Example Group By Header
I will explain about android listview section header with example in this article.
You will make a listview with a specific header between it’s row items.
Last Views
After all of this hard work, you should get the listview like below video
What is Section Header ?
Section header means that a header among listview items to sort them with particular category.
For example, you are making listview with county names. Now countries can be categorized by continents.
So, you will make the first row as a section header which have continent name like Asia. Then in the second, third row you will write Asian countries like India, Chine etc.
After Asia, again you will make listview row as a section header and will name it Europe and further this process continues.
In this example, we will group listview by vehicle type as a header. We will create custom view for header which is different than the normal listview item.
So let us follow all the below steps carefully.
Step 1. Layout Resources
Different layout for header and normal rows requires different layout xml files. Hence, we will create two layout resources files.
Make two xml files res->layout directory.
Give a name lv_child.xml to first file and lv_header.xml to second xml file.
Add below code in lv_child.xml
Above file will create the layout for normal listview row items.
Copy following code in lv_header.xml
This code will generate the layout for header rows.
Step 2. Separate Classes
We need to create two java classes for both normal and header rows.
This class will work as a general model class. So make two new java classes and name them HeaderModel.java and ChildModel.java respectively.
Write down the below code in HeaderModel.java
isHeader() method will tell compiler whether the listview row is a header row or a normal row.
setheader(String header) method will set the string as a header title which passes as a parameter.
getName() method will return a header text in a string format.
Now add the below code in ChildModel.java
Similar methods are used here as HeaderModel.java class. Only difference is that get method will return normal row item text and set method will set the text as a row item name.
Step 3. Custom Adapter
As always, every listview requires an adapter class which will provide the data to populate the listview rows.
Make a new java class named CustomeAdapter.java and add below code in it.
Here I am populating listview with the help of the listItemArraylist.
listItemArraylist is created in the Main activity and passed as a parameter to the constructor of this adapter class.
Hence, let us first understand the Main Activity so it would be easier to understand adapter class.
Step 4. Final Codes
Now the final task is to write Main Activity code.
Add below code in activity_main.xml
Write the following code in MainActivity.java file
Diving Deep In Main Activity
Consider below code
First string array vehicleTypes will provide the header names.
Secong string array childnames will provide the text names for normal listview rows.
listItemArraylist is defined as below
Here ListItem is an Interface which in implemented by both model classes : HeaderModel.java and ChildModel.java.
So the methods present is the ListItem interface are overriden in HeaderModel.java and ChildModel.java.
Following is the code for the Interface ListItem
As we have seen earlier in Step 2 that both the methods of Interface ListItem are overriden in HeaderModel.java and ChildModel.java.
Now we will create data structure using populateList() method.
Below is the source code for the populateList() method.
Here I have make four child rows for each header.
Listview will start with the first header then four rows will be it’s child items. The fifth row will be second header and then four rows will be the child row for second header and it continues in this fashion.
So the first, sixth, eleventh and sixteenth row of the listview will be header rows.
Hence in the for loop if condition will be true for four times.
When the if condition is true, object of the HeaderModel will be added to the listIemArrayList
In all other for loop iterations, object of the ChildModel will be added to the listIemArrayList.
After completion of for loop, listIemArrayList is passed to the adapter constructor.
Now let’s see the adapter code.
Understanding Adapter
Read the below code for getView() method
This method will fetch the data from listIemArrayList and will populate the listview using that data.
Look at the following codes
It will check for the header object by using isHeader() method.
If isHeader() method returns true then compiler will inflate the lv_header.xml file as a listview row layout.
Otherwise it will inflate the lv_child.xml
After checking for above conditions and inflating the layout file compiler will set the text pf the listview row using the below line
Источник


