- Android и звук: как делать правильно
- A Step by Step Guide to Building an Android Audio Player App
- Part One – Setting up the Project.
- Step Two – Create the MediaPlayer Service
- Step Three – Constructing the MediaPlayer
- Step Four – Handling Audio Focus
- Step Five – Service Lifecycle Methods
- Step Six – Binding the Audio Player
- Step Seven – Activity Lifecycle Methods
- Extras – Loading Local Audio Files
- What is a BroadcastReceiver ?
- Lets Get Back to the Audio Player App
- Change of audio outputs (headphone removed)
- Handling Incoming Calls
- Redefine Methods
- Play New Audio Broadcast
- Register BroadcastReceiver S
- User Interactions
- Finishing Up
- Fast Forward
Android и звук: как делать правильно
В статье рассматривается архитектура и API для создания приложений, воспроизводящих музыку. Мы напишем простое приложение, которое будет проигрывать небольшой заранее заданный плейлист, но «по-взрослому» — с использованием официально рекомендуемых практик. Мы применим MediaSession и MediaController для организации единой точки доступа к медиаплееру, и MediaBrowserService для поддержки Android Auto. А также оговорим ряд шагов, которые обязательны, если мы не хотим вызвать ненависти пользователя.
В первом приближении задача выглядит просто: в activity создаем MediaPlayer, при нажатии кнопки Play начинаем воспроизведение, а Stop — останавливаем. Все прекрасно работает ровно до тех пор, пока пользователь не выйдет из activity. Очевидным решением будет перенос MediaPlayer в сервис. Однако теперь у нас встают вопросы организации доступа к плееру из UI. Нам придется реализовать binded-сервис, придумать для него API, который позволил бы управлять плеером и получать от него события. Но это только половина дела: никто, кроме нас, не знает API сервиса, соответственно, наша activity будет единственным средством управления. Пользователю придется зайти в приложение и нажать Pause, если он хочет позвонить. В идеале нам нужен унифицированный способ сообщить Android, что наше приложение является плеером, им можно управлять и что в настоящий момент мы играем такой-то трек из такого-то альбома. Чтобы система со своей стороны подсобила нам с UI. В Lollipop (API 21) был представлен такой механизм в виде классов MediaSession и MediaController. Немногим позже в support library появились их близнецы MediaSessionCompat и MediaControllerCompat.
Следует сразу отметить, что MediaSession не имеет отношения к воспроизведению звука, он только об управлении плеером и его метаданными.
MediaSession
Итак, мы создаем экземпляр MediaSession в сервисе, заполняем его сведениями о нашем плеере, его состоянии и отдаем MediaSession.Callback, в котором определены методы onPlay, onPause, onStop, onSkipToNext и прочие. В эти методы мы помещаем код управления MediaPlayer (в примере воспользуемся ExoPlayer). Наша цель, чтобы события и от аппаратных кнопок, и из окна блокировки, и с часов под Android Wear вызывали эти методы.
Полностью рабочий код доступен на GitHub (ветка master). В статьи приводятся только переработанные выдержки из него.
Для доступа извне к MediaSession требуется токен. Для этого научим сервис его отдавать
и пропишем в манифест
MediaController
Теперь реализуем activity с кнопками управления. Создаем экземпляр MediaController и передаем в конструктор полученный из сервиса токен.
MediaController предоставляет как методы управления плеером play, pause, stop, так и коллбэки onPlaybackStateChanged(PlaybackState state) и onMetadataChanged(MediaMetadata metadata). К одному MediaSession могут подключиться несколько MediaController, таким образом можно легко обеспечить консистентность состояний кнопок во всех окнах.
Наша activity работает, но ведь идея исходно была, чтобы из окна блокировки тоже можно было управлять. И тут мы приходим к важному моменту: в API 21 полностью переделали окно блокировки, теперь там отображаются уведомления и кнопки управления плеером надо делать через уведомления. К этому мы вернемся позже, давайте пока рассмотрим старое окно блокировки.
Как только мы вызываем mediaSession.setActive(true), система магическим образом присоединяется без всяких токенов к MediaSession и показывает кнопки управления на фоне картинки из метаданных.
Однако в силу исторических причин события о нажатии кнопок приходят не напрямую в MediaSession, а в виде бродкастов. Соответственно, нам надо еще подписаться на эти бродкасты и перебросить их в MediaSession.
MediaButtonReceiver
Для этого разработчики Android любезно предлагают нам воспользоваться готовым ресивером MediaButtonReceiver.
Добавим его в манифест
MediaButtonReceiver при получении события ищет в приложении сервис, который также принимает «android.intent.action.MEDIA_BUTTON» и перенаправляет его туда. Поэтому добавим аналогичный интент-фильтр в сервис
Если подходящий сервис не найден или их несколько, будет выброшен IllegalStateException.
Теперь в сервис добавим
Метод handleIntent анализирует коды кнопок из intent и вызывает соответствующие коллбэки в mediaSession. Получилось немного плясок с бубном, но зато почти без написания кода.
На системах с API >= 21 система не использует бродкасты для отправки событий нажатия на кнопки и вместо этого напрямую обращается в MediaSession. Однако, если наш MediaSession неактивен (setActive(false)), его пробудят бродкастом. И для того, чтобы этот механизм работал, надо сообщить MediaSession, в какой ресивер отправлять бродкасты.
Добавим в onCreate сервиса
На системах с API Так это выглядит
Android 4.4 
MIUI 8 (базируется на Android 6, то есть теоретически окно блокировки не должно отображать наш трек, но здесь уже сказывается кастомизация MIUI).
Уведомления
Однако, как ранее упоминалось, начиная с API 21 окно блокировки научилось отображать уведомления. И по этому радостному поводу, вышеописанный механизм был выпилен. Так что теперь давайте еще формировать уведомления. Это не только требование современных систем, но и просто удобно, поскольку пользователю не придется выключать и включать экран, чтобы просто нажать паузу. Заодно применим это уведомление для перевода сервиса в foreground-режим.
Нам не придется рисовать кастомное уведомление, поскольку Android предоставляет специальный стиль для плееров — Notification.MediaStyle.
Добавим в сервис два метода
И добавим вызов refreshNotificationAndForegroundStatus(int playbackState) во все коллбэки MediaSession.
Android 4.4
Android 7.1.1
Android Wear
Started service
В принципе у нас уже все работает, но есть засада: наша activity запускает сервис через binding. Соответственно, после того, как activity отцепится от сервиса, он будет уничтожен и музыка остановится. Поэтому нам надо в onPlay добавить
Никакой обработки в onStartCommand не надо, наша цель не дать системе убить сервис после onUnbind.
А в onStop добавить
В случае, если к сервису привязаны клиенты, stopSelf ничего не делает, только взводит флаг, что после onUnbind сервис можно уничтожить. Так что это вполне безопасно.
ACTION_AUDIO_BECOMING_NOISY
Продолжаем полировать сервис. Допустим пользователь слушает музыку в наушниках и выдергивает их. Если эту ситуацию специально не обработать, звук переключится на динамик телефона и его услышат все окружающие. Было бы хорошо в этом случае встать на паузу.
Для этого в Android есть специальный бродкаст AudioManager.ACTION_AUDIO_BECOMING_NOISY.
Добавим в onPlay
В onPause и onStop
И по факту события встаем на паузу
Android Auto
Начиная с API 21 появилась возможность интегрировать телефон с экраном в автомобиле. Для этого необходимо поставить приложение Android Auto и подключить телефон к совместимому автомобилю. На экран автомобиля будет выведены крупные контролы для управления навигацией, сообщениями и музыкой. Давайте предложим Android Auto наше приложение в качестве поставщика музыки.
Если у вас под рукой нет совместимого автомобиля, что, согласитесь, иногда бывает, можно просто запустить приложение и экран самого телефона будет работать в качестве автомобильного.
Исходный код выложен на GitHub (ветка MediaBrowserService).
Прежде всего надо указать в манифесте, что наше приложение совместимо с Android Auto.
Добавим в манифест
Здесь automotive_app_desc — это ссылка на файл automotive_app_desc.xml, который надо создать в папке xml
Преобразуем наш сервис в MediaBrowserService. Его задача, помимо всего ранее сделанного, отдавать токен в Android Auto и предоставлять плейлисты.
Поправим декларацию сервиса в манифесте
Во-первых, теперь наш сервис экспортируется, поскольку к нему будут подсоединяться снаружи.
И, во-вторых, добавлен интент-фильтр android.media.browse.MediaBrowserService.
Меняем родительский класс на MediaBrowserServiceCompat.
Поскольку теперь сервис должен отдавать разные IBinder в зависимости от интента, поправим onBind
Имплементируем два абстрактных метода, возвращающие плейлисты
И, наконец, имплементируем новый коллбэк MediaSession
Здесь mediaId — это тот, который мы отдали в setMediaId в onLoadChildren.
Плейлист
Трек
UPDATE от 27.10.2017: Пример на GitHub переведен на targetSdkVersion=26. Из релевантных теме статьи изменений необходимо отметить следующее:
- android.support.v7.app.NotificationCompat.MediaStyle теперь deprecated. Вместо него следует использовать android.support.v4.media.app.NotificationCompat.MediaStyle. Соответственно, больше нет необходимости использовать android.support.v7.app.NotificationCompat, теперь можно использовать android.support.v4.app.NotificationCompat
- Метод AudioManager.requestAudioFocus(OnAudioFocusChangeListener l, int streamType, int durationHint) теперь тоже deprecated. Вместо него надо использовать AudioManager.requestAudioFocus(AudioFocusRequest focusRequest). AudioFocusRequest — новый класс, добавленный с API 26, поэтому не забывайте проверять на API level.
Создание AudioFocusRequest выглядит следующим образом
Теперь запрашиваем фокус
Разумеется, все вышеописанные изменения вносить необязательно, старые методы работать не перестали.
Вот мы и добрались до конца. В целом тема эта довольно запутанная. Плюс отличия реализаций на разных API level и у разных производителей. Очень надеюсь, что я ничего не упустил. Но если у вас есть, что исправить и добавить, с удовольствием внесу изменения в статью.
Еще очень рекомендую к просмотру доклад Ian Lake. Доклад от 2015 года, но вполне актуален.
Источник
A Step by Step Guide to Building an Android Audio Player App

This tutorial is a step by step guide to building an Android Audio app, using the best and most efficient methodologies and APIs. This is a long tutorials, so I have split it into two discrete parts if it’s too much to digest in one read:
- Building a media player in a service, important for playing media in the background.
- Interacting with the service through BroadcastReceiver s ( PLAY, PAUSE, NEXT, PREVIOUS). How to handle edge use-cases like incoming calls, change of audio outputs (e.g. removing headphones).
Part One – Setting up the Project.
Create a new Project in Android Studio and add the following permissions in the AndroidManifest.xml file.
The app needs these permissions to access media files over the internet when streaming media. Since the focus of this article is building a media player app, you need the MEDIA_CONTENT_CONTROL to control media playback. You use the READ_PHONE_STATE permission to access phone state to listen to events like incoming calls so you can stop the audio while a call is in progress.
Step Two – Create the MediaPlayer Service
The core of the Audio Player app is the media player service. The following class is an example of this service. The class has multiple MediaPlayer implementations to handle events that can happen while playing audio. The last implementation, from AudioManager.OnAudioFocusChangeListener is necessary to handle requests for AudioFocus from other apps that want to play media files.
The code above is a template of all the methods that will handle the MediaPlayer events. The only code that is complete is the binding of the Service . You need to bind this service because it interacts with the activity to get the audio files. You can lean more about bound services in the documentation.
Declare the Service in the AndroidManifest.xml file
Step Three – Constructing the MediaPlayer
The Android multimedia framework supports a variety of common media types. One key component of this framework is the MediaPlayer class, which with minimal setup you can use to play audio and video. You can find a basic example of the MediaPlayer implementation in the documentation, but you will need more than this example Service to play media. Next I will describe the necessary methods that need to be setup in the MediaPlayerService class.
Create the following global instances of MediaPlayer and the String path of the audio in the Service class.
Now initialize the mediaPlayer :
When working with media, you need to implement some functions to handle basic action for playing media. These basic functions are Play, Stop, Pause, and Resume.
First add another global variable to store the pause/resume position.
Add if statements to make sure there are no problems while playing media.
Now that you have created the initialization functions it’s time to implement the @Override methods constructed in the initial Service template. These methods are important to the MediaPlayer because all the key actions the player will perform will be called from these methods. Replace the original methods in the Service template with the following.
Note: There are more @Override methods implemented in the initial Service template. These are useful in specific MediaPlayer events, but since the focus of this tutorial is building a general purpose media player I wont implement them.
Step Four – Handling Audio Focus
For a good user experience with audio in Android, you need to be careful that your app plays nicely with the system and other apps that also play media.
To ensure this good user experience the MediaPlayerService will have to handle AudioFocus events and these are handled in the last override method, onAudioFocusChange() . This method is a switch statement with the focus events as its case: s. Keep in mind that this override method is called after a request for AudioFocus has been made from the system or another media app.
What happens in each case: ?
- AudioManager.AUDIOFOCUS_GAIN – The service gained audio focus, so it needs to start playing.
- AudioManager.AUDIOFOCUS_LOSS – The service lost audio focus, the user probably moved to playing media on another app, so release the media player.
- AudioManager.AUDIOFOCUS_LOSS_TRANSIENT – Fucos lost for a short time, pause the MediaPlayer .
- AudioManager.AUDIOFOCUS_LOSS_TRANSIENT_CAN_DUCK – Lost focus for a short time, probably a notification arrived on the device, lower the playback volume.
In addition to the override methods, you need two other functions to request and release audio focus from the MediaPlayer . The following code block contains all the audio focus methods described above. I took the onAudioFocusChange() вЂs code from the Android Developer documentation and made some changes, but this code gets the job done for this example.
First add a new global variable to the Service class.
Replace the Service вЂs onAudioFocusChange() method with the following and add the functions it uses.
If you want to learn more about audio focus then SitePoint article has a great tutorial.
Step Five – Service Lifecycle Methods
In this section I will focus on the Service lifecycle. These methods are crucial to the MediaPlayer because the Service lifecycle is closely connected to the MediaPlayer s. These methods will handle the initialization and resource management for the MediaPlayer .
I have inline comments to make it easier to understand.
The onStartCommand() handles the initialization of the MediaPlayer and the focus request to make sure there are no other apps playing media. In the onStartCommand() code I added an extra try-catch block to make sure the getExtras() method doesn’t throw a NullPointerException .
Another important method you need to implement is onDestroy() . In this method the MediaPlayer resources must be released, as this service is about to be destroyed and there is no need for the app to control the media resources.
The onDestroy() method also releases audio focus, this is more of a personal choice. If you release the focus in this method the MediaPlayerService will have audio focus until destroyed, if there are no interruptions from other media apps for audio focus.
If you want a more dynamic focus control, you can request audio focus when new media starts playing and release it in the onCompletion() method, so the service will have focus control only while playing something.
Step Six – Binding the Audio Player
In this section I will cover the final steps to bind the MediaPlayerService class to the MainActivity and provide it with audio to play. You must bind the Service to the Activity so they can interact with each other.
Add the following global variables to the MainActivity class.
The first is an instance of the Service and the second Boolean value contains the status of the Service , bound or not to the activity.
To handle Service binding, add the following to the MainActivity class.
Now it’s time to play some audio. The following function creates a new instance of the MediaPlayerService and sends a media file to play, so add it to the MainActivity .
The playAudio() function is not complete. I will return to this later when sending media files to the Service with a BroadcastReceiver .
Call the playAudio() function from the Activity s onCreate() method and reference an audio file.
Step Seven – Activity Lifecycle Methods
In this section I will cover basic, but crucial implementations of the MainActivity s life-cycle methods. If you call the playAudio() function from the Activity s onCreate() method the Service will start playing, but the app can easily crash.
Add the following methods to MainActivity to fix it. All these methods do is save and restore the state of the serviceBound variable and unbind the Service when a user closes the app.
Extras – Loading Local Audio Files
A user will likely want to load audio from the actual device instead of streaming them online. You can load audio files from the device by using ContentResolver .
Create a new Java class used as an audio object. The following class contains the crucial information an audio file needs, but you can add more if necessary.
Add the permission to AndroidManifest.xml.
This is necessary to load local media files from the Android device.
In the MainActivity class create a global ArrayList of Audio objects.
To get data from the device add the following function to MainActivity . It retrieves the data from the device in ascending order.
After retrieving data from the device the playAudio() function can play it on the Service .
In MainActivity вЂs onCreate() method add the following code. Be sure to have at least one audio track the service can play or the app will crash.
If you’re ready for more, then keep reading, or this is also a good opportunity to take a quick break before continuing.
Next I will focus on user interaction with the MediaPlayerService and handling interruptions that occur while playing media like incoming calls, change of audio outputs and other functionality needed to build a complete Audio Player app.
The key component for interacting with background services is BroadcastReceiver .
What is a BroadcastReceiver ?
Android system components and apps make system wide calls through intents with the help of sendBroadcast() , sendStickyBroadcast() or sendOrderedBroadcast() methods to notify interested applications. Broadcast intents can be useful for providing a messaging and event system between application components or used by the Android system to notify interested applications about key system events. Registered BroadcastReceiver s intercept these events broadcast to the whole Android system. The BroadcastReceiver s purpose is to wait for certain events to happen and to react to these events, but a BroadcastReceiver does not react to all the incoming events, only specific events. When a BroadcastReceiver detects a matching intent it will call its onReceive() method to handle it.
You can register a BroadcastReceiver in two ways, statically in AndroidManifest.xml or dynamically by using the registerReceiver() method at runtime.
For this tutorial, the BroadcastReceiver s are dynamically created since it’s important that the MediaPlayerService listens for events only when the player is active. It’s not a good user experience if the app starts playing audio unexpectedly after an event was triggered. If you register a receiver, you must unregister it when it’s no longer needed.
Lets Get Back to the Audio Player App
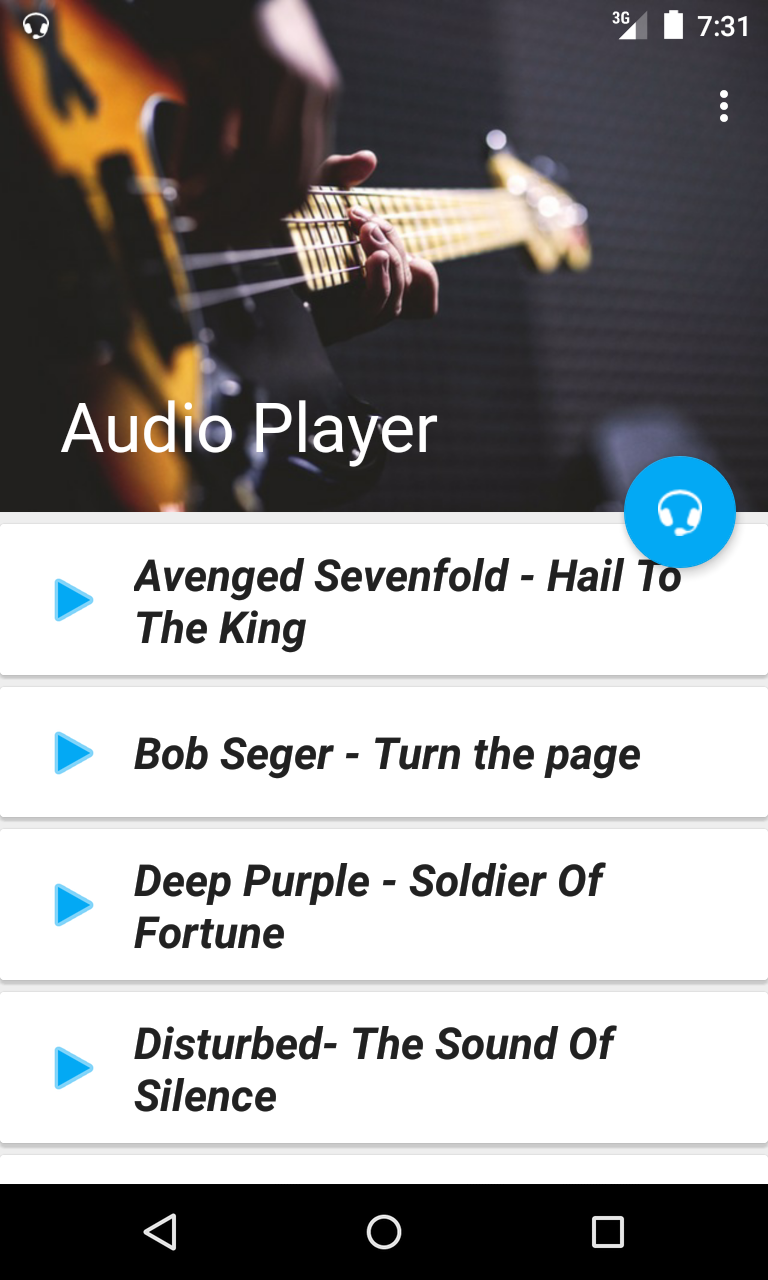
For a more complete audio app I added a RecyclerView , and with the help of the loadAudio() function, loaded local audio files to the RecyclerView . I also made changes to the color scheme and layout. I wont go into detail describing the process of adding the RecyclerView to the app, but you can see the end result on GitHub.
If you want to learn more about RecyclerView , then read my article.
Another change is the playAudio() function and the Service s onStartCommand() method, but I will return to these changes later and focus on the BroadcastReceiver s events and user interaction with the Service .
Change of audio outputs (headphone removed)
In media apps it’s common that when a user removes their headphones from the jack the media stops playing.
In the MediaPlayerService class create a BroadcastReceiver that listens to ACTION_AUDIO_BECOMING_NOISY , which means that the audio is about to become вЂnoisy’ due to a change in audio outputs. Add the following functions in the service class.
The BroadcastReceiver instance will pause the MediaPlayer when the system makes an ACTION_AUDIO_BECOMING_NOISY call. To make the BroadcastReceiver available you must register it. The registerBecomingNoisyReceiver() function handles this and specifies the intent action BECOMING_NOISY which will trigger this BroadcastReceiver .
You have not yet implemented the buildNotification() , so don’t worry when it shows an error.
Handling Incoming Calls
The next functions avoid audio playing during calls, which would be a terrible user experience.
First create the following global variables in the MediaPlayerService class.
Add the following function.
The callStateListener() function is an implementation of the PhoneStateListener that listens to TelephonyManager s state changes. TelephonyManager provides access to information about the telephony services on the device and listens for changes to the device call state and reacts to these changes.
Redefine Methods
I mentioned that I changed the methods described earlier in this article. I also made changes to the way audio files are passed to the Service . The audio files are loaded from the device with the help of the loadAudio() function. When the user wants to play audio, call the playAudio(int audioIndex) function with an index of the wanted audio from the ArrayList of loaded audio files.
When calling the playAudio() function for the first time, the ArrayList is stored in SharedPreferences together with the audio index number and when the MediaPlayerService wants to play new audio it loads it from SharedPreferences . This is one way to load the Audio array to the Service , but there are others.
Open build.gradle (app) and add dependencies for the Gson library.
The following class handles Data storage.
Now it’s time to change the playAudio() function. First in the MainActivity class create a global static String .
This string sends broadcast intents to the MediaPlayerService that the user wants to play new audio and has updated the cached index of the audio they want to play. The BroadcastReceiver that handles this intent is not created yet, for now replace your old playAudio() function in the MainActivity with the following.
The audio is not passed to the Service through putExtra() , so the Service has to load the data from the SharedPreferences and this is why the onStartCommand() method needs to be rewritten. I will return to this method at the end of this tutorial to give the complete onStartCommand() implementation. For now, add the following global variables to the MediaPlayerService class.
Play New Audio Broadcast
When the MediaPlayerService is playing something and the user wants to play a new track, you must notify the service that it needs to move to new audio. You need a way for the Service to listen to these “play new Audio” calls and act on them. How? Another BroadcastReceiver . I mentioned these “play new Audio” calls in the Redefine methods section when calling the playAudio() function.
In the MediaPlayerService class add the following functions.
When intercepting a PLAY_NEW_AUDIO intent, this BroadcastReceiver loads the updated index and updates the activeAudio object to the new media and the MediaPlayer is reset to play the new audio. The buildNotification() function is not yet implemented so it shows an error.
Register BroadcastReceiver S
In the Service s onCreate() method add the registration calls for the BroadcastReceiver s.
You must unregister all the registered BroadcastReceiver s when they are not needed anymore. This happens in the Service s onDestroy() method. Replace your current onDestroy() method with the following. Again, don’t worry about the removeNotification() , it’s implemented later.
When the Service is destroyed it must stop listening to incoming calls and release the TelephonyManager resources. Another final thing the Service handles before it’s destroyed is clearing the data stored in the SharedPreferences .
User Interactions
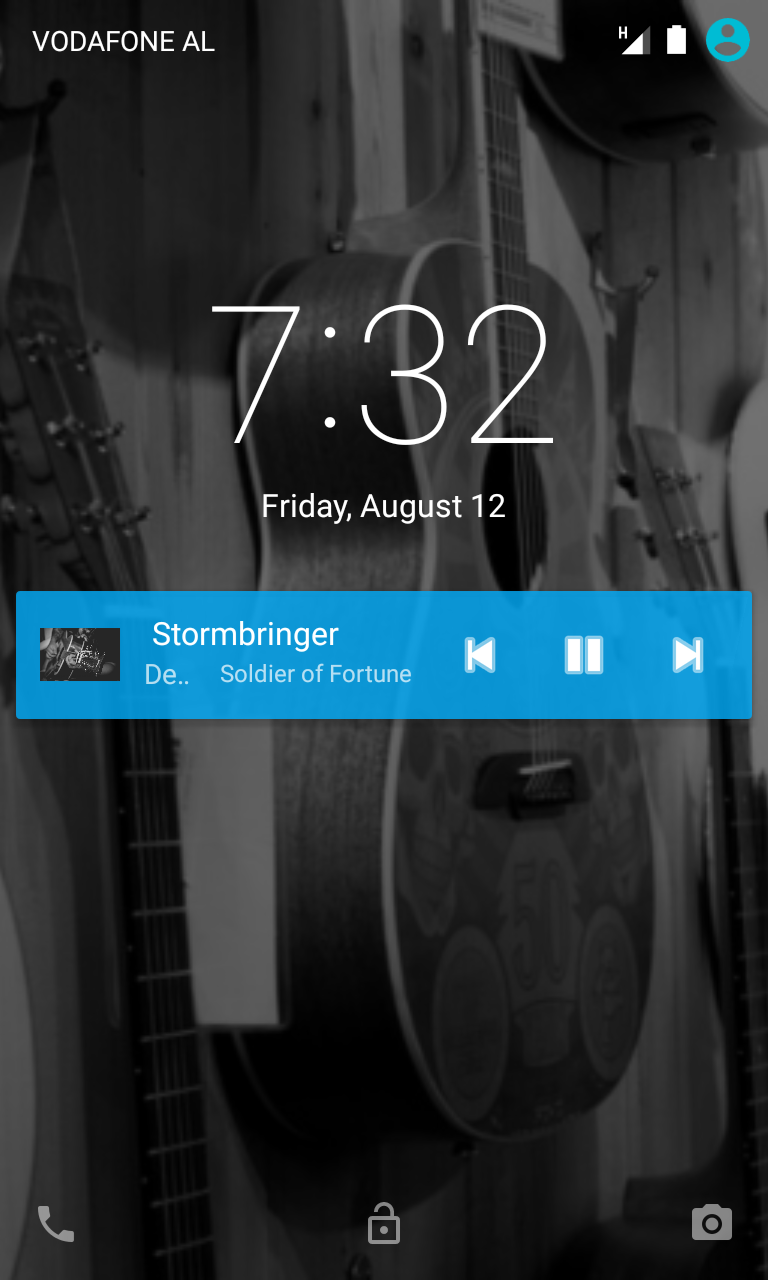
Interacting with the MediaPlayerService is one of the key features of an audio player app, because users don’t need to play media, but also need to have control over the app. This is not as easy as it looks when working with background services because there is no user interface in background threads. Android Lollipop introduced new features, including Android MediaStyle notifications.
Notification.MediaStyle allows you to add media buttons without having to create custom notifications. In this example I will use the MediaStyle s support library, NotificationCompat.MediaStyle to support older Android versions.
To have full control over media playback in the MediaPlayerService you need to create an instance of MediaSession . MediaSession allows interaction with media controllers, volume keys, media buttons, and transport controls. An app creates an instance of MediaSession when it wants to publish media playback information or handle media keys.
To build a MediaStyle notification for this example, the MediaPlayerService will make use of MediaSession s transport controls to add notification controls and publish MetaData so the Android system know that it’s playing audio.
Before moving on, add the following variables in the MediaPlayerService class.
The String variables are used to notify which action is triggered from the MediaSession callback listener. The rest of the instances relate to the MediaSession and a notification ID to uniquely identify the MediaStyle notification.
The following functions handle the initialization of the MediaSession and setting the MetaData to an active session. An important part of the following initMediaSession() function is setting the MediaSession callbacks to handle events coming from the notification buttons.
Add the following functions in the MediaPlayerService class.
The updateMetaData() method has a Bitmap image that you need to create, so add an image to the drawable folder of the project. The Callback() override methods make use of the media player key functions described earlier. Next add the media player functions mentioned earlier to the Service .
Now the service needs a way to build the MediaStyle notification, but the service needs a way to keep track of its playback status. For this create a new enumeration.
In your project create the following class.
Now the service has a way to keep track of its playback status add the following function for building the notifications.
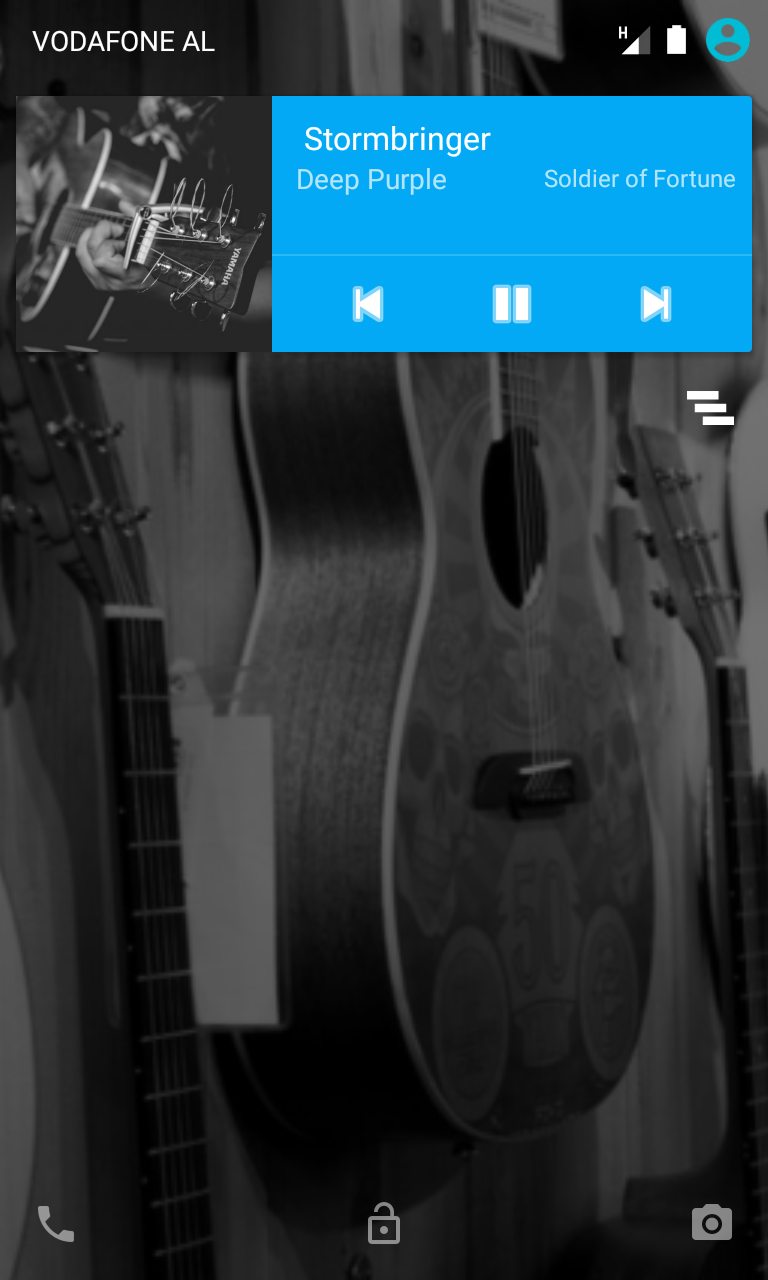
When called, this function will build the notification according to the PlaybackStatus .
The main purpose of the buildNotification() function is building the notification UI and setting up all the events that will trigger when a user clicks a notification button. You generate the actions through PendingIntent s from the playbackAction() function. Add it to the MediaPlayerService .
Now that the service generates actions when the user clicks on the notification buttons it needs a way to handle these actions. Add the following action to the service.
This function figures out which of the playback actions is triggered and executes one of the MediaSession callback methods through its transport controls. The callback methods, implemented in the initMediaSession() function handle all the MediaPlayer actions.
Finishing Up
All that is left is to define the services onStartCommand() method. This method will handle the initialization of the MediaSession , the MediaPlayer , loading the cached audio playlist and building the MediaStyle notification. In the service class replace the old onStartCommand() method with the following.
In the initMediaPlayer() function replace the setDataSource() call with the following line
That sums it up for playing audio in a background service in Android. Now run the app and play audio the right way. Here is an example how my sample app looks. I added a RecyclerView to the app and the layout might look different, but the notification view and controls are the same.
Fast Forward
And that’s it! I understand there was a lot to absorb and understand in this tutorial, so if you have any questions or comments, please let me know below.
Источник


