- Complete Guide on Sending Push Notifications on Android — Using Firebase
- Setup Repository, ViewModel and View
- These are the Best Text Messaging apps for Android: Google Messages, Chomp SMS, Pulse SMS, and more!
- Messages
- How to Push Notification in Android using Firebase Cloud Messaging?
- Approach
- activity_main.xml
- notification.xml
- AndroidManifest.xml
- AndroidManifest.xml
- Android Chat Tutorial: Building A Realtime Messaging App
- This tutorial will teach you:
- Setting up the project
- Import the Scaledrone module
- Defining the UI layout
- Next up, chat bubbles!
- Chat bubble sent by us
- Chat bubble sent by others
- Hooking up the realtime messaging logic
- Connecting to Scaledrone
- Sending messages
- Displaying messages
- Receiving messages
- And we’re done!
Complete Guide on Sending Push Notifications on Android — Using Firebase

Holla! 👋, I will explain how to send push notifications on android using Firebase Cloud Messaging .
Push notifications are messages that pop up on a users device. A user can see these notifications without having to be on the app. This is important for users retention.
WHAT WE ARE BUILDING
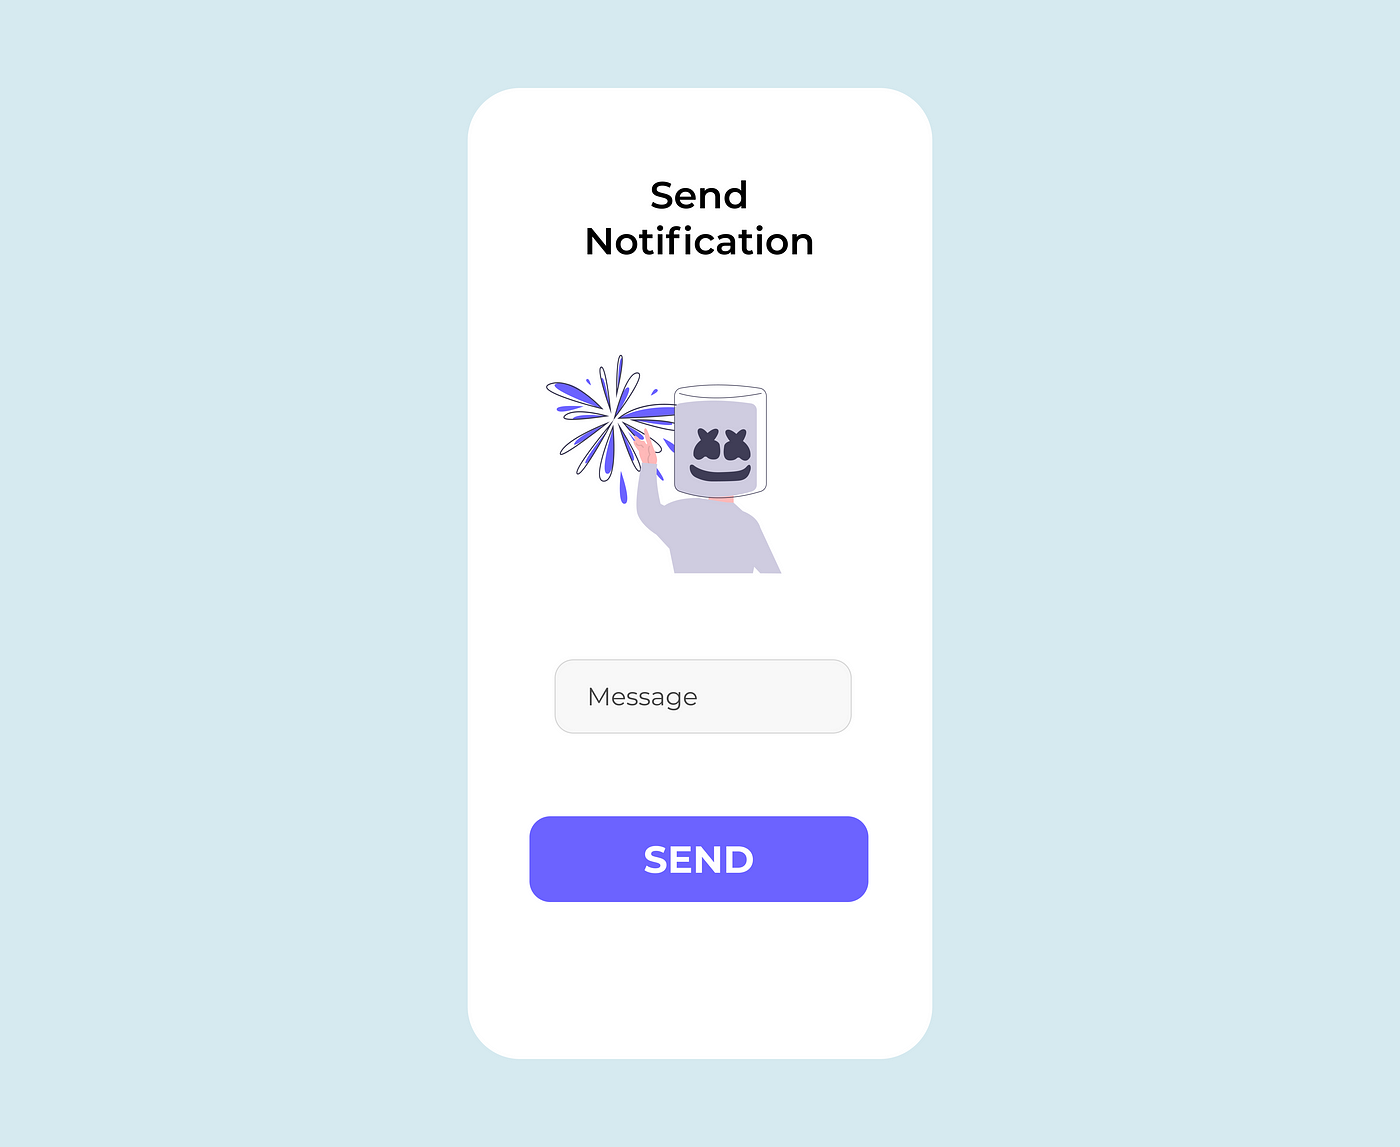
We are simply going to build an app that lets a user input a message and send a push notification to that user containing that message. Simple! 😄
This is how the final app will look like

OnClick of that button
- Push Notification is sent to the user which contains the message you inputted

- Firebase (Cloud Messaging)
- Kotlin (For Android)
- NodeJS (Backend)
- Android Studio IDE
- Set up android studio
- Set up firebase project
- Add dependencies
- Set up Hilt And Retrofit
- Set Up Firebase Cloud Messaging
- Build view
- Setup Repository ViewModel and View
- Set up our backend with NodeJS
Alright, lets see each of them, one by one
SET UP ANDROID STUDIO
- First download android studio and install.
- Create A New Project — Choose Empty Activity
- Name your project anything, I named mine Firebase Notification Android
- Click Finish
We are using MVVM architectural pattern for this project
- Create 7 new packages name them — di , firebase , helper , model , view , viewmodel , network
- Move MainActivity to the view package
SETUP FIREBASE PROJECT
- Go to https://console.firebase.google.com/
- Sign in and click on Add Project
- Enter the name of your project — Name it anything,
- Click Continue
- On the Google Analytics page, Click Continue
- Choose a Google Account — Select Default Account For Firebase
- Click Create Project
- You will see — “ Your new project is ready ”
- Click Continue
Congrats, you have successfully created a firebase project. Now, lets link the project with our android app
Connecting Firebase With Android
- On your console home page click on the Android Logo

- Android Package Name — Go to your Manifest.xml , copy the package and paste it there, it should be something like this — com.name.firebasenotificationandroid
- App Nickname — Put anything there
- Debug Signing Certificate — Go to Android Studio , Click on gradle — Tasks — Android — signingReport — Copy the SHA-1 key and paste

- Click on Register App
- Download google-services.json and paste in you project folder app directory

- Add all the necessary firebase dependencies
- Sync project and you are done 👏
This app makes use of coroutines, hilt, retrofit, cloud messaging etc.
- Open your build.gradle(app) file and add them
Open build.gradle(project) add hilt class path
- Create 2 new class under di package name them — AppModule and MyApplication
- AppModule — This class is used to perform injection to types such as interfaces and classes from external libraries which we do not own e.g Retrofit.
- MyApplication — This class extends Application class. This will generate all the needed hilt codes and serve as a dependency container. It should look like this.
- Finally, go to your Manifest.xml file, in the application tag add android:name=”.di.MyApplication”
- Under helper package, create a class called EndPoints
EndPoints — A class where our base url and all api calls endpoint resides
- Under model package, create a class name AuthResponse
AuthResponse — A class that models the response gotten from the server so we can take proper action
- Under the network package, create an interface called ApiService and 2 new classes, name them — ApiDataSource , BaseDataSource
ApiService — An interface where we will make a Post Request to our server to save a user’s name and notification token.
ApiDataSource- A class that exposes the ApiService so that we can use it in our repository
We are done with retrofit and hilt.
SET UP FIREBASE CLOUD MESSAGING
- Under firebase package, create a new class — MyFirebaseMessagingService — This class extends FirebaseMessagingService that handles messages, recieving notifications in foreground, receiving data payload, sending up stream messages
- Under helper create an object — Utility
Utility — A utility class with a function that builds our notification — Handling stuffs such as — action when a user taps on the notification, customizing look of notification e.t.c
- Open Manifest.xlm , before the closing application tag, add this
- Add a default notification icon,color and channel, add to manifest.xml within the application tag
That should be all for configuring cloud messaging
Open main_activity.xml and use this code
Okay, now we have our not so beautiful view and everything set up, now lets set up our repository and viewmodel.
Setup Repository, ViewModel and View
- Open viewmodel package, create 2 new classes — MainRepo and MainViewModel
MainRepo — This class serves as a source of data for our viewModel to consume.
MainViewModel — This class communicates with the repository, the result from the api call is then returned as a LiveData (Lifecycle aware) which is then observed by our view (MainActivity)
Here’s what this class does
- Get the views through ViewBinding
- Initialize the views
- Listen to click even on the button
- Communicate with viewModel to register the user
- Observe the data from the viewModel and display appropriate messages
SET UP NODEJS BACKEND
- Go to your firebase console, click settings icon -> Project settings

- Switch to Service Account tab, Click Generate new private key
- Confirm and download it
- Now create a folder in your pc, navigate to that folder with your terminal
- npm init and fill in all required details. This will create a package.json file
- npm i firebase-adminon your terminal to install firebase dependency
- Also npm i express and npm i bodyparser
- Create a config file
Okay, we are done. Take a deep breath! 😫
This is a link to the complete project, please check it out
Источник
These are the Best Text Messaging apps for Android: Google Messages, Chomp SMS, Pulse SMS, and more!
As chat platforms like WhatsApp and Telegram have become popular over the last several years, the good old SMS had to take a back seat. Still, SMS messages aren’t going anywhere anytime soon. Text messaging is still quite popular in countries like the US, and while your friends and family may not be pinging you on SMS as much, you’re still likely getting dozens of text messages from companies and service providers every day. To keep track of all these text messages on your Android phone, you need a good app. While the pre-installed apps work fine most of the time, they’re relatively barebones. So we’ve selected the best text messaging apps for Android you can download right now.
Messages


Previously known as Android Messages, the Messages app from Google is the company’s official app for texting and RCS messages. It comes pre-installed on Google’s Pixel series and select other phones but other Android users can download it from Google Play.
The Messages app packs support for sending text messages via your computer or pretty much any device that has a browser. Additionally, there are basic theming options, search support, spam protection, and a lot more. You can also send group texts, emojis, GIFs, stickers, videos, and audio messages using the app. Moreover, you get the power of Google Assistant right in your texting app.
Messages is free to download and use. New versions of the app have also been updated to support Google’s Material You theming.
Источник
How to Push Notification in Android using Firebase Cloud Messaging?
Firebase Cloud Messaging is a real-time solution for sending notifications to client apps without any kind of charges. FCM can reliably transfer notifications of up to 4Kb of payload. In this article, a sample app showing how this service can be availed is developed. Though FCM also allows sending out notifications using an app server, here Firebase admin SDK is used. Follow the complete article to implement an example of FCM.
Approach
Step 1: Add Firebase to the project and the required permissions
To add firebase to the project please refer Adding Firebase to Android App. The following is the gist of adding FCM to the app. Go to Tools -> Firebase -> Cloud Messaging -> Set up Firebase Cloud Messaging
- Connect your app to Firebase: Complete the three steps of creating a Firebase project.
- Add FCM to the app.
Since receiving FCM notifications require the use of the internet, add the following permission to the AndroidManifest.xml file anywhere between the and tags.
Note:
compile ‘…..’
this format for setting up dependencies is deprecated, instead, use
implementation ‘…..’
to declare dependencies in case of any discrepancy.
Step 2: Add all the required drawable resources
Here, the following icon has been used as a drawable resource. Add all the drawable resources to the drawable resource folder.
Step 3: Customize the activity_main.xml
Here, the home screen of the app just holds a TextView, however, one can customize the app as per the requirements.
activity_main.xml
Step 4: Create the Notification Layout
Create a new notification.xml file to design the layout for the Notification. This step is stated as optional because the content and title too can be directly set too without customizing the appearance of the notification, however here the notification has the following layout. Here the Notification consists of:
- An ImageView
- A TextView for the Title
- A TextView for the Message.
notification.xml
Step 5: Create the message receiving class
Create a FirebaseMessageReceiver.java class. This class extends the FirebaseMessagingService. Add the following code to the AndroidManifest.xml file between the and tags to recognise the FirebaseMessagingService as a service in the app.
AndroidManifest.xml
Here the attribute ‘android: name’ is assigned the name of the Java file that extends the FirebaseMessagingService so pass the class name FirebaseMessageReceiver. This service is required to do any type of message handling beyond just receiving notifications, while the client app runs in the background. It also serves the purpose of receiving notifications in foreground apps and much more. The complete AndroidManifest.xml file is given below.
AndroidManifest.xml
Step 6: Working with FirebaseMessageReceiver.java class
FirebaseMessageReceiver.java class overrides the onMessageReceived() method to handle 2 events:
- If Notification contains any data payload, i.e it is received from the app server.
- If Notification contains any notification payload, i.e. it is sent via the Firebase Admin SDK.
This method takes RemoteMessage as a parameter. RemoteMessage is a class that extends Object Class and implements Parcelable interface. It is nothing but the object of the message passed using FCM. The above method then calls a user-defined method showNotification() which in turn accepts two parameters. A detailed explanation is provided via comments in the code itself. A notification channel is required for Notifications in Android Versions greater than Oreo.
In this example, since a customized notification is designed, a method getCustomDesign() is defined and called to set the resources accordingly. This method sets the custom layout for the display of the notification received. Assuming that only title and body are received from the notification, it appropriately maps the TextViews according to the IDs and sets the image resource for the notification. The complete code for this file is given below.
Источник
Android Chat Tutorial: Building A Realtime Messaging App
In this tutorial, we’re going to be building a realtime group chat for Android using the Scaledrone Java API Client. It will work very similarly to apps such as WhatsApp, Facebook Messager and LINE.
You can find the full source code on GitHub.
This tutorial will teach you:
- How to build a fully functional group chat.
- Designing the UI elements such as chat bubbles and text inputs.
- How to use Scaledrone as the realtime backend of your app.
The project might seem daunting at first, but the messaging code outside of the layout files is pretty short.
Setting up the project
Start by creating a new Android project. We are using Android Studio, but this tutorial will work with any IDE of choice.
Import the Scaledrone module
To add the Scaledrone dependency to your app, you need to add it to your build.gradle file.
For Android to allow us to connect to the internet, we need to add the internet permission to the manifests/AndroidManifest.xml file:
Defining the UI layout
To start with the UI layout let’s build the empty state. It consists of:
An empty ListView into where the messages will go
An EditText where the user can type their message
And finally, an ImageButton as a button to send the message
![]()
The base layout is defined in /res/layout/activity_main.xml :
String constants are defined in /res/layout/activity_main.xml :
The icon for the send button is defined in /res/drawable/ic_send_black_24dp.xml :
Next up, chat bubbles!
Our chat app is going to have two type of chat bubbles: a bubble for messages sent by us and bubbles for messages sent by others.
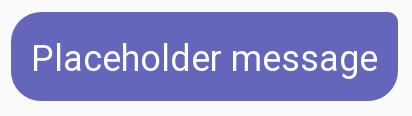
Chat bubble sent by us
The messages sent by us will look dark and be aligned to the right. We’re using a drawable to get the border radius effect.
The message itself is just a simple TextView aligned to the right.
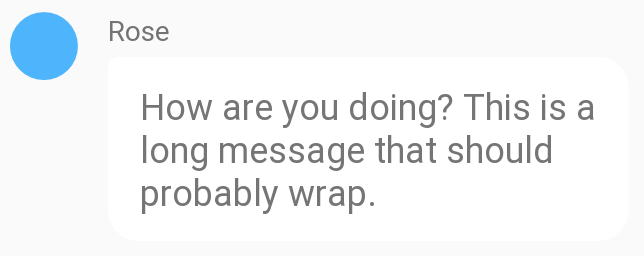
Chat bubble sent by others
The chat bubble sent by others within the group chat will be light and aligned to the left. In addition to the bubble itself, we will show an avatar (as a simple full-color circle) and the name of the user.
For the avatar let’s define a circle shape under /res/drawable/circle.xml :
And for the bubble let’s create a shape with curved corners and the sharp corner on the left. This goes in /res/drawable/their_message.xml :
Putting it together their message bubble layout under /res/layout/their_message.xml will look like this:
Hooking up the realtime messaging logic
We’re finally done with the layout and can get to the interesting part!
Let’s find the EditText view from our layout and extend Scaledrone’s RoomListener so we could receive messages. Most of the methods will have minimal code in them, and we’ll fill them up as the tutorial goes along.
Connecting to Scaledrone
If you don’t have a Scaledrone account yet, open up Scaledrone.com and create a new free account. To successfully connect to Scaledrone you need to get your own channel ID from the Scaledrone’s dashboard. To do that go to the dashboard and click the big green +Create Channel button to get started. You can choose Never require authentication for now. Copy the channel ID from the just created channel and replace CHANNEL_ID_FROM_YOUR_SCALEDRONE_DASHBOARD with it.
Connecting to Scaledrone can happen within the onCreate() method, right after we have set up the UI. Scaledrone gives us the ability to attach arbitrary data to a user (users are called members in Scaledrone lingo), we’re going to be adding a random name and color.
You might have noticed that we named our name Scaledrone room observable-room. You can name the room anything you want, a single user can actually connect to an infinite amount of rooms to provider for all sorts of application scenarios. However in order for messages to contain the info of the sender the room name needs to be prefixed with observable-. Read more..
To create the MemberData let’s implement the getRandomName() and getRandomColor() functions as well as the MemberData class itself.
For the sake of keeping this tutorial simple, we’ll define a random username on the client side of the application. Later you can add fancy login functionality to your app. To create a random name, we pre-define two lists of random adjectives and nouns, then combine them randomly.
The random color function will be generating a random seven-character color hex such as #FF0000 .
The MemberData class is super minimal and will later be serialized into JSON and sent to users by Scaledrone.
Sending messages
To send (or publish) the message to the Scaledrone room we need to add a onClick() handler to the ImageButton in the activity_main.xml file.
Let’s add the sendMessage() function to the MainActivity . If the user has input something we send the message to the same observable-room as we subscribed to above. After the message has been sent we can clear the EditText view for convenience.
Scaledrone will take care of the message and deliver it to everyone that has subscribed to the observable-room room in your channel.
Displaying messages
As seen in the layout file the messages are going to be displayed via ListView . To use a ListView you need to create a class that extends android.widget.BaseAdapter . This class is then used as the state of the ListView .
Let’s define our MessageAdapter as well as the Message class itself. The Message class will hold all the needed info to render a single message.
The MessageAdapter defines how we render our rows within the ListView .
Receiving messages
Now that we can display and render our chat bubbles we need to hook up the incoming messages with the MessageAdapter that we just created. We can do that by going back to the MainActivity class and finishing the onMessage() method.
Scaledrone uses the popular Jackson JSON library for serializing and parsing the messages, and it comes bundled with the Scaledrone API client. Please see the Jackson docs for best practices on how to parse the incoming Scaledrone messages and users data.
And we’re done!
Hopefully, this tutorial helped you build your very own chat app. You can find the full source code or run the working prototype on GitHub. If you have any questions or feedback feel free to contact us.
This tutorial only scratched what Scaledrone can do for you and is the ideal basis for any of your future realtime needs.
Looking to build the same app for iOS using Swift? Check out our iOS chat tutorial.
Источник


