- Сервисные (секретные) коды для смартфонов Android
- Популярные секретные коды для Андроид смартфонов
- Сервисные коды Android в приложении Secret Codes
- Android Hidden Codes: All the custom Dialer Codes and What they do!
- Structure of the Android hidden codes
- Generic hidden codes
- Special hidden codes for popular Android brands
- Motorola
- Nokia
- OnePlus
- Realme
- Samsung
- Xiaomi
- How to Create User Interface Login & Register with Android Studio
- Adjustment of several layouts :
- Connect fragments with viewpager
Сервисные (секретные) коды для смартфонов Android
Сервисные (они же инженерные, они же секретные) коды используются для быстрого доступа к различным функциям, часто даже скрытым. Есть универсальные коды для Android, а есть те, которые доступны только для определенных моделей устройств.

Не так давно я публиковал статью, в которой рассказал, как увеличить громкость звука на Андроид. Для этого можно было использовать специальный софт либо воспользоваться одним из секретных кодов. Сейчас я расскажу о самых популярных из них, благодаря которым можно осуществлять многие настройки системы.
Также рекомендую интересные статьи по теме Android:
Популярные секретные коды для Андроид смартфонов
Почему данные коды называют «секретными»? Просто они не нужны большинству рядовых пользователей, их не публикуют в инструкциях к смартфонам. В первую очередь «secret codes» предназначены для инженеров и разработчиков для проведения различных тестов.
Чтобы использовать любой из сервисных кодов, нужно ввести его в номеронабирателе. На планшетах придется скачать стороннее приложение для осуществления звонков – введите в поиске Google Play запрос «Dialer» и загрузите понравившуюся «звонилку».
- *#06# — информация об IMEI смартфона
- *#*#4636#*#* — информация о Wi-Fi, аккумуляторе и статистике использования
- *#*#3646633#*#* или *#*#83781#*#* — вход в инженерное меню на смартфонах с процессором MTK (через него можно увеличить громкость динамиков и наушников)
- *#*#8255#*#* — тестирование сервиса Google Talk
- *#*#7594#*#* — если введете данную комбинацию, после этого, при нажатии кнопки выключения, смартфон будет сразу же выключаться, без предложения меню
- *#*#44336#*#* — информация о PDA, CSC, времени сборки и прочих данных о смартфоне
- *#*#232338#*#* — MAC адрес Wi-Fi
- *#*#7780#*#* — моментальный сброс к заводским настройкам (Hard Reset). Удаляет только приложения
- *2767*3855# — моментальный сброс настроек до заводских, но в отличии от предыдущего способа Android полностью переустанавливается
- *#*#1234#*#* или *#12580*369# — информация о прошивке устройства
- *#*#1111#*#* — информация о FTA софтверной версии
- *#*#2222#*#* — информация о FTA хардверной версии
- *#*#0283#*#* — тест Loopback
- *#*#0*#*#* — тест экрана
- *#0*# — тестирование различных компонентов: экрана, камеры, динамиков, вибрации, микрофона и прочих
- *#*#0673#*#* или *#*#0289#*#* — тест аудио
- *#*#0842#*#* — тест вибрации и подсветки
- *#*#232339#*#* или *#*#526#*#* — тест беспроводной сети
- *#*#1472365#*#* — тест GPS
- *#*#1575#*#* — подробный тест GPS
- *#*#232331#*#* — тест Bluetooth
- *#*#232337#*#* — показать Bluetooth-адрес
- *#*#2663#*#* — версия сенсорного экрана
- *#*#2664#*#* — тестирование сенсорного экрана
- *#*#0588#*#* — тестирование датчика движения
- *#*#7262626#*#* — тест сигнала GSM
- *#197328640# — переход в сервисный режим
- *#*#3264#*#* — версия RAM памяти
- *#*#8351#*#* — активация режима регистрации голосового набора
- *#*#8350#*#* — выключение режима регистрации голосового набора
- #*5376# — удаление всех SMS
- *#2222# — версия прошивки Android
- #*2562#, #*3851#, #*3876# — перезагрузка смартфона, планшета
- *#34971539# — полная информация о камерах и обновлении их прошивок
- *#*#273283*255*663282*#*#* — быстрое создание резервной копии медиафайлов
- *#*#4636#*#* — секретное меню для устройств Motorola
- **05***# — разблокировка PUK на Sony
- 3845#*855# — сервисное меню на LG G3
- *#0011# — сервисное меню на Samsung Galaxy S4
- ##778 (+кнопка вызова) — выводит на экран EPST-меню (для Samsung)
- ##3424# — режим диагностики (для HTC)
- ##3282# — EPST (для HTC)
- ##8626337# — VOCODER (для HTC)
- ##33284# — технические данные состояния сети (для HTC)
- ##7738# — ревизия протокола (для HTC)
В принципе, это самые основные и универсальные сервисные (секретные) коды для планшетов и смартфонов на Андроид, но все производители добавляют поддержку своих собственных, поэтому, если вас интересуют коды для отдельного аппарата, скачайте приложение Secret Codes. О нем пойдет речь ниже.
Сервисные коды Android в приложении Secret Codes
Приложение Secret Codes просканирует систему на наличие инженерных кодов и выдаст результат в виде списка. Вам достаточно будет только нажать на интересующий код и вы перейдете к нужной опции.
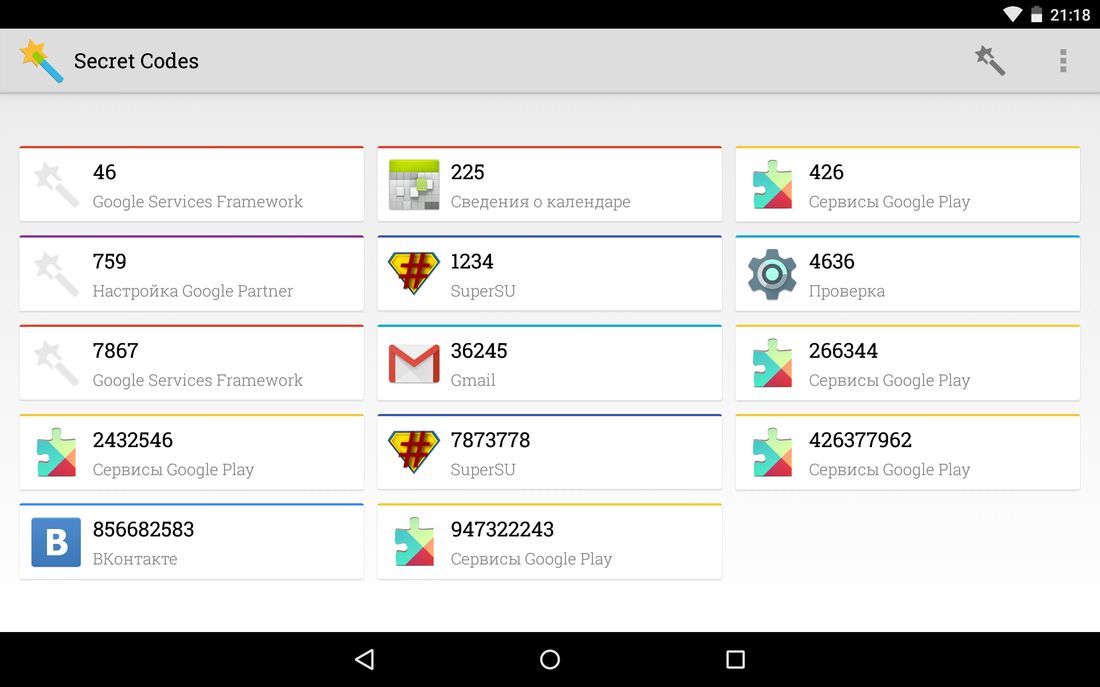
К сожалению, у этого способа есть минус: на некоторых устройствах приложение не находит ни единого сервисного кода, а на некоторых находит не все. Но на протестированных мною девайсах все было отлично, да и отзывы в Google Play практически все положительные.
Источник
Android Hidden Codes: All the custom Dialer Codes and What they do!
The Android operating system is well known for its hidden features and easter eggs. One such area is using custom dialer codes to access various hidden apps and settings. Some of these codes are universal, which means you’ll get the desired output on any Android device, irrespective of them being a great flagship or a cheap budget phone. However, custom OEM skins (e.g. One UI by Samsung and MIUI by Xiaomi) and carrier-customized models often come with their own set of hidden codes.
Below you can find a bunch of generic as well as device-specific Android hidden codes. Give them a try and discover some of the handiest secret functionalities of your phone. If you don’t see your device listed or you want to submit a new code, send a message to Skanda Hazarika (SkandaH on the forums) with all the relevant details.
Table of Contents:
Structure of the Android hidden codes
The so-called hidden codes are basically part of the Man Machine Interface (MMI) schema. These are a bit different from the Unstructured Supplementary Service Data (USSD) codes, although both of them start with an asterisk (*) followed by digits that comprise of commands or data. Groups of digits may be separated by additional asterisks. The message is terminated with a hash symbol (#), but custom MMI codes may end with an asterisk as well.
While USSD codes are used to communicate with the mobile network operator’s servers for menu-based information services, mobile-money services, and location-based content services, the MMI Supplementary Service codes work completely offline.
Just like USSD, you have to dial the “hidden” codes on the stock dialer app to invoke the corresponding action.
Generic hidden codes

- *#07#
Displays the Specific Absorption Rate (SAR) value of the device.

- *#*#225#*#*
Displays calendar storage information.

- *#*#426#*#*
Displays the Firebase Cloud Messaging (FCM) diagnostics page or information related to Google Play Services.

- *#*#759#*#*
Displays the RLZ Debug UI with Unique Device ID and other data related to application installation. It’s also possible to turn on (and off) OEM mode through this interface.

- *#*#4636#*#*
Displays information about the phone, battery, and various network statistics.

Special hidden codes for popular Android brands
The generic codes should work on every Android device out there. In case you’re looking for OEM-specific codes, take a look at the following index.
- *#07#
Displays the regulatory labels. - .12345+= (must be entered in the stock calculator app)
Opens the engineering mode.
Google Pixel devices run an enhanced version of vanilla Android, which means you’re limited to the generic codes mentioned above.
Motorola
- *#*#2486#*#*
Opens up the engineering mode. You may need to boot through the “BP Tools” section in the fastboot interface at least once before trying this code. - *#07#
Displays the regulatory information.
Nokia
- *#*#372733#*#*
Opens up the service mode (also known as the FQC menu).

OnePlus
- 1+= (must be entered in the stock calculator app)
Displays the company’s motto – “Never Settle” – on the calculator app.

- *#66#
Displays the IMEI and MEID in an encrypted format
![]()
- *#888#
Displays the PCB version of the motherboard of the phone.
![]()
- *#1234#
Displays the software version.
![]()
- *#*#2947322243#*#*
Wipes out the internal memory (use with caution!).
Realme
- *#800#
Opens up the factory mode/feedback menu.
![]()
- *#888#
Displays the PCB version of the motherboard of the phone.
![]()
- *#6776#
Displays the software version and additional details.
![]()
Samsung
- *#0*#
Opens up the hardware diagnostic menu.

- *#011#
Displays network connection and serving cell related information. - *#0228#
Displays battery status.

- *#0283#
Opens up the packet loopback settings.


- *#1234#
Displays the software version and additional details.

- *#2663#
Displays advanced firmware version menu.

- *#7353#
Displays the quick test menu. - *#9090#
Displays advanced debugging tools.

- *#9900#
Opens up system dump mode.

- *#2683662#
Displays advanced service mode.

- *#34971539#
Displays advanced camera firmware information.

- *#*#73788423#*#*
Displays the service menu. - *#07#
Displays certifications details.
Xiaomi
- *#*#64663#*#*
Displays the hardware diagnostic menu (also known as the QC test menu).

We hope this guide will get you in and out of hidden menus within Android. We’ll be updating this guide with more such codes for specific phones, so check back again in the future.
XDA В» Tutorials В» Android Hidden Codes: All the custom Dialer Codes and What they do!
Источник
How to Create User Interface Login & Register with Android Studio
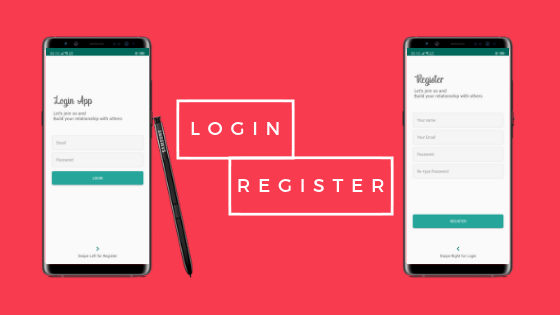
ok, this is my first article in Medium. In this section, I want to share with you about the User Interface on Android and we will create a Login page and a Register page. Some components that I will use:
1. Viewpager
2. Fragment
3. Edittext
4. Button
5. Textview
6. Imageview
What about the results? let’s coding (follow step by step)
- Of course we must already have an Android Studio. if not, you can download it first on the official Android Studio website. If you already have one, please open your Android studio.
2. We create a new project by clicking “Start a new Android Studio project”. Fill in the application name column with “LoginApp”, then click next.

3. Select the minimum SDK you need or want, then click next.


4. Select “Empty Activity” and click next. After that, the “Activity Name” and “Layout Name” columns will appear, in this section just leave it like that, then click finish.

After you click finish, Android Studio will make you an Application with the name “LoginApp”.
After the application is successfully built, you can simply make adjustments to the following sections:
Open the colors.xml file in app/res/values/colors.xml, and change it like this:
Create a folder with the name “font” in the res folder, by right clicking on the res directory, select new / directory and name it “font”. After that, copy this font into font directory. (download the font 1 and font 2).
Create some Drawable Resource File in the drawable directory, by right-clicking on the drawable directory, select new / Drawable Resource File.
After that open file styles.xml and change like this :
Add the theme property in the Main Activity in the manifest, in the app / manifests / AndroidManifest.xml folder
So the AndroidManifest.xml file will be as follows:
After all the steps above are done, then make 2 fragments with the name fragment_login and fragment_register in the layout directory, by right-clicking on the layout directory, New/Fragment/Fragment (Blank)

Uncheck:
include fragment factory methods? and include interface methods?

Adjustment of several layouts :
change the activity_main.xml layout, fragment_login.xml and fragment_register.xml so that it will be as below
Open the strings.xml file in the res / values / strings.xml directory and change it to something like the following :
So that the overall structure of the project will be as follows :

Connect fragments with viewpager
Create an inner class in the MainActivity.java class with the name AuthenticationPapterAdapter. This class is a derivative of the FragmentPagerAdapter class and serves to connect Fragments with ViewPager,
Then call the class in the onCreate() method in MainActivity.java and connect with viewpager
So the MainActivity.java class will be like this
The display of the final application will be like this
Источник


