Navigation in multi module Android Compose UI project + Hilt

If you’ve written an Android application you must have had some form of navigation inside your project, whether that’s manually starting Activities or managing Fragment transactions on your own (hopefully you didn’t have to do this) or using navigation component, this is an article for you.
As you know Google released a terribly named UI toolking that’s just basically a compiler plugin on top of Kotlin to build Android UI, for more information about this read Jake’s blogpost.
Shortcomings of Navigation-compose
Google also released navigation component for Compose and it has it’s shortcomings, especially with multi modular applications.
You need to use the navigation controller to navigate to a destination, this produces
- NavHostController reference in Composable functions
- We need the instance produced by rememberNavController in order to navigate somewhere.
- This instance won’t allow us to easily test navigation as it does make us reliant on the instance provided either as a function parameter or a LocalProvider which both can be shooting yourself in the foot
- Easier testing
- As Mentioned in #1
- Modularization approach
- In order for you to navigate to a destination, using the navController will require you to have inclusion of the navigation dependency, which won’t make sense to use in a multi module project.
- The destination doesn’t have to know about the UI, it can be separated from the logic as well, since in compose we only navigate through routes built of String s.
- Going back from current destination requires also the navController instance just to call navigateUp which is painful when you might only need this, imagine navigating to a details screen and there you only have a back button, adding the whole navigation controller instance doesn’t make much sense.
- Reusability, let’s say you want to go from A > B, B > C, C > D, D > B, the problem arises when going from D > B, in our approach D can include the navigation logic and know how to get to B, same as A, by just re-using the navigation routes we’ll make our lives easier.
There are probably more whys, I just haven’t got to them yet.
Building our navigation module
Every destination has two things in common.
- Route
- Arguments
For that matter we create our contract
You might ask yourself, why’s this a functional interface?
Sometimes you might never add arguments, for example your app provide crash reports on your own, your user can navigate from Settings > Crash reports, for that case we have a default for our arguments and the route has to be included every time.

The other building block we need is the events, every app has a navigate to and navigate from, of course this doesn’t stop you to add more events as they can be tailored to your use case, these are the most commonly used, for that purpose we have our Navigator
The most confusing part here is the < launchSingleTop = true >, since we mostly need only one instance at a time when navigating to a composable screen, that’s the default for the NavOptionsBuilder since we are leveraging the following function from the navigation controller, you can tailor to your own one it doesn’t matter, consider this as it should be your guide towards your own use case.
We need events for the navigator, sealed classes are our best friends here
and we also need something to handles our events, with the help of Hilt as we tend to reuse this we have to implement our navigator
in our NavigatorImpl we mimick the navController navigate and navigateUp functions but built on coroutines to try and handle successful navigations or not with the boolean callback but relying on the channel’s implementation for that, trySend doesn’t block, you can have the navigateUp as a suspend function in order to have more granular control of the Job returned but I didn’t see any need for that.
Sweet Hilt helps us with exposing the Navigator only while keeping the implementation internal to the module as you might have noticed NavigatorImpl has internal modifier.
That’s not all, since we already build our module sometimes we might only need navigation logic, but we can’t get that with Hilt inside a composable without creating an EntryPoint which will look like a boilerplate but we can do the following
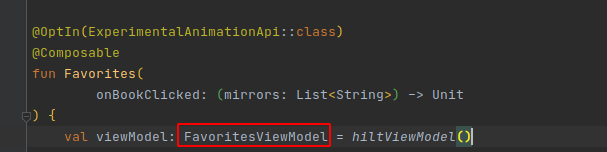
Navigator has the necessary elements for navigating and we can delegate them to this ViewModel which will be our navigator mechanism within the composable, we can end up having a logic where we only need navigation to destinations without any other logic and we can use the NavigatorViewModel
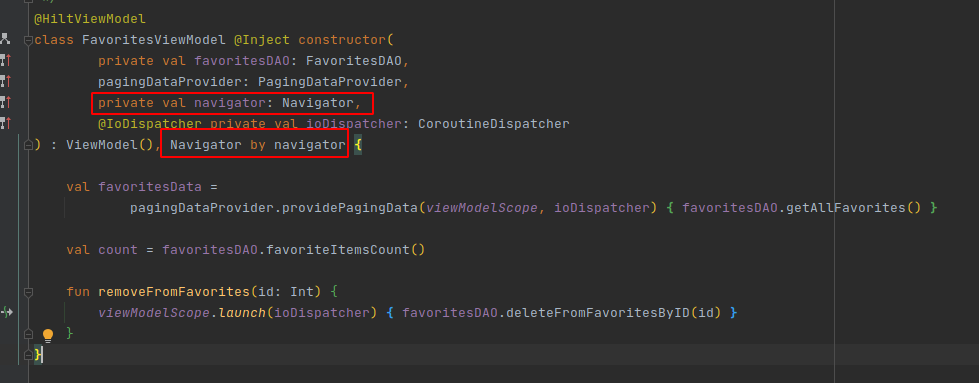
or we can have it injected into a view model (as the picture above) wherever we need the functionality for later on (pictures below)

The navigation destination is really simple, but yet confusing
BookDetailsDestination holds our navigation route and arguments for the NavGraph , we add this so that the graph knows about this destination, this is separate from our createBookDetailsRoute that creates the route to navigate to the destination which we need to pass to our Navigator.navigate(route:String) in order to execute the navigation.
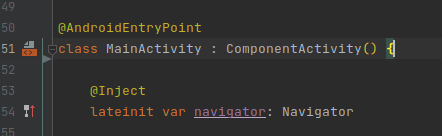
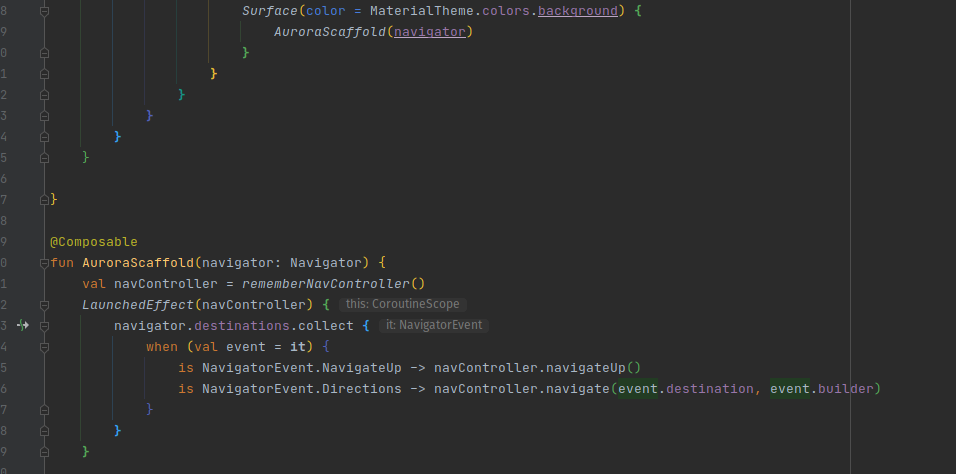
In order to wire the whole navigation we only need this included in the app level where we set up our navigation
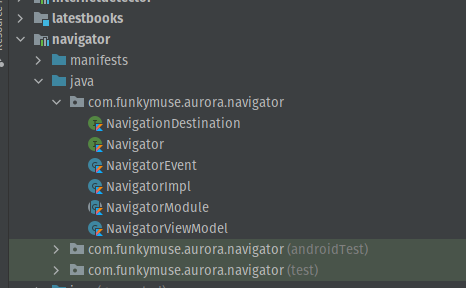
Our navigation module end up looking really short
Structuring our application
Taking care of the navigation is the easy part, the next challenge is structuring the project.
The approach I took for a client (due to NDAs i’m not supposed to reveal the app, it’s fitness related app), that now i’m using for a pet project, scaled pretty well, there were
50 screens and everything was separated, every feature was a folder module, within that module there’s
- Data module -> Which loads the data and exposes it through a view model, can have the navigation as a delegate so that we don’t include the navigator with a separate ViewModel or doesn’t have to if it doesn’t have to then your UI would need to include the navigator, whichever approach I took I ended up delegating the navigator to the data module inside the ViewModel
- UI module -> Has only the UI part which uses the data module
- Destination module -> has the logic to navigate to the screen
- Model module -> has the necessary models that will be included in our Data module (#1)
Do note that the naming doesn’t really matter, some might use: business logic/layer etc etc.. that’s up for discussion internally in your team or however you feel like.
Your project will look like this or you might add another layer in between that creates a database 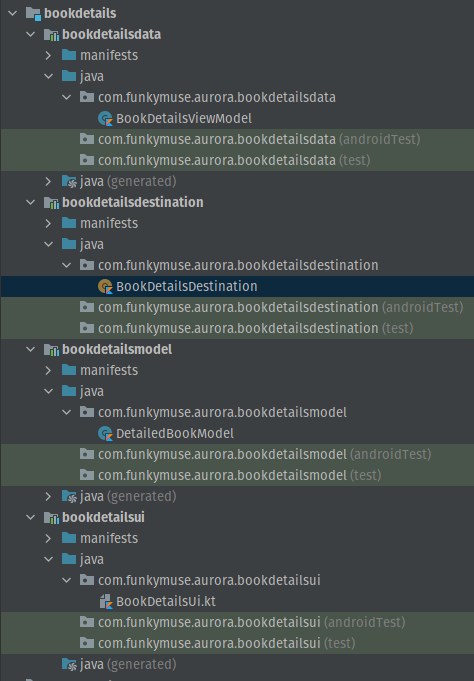
You might think, we’re creating a lot of modules, yes we are, we’re creating reusable parts that we can easily test and plug-in, plug-out or replace whenever we need to, some argue that good architecture is expensive, but have you tried bad architecture?
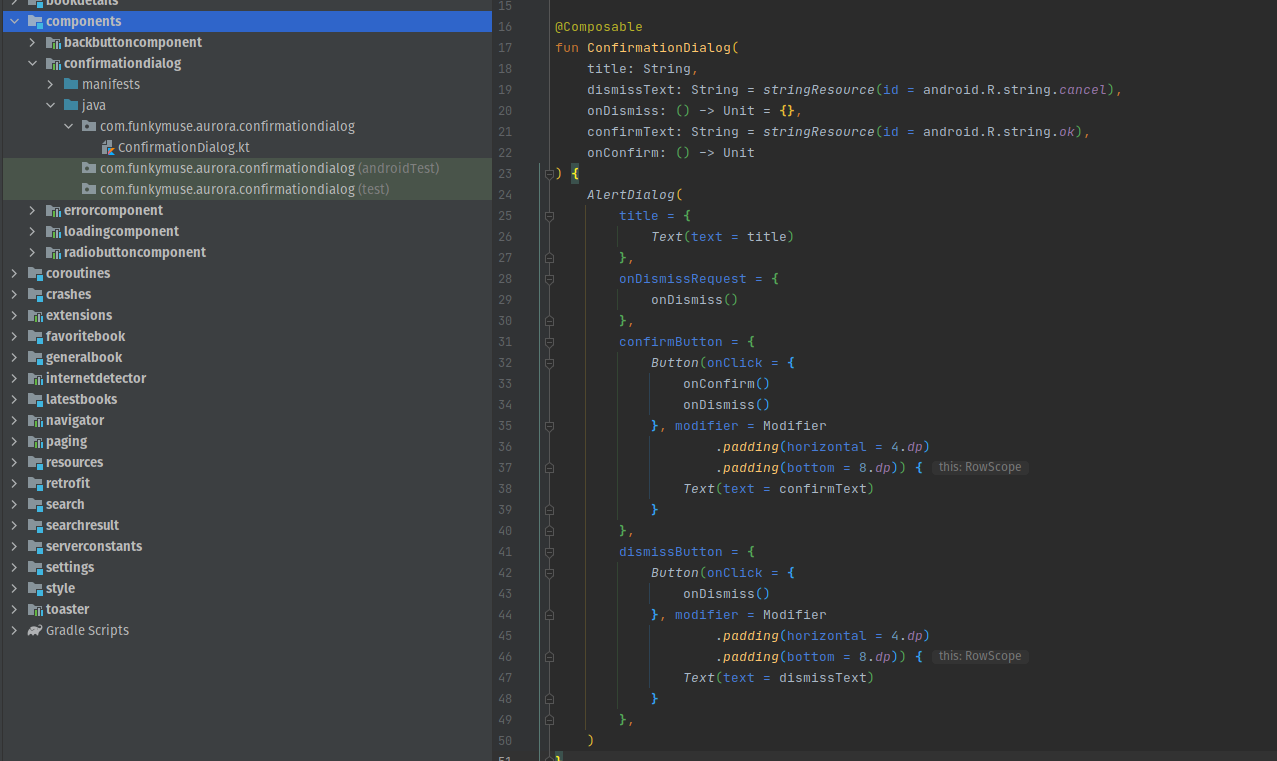
Compose UI enables us to hoist everything up to the top function and we can have everything as it’s own component, unreliant on anything else, uncoupled and does only it’s own thing.
For example a confirmation dialog
You can check out this approach in my pet project.
Also there’s another UI approach I took, not as mentioned in the project (as this project only has a small part of the UI modularized), which had the design, colors, styles, themes separated, as well as a building component for buttons, titles, subtitles etc.. but it’s not mentioned here as the UI parts for compose will change in the future and there will be better “best” practices, at the moment that’s how I saw it fit to modularize every single part of the UI as well, but this small pet project can’t really shine in that way, unless it grows in the future.
Thank you for reading and I hope you learnt something new.
Don’t forget to subscribe to the RSS feed in order to get updates for future posts.
Источник
Navigation in Multi-Module Projects

Navigation in developing Android apps is quite important and you should think twice what library suits (or your own solution) most and how it will be convenient to use when the app becomes bigger. Also, it might be good to think about how easy it will be to change your implementation to another one.
Before we will start, let me tell a story. Let’s call it like this «How we made project modular and why I hated our navigation».
We had a single module project and everything worked fine except building time, that is because we used Dagger and it took too long to generate a single component. So we decided to separate the project into modules by features, for example, a login feature, a help feature and etc.
We had a lot of difficulties because we had to move network logic into its own Gradle module, domain login into its module and also we had issues with the navigation.
In our implementation, we had a router that knew about every Fragment and it was responsible for transitions between them. Unfortunately, every Fragment knew that there was the router and knew about other Fragments, because the Fragment said to the router what Fragment should be opened or the Fragment was waiting for the results from another Fragment. These things ruined the idea of making independent feature modules.
Therefore, I have been thinking how to make it better, how to break these connections between Fragments, how to get rid of knowledge that there is some router. In this article, I will show what I have made.
What we will do

The application will be super simple but it will be modular. There will be one application module and three feature modules:
- App module — this module knows everything about the app and there we will implement our navigation. We will use the Navigation Component from JetPack.
- Questions module — this module is responsible for the questions feature. The module knows nothing about the App module or any other module. There will be a QuestionsFragment and a QuestionsNavigation interface.
- Question module — there will be a question feature. As the previous module, it does not know about other modules. That module will contain a QuestionFragment and an QuestionNavigation interface.
- Result module — this is a result feature. Also, it completely independent module. There will be a RightAnswerFragment with RightAnswerNavigation interface and there will be a WrongAnswerFragment with a WrongAnswerNavigation interface.
The source code for the app can be found here: GitHub.
Implementation
In this article, I will use ComponentsManager library to get the feature’s navigation. In a real project, I will provide feature’s navigation by Dagger but for this small project it is not necessary. Also, the ComponentManager library helps you to use Dagger in multi-module projects.
Are you ready? Let’s go!
Questions Module
Create an Android module and call it questions. After that make sure that Kotlin is configured in the module and the ConstraintLayout and the ComponentsManager are added as dependencies.
Instead of using Route or Navigator in the Fragment , we will create an interface QuestionsNavigation that defines the needed transitions. Thus for the Fragment, it does not matter how those transitions will be implemented, it just needs that interface and relies on when the method is called, the needed screen will be open.
To open a screen with a question, we just call the openQuestion(questionId: Long) method and that is it. We do not care how the screen will be opened, we do not even care whether it is Fragment or Activity or something else.
Here is the QuestionsFragment and its layout.
Question Module
Firstly, create an Android library module and call it question. The module’s build.gradle must contain the same dependencies as the question module’s build.gradle file.
After that we create an interface that defines module’s navigation. The navigation idea in other modules will be the same as in the previous one.
From the QuestionFragment user can open a wrong answer screen or a right answer screen so the interface will have two methods.
The last thing is fragment. For this fragment, we will add a companion method that returns a Bundle so we will be able to pass question’s id and use it. The fragment’s layout.
Result Module
The final feature module is a result module. There will be two fragments that show a right and wrong answer. Create an Android library module and call it result, then change the module’s build.gradle so it will have the same dependencies as the previous feature modules.
Let’s start from the right answer fragment. The navigation interface will have one method because the user can open only an all question screen.
The RightAnswerFragment , its layout.
As I said earlier, this module has two Fragments , so let’s implement a wrong answer screen.
In my implementation, from the wrong answer screen user can only go back to the question’s screen and try to answer the question again, so the navigation interface has only one method.
And the WrongAnswerFragment, its layout.
App Module
We have made the modules and it is time to connect them and run the app.
First thing first, we need to edit the app module’s build.gradle. It must have all the created modules and a Navigation Component library with the Components Manager.
Before implementation the classes that work with navigation, we have to add the navigation itself. We will use the Navigation Component to built it.
Create a navigation resource file and call it nav_graph.xml. There will be three connections:
- The QuestionsFragment with the QuestionFragment
- The QuestionFragment with the WrongAnswerFragment
- The QuestionFragment with the RightAnwerFragment . This connection has a little difference. If the user is on the RightAnswerFragment and the user presses the back button, he or she will be returned to the QuestionsFragment . How make that happen? Just select the arrow that connects the questionFragment with rightAnswerFragment , then in the drop-down list near the Pop to select the questionsFragment .
Here is the XML representation of the navigation graph.
Then, create a Navigator class. Obviously, the class is responsible for making transitions between fragments. It implements all the navigations interfaces from the feature modules, do not forget to add calls of the corresponding actions to open the required screen. Also, the class has methods to bind the navController and unbind it.
On the 8th line you can see how I pass question’s id to the QuestionFragment .
After that, create a NavApplication class. Actually, I had to add this class to make Navigator available to other classes, otherwise, it would be harder to get the navigator in the feature modules. Do not forget to add this class to Manifest.
With the 4th-6th lines, it would be possible to get the implementations of features’ navigation interface by calling XInjectionManager.findComponent().
The last but not least, change the MainActivity class and its layout.
That is all, now you can run the app and see how it works.
Summary
Good job! We have made a navigation system that:
- breaks the connections between fragments in different feature modules,
- can be easily changed,
- is easy to test.
Кросспост
Источник


