- How to add Extended Floating Action Button in Android | Android Studio | Java
- Step 1: add the dependency
- Step 2: add the drawable files
- Step 3: design the XML file
- Step 4: add the functionality
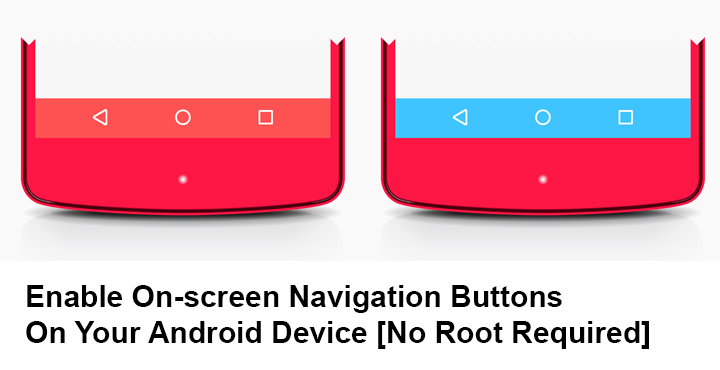
- Enable On-screen Navigation Buttons on Android Devices [No Root Required]
- Download Virtual Softkeys
- Set up Virtual Softkeys
- Buttons
- Responding to Click Events
- Kotlin
- Using an OnClickListener
- Kotlin
- Styling Your Button
- Borderless button
- Custom background
- Android on screen buttons
- Attributes of Button in Android:
- Button Example In Android Studio:
How to add Extended Floating Action Button in Android | Android Studio | Java

How to add Extended Floating Action Button in Android | Android Studio | Java.
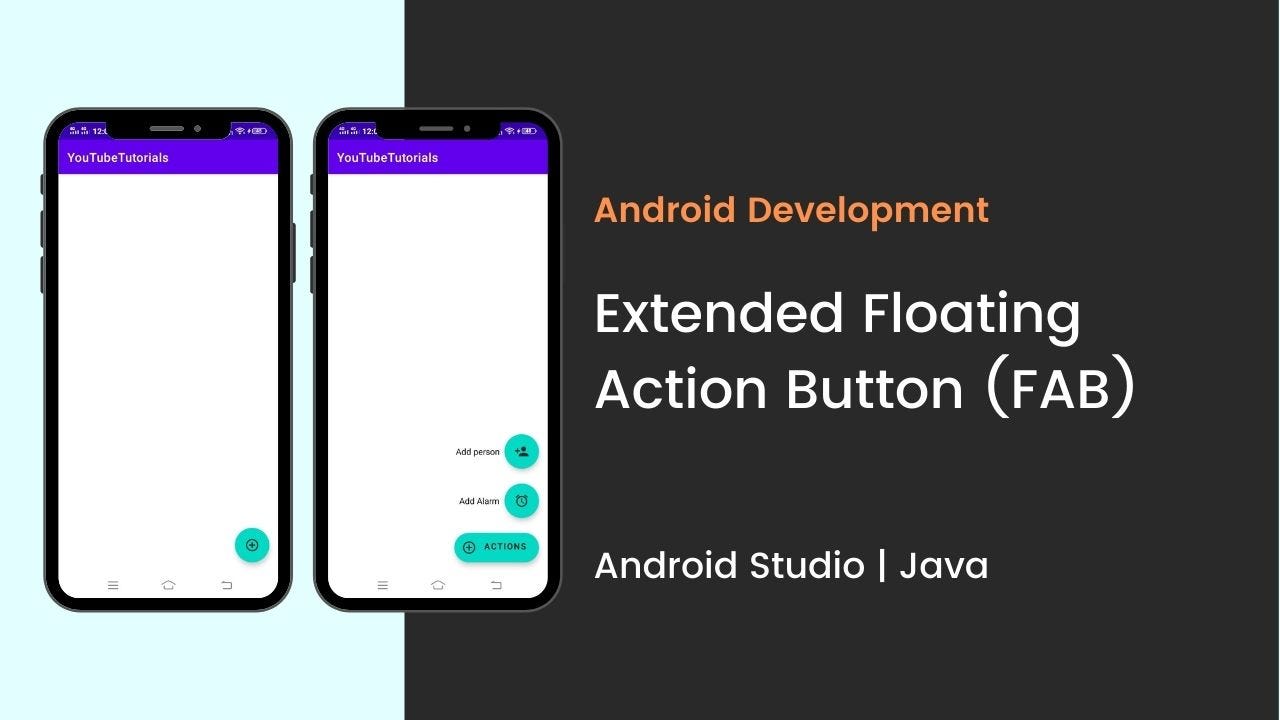
In this tutorial, we are going to create an extended floating action button in android. A floating action button (FAB) performs the primary, or most common, action on a screen. It appears in front of all screen content, typically as a circular shape with an icon in its center.
Extended Floating Action Button is the newly introduced class with Material Components library in Android.
Material Components is introduced with SDK 28 or Android P. It’s a superset of Support Design Library with lots of new additions and improvements. And, in this tutorial, we are going to create an extended floating action button.
So, let’s start creating the extended FAB.
Before going to create let’s see what you’re going to see.
Step 1: add the dependency
make sure to add the material design dependency in your build.gradle app file.
Step 2: add the drawable files
before going to design the main XML file, first, import the drawable files. Below drawable files that I used in my project.

Step 3: design the XML file
now, design the main XML file, add the Extended Floating Action Button that is set as the parent FAB and also add the child FAB. Here as a child FAB, I used two FABs.
parent FAB: Action
child FAB 1: Alarm
child FAB 2: Person
Step 4: add the functionality
now in the main JAVA file add the functionality for the extended FAB and add the click listener in the child FAB.
Источник
Enable On-screen Navigation Buttons on Android Devices [No Root Required]
On-screen navigation keys have only one big disadvantage, they reduce the practical size of the display. So I understand if you prefer hardware navigation buttons instead. Hardware buttons too, come with their own disadvantage and that is wear and tear. If your mechanical home button or any of the capacitive navigation buttons are on the fritz, navigating through the Android interface becomes a tedious chore. The on-screen navigation buttons are an integral part of the Android experience, so they’re there even if you can’t use them. Usually, users with a rooted Android device can enable on-screen navigation buttons (or disable) with a simple build.prop edit or some other mod.
But rooting is not everybody’s cup of tea. Keeping that in mind, developer Daxia has created an app called Virtual SoftKeys which is a pretty self-explanatory name. But the better part about the app is that it enables on-screen navigation buttons without requiring root access. Setting it up is easy too, so if you wanted on-screen keys go ahead and install the app from the Google Play Store.
Download Virtual Softkeys
Set up Virtual Softkeys
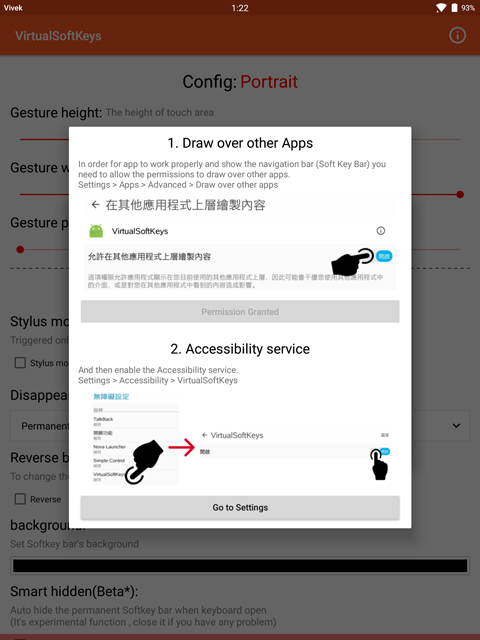
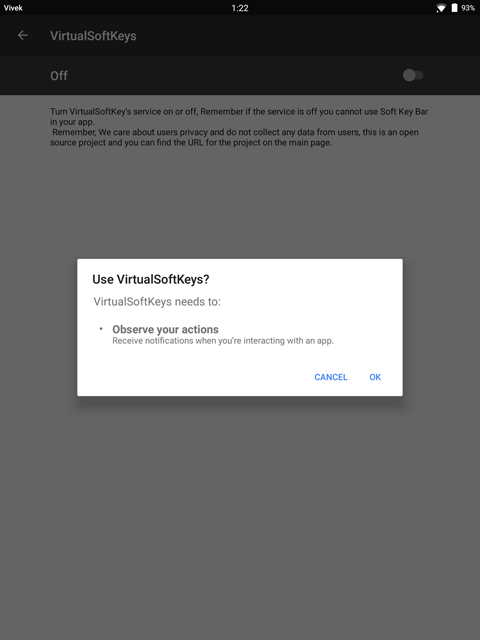
When you launch the app, it will ask for some additional permissions. It needs the permission to Draw over other apps. Simply follow the on-screen prompt and tap the Go to Settings button. It will lead you to Accessibility settings. Here, tap on the Virtual Softkeys entry and then toggle on the switch at the top. Tap Ok on the pop-up that appears.
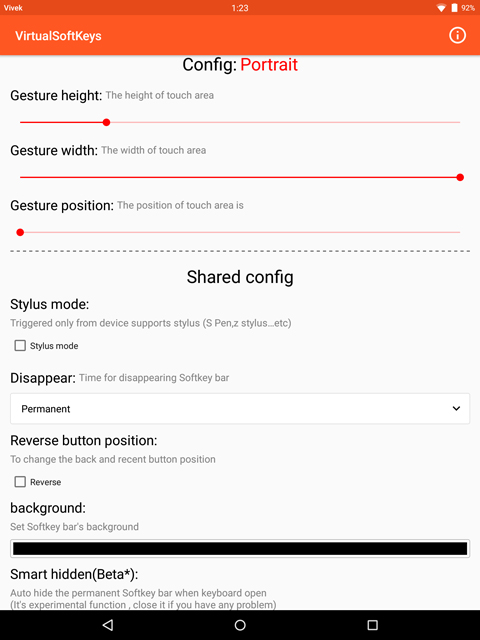
Once done, press the back button and head back to the Virtual Softkeys app. Here, you can tweak the look and feel of your navigation bar, which you can’t yet see. That is because it is hidden by default, but you can simply swipe up from the bottom of your screen to bring it up. You will see a semi-transparent trigger area at the bottom of the screen whenever the app is open. This trigger area indicator is thankfully absent otherwise. There are times when you don’t want the navigation keys like while watching a video or playing a game. You can simply swipe it down to hide it.
You can make this trigger area bigger or smaller using the Gesture height slider. The color of your navigation bar can also be changed in case you don’t like the default black look.
Virtual Softkeys aren’t a part of Android’s system UI so they don’t or can’t behave like the traditional navigation bar. So instead of pushing the contents of the screen, your third-party navigation bar just draws over anything that’s on your screen, hence the required permissions.
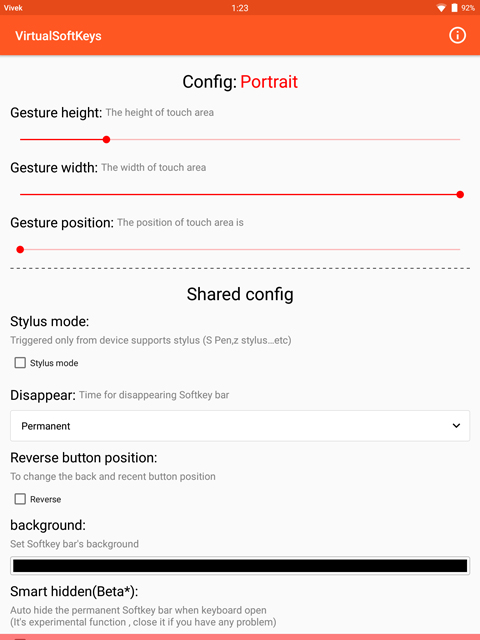
Therefore, one setting you should enable is Smart hidden. With this turned on, the on-screen navigation buttons will auto-hide when you’re using your keyboard. If you don’t enable it, the navigation bar would cover up your keyboard’s spacebar and other buttons at the bottom which can be a problem.
You can also set the navigation bar to auto-hide after a few seconds if you don’t want to be swiping down every now and then.
Источник
Buttons
A button consists of text or an icon (or both text and an icon) that communicates what action occurs when the user touches it.
Depending on whether you want a button with text, an icon, or both, you can create the button in your layout in three ways:
- With text, using the Button class:
- With an icon, using the ImageButton class:
- With text and an icon, using the Button class with the android:drawableLeft attribute:
Key classes are the following:
Responding to Click Events
When the user clicks a button, the Button object receives an on-click event.
To define the click event handler for a button, add the android:onClick attribute to the element in your XML layout. The value for this attribute must be the name of the method you want to call in response to a click event. The Activity hosting the layout must then implement the corresponding method.
For example, here’s a layout with a button using android:onClick :
Within the Activity that hosts this layout, the following method handles the click event:
Kotlin
The method you declare in the android:onClick attribute must have a signature exactly as shown above. Specifically, the method must:
- Be public
- Return void
- Define a View as its only parameter (this will be the View that was clicked)
Using an OnClickListener
You can also declare the click event handler programmatically rather than in an XML layout. This might be necessary if you instantiate the Button at runtime or you need to declare the click behavior in a Fragment subclass.
To declare the event handler programmatically, create an View.OnClickListener object and assign it to the button by calling setOnClickListener(View.OnClickListener) . For example:
Kotlin
Styling Your Button
The appearance of your button (background image and font) may vary from one device to another, because devices by different manufacturers often have different default styles for input controls.
You can control exactly how your controls are styled using a theme that you apply to your entire application. For instance, to ensure that all devices running Android 4.0 and higher use the Holo theme in your app, declare android:theme=»@android:style/Theme.Holo» in your manifest’s element. Also read the blog post, Holo Everywhere for information about using the Holo theme while supporting older devices.
To customize individual buttons with a different background, specify the android:background attribute with a drawable or color resource. Alternatively, you can apply a style for the button, which works in a manner similar to HTML styles to define multiple style properties such as the background, font, size, and others. For more information about applying styles, see Styles and Themes.
Borderless button
One design that can be useful is a «borderless» button. Borderless buttons resemble basic buttons except that they have no borders or background but still change appearance during different states, such as when clicked.
To create a borderless button, apply the borderlessButtonStyle style to the button. For example:
Custom background
If you want to truly redefine the appearance of your button, you can specify a custom background. Instead of supplying a simple bitmap or color, however, your background should be a state list resource that changes appearance depending on the button’s current state.
You can define the state list in an XML file that defines three different images or colors to use for the different button states.
To create a state list drawable for your button background:
- Create three bitmaps for the button background that represent the default, pressed, and focused button states.
To ensure that your images fit buttons of various sizes, create the bitmaps as Nine-patch bitmaps.
Источник
Android on screen buttons
In Android, Button represents a push button. A Push buttons can be clicked, or pressed by the user to perform an action. There are different types of buttons used in android such as CompoundButton, ToggleButton, RadioButton.
 Button is a subclass of TextView class and compound button is the subclass of Button class. On a button we can perform different actions or events like click event, pressed event, touch event etc.
Android buttons are GUI components which are sensible to taps (clicks) by the user. When the user taps/clicks on button in an Android app, the app can respond to the click/tap. These buttons can be divided into two categories: the first is Buttons with text on, and second is buttons with an image on. A button with images on can contain both an image and a text. Android buttons with images on are also called ImageButton.
Button code in XML:
The below code will create Button and write “Abhi Android” text on it.
Table Of Contents
Attributes of Button in Android:
Now let’s we discuss some important attributes that helps us to configure a Button in your xml file (layout).
1. id: id is an attribute used to uniquely identify a text Button. Below is the example code in which we set the id of a Button.
2. gravity: The gravity attribute is an optional attribute which is used to control the alignment of the text like left, right, center, top, bottom, center_vertical, center_horizontal etc.
Below is the example code with explanation included in which we set the right and center vertical gravity for text of a Button.
3. text: text attribute is used to set the text in a Button. We can set the text in xml as well as in the java class.
Below is the example code with explanation included in which we set the text “Learning Android @ AbhiAndroid” in a Button.
Setting Text Using Java class:
Below is the example code in which we set the text on Button programmatically means in java class. The output will be same as the above.
4.textColor: textColor attribute is used to set the text color of a Button. Color value is in the form of “#argb”, “#rgb”, “#rrggbb”, or “#aarrggbb”.
Below is the example code with explanation included in which we set the red color for the displayed text of a Button.
Setting Text Color On Button Inside Java class:
Below is the example code in which we set the text color of a Button programmatically means in java class.
5. textSize: textSize attribute is used to set the size of the text on Button. We can set the text size in sp(scale independent pixel) or dp(density pixel).
Below is the example code in which we set the 25sp size for the text of a Button.
Setting textSize In Java class:
Below is the example code in which we set the text size of a Button programmatically means in java class.
6. textStyle: textStyle attribute is used to set the text style of a Button. The possible text styles are bold, italic and normal. If we need to use two or more styles for a Button then “|” operator is used for that.
Below is the example code with explanation included, in which we set the bold and italic text styles for text of a button.
7. background: background attribute is used to set the background of a Button. We can set a color or a drawable in the background of a Button.
Below is the example code in which we set the gren color for the background, Black color for the displayed text and set 15dp padding from all the side’s for Button.
Setting background in Button In Java class:
Below is the example code in which we set the background color of a Button programmatically means in java class.
8. padding: padding attribute is used to set the padding from left, right, top or bottom. In above example code of background we also set the 10dp padding from all the side’s of button.
9. drawableBottom: drawableBottom is the drawable to be drawn to the below of the text.
Below is the example code in which we set the icon to the below of the text.
Make sure you have image saved in your drawable folder name ic_launcher.
10. drawableTop, drawableRight And drawableLeft: Just like the above attribute we can draw drawable to the left, right or top of text.
In the Below example we set the icon to the right of the text. In the same way you can do for other two attribute by your own:
Button Example In Android Studio:
Below is the example of button in which we display two buttons with different background and whenever a user click on the button the text of the button will be displayed in a toast.
Step 1: Create a new project in Android Studio and name it ButtonExample.
Step 2: Now open res -> layout -> xml (or) activity_main.xml and add following code. Here we are designing the UI of two button in Relative Layout.
Step 3: Now Open app -> package -> MainActivity.java and the following code. Here using setOnClickListener() method on button and using Toast we will display which button is clicked by user.
Output:
Now start the AVD in Emulator and run the App. You will see two button. Click on any button and you will see the message on screen which button is clicked.
Источник


